
Denver MC-5220 MK2 Black
Denver MC-5220 MK2 CD Player User Manual
Comprehensive guide for your Denver HiFi System with CD Player, Speakers, and Radio.
1. Product Overview
The Denver MC-5220 MK2 is a versatile HiFi system designed for home use, featuring a CD player, FM radio, and AUX input. It offers flexible placement options, functioning as a wall-mounted unit or a desktop system with the included stand. Key features include a programmable CD player, a multi-function alarm clock, and a full-function remote control for convenient operation.

Figure 1.1: Front view of the Denver MC-5220 MK2 CD Player on its desktop stand.
2. What's in the Box
Upon unpacking, please ensure all the following items are present:
- Denver MC-5220 MK2 HiFi Music System
- Desktop Stand
- Mains Power Plug
- Remote Control
- User Manual (this document)
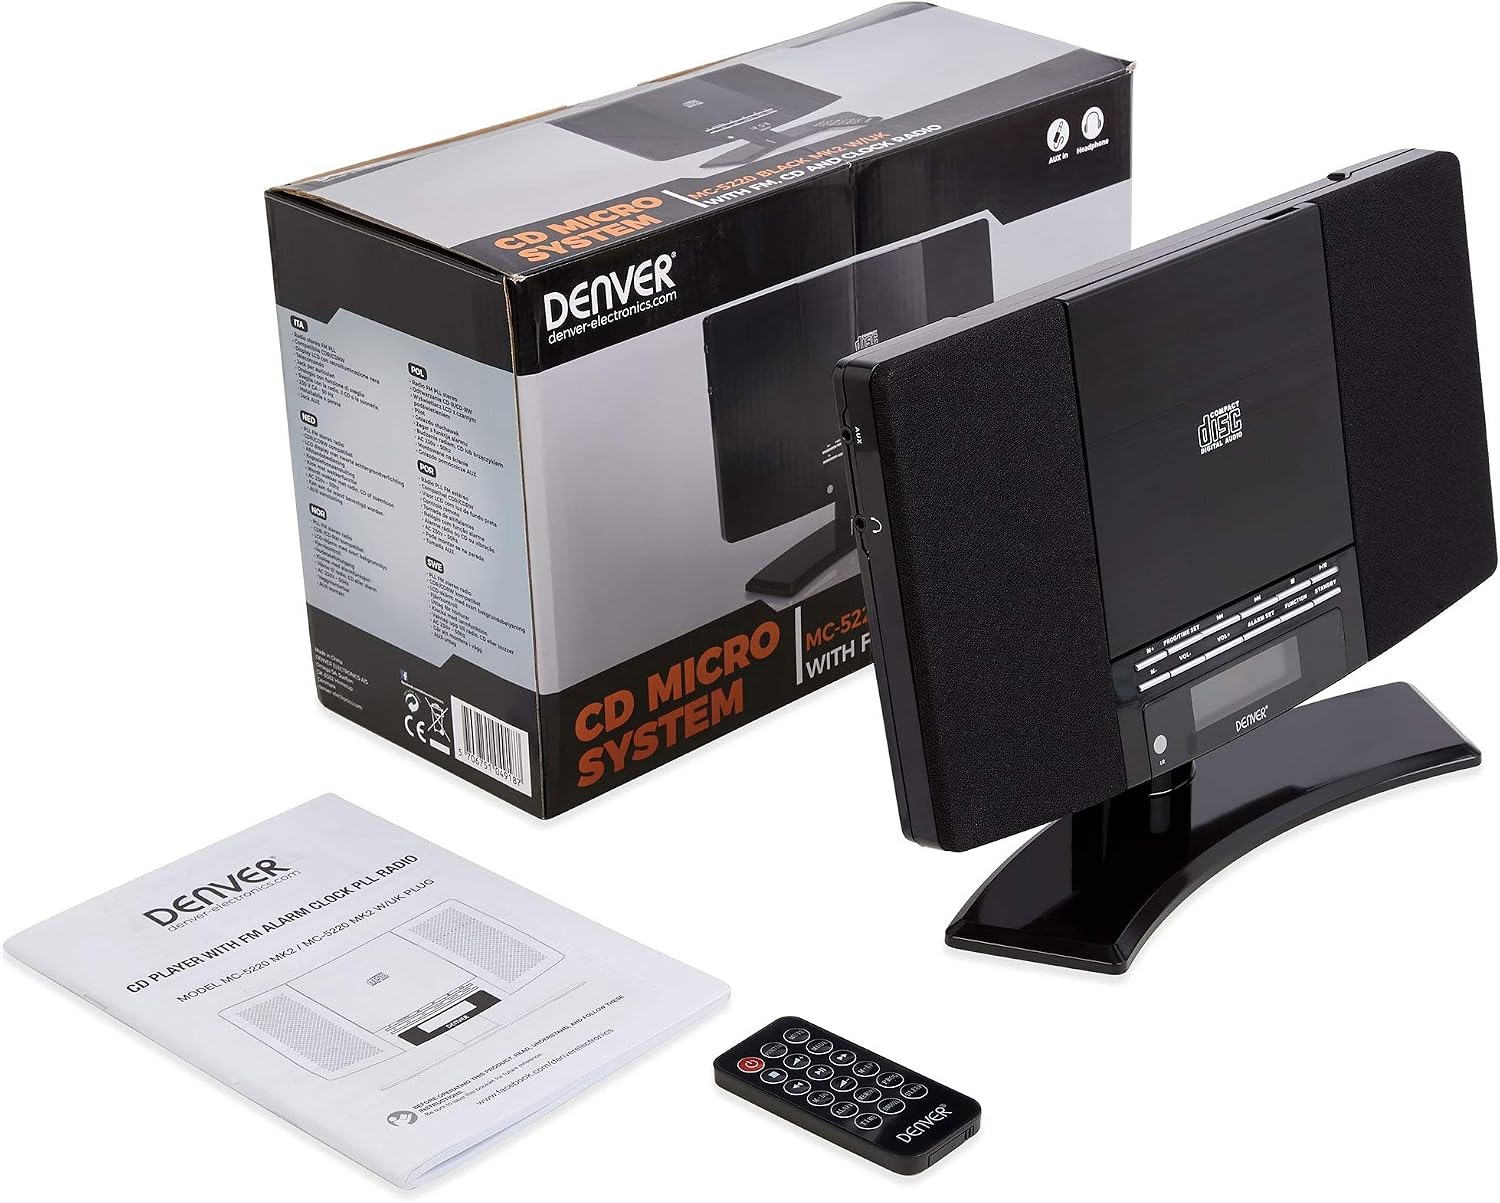
Figure 2.1: All components included in the product packaging.
3. Setup
3.1 Power Connection
Connect the supplied mains power plug to the AC input on the rear of the unit and then to a standard wall outlet. The system operates on AC / DC 100 - 240V mains power only.
3.2 Desktop Stand Assembly
If using the desktop stand, align the system with the stand's mounting points and secure it firmly. Ensure the unit is stable on a flat, level surface.
3.3 Wall Mounting
For wall mounting, identify suitable mounting points on your wall. Use appropriate screws and wall plugs (not supplied) to secure the unit. Ensure the unit is securely fastened before use. Refer to the rear of the unit for keyhole slots.

Figure 3.1: Rear panel with wall mounting keyholes and battery compartment.
3.4 Backup Battery Installation
The unit requires a backup battery (type not specified in product details, typically a CR2025 coin cell for remote or AAA for unit backup) to retain alarm clock and radio settings during a power cut. Locate the battery compartment on the rear of the unit (or remote control) and insert the battery, observing polarity.
4. Operating Instructions
4.1 Basic Controls
The main controls are located on the front panel of the unit and on the supplied remote control. These include Power, Volume Up/Down, Function (mode selection), and Standby.

Figure 4.1: Front control panel and display.
4.2 CD Playback
- Press the FUNCTION button to select CD mode.
- Gently open the CD compartment door.
- Insert a CD with the label side facing outwards.
- Close the CD compartment door. The unit will read the disc.
- Press PLAY/PAUSE to start playback.
- Use the SKIP buttons (<< / >>) to navigate between tracks.
- The CD player supports a 20-track programmable function and random play. Refer to the remote control for these advanced features.

Figure 4.2: CD compartment with disc inserted.
4.3 FM Radio Operation
- Press the FUNCTION button to select FM radio mode.
- Use the TUNE buttons to manually tune to a station or press and hold for automatic scanning.
- To store a favourite station, use the PROG/TIME SET button. The system can store up to 20 radio stations.
4.4 AUX Input
Connect an external audio device (e.g., MP3 player, smartphone) to the AUX IN jack on the side of the unit using a 3.5mm audio cable (not supplied). Press the FUNCTION button to select AUX mode to play audio from the connected device.
A headphone socket is also available for private listening.

Figure 4.3: Side panel with AUX input and headphone jack.
4.5 Alarm Clock Function
The system features a radio alarm clock with three alarm functions: CD, radio, or buzzer.
- To set the time, press and hold the TIME SET button. Use the SKIP buttons to adjust hours and minutes, then press TIME SET again to confirm.
- To set the alarm, press and hold the ALARM SET button. Use the SKIP buttons to set the alarm time and select the alarm source (CD, Radio, Buzzer). Press ALARM SET again to confirm.
- To snooze the alarm, press the SNOOZE button on the remote control.
- To switch off the alarm, press the POWER/STANDBY button.
5. Maintenance
5.1 Cleaning
Wipe the unit with a soft, dry cloth. Do not use abrasive cleaners or solvents. Ensure the unit is unplugged before cleaning.
5.2 CD Care
Handle CDs by their edges. Keep them clean and free from scratches. Store CDs in their cases when not in use.
6. Troubleshooting
| Problem | Possible Cause | Solution |
|---|---|---|
| No power | Power cord not connected; Power outlet not active. | Ensure power cord is securely plugged in. Test the outlet with another device. |
| CD not playing | CD inserted incorrectly; CD is dirty or scratched; Unit in wrong mode. | Re-insert CD with label side out. Clean CD. Select CD function mode. |
| Poor radio reception | Antenna not extended; Weak signal. | Extend the FM antenna fully. Reposition the unit for better reception. |
| Remote control not working | Batteries depleted or inserted incorrectly; Obstruction between remote and unit. | Replace remote control battery (CR2025). Ensure correct polarity. Remove obstructions. |
| Alarm settings lost after power cut | Backup battery not installed or depleted. | Install or replace the backup battery. |
7. Specifications
| Feature | Detail |
|---|---|
| Model Number | MC5220-MK2-UK-BLACK |
| Power Source | AC / DC 100 - 240V Mains power |
| Speaker Type | Stereo |
| Connectivity Technology | Auxiliary (3.5mm jack) |
| Colour | MK2 Black |
| Product Dimensions | 30.5 x 6 x 18 cm (approx.) |
| Manufacturer | Denver Electronics |
8. Warranty and Support
This Denver MC-5220 MK2 CD Player comes with a 12-month no-nonsense warranty. For any questions or problems, please contact our helpful and friendly support staff at our dedicated UK warranty centre. Contact details can typically be found on the product packaging or the official Denver website.

Figure 8.1: 12-month warranty included.
Related documentsMC-5220 MK2 Black


Ask a question about this manual
Ask about setup, troubleshooting, compatibility, parts, safety, or missing instructions. Manuals+ will review the question and use this page’s manual context to help answer it.