Introduction
Thank you for choosing the GRIFEMA Basin Mixer Tap G1002A. This manual provides detailed instructions for the safe and efficient installation, operation, and maintenance of your new basin faucet. Designed with a sleek modern aesthetic and robust stainless steel construction, this tap features a 360° swivel spout, single lever control for hot and cold water, and a water-saving aerator. Please read this manual thoroughly before installation and keep it for future reference.
Safety Information
Please observe the following safety precautions during installation and use:
- Always turn off the main water supply before beginning any installation or maintenance work.
- Ensure all connections are secure to prevent leaks.
- If you are unsure about any part of the installation process, consult a qualified plumber.
- Do not use abrasive cleaners or harsh chemicals on the tap's surface, as this may damage the finish.
- Keep small parts out of reach of children.
Package Contents
Verify that all components are present before beginning installation:
- 1 x GRIFEMA Basin Mixer Tap (G1002A)
- 2 x 40 cm Flexible Hoses (3/8" connections)
- 1 x Installation Hardware Kit (gaskets, nuts, mounting plate)

Image: The GRIFEMA Basin Mixer Tap G1002A, showcasing its sleek design and brushed chrome finish.
Specifications
| Feature | Detail |
|---|---|
| Model Number | G1002A |
| Material | Brass (with Stainless Steel construction) |
| Finish | Nickel / Brushed Chrome |
| Installation Method | Single Hole, Deck Mount |
| Number of Handles | 1 (Single Lever) |
| Spout Swivel | 360° |
| Special Features | Water Saving System, Lead Free, Tarnish Resistant |
| Product Dimensions | 25.6 x 16.7 x 8.5 cm |
| Item Weight | 1.2 kg |
| Maximum Pressure | 10 Bars |
| Hose Length | 0.38 Inches (approx. 40 cm) |
| Spout Height | 180 mm (7 inches) |
| Spout Reach | 120 mm (4.7 inches) |

Image: Detailed dimensions of the GRIFEMA Basin Mixer Tap, showing height, reach, and swivel capability.
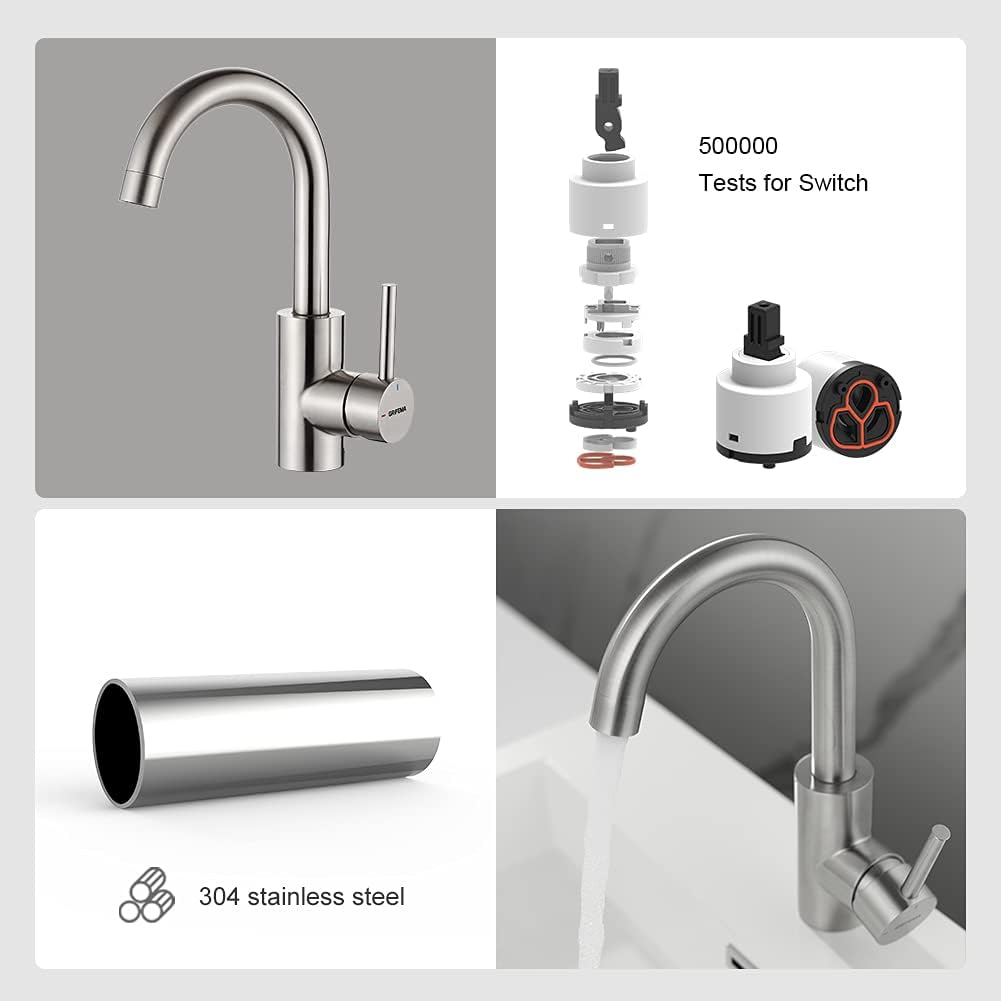
Image: Illustration of the tap's internal ceramic disc valve and the 304 stainless steel construction, highlighting durability and performance.
Installation Guide
Before You Begin
- Ensure you have the necessary tools: adjustable wrench, screwdriver, plumber's tape, bucket, and a cloth.
- Turn off the main water supply to your property.
- Clear the area under the sink for easy access.
- This tap is designed for single-hole deck mount installation and is suitable for basins under the desktop.

Image: Visual guide indicating suitable basin types for installation, specifically for basins mounted under the desktop.
Step-by-Step Installation
- Prepare the Sink: If replacing an old tap, remove it and clean the mounting surface thoroughly. Ensure the mounting hole is clear and appropriately sized for a single-hole installation.
- Connect Hoses: Screw the hot and cold flexible hoses into the base of the tap. Ensure they are hand-tightened, then use a wrench for a quarter turn to secure them, being careful not to overtighten.
- Mount the Tap: Place the rubber gasket onto the base of the tap. Insert the tap's threaded rod and hoses through the mounting hole in the sink.
- Secure the Tap: From underneath the sink, slide the metal washer and then the fixing nut onto the threaded rod. Hand-tighten the nut, then use the provided installation tool or an adjustable wrench to firmly secure the tap to the sink, ensuring it is straight and stable.
- Connect to Water Supply: Connect the flexible hoses to your hot and cold water supply lines. The hoses are typically marked for hot (red) and cold (blue) or can be identified by connecting to the corresponding supply. Use plumber's tape on the threads of your supply lines for a watertight seal.
- Check for Leaks: Slowly turn on the main water supply. Check all connections for leaks. If any leaks are detected, tighten the connections slightly until the leak stops.
- Flush the System: Turn on the tap and let the water run for a few minutes to flush out any debris from the new installation.
Operating Instructions
The GRIFEMA Basin Mixer Tap G1002A features a single lever for easy control of water flow and temperature:
- Water Flow: Lift the lever upwards to increase water flow. Push it downwards to decrease or turn off the flow.
- Temperature Control: Move the lever to the left for hot water and to the right for cold water. The ceramic disc valve ensures smooth and precise temperature adjustment.
- Swivel Spout: The spout can be rotated 360° for convenience, allowing you to direct the water flow as needed within your basin.

Image: The GRIFEMA Basin Mixer Tap in operation, demonstrating water flow and the single lever control.
Maintenance and Care
Proper care will ensure the longevity and pristine appearance of your GRIFEMA tap:
- Regular Cleaning: Clean the tap regularly with a soft cloth and mild soap and water. Rinse thoroughly and dry with a soft cloth to prevent water spots.
- Avoid Harsh Cleaners: Do not use abrasive cleaners, scouring pads, ammonia-based cleaners, bleach, or other harsh chemicals, as these can damage the brushed chrome finish and internal components.
- Aerator Maintenance: If water flow becomes restricted, the aerator may be clogged with mineral deposits. Unscrew the aerator from the tip of the spout, clean it under running water, and use a soft brush if necessary. Reattach the aerator securely.

Image: Close-up of the water-saving aerator, highlighting its design for efficient water usage and easy maintenance.
Troubleshooting
Refer to the table below for common issues and their solutions:
| Problem | Possible Cause | Solution |
|---|---|---|
| Low Water Flow | Clogged aerator; partially closed stopcock; kinked supply hose. | Clean the aerator. Ensure stopcocks are fully open. Check hoses for kinks. |
| Leaking from Base | Loose mounting nut; damaged gasket. | Tighten the mounting nut. Inspect and replace gasket if damaged. |
| Leaking from Spout | Worn ceramic disc cartridge. | Contact customer support for a replacement cartridge. |
| No Hot/Cold Water | Supply valve closed; blocked hose. | Ensure hot/cold supply valves are fully open. Check hoses for blockages. |
If the problem persists after attempting these solutions, please contact GRIFEMA customer support.
Warranty and Support
GRIFEMA products are manufactured to high-quality standards and are backed by a manufacturer's warranty against defects in materials and workmanship. Please refer to the warranty information provided with your purchase or visit the official GRIFEMA website for details on warranty terms and conditions.
For technical assistance, replacement parts, or any other inquiries, please contact GRIFEMA customer support through their official website or the retailer where you purchased the product. When contacting support, please have your model number (G1002A) and purchase details ready.