
WESCO WS4366
Wesco WS4366 Belt Sander User Manual
Model: WS4366
1. Important Safety Instructions
Always read and understand all safety warnings and instructions before operating this power tool. Failure to follow the warnings and instructions may result in electric shock, fire, and/or serious injury.
- Wear appropriate personal protective equipment (PPE) such as safety glasses, a dust mask, and hearing protection.
- Ensure the work area is clean, well-lit, and free from obstructions.
- Keep children and bystanders away while operating a power tool.
- Do not operate power tools in explosive atmospheres, such as in the presence of flammable liquids, gases, or dust.
- Always disconnect the plug from the power source before making any adjustments, changing accessories, or storing the tool.
- Do not force the power tool. Use the correct power tool for your application.
- Maintain power tools. Check for misalignment or binding of moving parts, breakage of parts, and any other condition that may affect the power tool’s operation.
- Use the tool and accessories in accordance with these instructions, taking into account the working conditions and the work to be performed.
2. Product Overview and Components
Familiarize yourself with the parts of your Wesco WS4366 Belt Sander before operation.

Figure 2.1: Component Diagram of the Wesco WS4366 Belt Sander.
- Auxiliary Handle
- Dust Extraction Outlet
- Lock-On Button
- Grip Area
- Dust Bag
- Belt Cover
- Belt Centering Knob
- On/Off Switch
- Variable Speed Control Dial
- Sanding Belt
- Belt Release Lever
The diagram illustrates the main parts of the belt sander, including the auxiliary handle for better control, the dust extraction outlet for connecting the dust bag or a vacuum cleaner, and the variable speed control dial for adjusting sanding speed.
3. Setup
3.1 Attaching the Dust Bag / Vacuum Adapter
The Wesco WS4366 Belt Sander comes with a removable dust bag and a vacuum adapter for efficient dust collection.
- To attach the dust bag, slide it firmly onto the dust extraction outlet (2).
- For connecting an external vacuum cleaner, attach the provided vacuum adapter to the dust extraction outlet (2) and then connect your vacuum hose to the adapter.

Figure 3.1: The belt sander shown with its included dust bag and vacuum adapter. These accessories are crucial for maintaining a clean work environment by collecting sanding dust.
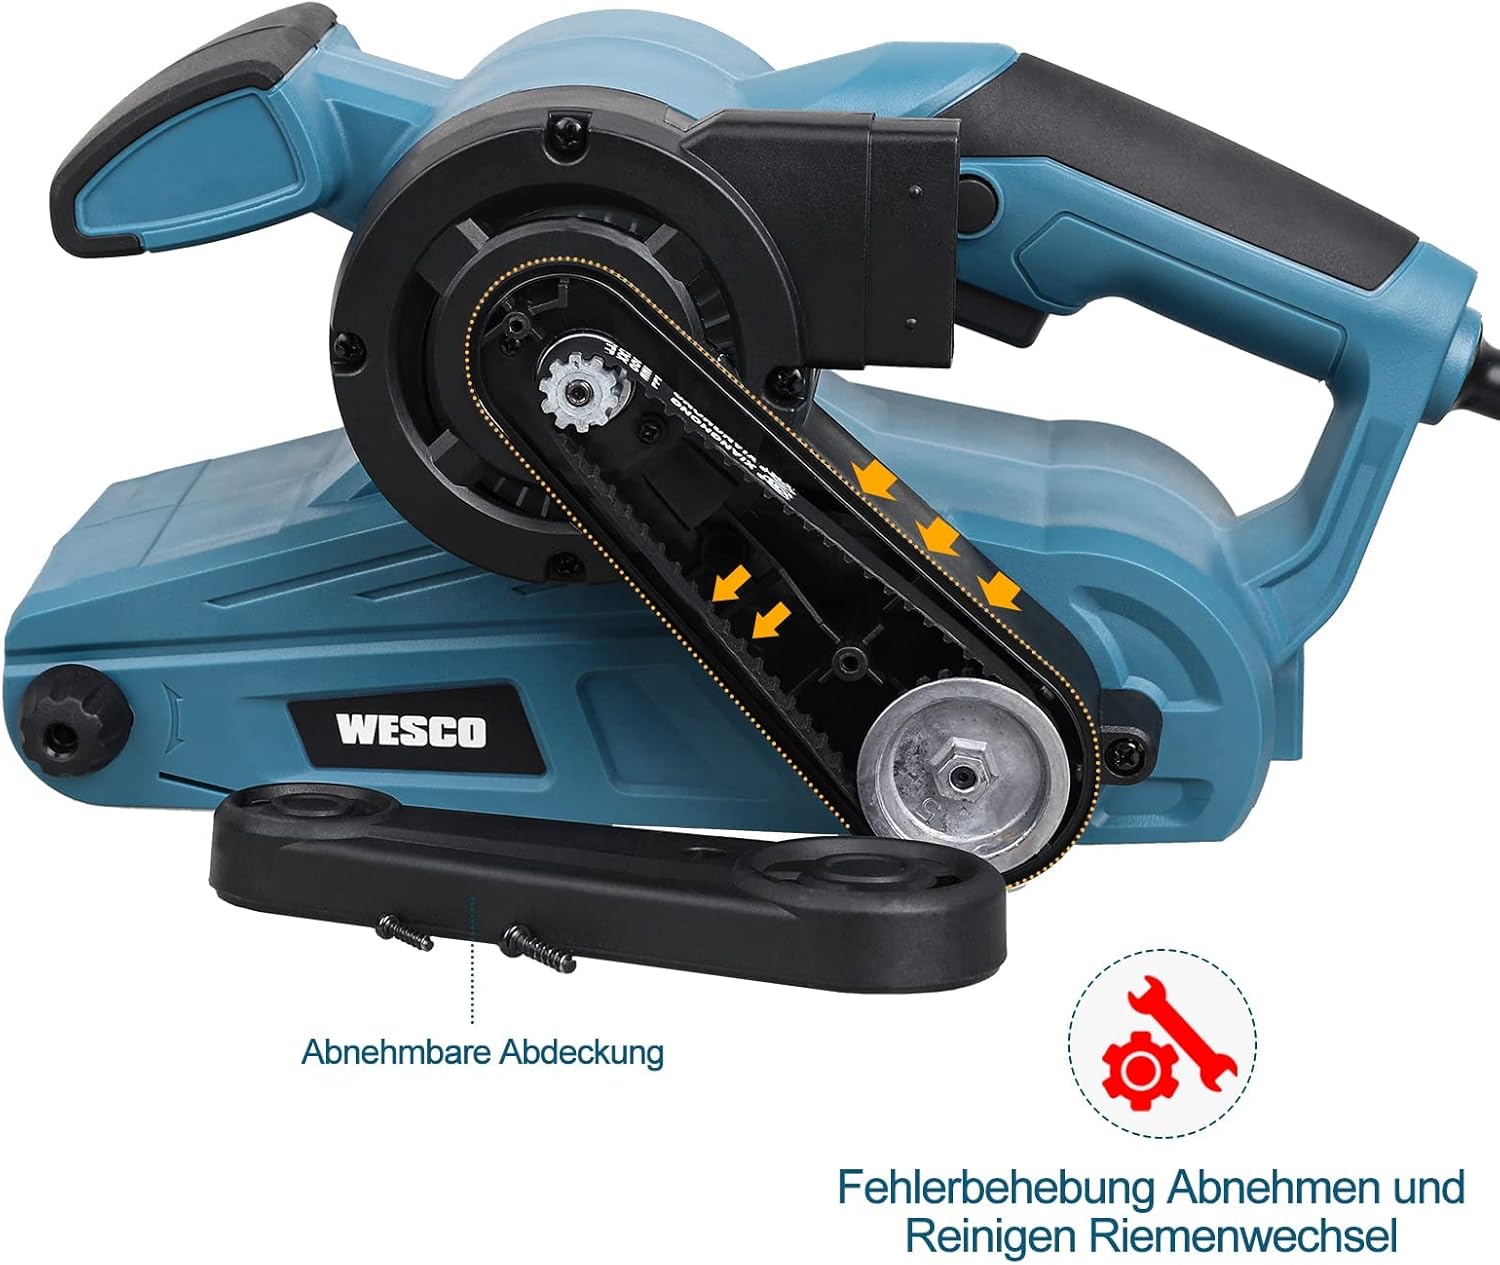
Figure 3.2: Demonstrates connecting an external vacuum cleaner to the belt sander for enhanced dust extraction. This setup significantly reduces airborne dust during operation.
3.2 Installing/Replacing the Sanding Belt
The sanding belt (10) is a consumable part and needs to be replaced when worn or when a different grit is required.
- Ensure the tool is unplugged from the power source.
- Locate the belt release lever (11) on the side of the sander.
- Pull the belt release lever (11) to loosen the tension on the sanding belt.
- Slide the old sanding belt off the rollers.
- Place the new sanding belt onto the rollers, ensuring the arrow on the inside of the belt matches the direction of rotation arrow on the sander.
- Release the belt release lever (11) to tension the new belt.
- Use the belt centering knob (7) to adjust the belt's position if it is not running centrally.

Figure 3.3: Illustrates the process of replacing the sanding belt. The red arrows indicate the direction to pull the belt release lever and slide the belt on/off the rollers.
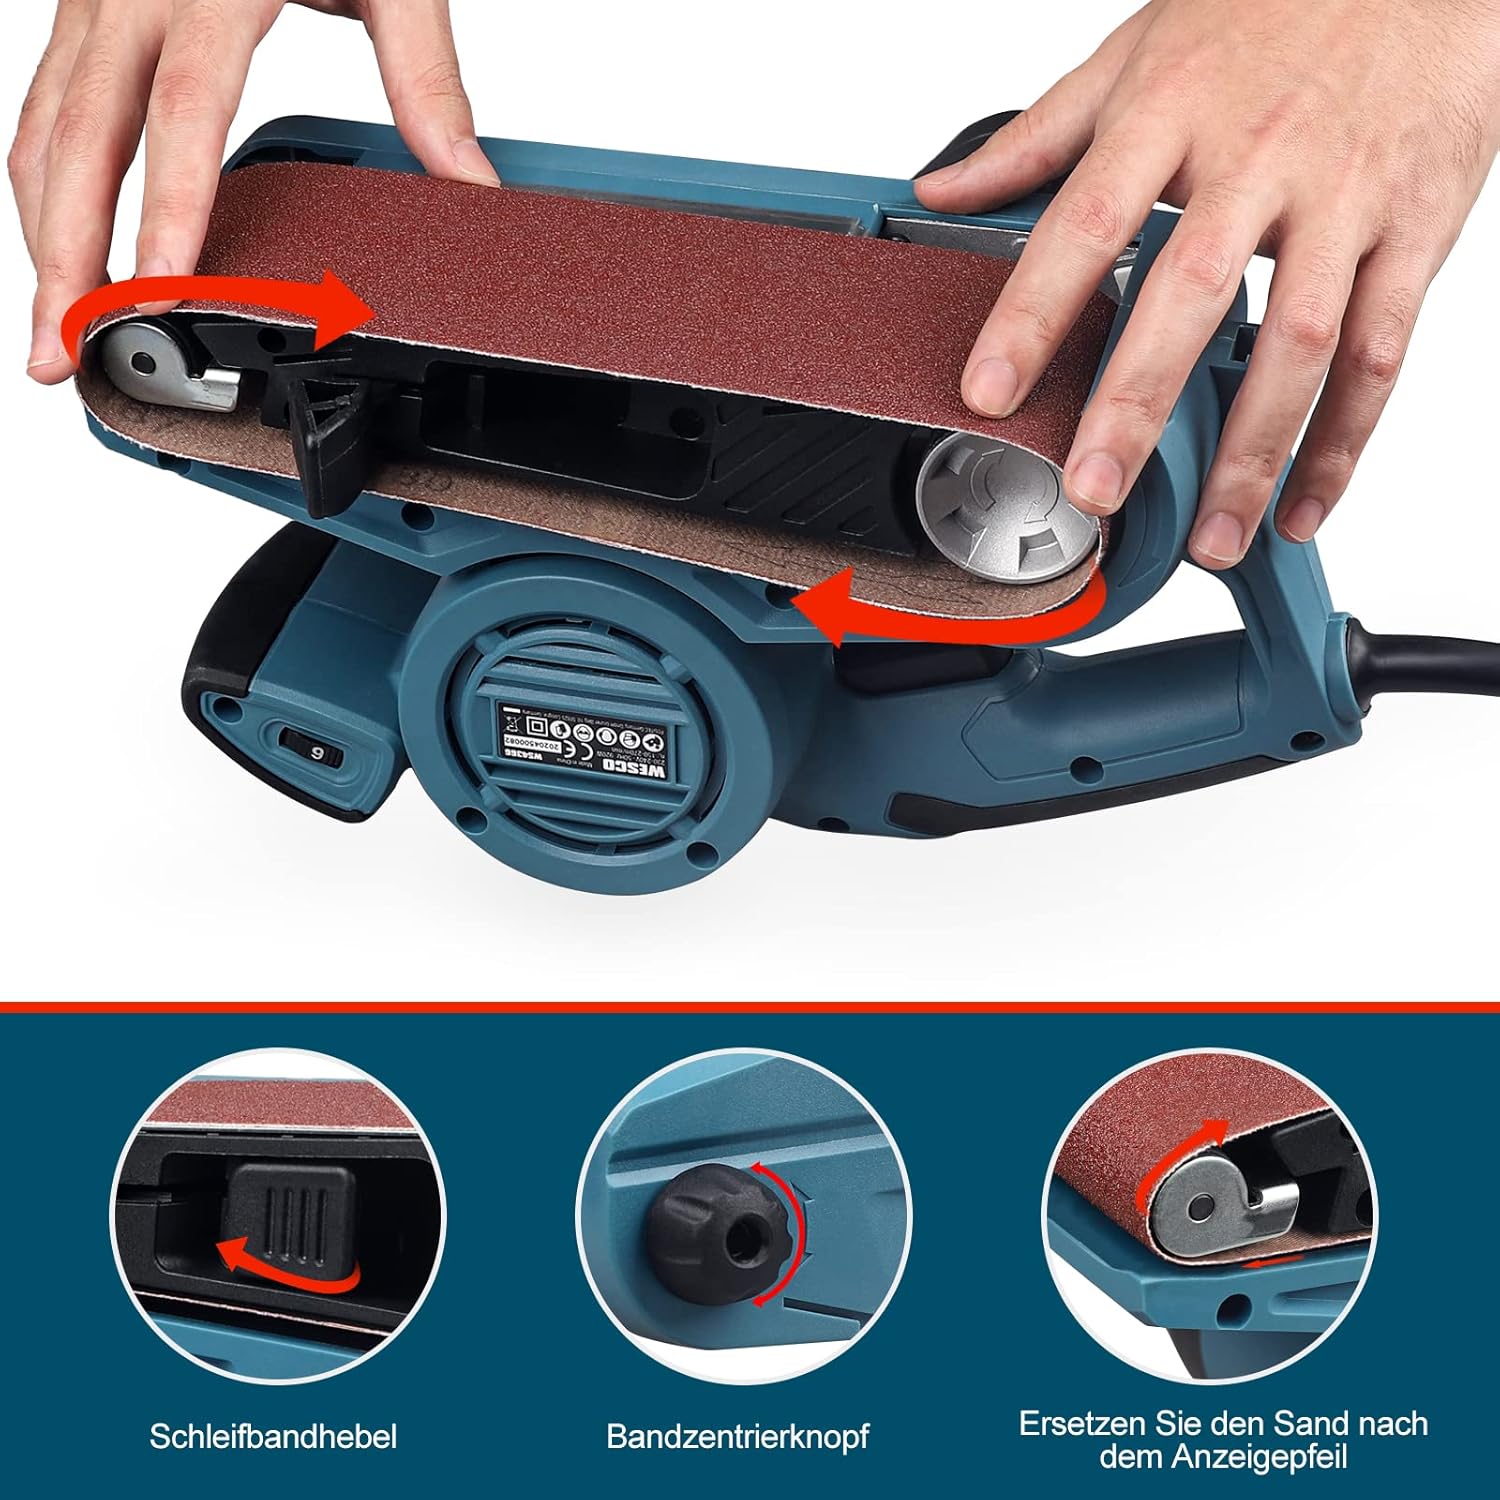
Figure 3.4: Detailed view of the belt release lever and belt centering knob. The lever (left) is used to quickly release and tension the belt, while the knob (middle) allows for fine-tuning the belt's alignment during operation. The image on the right shows the correct orientation of the sanding belt.
4. Operating Instructions
4.1 Powering On/Off and Speed Control
The Wesco WS4366 features a 920W motor with variable speed control.
- To turn the sander ON, press the On/Off switch (8).
- To turn the sander OFF, release the On/Off switch (8).
- For continuous operation, press the On/Off switch (8) and then engage the lock-on button (3). To release, press the On/Off switch again.
- Adjust the sanding speed using the variable speed control dial (9). There are 6 modes, allowing speeds from 150-270 m/min. Higher speeds are suitable for faster material removal, while lower speeds are better for fine finishing.
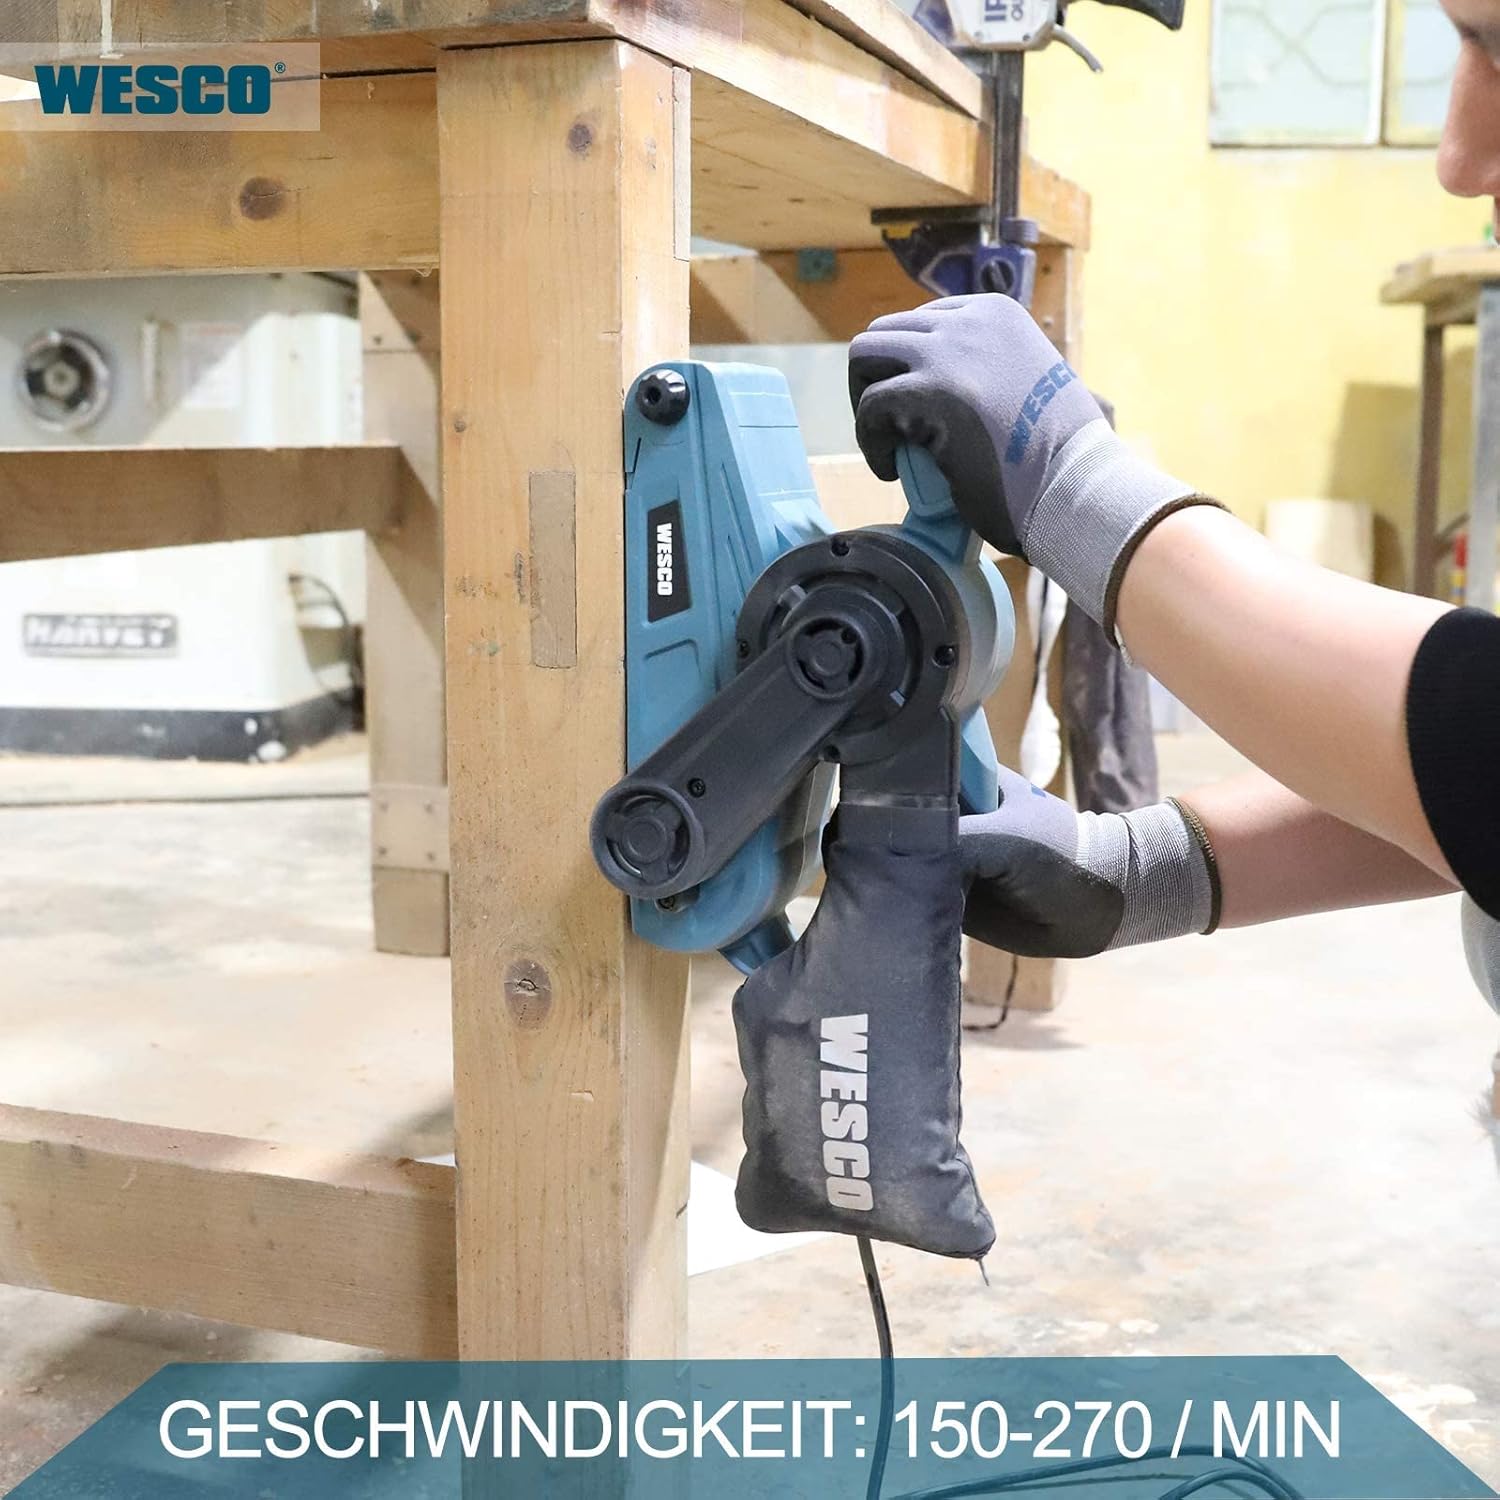
Figure 4.1: The belt sander in use, highlighting its variable speed capability (150-270 m/min). This feature allows users to select the optimal speed for different materials and tasks.
4.2 Sanding Techniques
Proper technique ensures efficient sanding and a smooth finish.
- Always hold the sander firmly with both hands using the main grip and auxiliary handle (1).
- Start the sander before placing it on the workpiece.
- Apply light, even pressure. Let the sander do the work. Excessive pressure can slow the motor, damage the belt, and produce an uneven finish.
- Move the sander smoothly and continuously over the surface in the direction of the wood grain. Avoid stopping in one spot, as this can create depressions.
- For rough sanding, use a coarser grit belt (e.g., 80 grit included). For finer finishes, progress to higher grit belts.

Figure 4.2: Demonstrates the belt sander in action, sanding a wooden surface. This image highlights the effective material removal capability of the tool.

Figure 4.3: The belt sander being used for polishing furniture, showcasing its versatility beyond just rough sanding. This application requires careful control and appropriate sanding belts.
5. Maintenance
Regular maintenance ensures the longevity and optimal performance of your belt sander.
5.1 Cleaning
- Always unplug the tool before cleaning.
- Empty the dust bag regularly. The dust bag is detachable and easy to clean.
- Clean the ventilation openings of the tool with a soft brush or compressed air to prevent overheating.
- Wipe the exterior of the tool with a damp cloth. Do not use harsh chemicals or abrasive cleaners.
5.2 Belt Cover and Internal Belt Inspection
The belt cover (6) can be removed for cleaning or inspection of the internal drive belt.
Figure 5.1: Shows the removable belt cover and the internal belt mechanism. This allows for inspection, cleaning, or replacement of the drive belt if necessary, ensuring smooth operation.
- To remove the belt cover, unscrew the retaining screws.
- Clean any accumulated dust or debris from the internal components.
- If the internal drive belt is worn or damaged, it can be replaced. Refer to the diagram for the belt path.
- Reattach the belt cover securely after cleaning or replacement.
6. Troubleshooting
This section addresses common issues you might encounter with your belt sander.
| Problem | Possible Cause | Solution |
|---|---|---|
| Sander does not start. | No power supply; Faulty switch; Damaged power cord. | Check power outlet and circuit breaker. Ensure power cord is not damaged. If switch is faulty, contact customer support. |
| Sanding belt slips or stops. | Belt tension too loose; Belt worn out; Excessive pressure applied. | Ensure belt release lever is fully engaged. Replace worn belt. Reduce pressure during sanding. |
| Poor dust collection. | Dust bag full; Dust extraction outlet clogged; Dust bag not properly attached. | Empty dust bag. Clear any clogs from the outlet. Ensure dust bag or vacuum adapter is securely attached. |
| Belt runs off track. | Belt not centered; Belt installed incorrectly. | Adjust belt centering knob (7) while running. Ensure belt is installed with correct direction of rotation. |
| Excessive vibration or noise. | Worn bearings; Damaged belt; Loose components. | Inspect belt for damage and replace if necessary. Check for loose screws. If problem persists, contact customer support. |
7. Specifications
| Feature | Specification |
|---|---|
| Model | WS4366 |
| Power Input | 920 W |
| Voltage | 230 V |
| No-Load Belt Speed | 150-270 m/min (6 variable speeds) |
| Sanding Belt Size | 76 x 533 mm |
| Sanding Surface | 76 x 135 mm |
| Cord Length | 2 meters |
| Weight | Approx. 3.36 kg |
| Included Accessories | 1 x Dust Bag, 1 x 80 Grit Sanding Belt, 1 x Vacuum Adapter |
8. Warranty and Support
Wesco products are manufactured to high quality standards and are guaranteed against defects in materials and workmanship.
- For warranty claims or technical support, please contact Wesco customer service.
- Contact Email: support@wesco-tools.com
- Please have your model number (WS4366) and purchase information ready when contacting support.
Ask a question about this manual
Ask about setup, troubleshooting, compatibility, parts, safety, or missing instructions. Manuals+ will review the question and use this page’s manual context to help answer it.