Introduction
This manual provides detailed instructions for the installation, operation, and maintenance of your Kenwood KDC-BT450DAB CD Receiver. Please read this manual thoroughly before using the unit to ensure proper operation and to prevent damage.
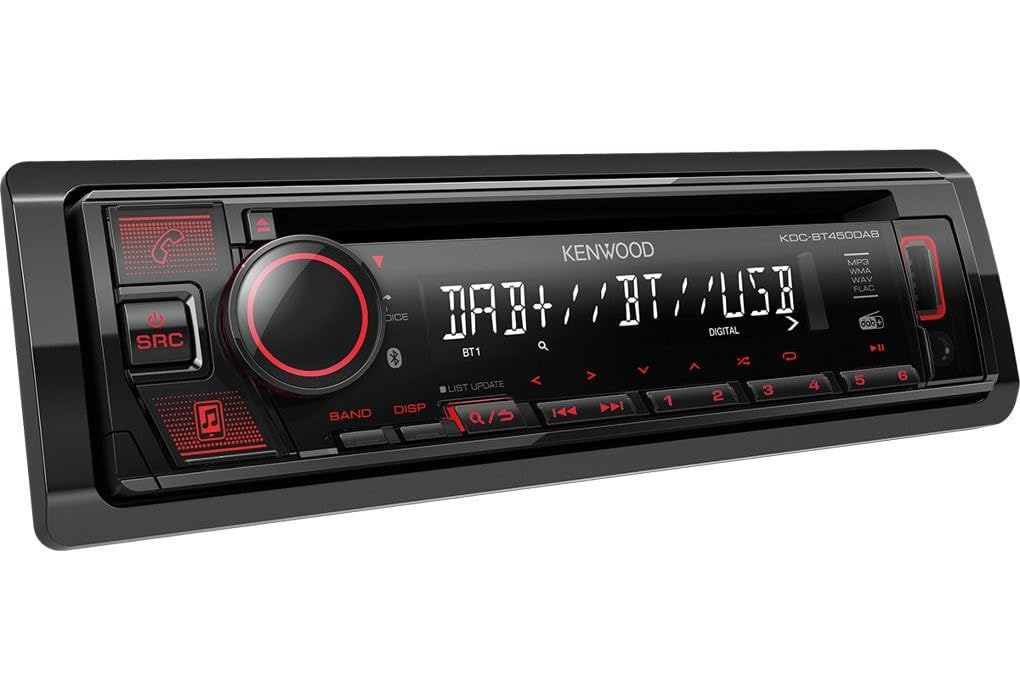
Figure 1: Front panel view of the Kenwood KDC-BT450DAB CD Receiver. This image displays the main controls, display screen, CD slot, USB port, and AUX input.
Safety Information
- Do not operate the unit in a manner that distracts you from driving.
- Ensure proper installation to prevent electrical shock or fire.
- Consult a qualified technician for installation if you are unsure.
- Keep the volume at a level where you can still hear outside sounds.
What's in the Box
Verify that all items are present before proceeding with installation:
- Kenwood KDC-BT450DAB Headunit
- Microphone
- DAB Antenna (glass mount)
- Wiring Harness
- Mounting Hardware
Setup and Installation
1. Wiring Connections
Connect the wiring harness according to your vehicle's wiring diagram. Ensure all connections are secure to prevent short circuits.
- Power Connection: Connect the yellow wire to constant 12V, red wire to switched 12V (ignition), and black wire to ground.
- Speaker Connections: Connect speaker wires to the corresponding vehicle speakers. Observe correct polarity.
- Antenna Connection: Connect the DAB antenna to the designated input on the headunit. Mount the glass mount DAB antenna as per its specific instructions for optimal reception.
- Microphone Connection: Plug the microphone into the dedicated input for hands-free calling. Position the microphone in a location that allows clear voice pickup.
- Steering Wheel Control: If your vehicle supports steering wheel controls, additional wiring looms may be required. Consult your vehicle's manual or a professional installer.
2. Mounting the Unit
Install the headunit into the vehicle's dashboard using the provided mounting hardware. Ensure it is securely fastened.
3. Initial Power On
After installation, turn on the vehicle's ignition. The unit should power on. Follow any on-screen prompts for initial setup, such as language selection or clock setting.
Operating Instructions
Basic Controls
- SRC (Source) Button: Press to cycle through available audio sources (CD, DAB+, FM/AM Radio, Bluetooth Audio, USB, AUX).
- Volume Knob: Rotate to adjust the audio volume. Press to access audio settings (e.g., Bass, Treble, Balance, Fader, Equalizer).
- Band/Disp Button: Press to change radio bands (FM1, FM2, FM3, AM, DAB1, DAB2, DAB3). Hold to change display information.
- Seek/Track Buttons (<< / >>): Press to seek radio stations or skip tracks on CD/USB/Bluetooth.
- Number Buttons (1-6): Use for direct station recall in radio mode or as preset buttons.
- Call Button (Green Phone Icon): Press to answer an incoming call or access the phone menu.
- End Call Button (Red Phone Icon): Press to end a call or reject an incoming call.
Radio Operation (DAB+/FM/AM)
- Press the SRC button to select DAB+ or FM/AM radio.
- Press the Band button to select the desired band (DAB1/2/3, FM1/2/3, AM).
- Use the Seek buttons (<< / >>) to find stations.
- To store a station, tune to the desired station, then press and hold one of the number buttons (1-6) until a beep sounds.
- For DAB+, press the LIST UPDATE button to refresh the station list.
CD Playback
- Insert a CD into the disc slot. The unit will automatically switch to CD source and begin playback.
- Use the Seek buttons (<< / >>) to skip tracks.
- Press the Play/Pause button (often integrated with the volume knob or a dedicated button) to pause/resume playback.
USB Playback
- Connect a USB device (e.g., USB flash drive) to the front USB port.
- Press the SRC button to select the USB source.
- The unit will automatically detect and play compatible audio files (MP3, WMA, WAV, FLAC).
- Use the Seek buttons (<< / >>) to navigate tracks.
- Note: Only Android devices can have music playback via USB.
AUX Input
- Connect an external audio device (e.g., smartphone, MP3 player) to the front 3.5mm AUX input using an audio cable.
- Press the SRC button to select the AUX source.
- Control playback from the connected device.
Bluetooth Operation
Pairing a Bluetooth Device
- Ensure Bluetooth is enabled on your mobile device.
- On the KDC-BT450DAB, select the Bluetooth source using the SRC button.
- The unit will enter pairing mode (or you may need to access the Bluetooth menu via the volume knob).
- On your mobile device, search for available Bluetooth devices and select "KDC-BT450DAB".
- Confirm the pairing code if prompted.
- The unit supports connecting two Bluetooth devices simultaneously.
Bluetooth Audio Streaming (A2DP)
- Once paired, select the Bluetooth Audio source.
- Start playing music on your mobile device. The audio will stream through the KDC-BT450DAB.
- Use the Seek buttons (<< / >>) on the receiver to skip tracks, or control playback from your device.
Bluetooth Hands-Free Calling (HFP V1.6)
- When a call comes in, the unit will display the caller ID.
- Press the Green Phone Icon button to answer the call.
- Speak into the connected microphone.
- Press the Red Phone Icon button to end the call.
Maintenance
- Cleaning the Unit: Use a soft, dry cloth to wipe the front panel. Do not use abrasive cleaners or solvents.
- CD Slot: Avoid inserting foreign objects into the CD slot. If a disc gets stuck, refer to the troubleshooting section.
- USB Port: The USB port has a dust cover for protection. Keep it closed when not in use.
- Firmware Updates: Periodically check the Kenwood website for any available firmware updates for your model.
Troubleshooting
| Problem | Possible Cause | Solution |
|---|---|---|
| No power | Incorrect wiring; Blown fuse | Check power connections (yellow, red, black wires). Inspect and replace fuse if necessary. |
| No sound | Volume too low; Mute activated; Incorrect speaker wiring | Increase volume. Check if mute is active. Verify speaker connections and polarity. |
| Cannot pair Bluetooth device | Bluetooth not enabled on device; Unit not in pairing mode; Device already paired to another unit | Ensure Bluetooth is on. Put KDC-BT450DAB into pairing mode. Disconnect from other devices. |
| Poor radio reception (DAB/FM) | Antenna not properly connected or positioned; Weak signal area | Check antenna connection. Adjust antenna position. Try a different location. |
| USB device not recognized | Incompatible format; Damaged USB device; Loose connection | Ensure files are MP3, WMA, WAV, or FLAC. Try a different USB device. Check connection. |
Specifications
| Feature | Detail |
|---|---|
| Model Number | KDC-BT450DAB |
| Brand | Kenwood |
| Connectivity | Bluetooth, USB, 3.5mm Jack |
| Special Features | DAB+, Equalizer, Spotify Link |
| Wattage | 50 watts (per channel, typical max output) |
| Compatible Devices | Smartphone (Android via USB, iOS via Bluetooth/AUX) |
| Audio Encoding | Stereo (MP3, WMA, WAV, FLAC) |
| Audio Output Mode | Stereo |
| Surround Sound Channel Configuration | 5.1 (Note: This typically refers to pre-out channels for external amplifiers) |
| Video Encoding | RM (Note: This unit is primarily for audio, video playback is not a primary feature) |
| Product Dimensions (L x W x H) | 7.17 x 6.22 x 2.09 inches |
| Item Weight | 3.48 pounds |
Warranty Information
Kenwood products are covered by a limited warranty. For specific warranty terms and conditions, please refer to the warranty card included with your product or visit the official Kenwood website. Keep your proof of purchase for warranty claims.
Customer Support
For further assistance, technical support, or service inquiries, please contact Kenwood customer support through their official website or the contact information provided in your product documentation.
Official Kenwood Website: www.kenwood.com