Introduction
This manual provides essential information for the safe and effective assembly, operation, and maintenance of your K-Sport Adjustable Squat Rack and Barbell Stand, model KSH012. Please read all instructions carefully before use to ensure proper functionality and user safety.
Safety Information
Adhering to these safety guidelines is crucial for preventing injury and ensuring the longevity of your equipment.
- Always consult a physician before starting any new exercise program.
- Ensure all bolts, nuts, and adjustment knobs are securely tightened before each use. Regularly check for any loosening.
- Do not exceed the maximum weight capacity of 140 kg. Overloading can lead to equipment failure and serious injury.
- Use the equipment on a flat, stable, and non-slip surface. Ensure adequate space around the rack for safe movement.
- Keep children and pets away from the equipment during use and when unattended.
- Inspect the equipment regularly for any signs of wear, damage, or corrosion. Replace damaged parts immediately with genuine K-Sport components.
- When lifting heavy weights, especially during squats or bench presses, always use appropriate spotters or safety mechanisms.
- Do not modify the equipment in any way. Unauthorized modifications can compromise safety and void the warranty.
Setup and Assembly
Assembly of the K-Sport Squat Rack begins from the bottom and proceeds upwards. Follow these steps carefully:
- Unpack all components from the packaging. Verify that all parts and hardware are present.
- Assemble the base frames by connecting the horizontal and vertical steel tubes. Ensure all connections are aligned correctly.
- Attach the main vertical uprights to the assembled base frames.
- Secure all connections using the included screws, washers, and nuts. Hand-tighten initially, then fully tighten with appropriate tools once all components are in place.
- Install the pull-up bar at the top of the uprights, ensuring it is firmly secured.
- Attach the adjustable barbell supports (J-hooks) and dip handles to the vertical uprights. Do not tighten them fully yet.
- Adjust the height of the barbell supports and dip handles to your preferred position (refer to Operating Instructions for details).
- Ensure all rubber pads are correctly placed on the feet of the base to prevent floor scratching and enhance stability.
- Perform a final check to ensure all connections are tight and the rack is stable before first use.
Note: The design incorporates heavy-duty steel tubes for maximum stability during weight training. Additional knobs are provided to secure attachments reliably and safely.

Front view of the K-Sport KSH012 Squat Rack, showing the main structure and adjustable components.

Side view of the K-Sport KSH012 Squat Rack, highlighting its depth and stability.

Back view of the K-Sport KSH012 Squat Rack, showing the rear support structure.
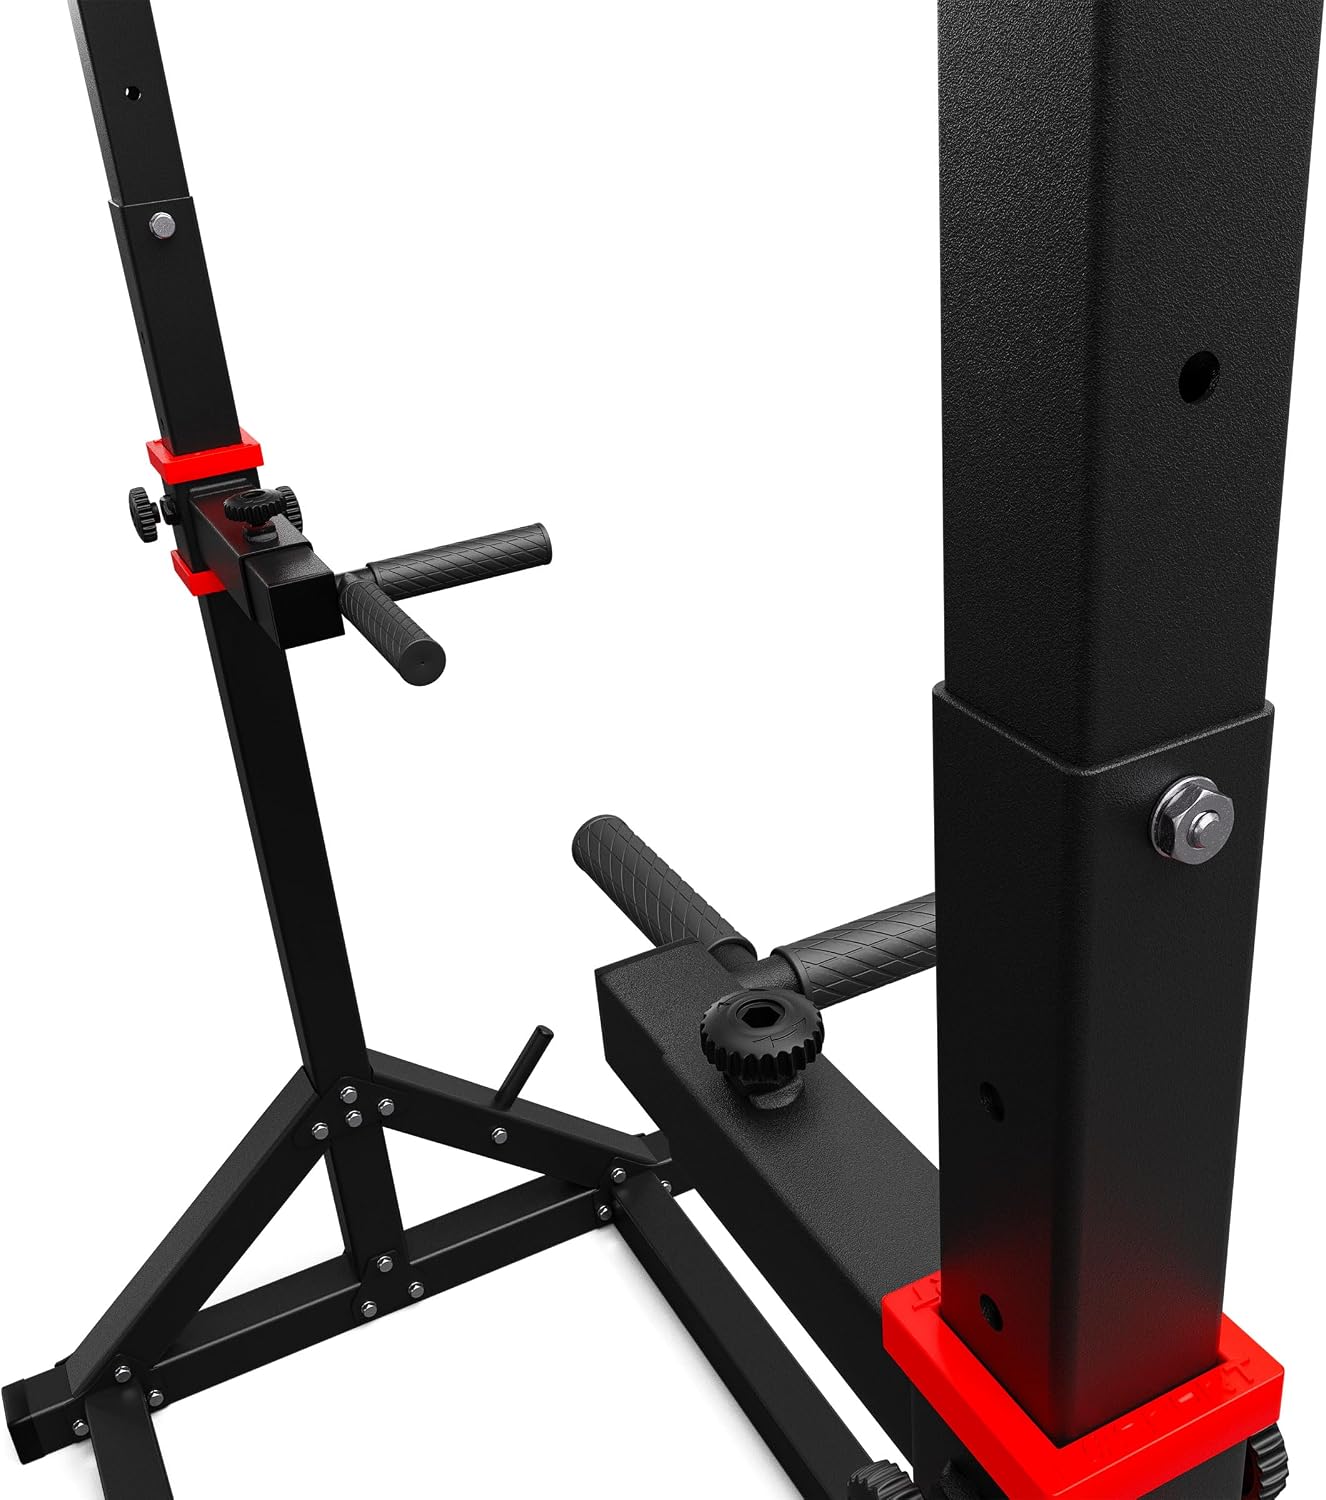
Close-up of the K-Sport KSH012 Squat Rack base, illustrating the robust construction and floor protection pads.
Operating Instructions
Adjusting Height
The squat rack features 7 levels of height adjustment, with 10 cm increments, providing an overall adjustment range of up to 70 cm. This allows for customization to various user heights and exercise types.
- Loosen the adjustment knobs located on the vertical uprights for the barbell supports or dip handles.
- Carefully slide the barbell supports (J-hooks) or dip handles to the desired height.
- Ensure the support pins are fully engaged in the corresponding adjustment holes.
- Tighten the adjustment knobs securely to lock the supports firmly in place before use.
Using the Barbell Supports (J-Hooks)
The fork design of the barbell supports allows for quick and secure placement of the barbell during various exercises. Always ensure the barbell is centered and fully seated in the supports before beginning your set. This design is suitable for both bench presses and standing squats.
Using Dip Handles
The adjustable dip handles can be positioned at a suitable height for performing dips and other bodyweight exercises. Before starting any exercise, ensure the dip handles are securely locked at your chosen height using the adjustment knobs.
Using the Pull-Up Bar
The integrated pull-up bar provides an option for various bodyweight exercises. Ensure the entire structure is stable and all connections are tight before performing pull-ups or other hanging exercises.

Close-up view of the adjustable J-hooks, demonstrating the secure locking mechanism for barbell placement.

Close-up view of the dip handles, showing their ergonomic design and attachment point.

Close-up view of the pull-up bar, illustrating its sturdy construction for bodyweight exercises.
Maintenance
Regular maintenance ensures the safety and extends the lifespan of your K-Sport Squat Rack.
- Tightness Check: Regularly check all nuts, bolts, and adjustment knobs for tightness. Tighten any loose fasteners immediately to maintain structural integrity.
- Frame Inspection: Inspect the steel frame for any signs of damage, cracks, bends, or rust. Address any issues promptly to prevent further deterioration.
- Cleaning: Clean the equipment with a damp cloth and a mild, non-abrasive detergent. Avoid using harsh chemicals or abrasive cleaners that could damage the powder-coated finish.
- Rubber Pads: Ensure all rubber pads on the feet are intact and providing adequate floor protection and stability. Replace worn or missing pads.
- Storage: Store the equipment in a dry environment to prevent corrosion, especially if not in regular use.
Troubleshooting
Equipment feels unstable or wobbly
- Ensure all assembly bolts and nuts are fully tightened.
- Verify that the equipment is placed on a flat, level, and stable surface. Uneven flooring can cause instability.
- Check if the adjustment pins for height are fully engaged in the holes and that the corresponding knobs are securely tightened.
Difficulty adjusting height
- Ensure adjustment knobs are fully loosened before attempting to slide the supports.
- Check for any obstructions or debris in the adjustment holes or along the sliding mechanism.
- Apply a small amount of silicone-based lubricant to the sliding surfaces if resistance persists.
Specifications
| Feature | Detail |
|---|---|
| Model | KSH012 |
| Brand | K-Sport |
| Dimensions (each stand) | 440 x 540 x 940-1530 mm (Width x Depth x Height) |
| Max Load Capacity | 140 kg |
| Steel Tube Dimensions | 40 x 40 mm |
| Height Adjustment | 7 levels (10 cm increments), total range up to 70 cm |
| Material | High-quality polished steel with powder-coated finish |
| Item Weight | 13 kg |
| Color | Black with Red accents |
| Country of Origin | Poland |

Technical diagram showing key dimensions and maximum load capacity of the K-Sport KSH012 Squat Rack.
Warranty and Support
This K-Sport product comes with a manufacturer's warranty. For specific warranty details, including coverage period and terms, please refer to the documentation included with your purchase or contact K-Sport customer support directly.
For technical assistance, inquiries regarding replacement parts, or any other support needs, please contact K-Sport customer service. Ensure you have your model number (KSH012) and proof of purchase available when contacting support.
- Manufacturer: K-Sport GmbH
- Seller: K-Sport GmbH