
Pyle PDMIKT140
Pyle USB Microphone Boom Mic Kit - User Manual
Model: PDMIKT140
Product Overview
The Pyle USB Microphone Boom Mic Kit (Model PDMIKT140) is a comprehensive audio recording solution designed for various applications including gaming, streaming, podcasting, and studio recording. This kit features a high-quality cardioid condenser microphone, a versatile boom arm stand, and essential accessories to ensure clear and precise audio capture.
Key features include a plug-and-play USB connection for universal compatibility with Windows, Mac, and Linux operating systems, an adjustable pop filter to eliminate plosive sounds, and a durable metal construction for reliable performance.
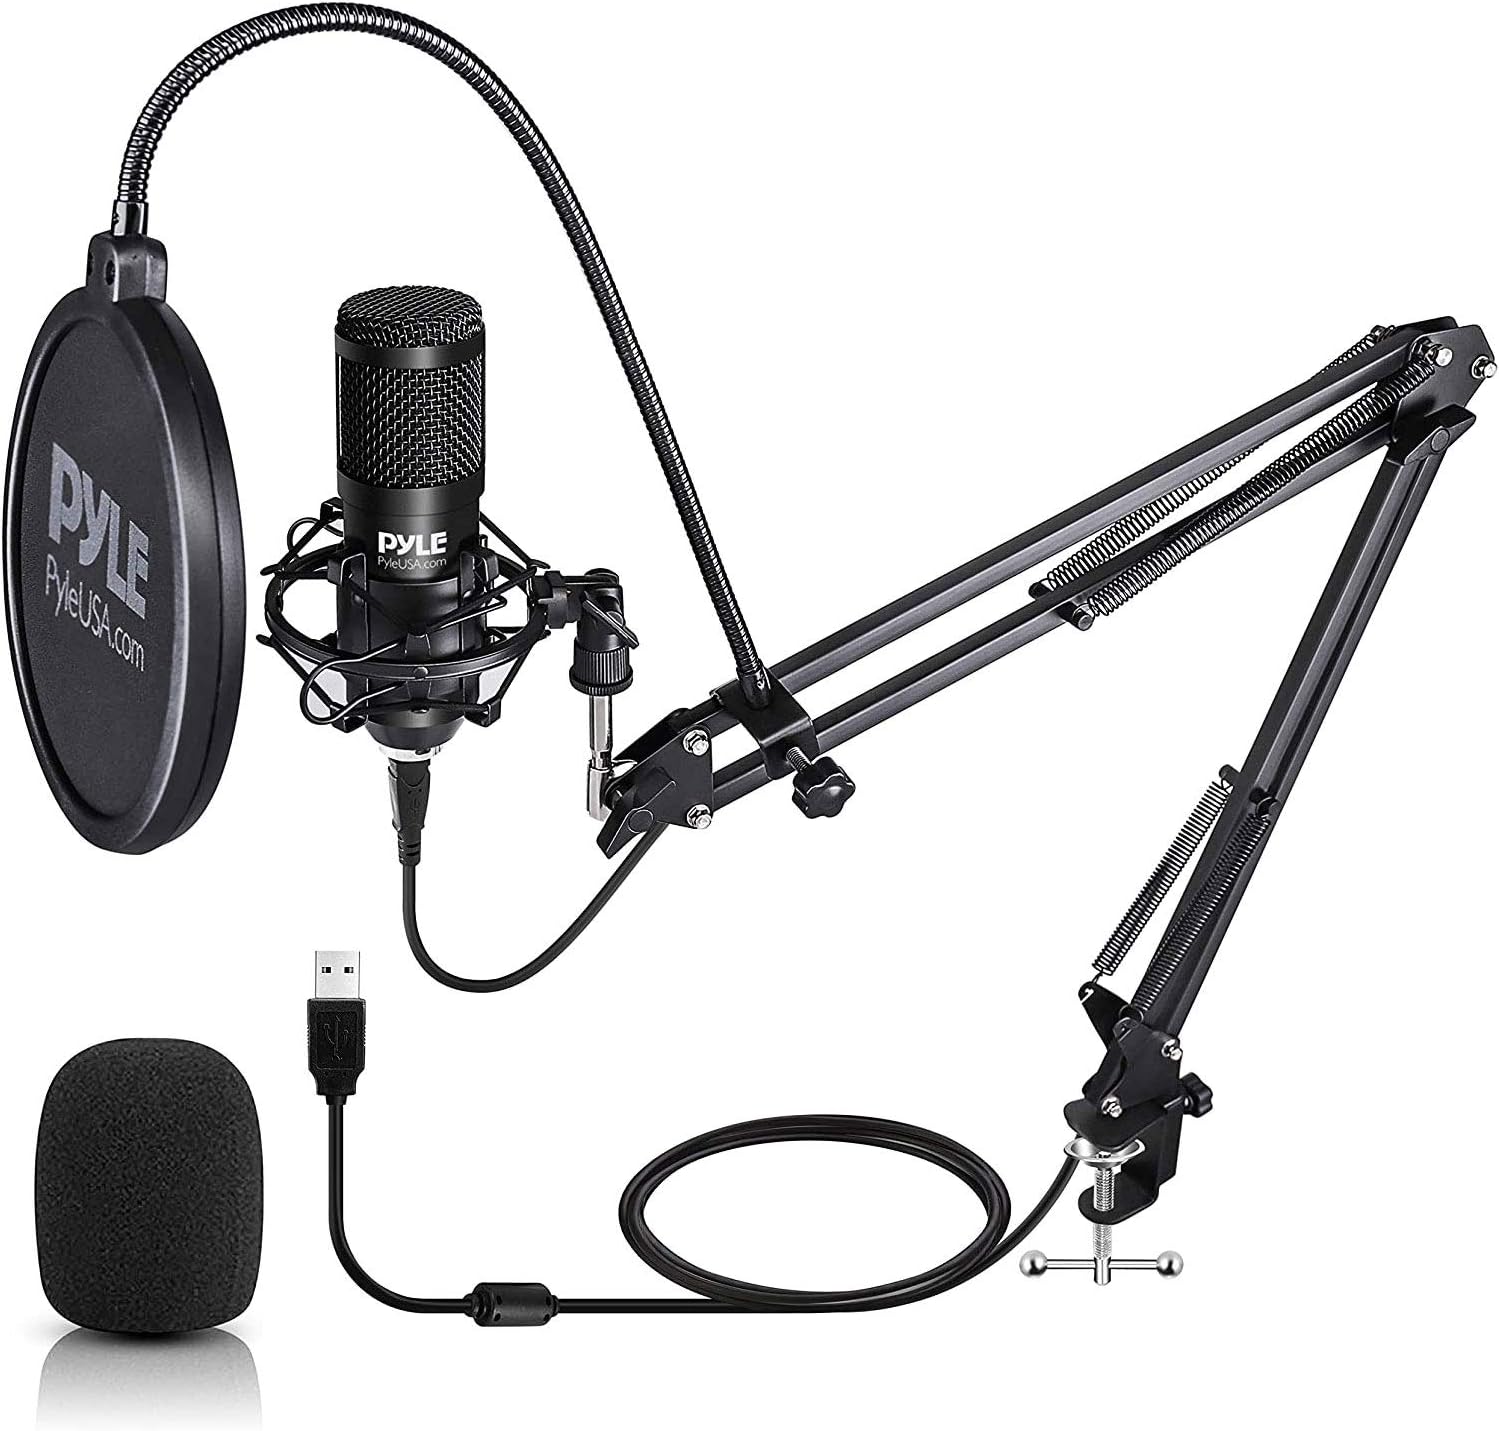
Image: The complete Pyle USB Microphone Boom Mic Kit, showcasing the condenser microphone, pop filter, and adjustable boom arm stand in an assembled configuration.
Package Contents
Verify that all components listed below are included in your package:
- (1) USB Microphone
- (1) Metal Shock Mount
- (1) USB Cable
- (1) Boom Arm Stand
- (1) Pop Filter
- (1) Wind Foam

Image: An exploded view illustrating all individual components included in the Pyle USB Microphone Boom Mic Kit, such as the condenser microphone, pop filter, shock mount, wind foam, USB cable, and the adjustable suspension scissor arm with desk mount clamp.
Setup Instructions
- Attach the Desk Mount Clamp: Securely fasten the desk mount clamp to the edge of your desktop or table. Ensure it is tightened sufficiently to provide a stable base for the boom arm.
- Insert the Boom Arm Stand: Insert the base of the boom arm stand into the hole on the desk mount clamp. Adjust the position and tighten the locking screw to fix the arm in place.
- Attach the Shock Mount: Screw the metal shock mount onto the threaded end of the boom arm.
- Install the Microphone: Carefully place the USB microphone into the shock mount. The shock mount helps to isolate the microphone from vibrations and handling noise.
- Attach the Pop Filter: The pop filter has a clamp that can be attached to the boom arm. Position the pop filter directly in front of the microphone, approximately 2-3 inches away, to reduce plosive sounds (e.g., 'p' and 'b' sounds).
- Apply Wind Foam (Optional): If desired, slide the wind foam over the microphone. This can provide additional protection against wind noise and plosives, especially in less controlled environments.
- Connect the USB Cable: Plug one end of the provided USB cable into the microphone and the other end into an available USB port on your computer (Windows PC, Mac, or Linux).
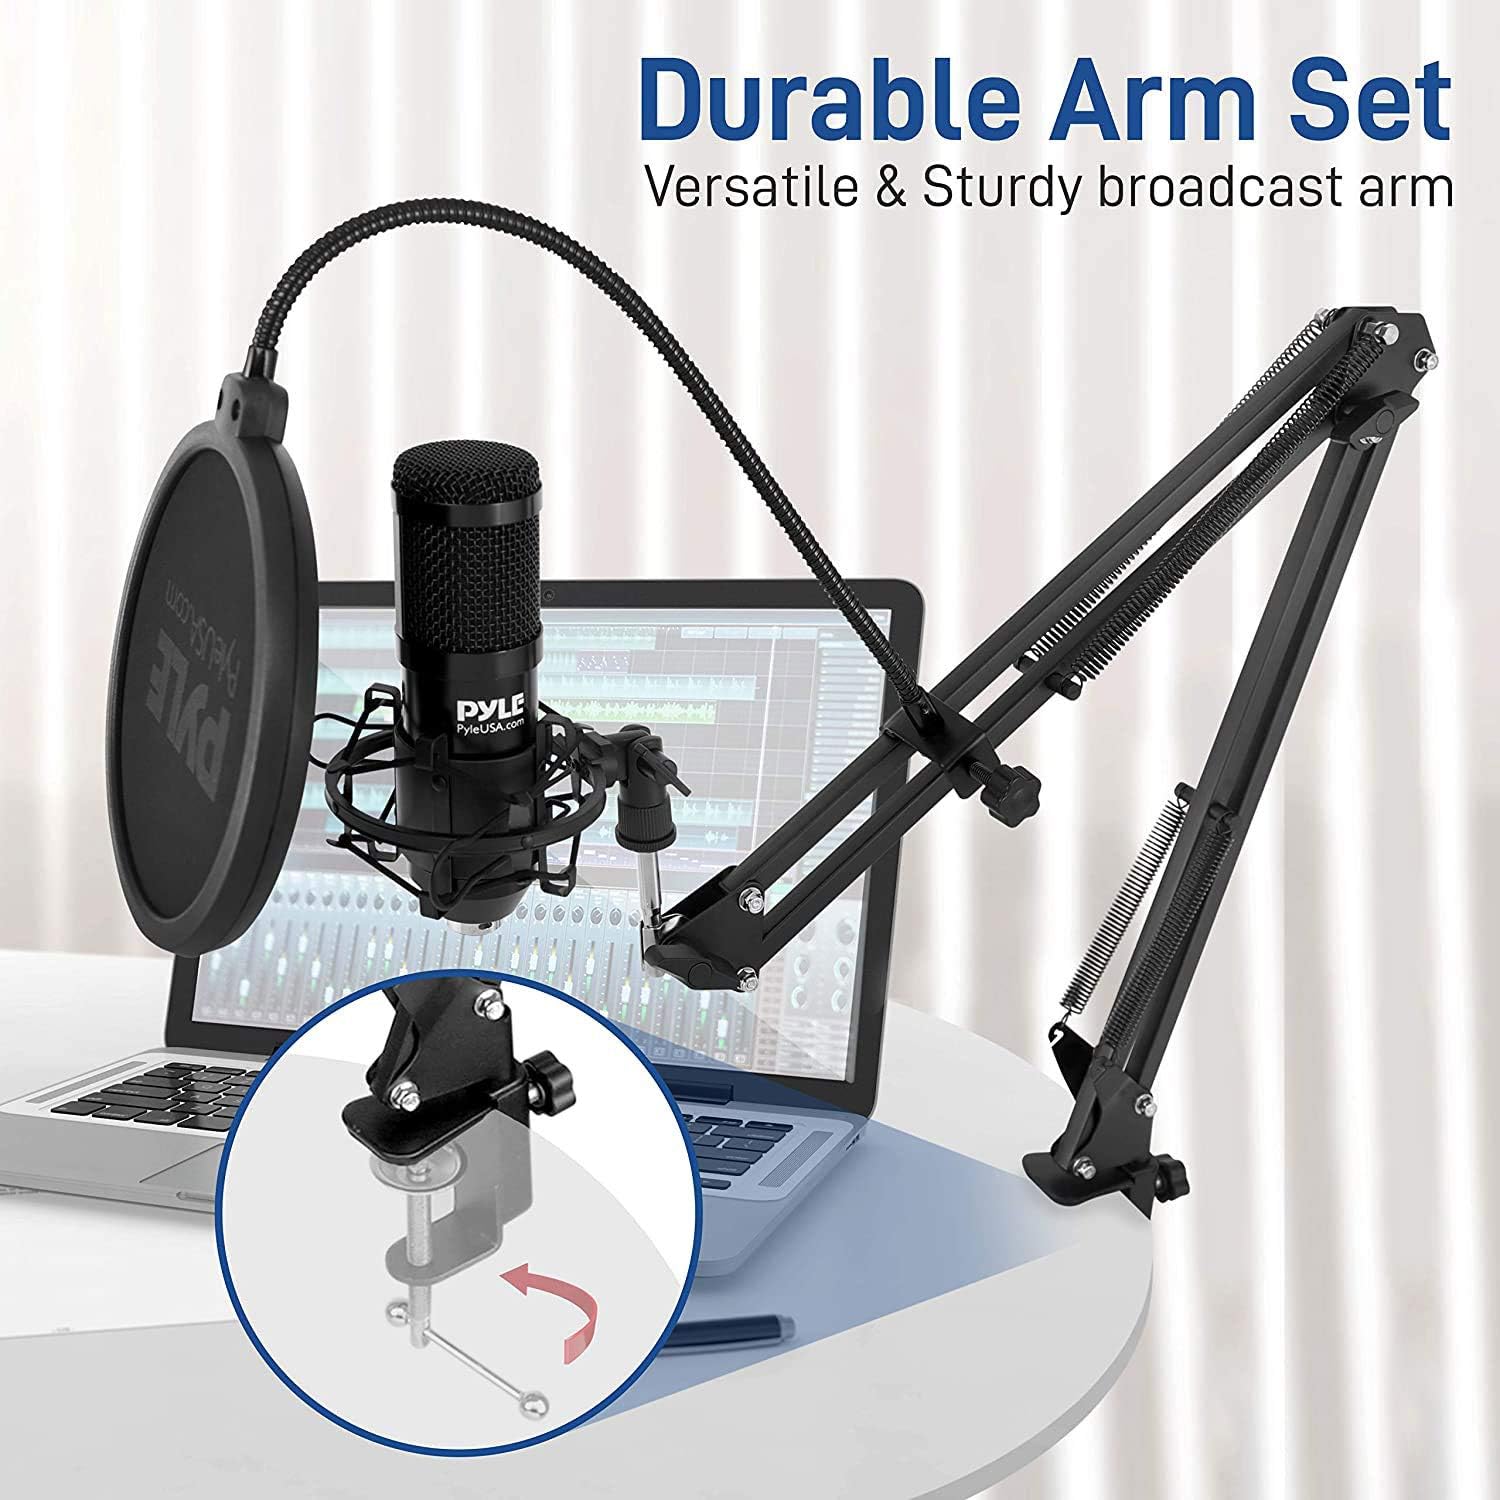
Image: The Pyle USB Microphone Boom Mic Kit set up on a desk with a laptop, highlighting the durable and versatile boom arm and its secure desk clamp attachment.
Operating Instructions
1. Plug and Play Operation
The Pyle USB Microphone is designed for simple plug-and-play functionality. No additional drivers are typically required for Windows, Mac, or Linux operating systems.
- Connect the USB cable from the microphone to your computer.
- Your operating system should automatically detect the microphone and install any necessary generic drivers.

Image: The Pyle USB Microphone connected to a laptop via its USB cable, demonstrating its plug-and-play functionality across Windows, Mac OS, and Linux operating systems without requiring additional driver software.
2. Selecting the Microphone as Input Device
After connecting, you may need to select the Pyle USB Microphone as your default audio input device in your computer's sound settings or within your recording/streaming software.
- Windows: Go to Settings > System > Sound > Input. Select "Pyle USB Microphone" (or similar) from the dropdown menu.
- Mac: Go to System Preferences > Sound > Input. Select "Pyle USB Microphone" (or similar) from the list.
- Recording/Streaming Software: Within your application (e.g., OBS Studio, Audacity, Discord), navigate to its audio settings and select the Pyle USB Microphone as the input device.
3. Adjusting Microphone Position
The boom arm allows for flexible positioning of the microphone to optimize sound capture.
- Adjust the height and angle of the boom arm to position the microphone approximately 6-12 inches from your mouth.
- Ensure the front of the microphone (where the Pyle logo is visible) is facing you, as it has a cardioid pickup pattern designed to capture sound primarily from the front.

Image: The Pyle USB Microphone boom arm demonstrating its adjustable height and angle capabilities, providing sturdy support for optimal microphone positioning at various levels.
4. Optimizing Audio Quality
- Pop Filter: Always use the pop filter to minimize harsh "p" and "b" sounds (plosives) and protect the microphone from moisture.
- Gain Settings: Adjust the microphone gain (input volume) in your computer's sound settings or recording software. Aim for a level where your voice is clear and strong without peaking (clipping) or sounding distorted.
- Environment: Record in a quiet environment to minimize background noise, as the cardioid pattern will still pick up some ambient sound.

Image: A collage of four images illustrating various applications of the Pyle USB Microphone, including recording vocals, gaming, online chatting, and podcasting, demonstrating its versatility.
Maintenance and Care
- Cleaning: Use a soft, dry cloth to clean the microphone and boom arm. Do not use liquid cleaners or solvents.
- Storage: When not in use, store the microphone kit in a clean, dry place away from extreme temperatures and humidity.
- Cable Care: Avoid bending or kinking the USB cable excessively to prevent internal damage.
- Shock Mount: Periodically check the elastic bands on the shock mount for wear and tear. Replace if they lose elasticity to ensure proper vibration isolation.
Troubleshooting
| Problem | Possible Cause | Solution |
|---|---|---|
| No sound from microphone |
|
|
| Audio sounds distorted or too loud |
|
|
| Background noise is audible |
|
|
| Popping sounds (plosives) in audio |
|
|
Specifications
| Feature | Detail |
|---|---|
| Model Number | PDMIKT140 |
| Microphone Type | Cardioid Condenser |
| Polar Pattern | Unidirectional |
| Connectivity Technology | Wired (USB) |
| Connector Type | USB |
| Audio Sensitivity | 36 Decibels (-43dB +/- 3dB (0dB=1V/Pa at 1KHz)) |
| Signal-to-Noise Ratio | 66 dB |
| Max SPL | 120dB |
| Mic Gain | -16dB (45dB Max) |
| Bit Depth | 16 bit |
| Sampling Rate | Up to 48KHz |
| Hardware Platform | Gaming Console, PC |
| Compatible Devices | Personal Computer, Laptop, Tablet, Gaming Console |
| Material | Metal (Engineered metal alloy & metal iron base) |
| Color | Black |
| Item Dimensions (L x W x H) | 2.75 x 16.5 x 9.5 inches |
| Item Weight | 2.9 pounds |
| Power Source | Corded Electric (USB Powered) |

Image: A detailed view of the Pyle USB Condenser Microphone, highlighting its heavy-duty 16mm condenser and cardioid pickup pattern, along with key technical specifications such as sensitivity, S/N ratio, Max SPL, Mic Gain, Bit Depth, and Sampling Rate.
Important Safety Information
WARNING:
This product contains chemicals known to the State of California to cause cancer and birth defects or other reproductive harm.
Warranty and Support
For warranty information and technical support, please refer to the official Pyle website or contact Pyle customer service directly. Details can typically be found on the manufacturer's product page or within the packaging materials.
Pyle Official Website: www.pyleusa.com
For further assistance, you may also visit the product page on Amazon: Pyle USB Microphone on Amazon
Related documentsPDMIKT140


Ask a question about this manual
Ask about setup, troubleshooting, compatibility, parts, safety, or missing instructions. Manuals+ will review the question and use this page’s manual context to help answer it.