Windflyer All-in-One Kids Alarm Clock
Windflyer OK to Wake Clock for Kids Instruction Manual
Model: All-in-One Kids Alarm Clock
Introduction
Thank you for choosing the Windflyer OK to Wake Clock for Kids. This multifunctional device is designed to assist with children's sleep training by using visual cues, night lights, and sound features. Please read this manual carefully to ensure proper setup and operation.
Setup
1. Unboxing and Components
Carefully remove all components from the packaging. Ensure you have the main clock unit and the power adapter. The clock has a built-in CR2032 battery for memory backup during power outages, which does not require user installation.
2. Power Connection
Connect the provided power adapter to the DC port on the back of the clock. Plug the adapter into a standard electrical outlet. The clock will power on automatically.
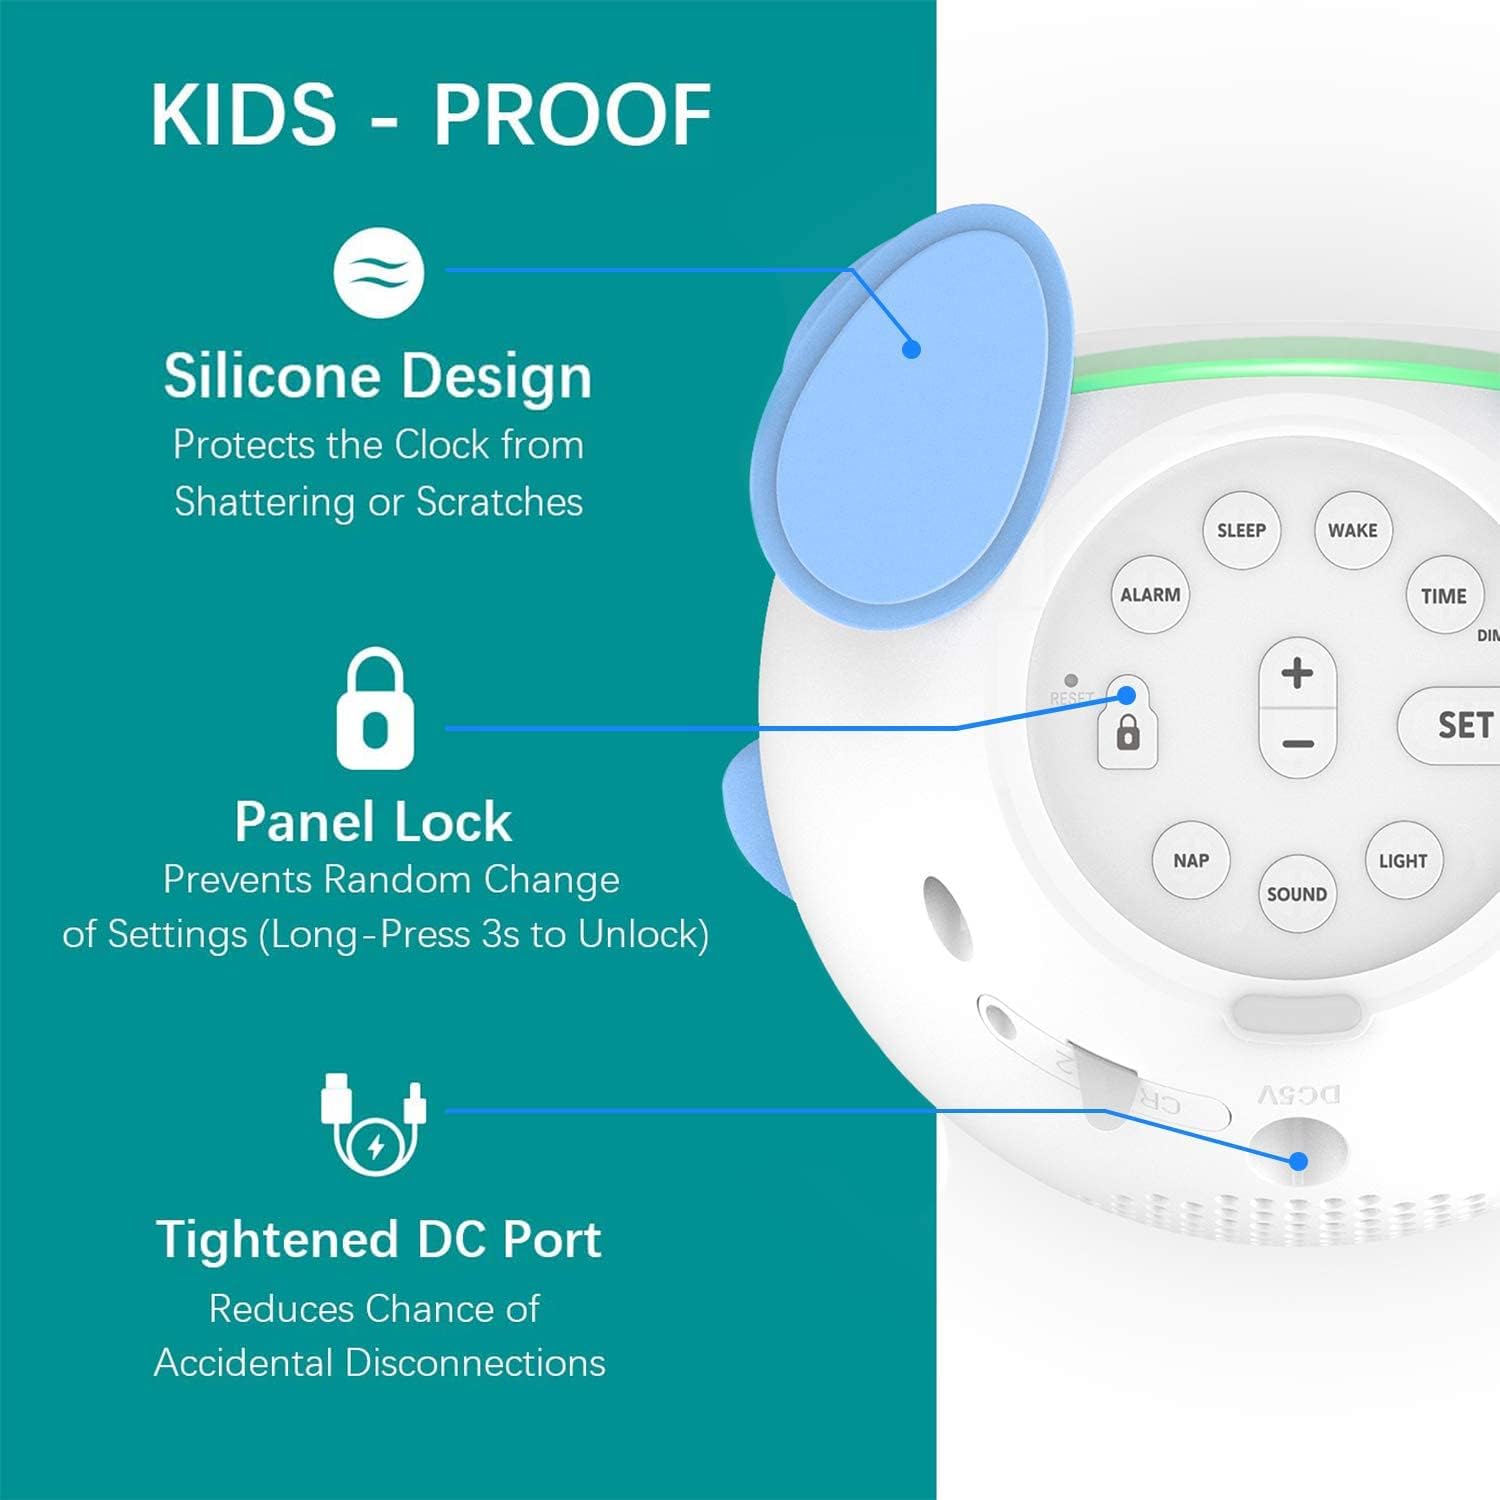
Image: Rear view of the clock highlighting the control panel and power input.
3. Initial Time Setting
- Press the TIME button to enter time setting mode.
- Use the + and - buttons to adjust the hour. Press SET to confirm.
- Repeat the process to set the minutes. Press SET to confirm.
- The clock supports 12-hour (AM/PM) and 24-hour formats. Adjust as needed during the time setting process.
4. Child-Lock Feature
To prevent accidental changes by children, the clock includes a child-lock function. Long-press the LOCK button (usually indicated by a padlock icon) for 3 seconds to activate or deactivate the lock. When activated, most buttons will be unresponsive except for the snooze/light button.
Operating Instructions
1. Sleep Training Modes (OK to Wake)
The clock uses different light colors and facial expressions to signal sleep, play, and wake times.
- Sleep Mode (Red Light): When it's bedtime, the clock displays a sleeping face and glows red, indicating it's time to stay in bed.
- Play Mode (Pale Green Light): An optional mode that can be set for a period before wake-up. The clock may display a winking face and glow pale green, signaling a quiet play time before it's fully time to wake.
- Wake Mode (Green Light): When it's time to wake up, the clock displays a smiling face and glows green, indicating it's okay to get out of bed.

Image: Visual representation of the clock's Wake (green), Sleep (red), and Play (pale green) modes with corresponding facial expressions.
2. Setting Sleep and Wake Times
- Press the SLEEP button to set the bedtime. Use + and - to adjust the hour and minutes, then SET to confirm.
- Press the WAKE button to set the wake-up time. Use + and - to adjust the hour and minutes, then SET to confirm.
- You can also set an optional PLAY time (pale green light) before the wake-up time. Refer to the specific instructions in your product's detailed manual for this advanced setting.
3. Night Light Features
The clock offers multiple night light colors and brightness levels.
- Press the LIGHT button to cycle through different colors (e.g., purple, pink, green, blue, yellow).
- Use the DIMMER button or + and - buttons (depending on mode) to adjust the brightness level (typically 4 levels).
- The night light can be set to turn off automatically after a specified time (0-90 minutes) or remain on at a low brightness (e.g., 10% for sleep companion).

Image: Display of the clock's various night light color options and brightness settings.
4. Sound Machine and Alarm
The clock includes soothing sounds and an alarm function.
- Press the SOUND button to cycle through available sounds (e.g., lullabies, white noise, nature sounds).
- Use the + and - buttons to adjust the volume level (typically 5 levels).
- The alarm sound can be set independently from the sleep training sounds.
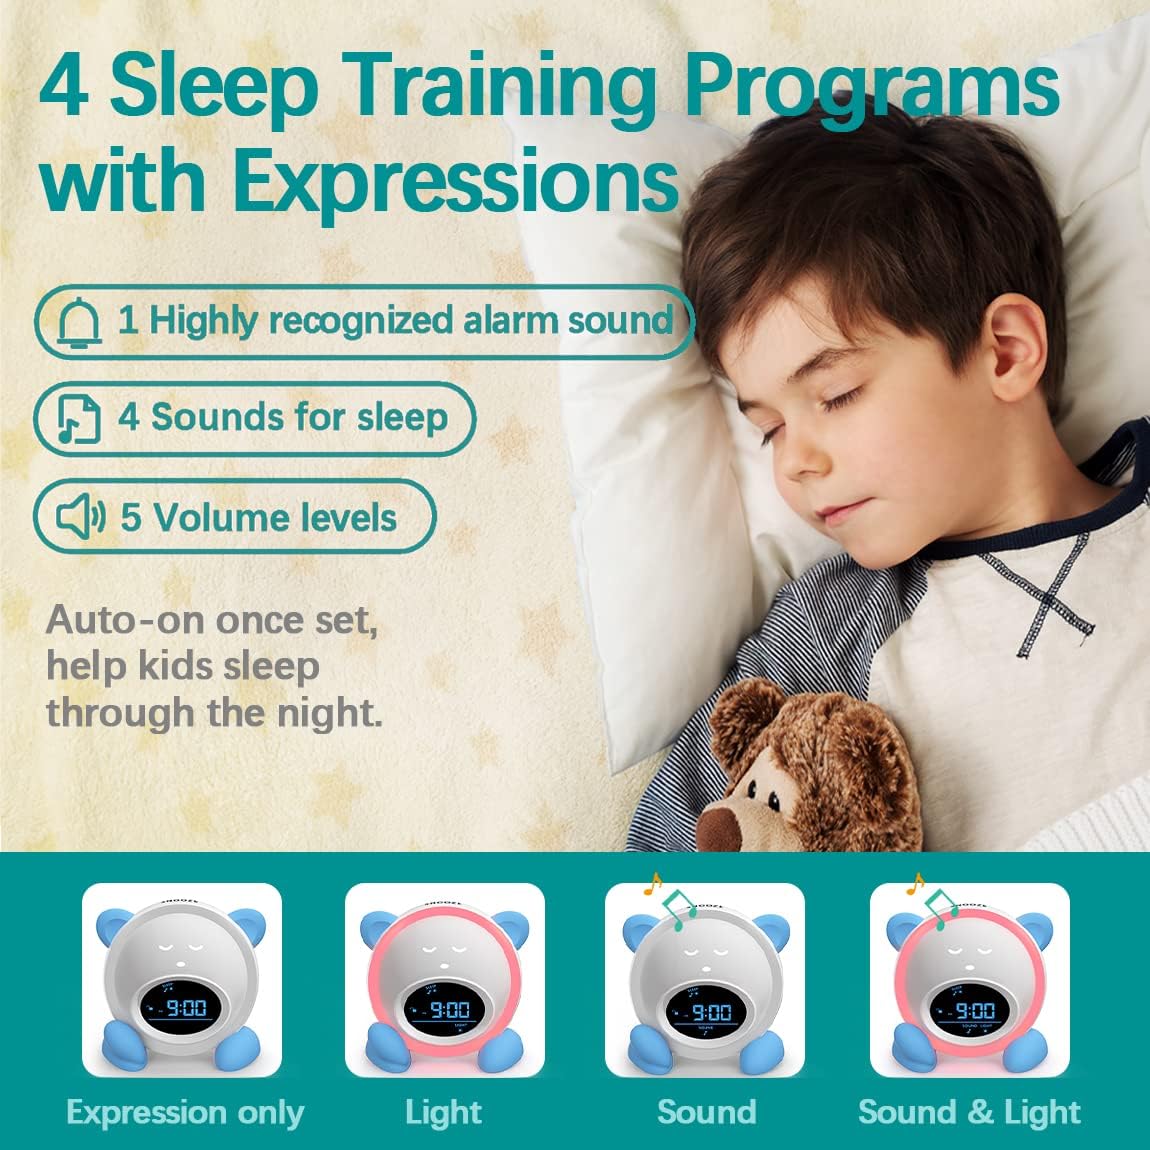
Image: Overview of the clock's sleep training programs, including alarm sounds, sleep sounds, and volume controls.
5. Nap Timer
To set a nap timer:
- Press the NAP button.
- Use the + and - buttons to select the desired nap duration (e.g., 15, 30, 60, 90, 180 minutes).
- Press SET to start the nap timer. The clock will typically display a sleeping face and a red light during the nap, changing to green when the nap is over.
6. Snooze Function
When the alarm sounds, press the large SNOOZE button on top of the clock to temporarily silence the alarm for 9 minutes. The alarm will resume after the snooze period.
Maintenance
1. Cleaning
Wipe the clock with a soft, dry cloth. Do not use abrasive cleaners or immerse the unit in water. Ensure the power adapter is unplugged before cleaning.
2. Battery Information
The clock contains a built-in CR2032 battery for memory backup. This battery preserves your settings in case of a power outage. It is not user-replaceable and typically lasts for the product's lifespan. If settings are frequently lost after power disconnection, contact support.
3. Storage
When not in use for an extended period, unplug the clock and store it in a cool, dry place away from direct sunlight and extreme temperatures.
Troubleshooting
- Clock not turning on: Ensure the power adapter is securely connected to both the clock and a working electrical outlet.
- Settings not saving: Check if the child-lock feature is active. If settings are still not saving after a power outage, the internal backup battery may need service.
- Alarm not sounding/light not changing: Verify that the alarm and wake times are correctly set and activated. Ensure the volume is not set to zero.
- Buttons unresponsive: Check if the child-lock feature is active. Deactivate it by long-pressing the lock button.
For further assistance, please refer to the detailed manual included with your product or contact customer support.
Specifications
| Brand | Windflyer |
| Model Number | All-in-One Kids Alarm Clock |
| Color | Blue |
| Display Type | Digital |
| Special Features | Alarm, Children Sleep Training Clock, Corded, Night Light, Sound Machine |
| Product Dimensions | 4.6"W x 5.5"H |
| Power Source | Corded Electric |
| Material | Acrylonitrile Butadiene Styrene (ABS) |
| Item Weight | 14.4 ounces |
| Batteries | 1 CR2032 batteries required (for memory backup) |

Image: Product dimensions of the clock.
Warranty and Support
Warranty Information
For details regarding the product warranty, please refer to the warranty card included in your product packaging or visit the official Windflyer website. Standard return policies typically allow for returns or replacements within 30 days of purchase.
Customer Support
If you encounter any issues or have questions not covered in this manual, please contact Windflyer customer support. Contact information can usually be found on the product packaging or the official brand website.
Ask a question about this manual
Ask about setup, troubleshooting, compatibility, parts, safety, or missing instructions. Manuals+ will review the question and use this page’s manual context to help answer it.