BLACK+DECKER BESTE620
BLACK+DECKER 14-inch Electric String Trimmer (BESTE620) User Manual
Model: BESTE620
Introduction
Thank you for choosing the BLACK+DECKER 14-inch Electric String Trimmer (Model BESTE620). This manual provides essential information for the safe and efficient operation, maintenance, and troubleshooting of your new string trimmer. Please read all instructions carefully before use to ensure optimal performance and user safety.

Figure 1: The BLACK+DECKER BESTE620 Electric String Trimmer. This image shows the full assembly of the trimmer, highlighting its compact and ergonomic design.
Important Safety Information
WARNING: Read and understand all safety warnings and instructions before operating this product. Failure to follow the warnings and instructions may result in electric shock, fire, and/or serious injury.
- Always wear protective eyewear when operating this string trimmer to prevent flying debris from causing injury.
- Ensure the area is clear of people, pets, and objects before starting the trimmer.
- Only use an approved extension cord if the trimmer is corded electric.
- Check the line frequently and replace it when necessary to maintain optimal performance and prevent potential hazards.
- Make sure the trimmer is off and unplugged (if corded) before adjusting the handle or height positions.
- Improper use of this product may result in serious injury or death. Refer to the user manual for detailed safety instructions.
Setup and Assembly
The BLACK+DECKER BESTE620 string trimmer requires minimal assembly. Ensure all components are present before beginning.
- Handle Adjustment: Loosen the adjustment knob on the auxiliary handle. Position the handle for comfortable operation, ensuring a balanced grip. Tighten the knob securely.
- Shaft Length Adjustment: The trimmer features an adjustable shaft. To adjust, locate the locking collar on the shaft, twist to loosen, extend or retract the shaft to your desired length, and then twist to lock securely.
- Guard Installation: Attach the debris guard to the trimmer head. Ensure it clicks firmly into place to protect against flying debris during operation.
- Cord Connection: Connect your extension cord to the trimmer's power cord. Utilize the integrated cord retention system to prevent accidental disconnection during use.

Figure 2: Adjusting the shaft length for ergonomic use. This image demonstrates how to extend or retract the trimmer's shaft for user comfort.

Figure 3: Utilizing the cord retention system. This image shows the proper method for securing the extension cord to prevent accidental unplugging.
Operating Instructions
The BESTE620 is designed for efficient trimming and edging of grass and light weeds.
Starting and Stopping
- To start the trimmer, ensure it is plugged into a suitable power outlet, then press the trigger switch.
- To stop the trimmer, release the trigger switch.
EASYFEED™ Line Advancement
The EASYFEED™ system allows for automatic line advancement with the push of a button, eliminating the need for bumping.
- While the trimmer is running, press the orange EASYFEED™ button located on the handle. The line will automatically extend.
- Release the button once the desired line length is achieved. The line will be cut to the correct length by the blade on the guard.

Figure 4: Activating the EASYFEED™ system. This image shows a hand pressing the orange button on the handle to advance the cutting line.
Trimming Operation
Hold the trimmer firmly with both hands. Maintain a comfortable distance from the cutting head. Move the trimmer in a sweeping motion, cutting small amounts of grass at a time.
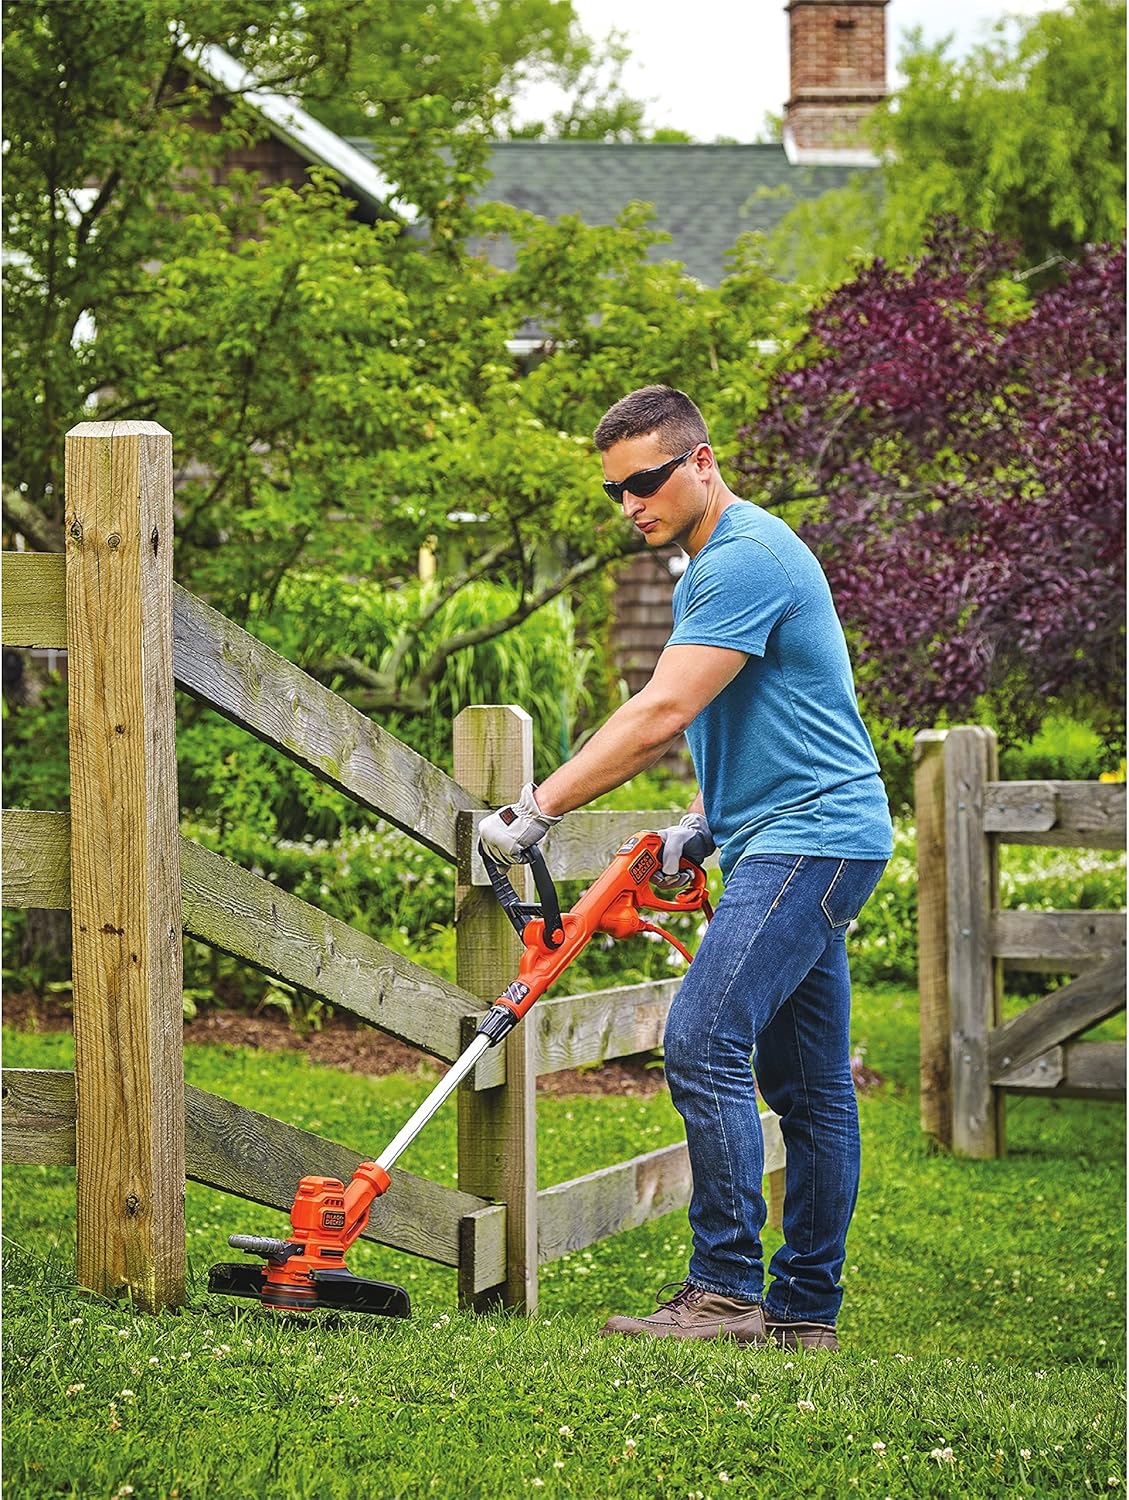
Figure 5: Trimming grass with the BESTE620. This image illustrates proper technique for trimming around obstacles like fences.
Edging Operation (2-in-1 Feature)
The BESTE620 converts from a trimmer to a wheeled edger with a simple rotation of the shaft.
- Ensure the trimmer is unplugged.
- Locate the pivot mechanism near the trimmer head. Rotate the head 90 degrees until it locks into the edging position. The integrated wheel will now be positioned to guide the trimmer along edges.
- Plug in the trimmer and guide the wheel along the edge of sidewalks, driveways, or flower beds for a clean, precise cut.

Figure 6: Edging a sidewalk with the BESTE620. This image demonstrates the trimmer's wheeled edging capability for neat lawn borders.

Figure 7: Detail of the edging wheel. This close-up shows the wheel that guides the trimmer during edging operations.
Maintenance
Regular maintenance ensures the longevity and optimal performance of your string trimmer.
Replacing the Trimmer Line Spool
When the trimmer line runs out, replace the spool with a genuine BLACK+DECKER replacement spool (Model AF-100 or equivalent 0.065-inch diameter line).
- Disconnect Power: Always unplug the trimmer from the power source before performing any maintenance.
- Remove Spool Cap: Press the tabs on the sides of the spool cap and lift it off.
- Remove Old Spool: Lift the empty spool out of the housing.
- Install New Spool: Place the new spool into the housing, ensuring the line feeds through the eyelet.
- Replace Spool Cap: Align the spool cap and press it down until it clicks securely into place.

Figure 8: Trimmer head detail. This image provides a closer look at the area where the line spool is housed, useful for replacement procedures.
Cleaning and Storage
- After each use, unplug the trimmer and clean the exterior with a damp cloth. Remove any grass clippings or debris from the guard and cutting head.
- Do not use harsh chemicals or abrasive cleaners.
- Store the trimmer in a dry, secure location, out of reach of children. Avoid storing in direct sunlight or extreme temperatures.
Troubleshooting
This section addresses common issues you might encounter with your string trimmer.
| Problem | Possible Cause | Solution |
|---|---|---|
| Trimmer does not start. | Not plugged in; power outlet faulty; extension cord damaged; trigger not fully depressed. | Ensure power cord is securely plugged in. Test outlet with another device. Inspect extension cord for damage. Fully depress the trigger switch. |
| Line does not advance. | Spool empty; line tangled or fused; EASYFEED button not pressed correctly. | Replace spool. Unplug and inspect spool for tangles; manually unwind if necessary. Ensure EASYFEED button is pressed firmly while trimmer is running. |
| Motor runs but line does not spin. | Spool not installed correctly; debris in head. | Unplug and re-install spool, ensuring it seats properly. Clear any debris from the trimmer head area. |
| Excessive vibration. | Damaged line; unbalanced spool; loose components. | Replace line. Check spool for damage or improper winding. Ensure all components (guard, handle) are securely fastened. |
Specifications
| Feature | Detail |
|---|---|
| Model Number | BESTE620 |
| Power Source | Corded Electric |
| Motor Amperage | 6.5 Amps |
| Cutting Width | 14 Inches |
| Item Weight | 7 Pounds |
| Product Dimensions (L x W) | 9"L x 5"W |
| Line Diameter | 0.065 inches (recommended) |
| Assembly Required | No (minimal assembly) |
| Included Components | 6.5AMP 14IN EASYFEED STRING TRIMMER |
Warranty and Support
Warranty Information
This BLACK+DECKER product is covered by a 2-year limited warranty and a 30-day money-back guarantee. This warranty covers defects in material or workmanship. For full terms and conditions, please refer to the warranty card included with your product or visit the official BLACK+DECKER website.
Customer Support
For technical assistance, replacement parts, or warranty claims, please contact BLACK+DECKER customer service. You can find contact information on the official BLACK+DECKER website or by referring to the product packaging.
Online Resources: Visit the official BLACK+DECKER website for FAQs, product registration, and additional support materials.