1. Introduction
Thank you for choosing the KALERM KLM1601 Automatic Coffee Maker. This machine is designed to provide a variety of coffee beverages, including Americano, Cappuccino, Espresso, and Latte, with ease and convenience. This manual provides essential information for the safe and efficient operation, maintenance, and troubleshooting of your coffee maker. Please read it thoroughly before first use and keep it for future reference.
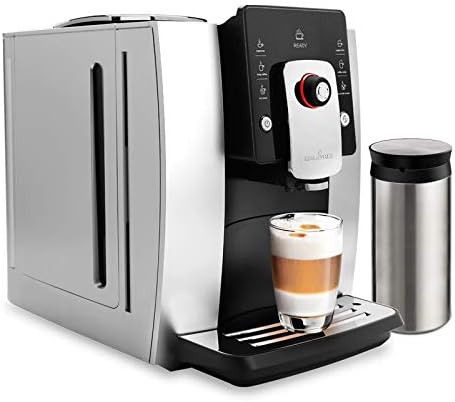
Image 1.1: The KALERM KLM1601 Automatic Coffee Maker, showcasing its sleek design, control panel, and a prepared latte in a glass, alongside a stainless steel milk container.
2. Important Safety Instructions
- Read all instructions before using the appliance.
- Do not immerse the appliance, power cord, or plug in water or other liquids.
- Ensure the voltage specified on the appliance matches your local power supply.
- Keep the appliance out of reach of children.
- Unplug from the outlet when not in use and before cleaning.
- Do not operate any appliance with a damaged cord or plug, or after the appliance malfunctions or has been damaged in any manner.
- Use only manufacturer-recommended accessories.
- Do not use outdoors.
- Avoid contact with hot surfaces. Use handles or knobs.
- Always ensure the water tank is filled to the appropriate level before operation.
- Exercise caution when handling hot liquids and steam.
3. Product Components
Familiarize yourself with the main parts of your KALERM KLM1601 coffee maker.

Image 3.1: Front view of the coffee maker, highlighting the control panel with various beverage selection buttons and the central rotary knob. A glass with a layered latte is positioned on the drip tray.
- Control Panel: Intuitive display for selecting beverages and settings.
- Coffee Spout: Dispenses brewed coffee. Adjustable height (80-140 mm).
- Milk Frother/Steam Wand: For preparing milk-based beverages.
- Water Tank: Removable tank with 1.8L capacity.
- Bean Hopper: Holds up to 250g of coffee beans.
- Ground Coffee Compartment: For pre-ground coffee (e.g., decaffeinated).
- Drip Tray: Collects excess liquid.
- Waste Coffee Container: Stores used coffee grounds (capacity: 15 servings).
- Thermoblocks: Two independent thermoblocks for water and steam.

Image 3.2: Side view of the coffee maker, clearly showing the transparent water tank on the left side, allowing for easy monitoring of the water level.
4. Initial Setup
- Unpacking: Carefully remove the coffee maker and all accessories from the packaging. Retain packaging for future transport or service.
- Placement: Place the machine on a stable, level, and heat-resistant surface, away from water sources and direct sunlight. Ensure adequate ventilation around the appliance.
- Cleaning: Before first use, clean the water tank, drip tray, and waste coffee container with warm water and mild detergent. Rinse thoroughly.
- Water Tank Filling: Fill the water tank with fresh, cold drinking water up to the MAX level indicator. Insert the tank securely into the machine.
- Bean Hopper Filling: Open the lid of the bean hopper and pour fresh coffee beans into it. Do not overfill.
- Power Connection: Plug the power cord into a grounded electrical outlet (127V - 50/60Hz).
- First Use Cycle: Follow the on-screen instructions for the initial rinse cycle. This primes the system and cleans internal components.
5. Operating Instructions
5.1. Brewing Coffee
- Ensure the water tank is filled and the bean hopper contains coffee beans.
- Place a cup under the coffee spout. Adjust the spout height if necessary.
- Turn on the machine using the power button.
- Select your desired beverage (e.g., Espresso, Americano) from the control panel.
- The machine will automatically grind the beans and brew your coffee.
- To use pre-ground coffee, open the ground coffee compartment, add one scoop of pre-ground coffee, then select the pre-ground coffee option on the display before brewing.

Image 5.1: The coffee maker actively brewing a beverage into a cup, demonstrating the dispensing process. Coffee beans and bags are visible in the background.
5.2. Preparing Milk-Based Beverages (Cappuccino, Latte)
- Fill the included steel flask or a suitable milk container with cold milk.
- Position the milk frother tube into the milk container.
- Place a cup under the coffee spout.
- Select your desired milk-based beverage (e.g., Cappuccino, Latte) from the control panel.
- The machine will first brew the espresso, then automatically froth and dispense milk into your cup.
- After use, clean the milk frother system immediately to prevent milk residue buildup.
5.3. Hot Water Dispensing
- Place a cup under the hot water spout.
- Select the "Hot Water" option from the control panel.
- The machine will dispense hot water for tea or other hot beverages.
6. Maintenance and Cleaning
Regular cleaning and maintenance ensure optimal performance and longevity of your coffee maker.
6.1. Daily Cleaning
- Drip Tray and Waste Coffee Container: Empty and rinse daily. The machine will prompt you when the waste container needs emptying (after approximately 15 servings).
- Milk Frother: After each use, run a quick rinse cycle for the milk frother to prevent blockages. Disassemble and clean thoroughly with warm water and mild detergent regularly.
- Exterior: Wipe the exterior surfaces with a soft, damp cloth. Do not use abrasive cleaners.
6.2. Weekly/Bi-Weekly Cleaning
- Water Tank: Clean the water tank with warm water and mild detergent. Rinse thoroughly to remove any residue.
- Brew Group: The machine features a self-cleaning function for the brew group. Follow the on-screen prompts for this cycle.
6.3. Descaling
The machine will indicate when descaling is required. Use a descaling solution specifically designed for coffee machines and follow the instructions provided with the descaling agent and on the machine's display. Regular descaling prevents mineral buildup and maintains brewing performance. The machine records descaling cycles.
7. Troubleshooting
If you encounter issues with your coffee maker, refer to the table below for common problems and solutions.
| Problem | Possible Cause | Solution |
|---|---|---|
| No coffee dispenses. | Water tank empty; brew group clogged; no coffee beans. | Fill water tank; perform a cleaning cycle; fill bean hopper. |
| Coffee is too weak/strong. | Grind setting incorrect; coffee quantity setting. | Adjust grinder fineness (5 levels available); adjust coffee strength setting on display. |
| Milk not frothing properly. | Milk frother clogged; milk too warm; incorrect milk type. | Clean milk frother thoroughly; use cold, fresh milk; try different milk types (e.g., whole milk). |
| Machine displays "Descale". | Mineral buildup in the system. | Perform a descaling cycle as prompted by the machine. |
| Machine is noisy. | Normal operation (grinding); air in the system. | This is normal during grinding. If persistent, run a hot water cycle to clear air. |
If the problem persists after attempting these solutions, please contact customer support.
8. Technical Specifications
| Feature | Specification |
|---|---|
| Model Number | KLM1601 |
| Brand | KALERM |
| Power | 1400 W |
| Voltage | 127 V |
| Frequency | 50/60 Hz |
| Pump Pressure | 19 Bar |
| Water Tank Capacity | 1.8 Liters |
| Coffee Bean Hopper Capacity | 250 grams |
| Waste Coffee Container Capacity | 15 servings |
| Cup Height Adjustment | 80 - 140 mm |
| Product Dimensions (W x D x H) | 30.2 x 45 x 47.5 cm (approx.) |
| Item Weight | 15.1 kg |
| Power Cable Length | 1.5 m |
| Coffee Grinder | Integrated, 5 adjustment levels |
| Thermoblocks | Two (1 for water, 1 for steam) |
9. Warranty and Support
For warranty information and technical support, please refer to the documentation provided with your purchase or contact KALERM customer service. Keep your proof of purchase for warranty claims.


