Introduction
This manual provides instructions for the installation and maintenance of the Occus Alloy Steering Ackerman Plate. This component is designed as an upgrade for specific 1/10 scale remote control (RC) vehicles, enhancing steering rigidity and performance.
The Ackerman plate is a critical part of the steering linkage, influencing the steering geometry of your RC vehicle. This alloy version offers increased durability and precision compared to standard components.
Product Features
- Material: Constructed from hardened 6061-T6 aluminum alloy for superior strength and durability.
- Finish: Features a hard-anodized color finish, which is CNC machined for precise fitment.
- Coating: PTFE-coated for reduced friction and enhanced wear resistance.
- Rigidity: Designed to maintain high rigidity under stress and during elevated ambient temperatures, improving steering response.
- Color: Blue.
Compatibility
This steering Ackerman plate is a direct replacement for original parts #10137, VTAS01156, and FTX6360. It is compatible with the following 1/10 scale RC vehicle models:
- VRX/River Hobby:
- RH1043 OCTANE XL EBD (Desert Buggy)
- RH1045 OCTANE XL EBL (Desert Buggy)
- Vetta Racing:
- VTAC01002 Karoo 1/10 (Desert Truck)
- FTX:
- FTX5570 OUTLAW 1/10 Brushed (Desert Buggy)
- FTX5571 OUTLAW 1/10 Brushless (Desert Buggy)
- VANTAGE/CARNAGE/OUTLAW series
Installation / Setup
Installation of the Alloy Steering Ackerman Plate requires basic RC vehicle assembly knowledge and tools. Refer to your specific RC vehicle's original instruction manual for detailed disassembly and reassembly procedures of the steering mechanism.
- Preparation: Ensure your RC vehicle is powered off and the battery is disconnected. Gather necessary tools, typically including small screwdrivers and hex wrenches.
- Removal of Existing Part: Carefully remove the existing steering Ackerman plate from your RC vehicle. Note the orientation and connection points of all components.
- Installation of New Part: Position the new Occus Alloy Steering Ackerman Plate in the same orientation as the removed part. Secure it using the original fasteners. Ensure all screws are tightened appropriately, but do not overtighten to avoid stripping threads or damaging components.
- Verification: After installation, manually check the steering linkage for smooth movement and proper alignment. Ensure there is no binding or excessive play.
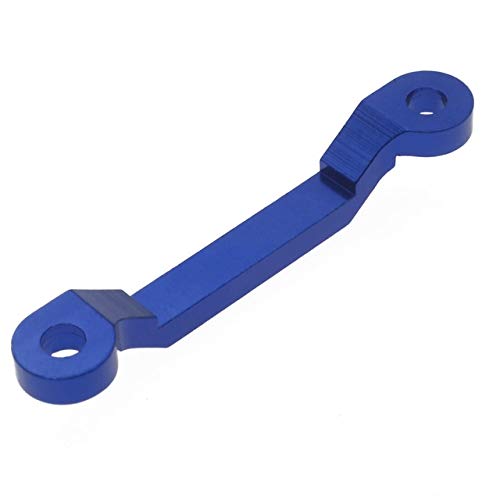
Image: The blue Occus Alloy Steering Ackerman Plate. This component is designed to replace the stock steering plate in compatible RC vehicles, offering enhanced durability and steering precision. It features a sleek blue anodized finish and mounting holes at each end.
Maintenance
Regular inspection and maintenance will prolong the life of your steering Ackerman plate and ensure optimal performance of your RC vehicle.
- Cleaning: Periodically clean the plate to remove dirt, dust, and debris that can accumulate and affect movement. Use a soft brush or compressed air.
- Inspection: Regularly check for any signs of wear, bending, or damage. Ensure all fasteners remain tight.
- Lubrication: While the PTFE coating reduces friction, occasional application of a dry lubricant to moving parts of the steering linkage (not directly on the plate itself unless specified by your vehicle's manual) can be beneficial.
Troubleshooting
If you experience issues with your steering after installing the new Ackerman plate, consider the following:
- Stiff Steering: Check for overtightened screws or binding in the steering linkage. Ensure no wires or other components are obstructing movement.
- Excessive Play: Verify that all screws are securely fastened and that the plate is correctly seated. Inspect other steering components for wear.
- Incorrect Steering Angle: Ensure the plate is installed in the correct orientation. Refer to your vehicle's manual for proper steering geometry setup.
Specifications
| Part Number (Replacement) | 10137, VTAS01156, FTX6360 |
| Material | 6061-T6 Aluminum Alloy |
| Coating | PTFE-coated |
| Color | Blue |
| Vehicle Scale | 1/10 |
Warranty and Support
For warranty information or technical support regarding this product, please refer to the retailer or manufacturer's official website where the product was purchased. Keep your proof of purchase for any warranty claims.
This product is intended for hobby use. The manufacturer is not responsible for damage caused by improper installation, modification, or misuse.