1. Introduction
This manual provides comprehensive instructions for the installation, operation, and maintenance of your new ADCARLIGHTS Headlight Assembly. Designed for a precise fit, this assembly replaces the original headlights on 2002-2005 Dodge Ram 1500 and 2003-2005 Dodge Ram 2500/3500 models. Please read all instructions carefully before beginning installation to ensure proper function and safety.

Image 1.1: Pair of ADCARLIGHTS Headlight Assemblies.
2. Safety Information
Always prioritize safety when working on your vehicle. Failure to follow these safety guidelines may result in injury or damage to the vehicle.
- Ensure the vehicle is parked on a level surface with the parking brake engaged.
- Turn off the engine and disconnect the negative terminal of the battery before starting any electrical work.
- Wear appropriate personal protective equipment, including safety glasses and gloves.
- If you are unsure about any step, consult a qualified automotive technician.
3. Installation Instructions
The ADCARLIGHTS Headlight Assembly is designed for a direct, plug-and-play installation, requiring no modifications to your vehicle's existing wiring or structure. This package includes both passenger and driver side headlight assemblies.
3.1. Tools Required
- Socket wrench set (10mm and 8mm sockets may be needed)
- Flathead screwdriver (for prying clips, if necessary)
- Gloves
3.2. Removal of Existing Headlight Assembly
- Open the hood of your vehicle.
- Locate the bolts securing the existing headlight assembly. Typically, there are two bolts visible from the front and one hidden bolt near the amber lens. For some 2003 Ram Diesel 2500 models, the front bolts may be 10mm and the hidden bolt 8mm.
- Carefully remove all securing bolts.
- Gently pull the headlight assembly forward to disengage any clips or alignment pins. Be aware of any plastic extrusions on the back side of the assembly. If a plastic insert is present in the vehicle body's square hole, and also on the new assembly, one must be removed for proper fitment. It is often easier to remove the attachment from the new light assembly.
- Disconnect all electrical connectors from the bulbs and the main harness.
- Remove the old headlight assembly from the vehicle.
3.3. Installation of New Headlight Assembly
- Connect the electrical harnesses to the new ADCARLIGHTS Headlight Assembly. Ensure all connections are secure.
- Align the new headlight assembly with the mounting points in the vehicle. Carefully push it into place, ensuring all clips and alignment pins engage correctly.
- Reinstall the securing bolts. Do not overtighten.
- Reconnect the negative battery terminal.
- Test all lighting functions (low beam, high beam, turn signals, parking lights) to ensure they are working correctly.
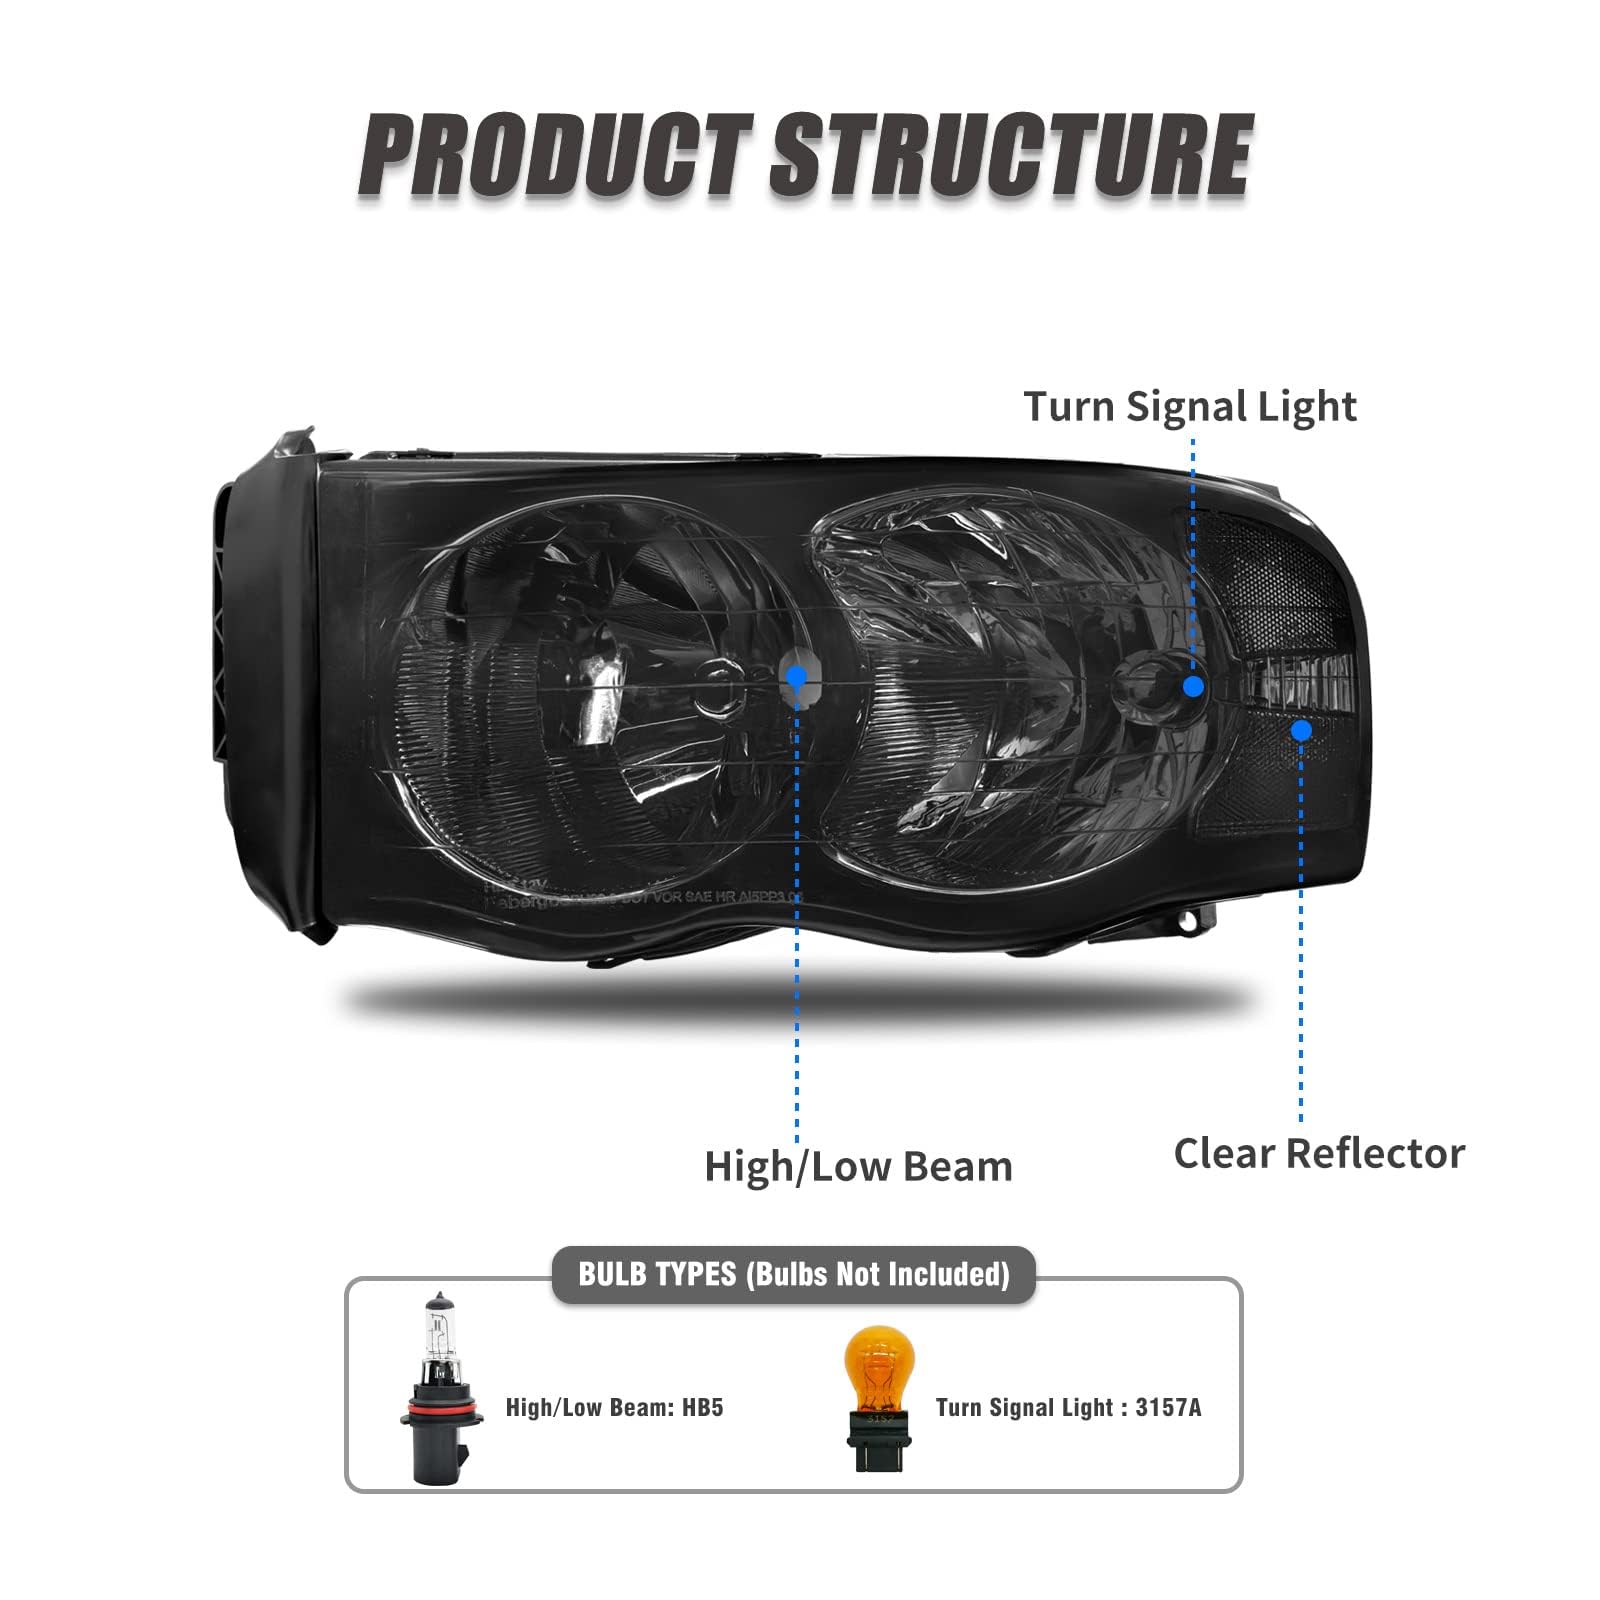
Image 3.1: Rear view of the headlight assembly, illustrating the bulb socket and electrical connector for installation reference.
4. Operating Instructions
Your ADCARLIGHTS Headlight Assembly is designed to provide optimal illumination for safe driving. The assembly uses standard bulb types for easy replacement.
4.1. Bulb Types
- High/Low Beam: HB5
- Turn Signal Light: 3157A
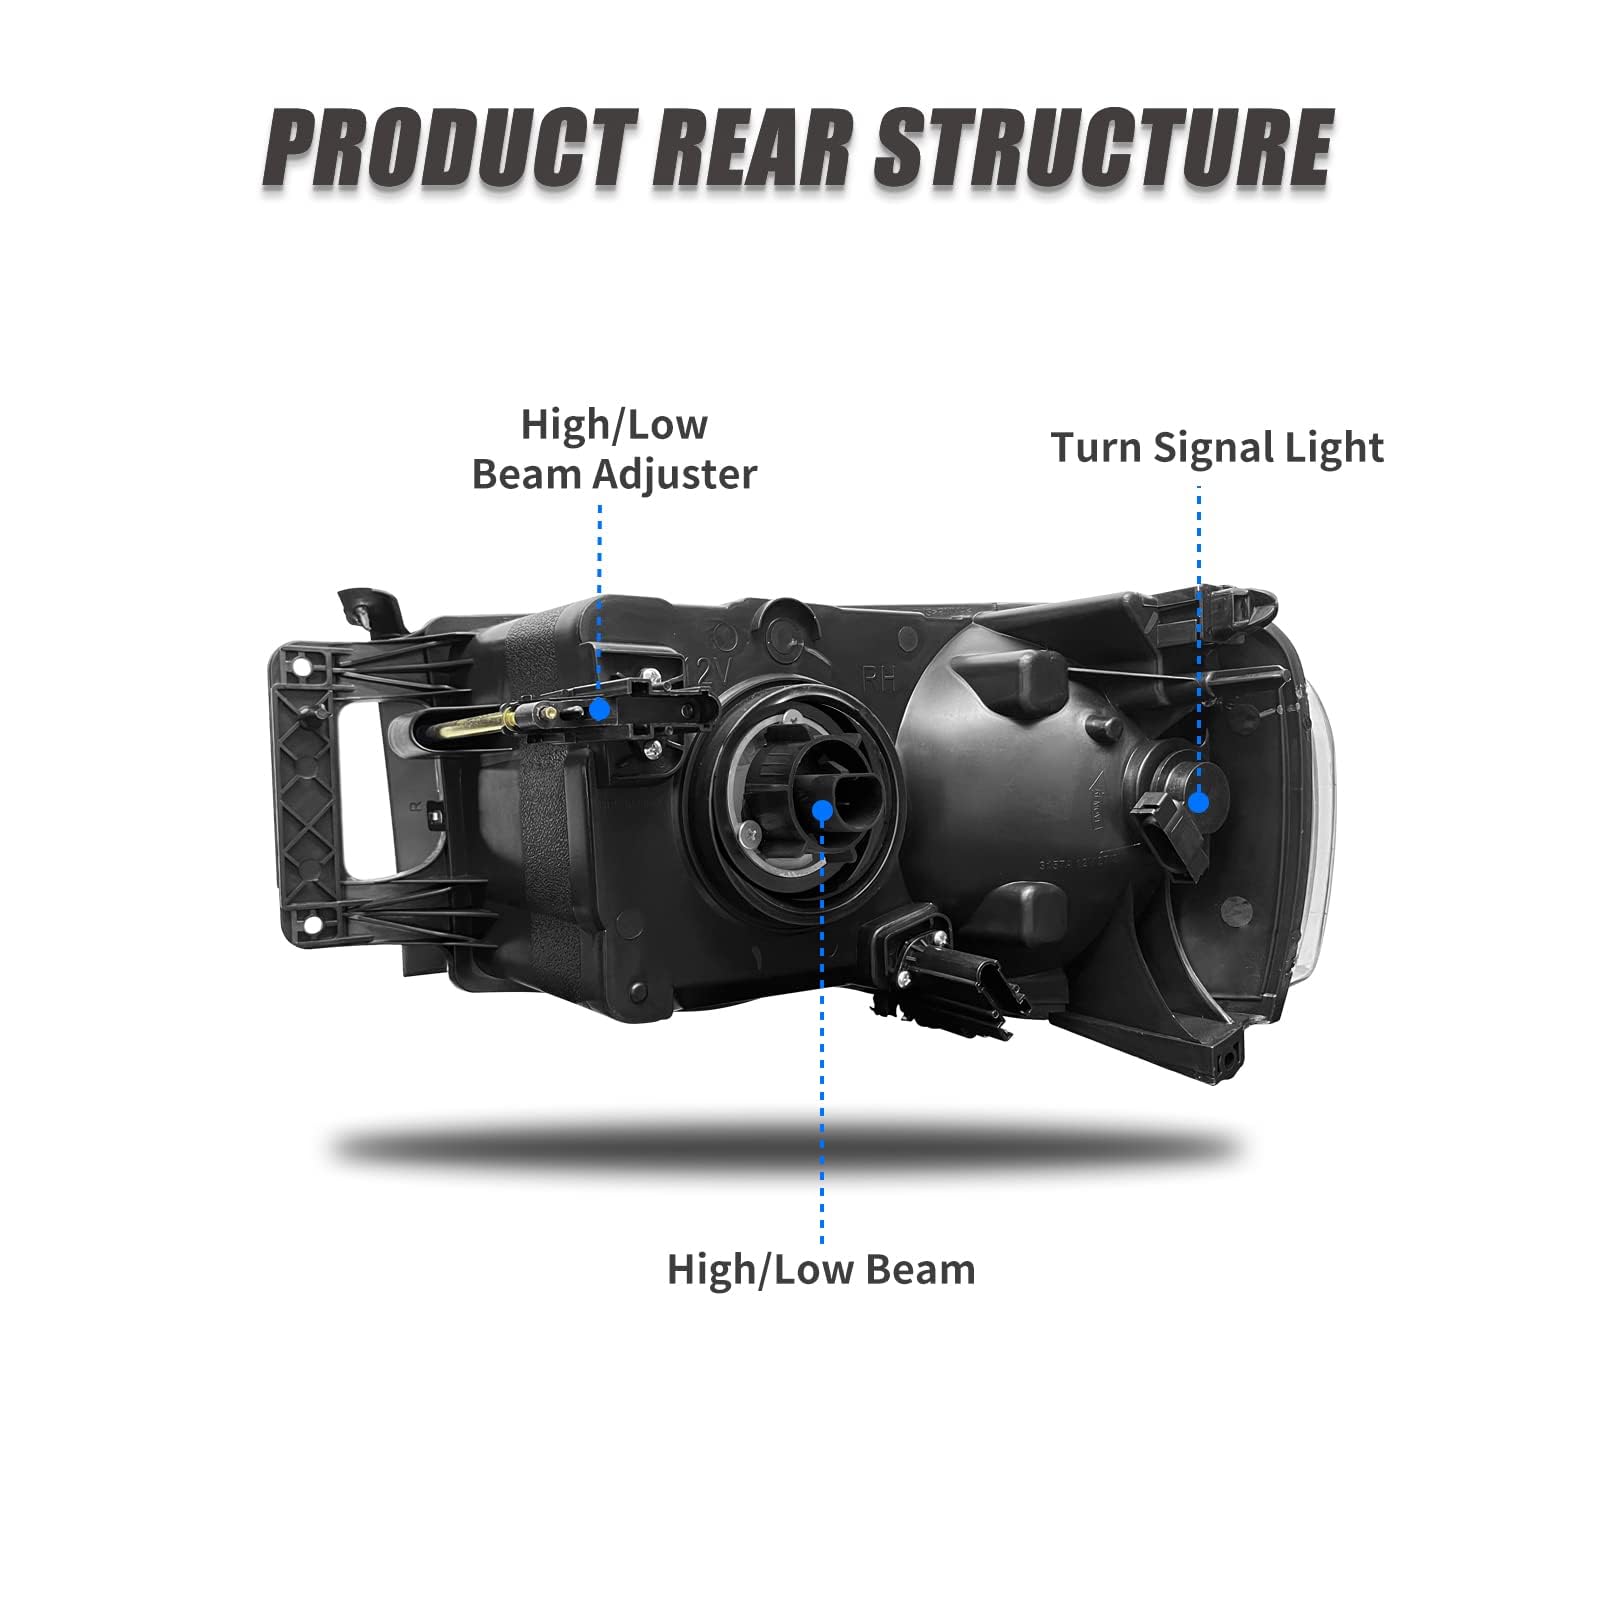
Image 4.1: Diagram showing the internal structure of the headlight and the specified bulb types for high/low beam and turn signal functions.
4.2. Headlight Adjustment
Proper headlight aim is crucial for visibility and to avoid blinding oncoming drivers. Your headlight assembly includes adjusters for precise beam alignment.
- Locate the adjustment screws on the rear of the headlight assembly. These typically allow for vertical and horizontal beam adjustments.
- Park your vehicle on a level surface facing a wall approximately 25 feet away.
- Turn on your headlights (low beam).
- Use the adjustment screws to align the beam pattern according to local regulations and vehicle manufacturer specifications. Consult your vehicle's owner's manual for specific aiming procedures.
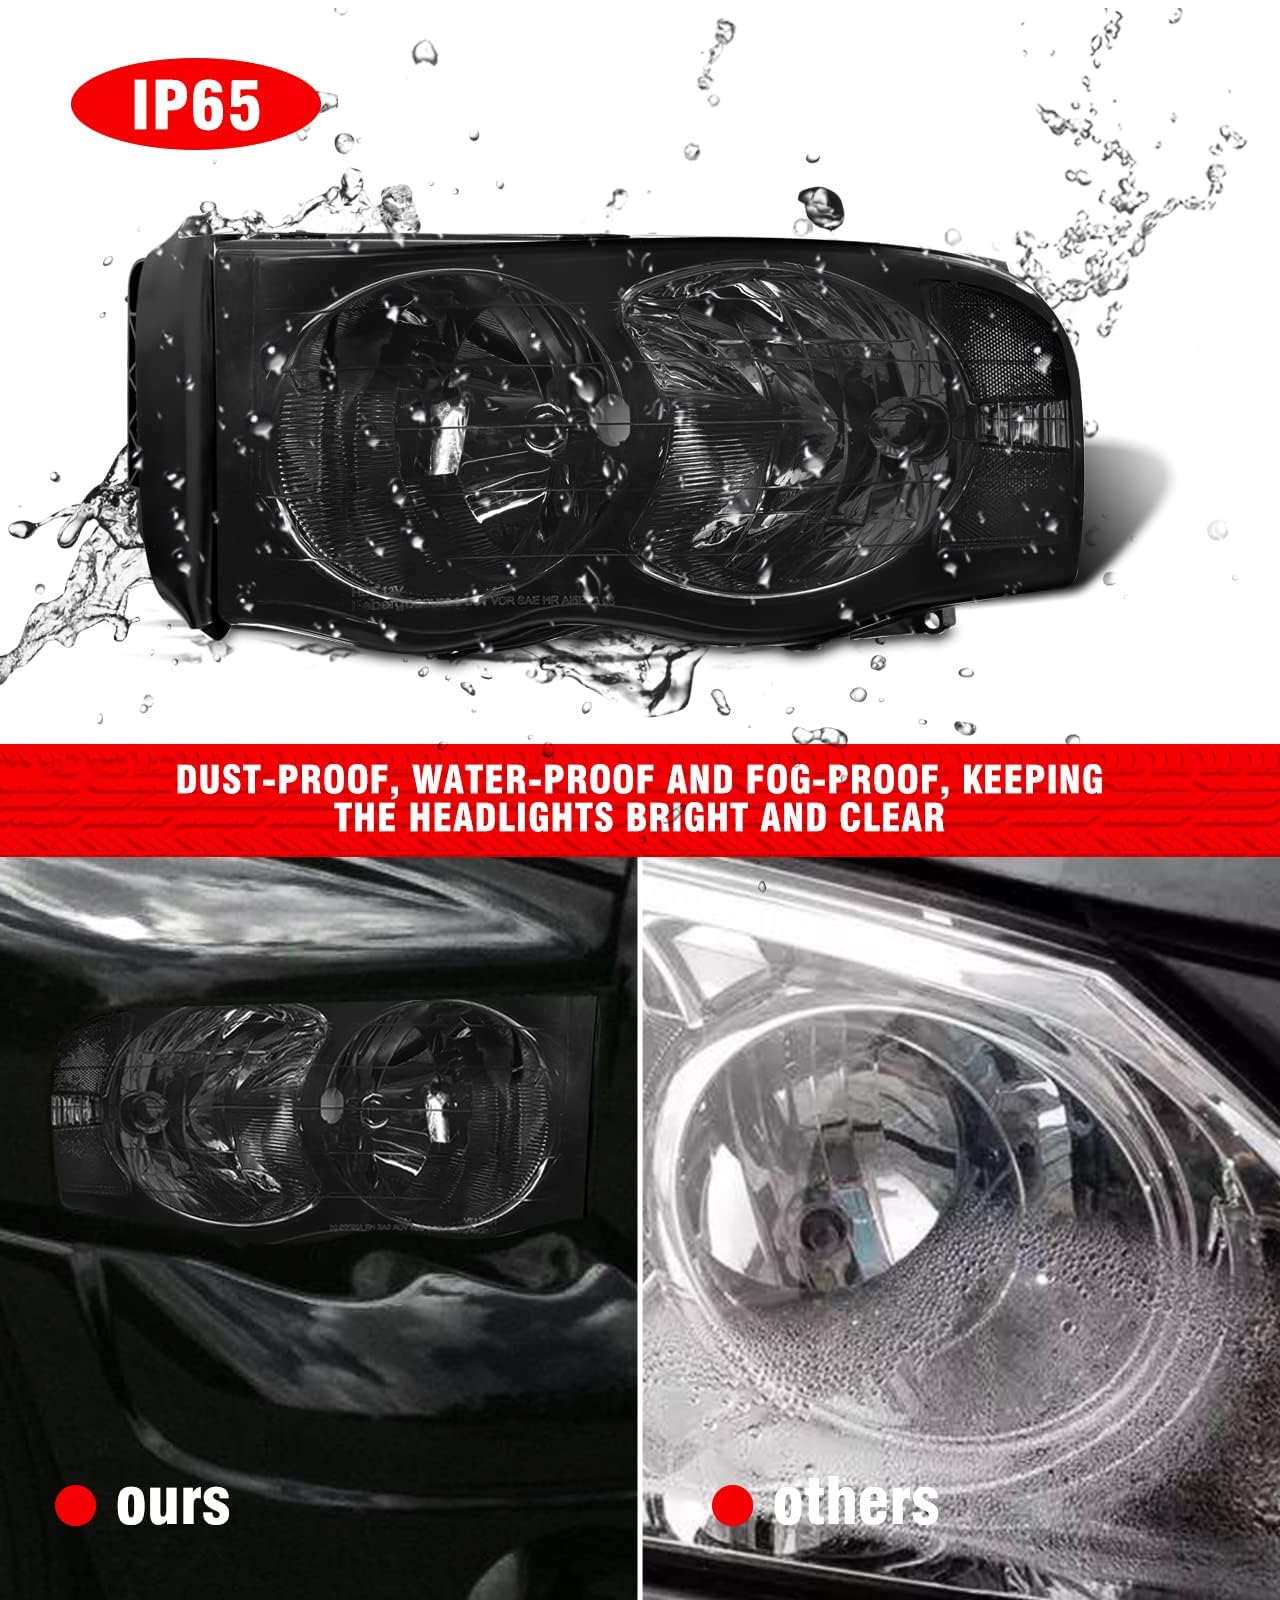
Image 4.2: Rear view of the headlight assembly, highlighting the high/low beam adjuster and turn signal light location.
5. Maintenance
To ensure the longevity and optimal performance of your ADCARLIGHTS Headlight Assembly, follow these maintenance guidelines:
- Cleaning: Regularly clean the outer lens with a soft cloth and mild automotive soap. Avoid abrasive cleaners or harsh chemicals that can damage the polycarbonate lens or UV coating.
- Inspection: Periodically inspect the headlight assembly for any signs of damage, cracks, or moisture intrusion. The assembly is IP65 certified for dust and water resistance, but extreme conditions or physical damage can compromise its seal.
- Bulb Replacement: If a bulb burns out, replace it with the correct type (HB5 for high/low beam, 3157A for turn signal) to maintain proper illumination and electrical compatibility.
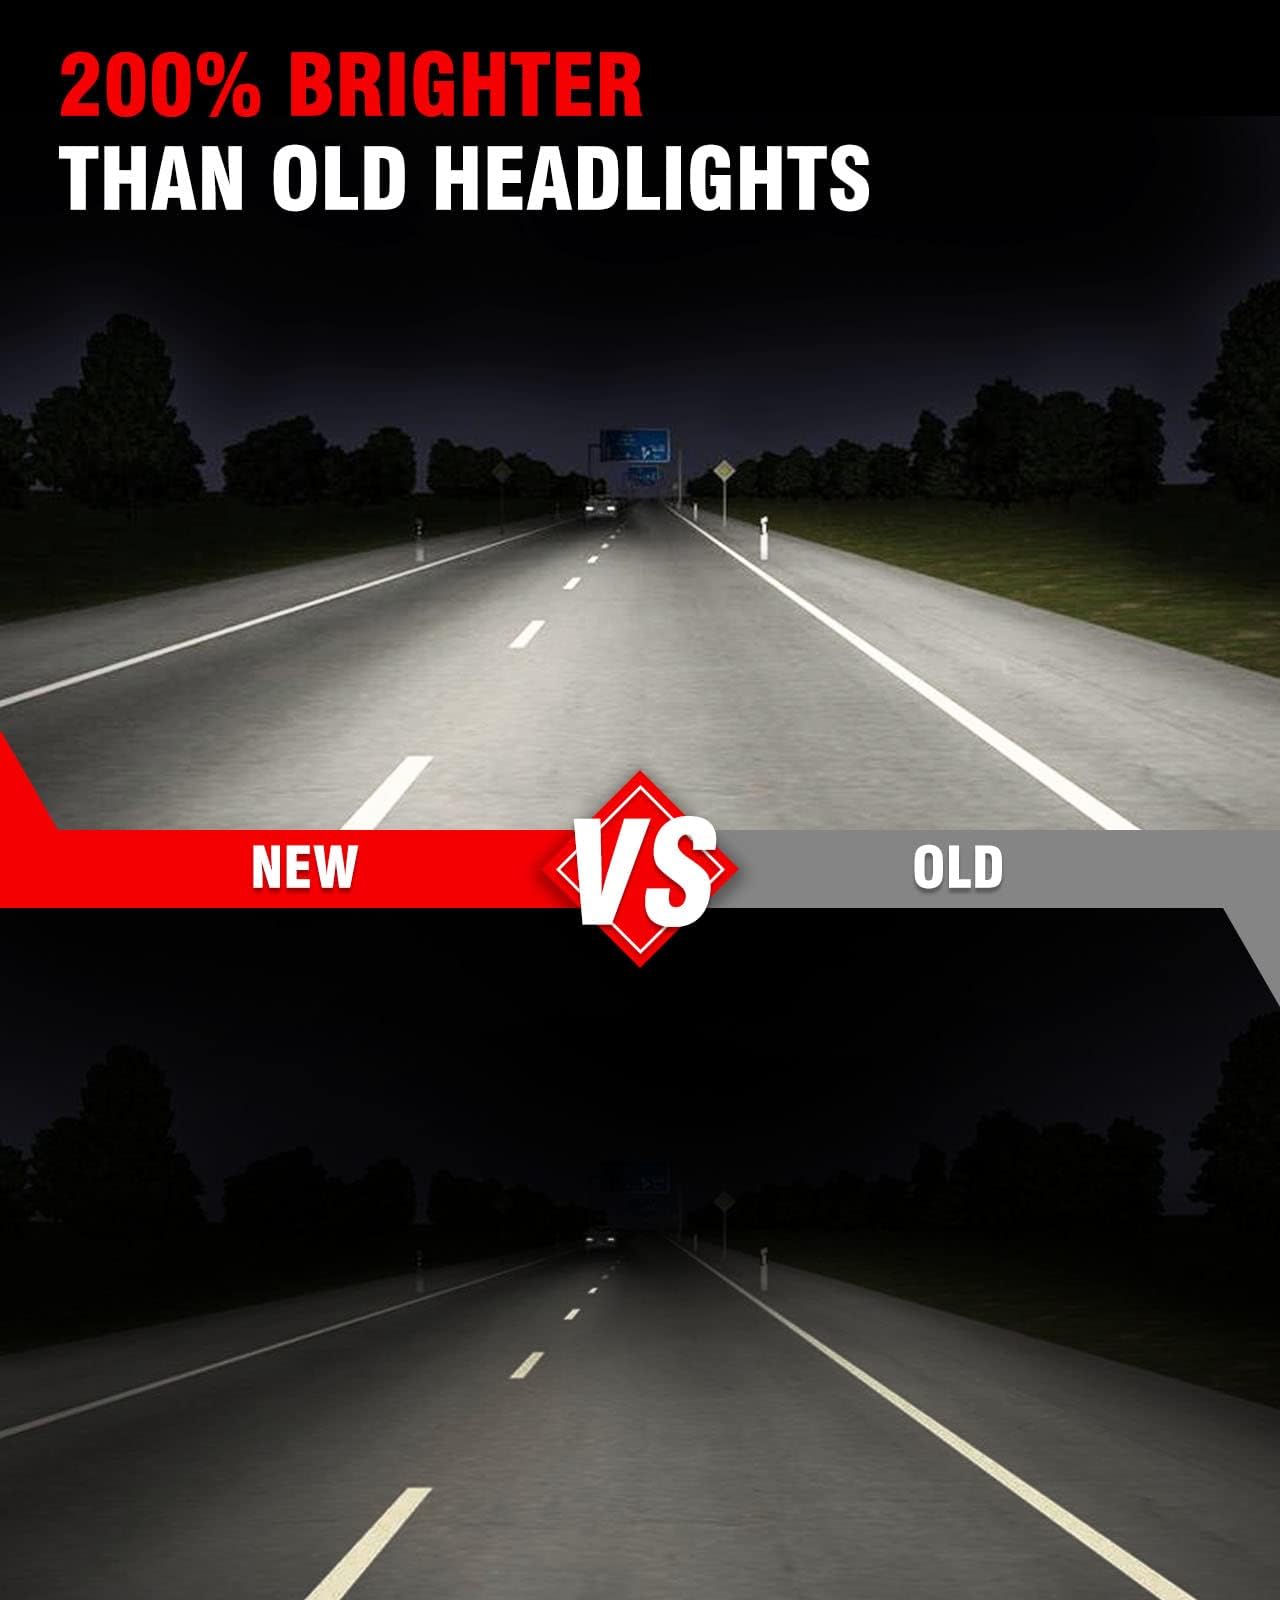
Image 5.1: Illustration demonstrating the IP65 dustproof and waterproof rating, ensuring durability against environmental elements.

Image 5.2: Visual comparison highlighting the clarity of a new headlight assembly versus an older, fogged unit, emphasizing the importance of maintenance.
6. Troubleshooting
This section addresses common issues you might encounter with your headlight assembly.
| Problem | Possible Cause | Solution |
|---|---|---|
| Headlight not working | Blown bulb, loose electrical connection, faulty fuse | Check and replace bulb, ensure connections are secure, inspect vehicle's fuse box. |
| Dim or flickering light | Poor electrical connection, failing bulb, insufficient power supply | Verify connections, replace bulb, check vehicle's charging system. |
| Moisture inside the lens | Condensation (normal in some conditions), compromised seal | Small amounts of condensation usually dissipate. If persistent or excessive, inspect for cracks or damage to the housing seal. |
| Difficulty with fitment during installation | Misalignment, interference from plastic inserts | Ensure all mounting points are correctly aligned. If plastic inserts on the assembly interfere with vehicle body inserts, remove the insert from the new headlight assembly. |
7. Product Specifications
- Brand: ADCARLIGHTS
- Model: AD-DPU0002885
- Color: Smoke Housing Clear Reflector
- Specific Uses: Head Lights
- Vehicle Service Type: 2002-2005 Dodge Ram 1500, 2003-2005 Dodge Ram 2500 3500
- Special Features: Dustproof, Waterproof (IP65 certified)
- Auto Part Position: Front Left and Front Right (Pair)
- Lens Color: Crystal Clear
- Lens Material: Polycarbonate
- Item Dimensions (L x W x H): 21.65 x 17.72 x 10.63 inches
- Item Weight: 12.25 pounds (per pair)
- OEM Part Numbers: 55077120AE, 55077121AE
- ABPA Partslink Numbers: CH2502135, CH2503135

Image 7.1: List of compatible vehicles and corresponding part numbers for the headlight assembly.
8. Warranty and Support
ADCARLIGHTS stands behind the quality of its products. This headlight assembly comes with a lifetime service guarantee, ensuring quick responses to your questions and support for each purchase.
For any inquiries, technical assistance, or warranty claims, please contact ADCARLIGHTS customer support through the retailer where the product was purchased or visit the official ADCARLIGHTS store online.
Online Store: ADCARLIGHTS Store