1. Introduction
Thank you for choosing the CREATE SILKAIR CONNECT 3-in-1 Mobile Air Conditioner. This versatile appliance is designed to provide cooling, dehumidification, and fan functions for your living space. With its Wi-Fi connectivity, you can conveniently control the unit via a mobile application. Please read this manual thoroughly before operation to ensure safe and efficient use.
Model: 64274_145198
Brand: CREATE
2. Safety Information
Always follow basic safety precautions when using electrical appliances to reduce the risk of fire, electric shock, and injury.
- Ensure the power supply matches the voltage specified on the rating label.
- Do not operate the unit with a damaged cord or plug.
- Keep the unit away from heat sources and direct sunlight.
- Do not block air inlets or outlets.
- Always unplug the unit before cleaning or maintenance.
- This appliance uses R290 refrigerant. Do not puncture the refrigerant circuit.
- Supervise children and ensure they do not play with the appliance.
3. Package Contents
Carefully unpack your air conditioner and check that all items are present and in good condition.
- CREATE SILKAIR CONNECT Mobile Air Conditioner Unit
- Exhaust Hose
- Window Sealing Kit (Adjustable window slider, hose adapter)
- Remote Control
- User Manual

Figure 1: The CREATE SILKAIR CONNECT Mobile Air Conditioner unit shown alongside a smartphone displaying its control application interface.
4. Product Overview
4.1 Control Panel

Figure 2: Close-up of the top-mounted control panel, featuring an LED display and touch-sensitive buttons for various functions such as power, mode selection, fan speed, and timer.
4.2 Components and Dimensions
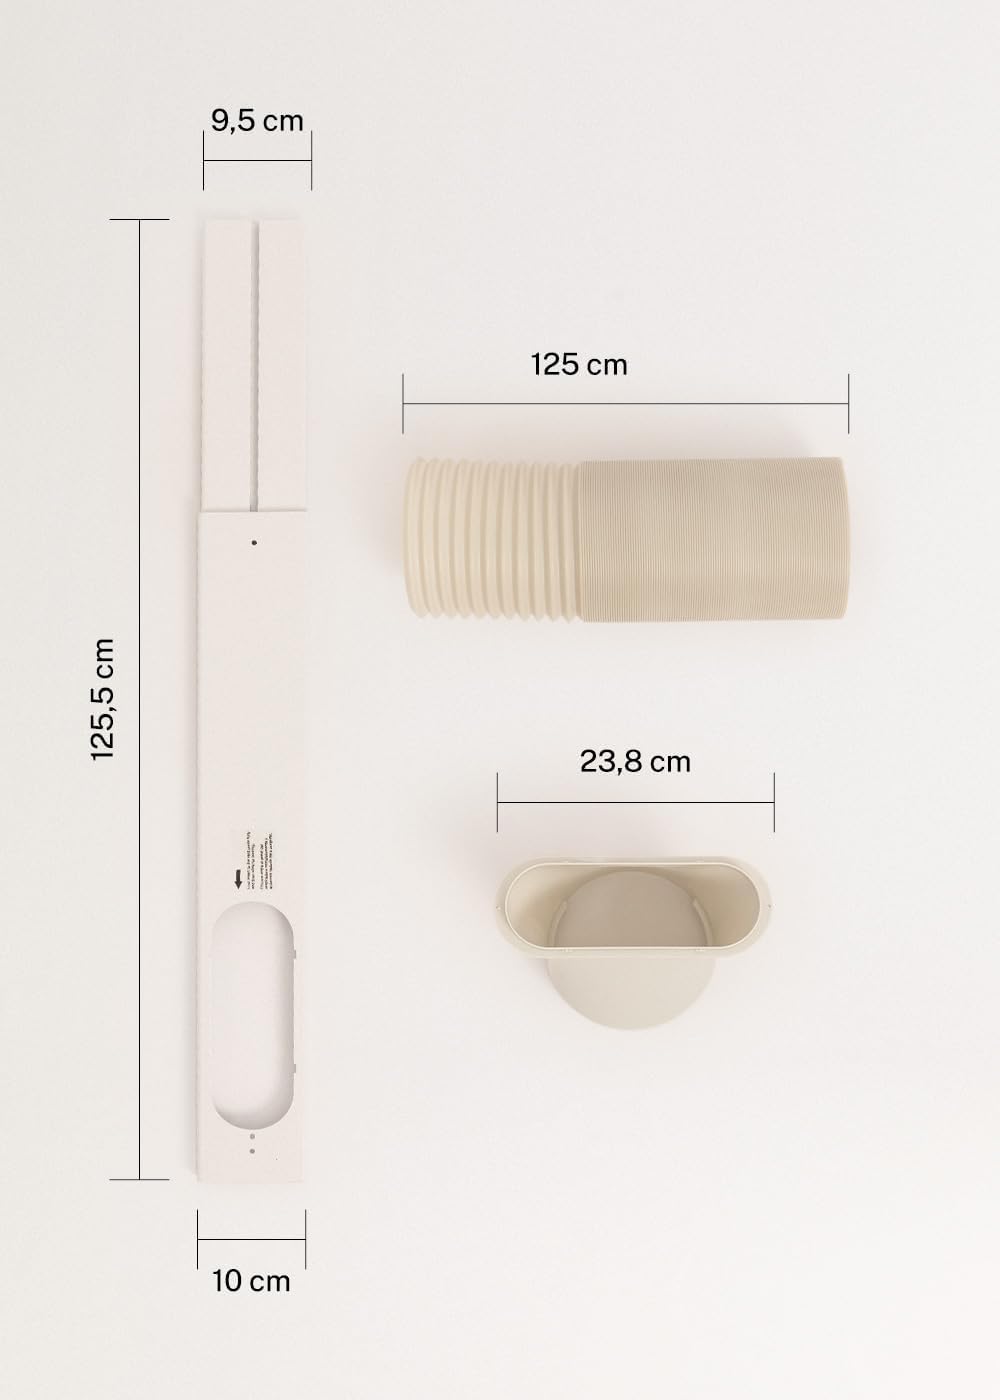
Figure 3: Detailed diagram illustrating the dimensions of the window sealing plate (125.5 cm length, 10 cm width, 9.5 cm adjustable width) and the exhaust hose (125 cm length) with its adapter (23.8 cm diameter).
5. Setup and Installation
Proper installation is crucial for the efficient operation of your mobile air conditioner.
5.1 Positioning the Unit
- Place the unit on a flat, stable surface.
- Ensure there is at least 30 cm of space around the unit for proper airflow.
- Position the unit near a window or opening for the exhaust hose.
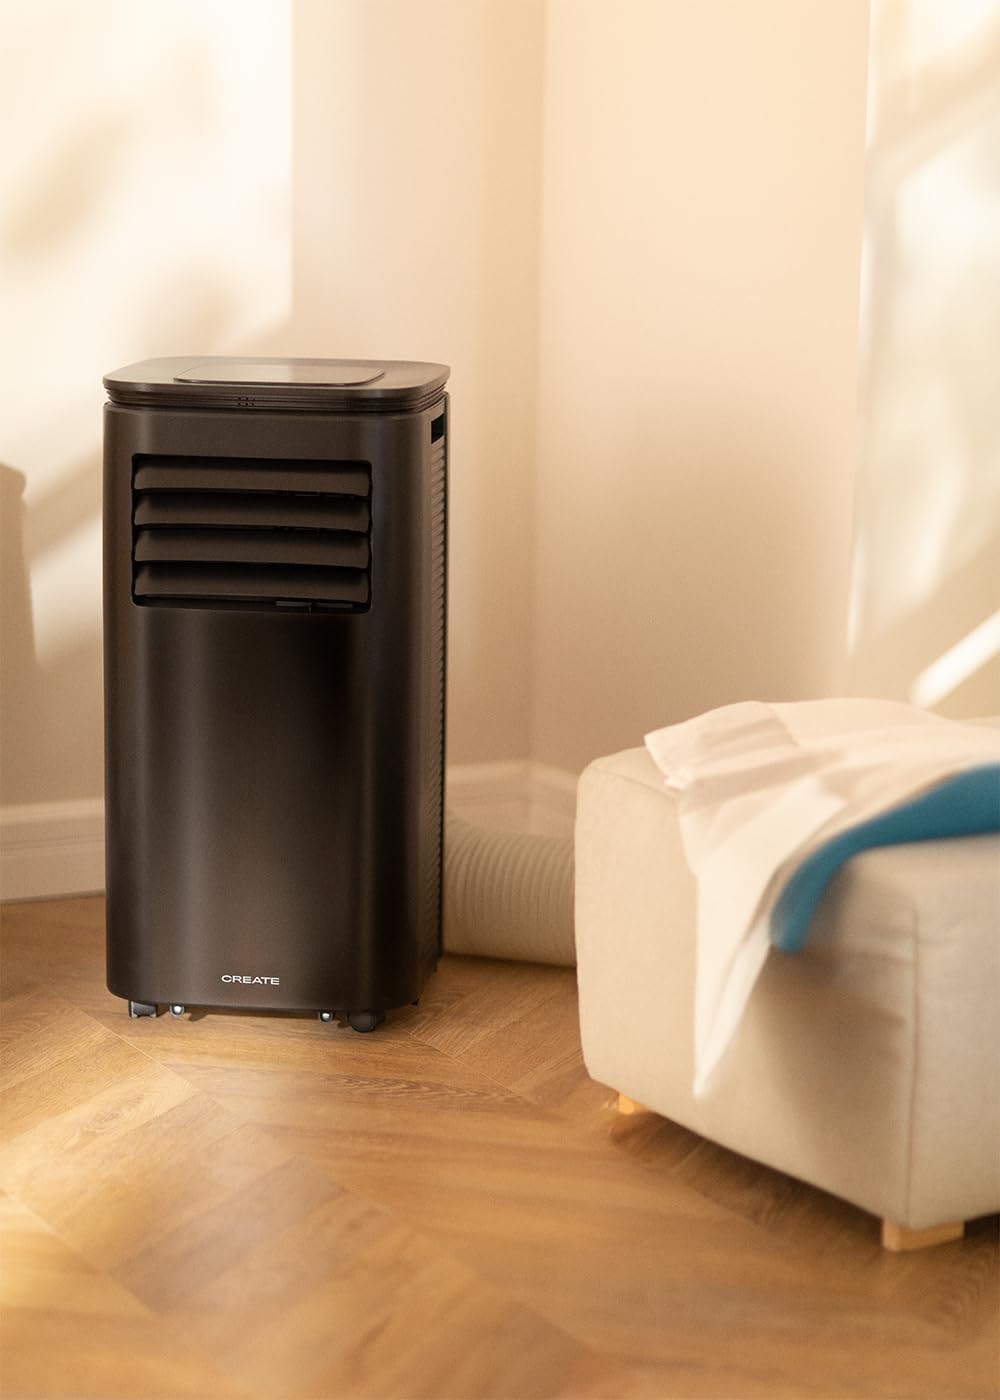
Figure 4: The air conditioner unit positioned in a room, demonstrating the typical setup with the exhaust hose directed towards a window for heat expulsion.
5.2 Installing the Exhaust Hose and Window Kit
- Attach the hose adapter to one end of the exhaust hose.
- Connect the other end of the exhaust hose to the air outlet on the back of the unit.
- Install the adjustable window sealing kit in your window opening. Extend it to fit the window frame.
- Insert the hose adapter into the opening of the window sealing kit.

Figure 5: Illustrates the secure connection of the flexible exhaust hose to the designated port at the rear of the air conditioning unit.
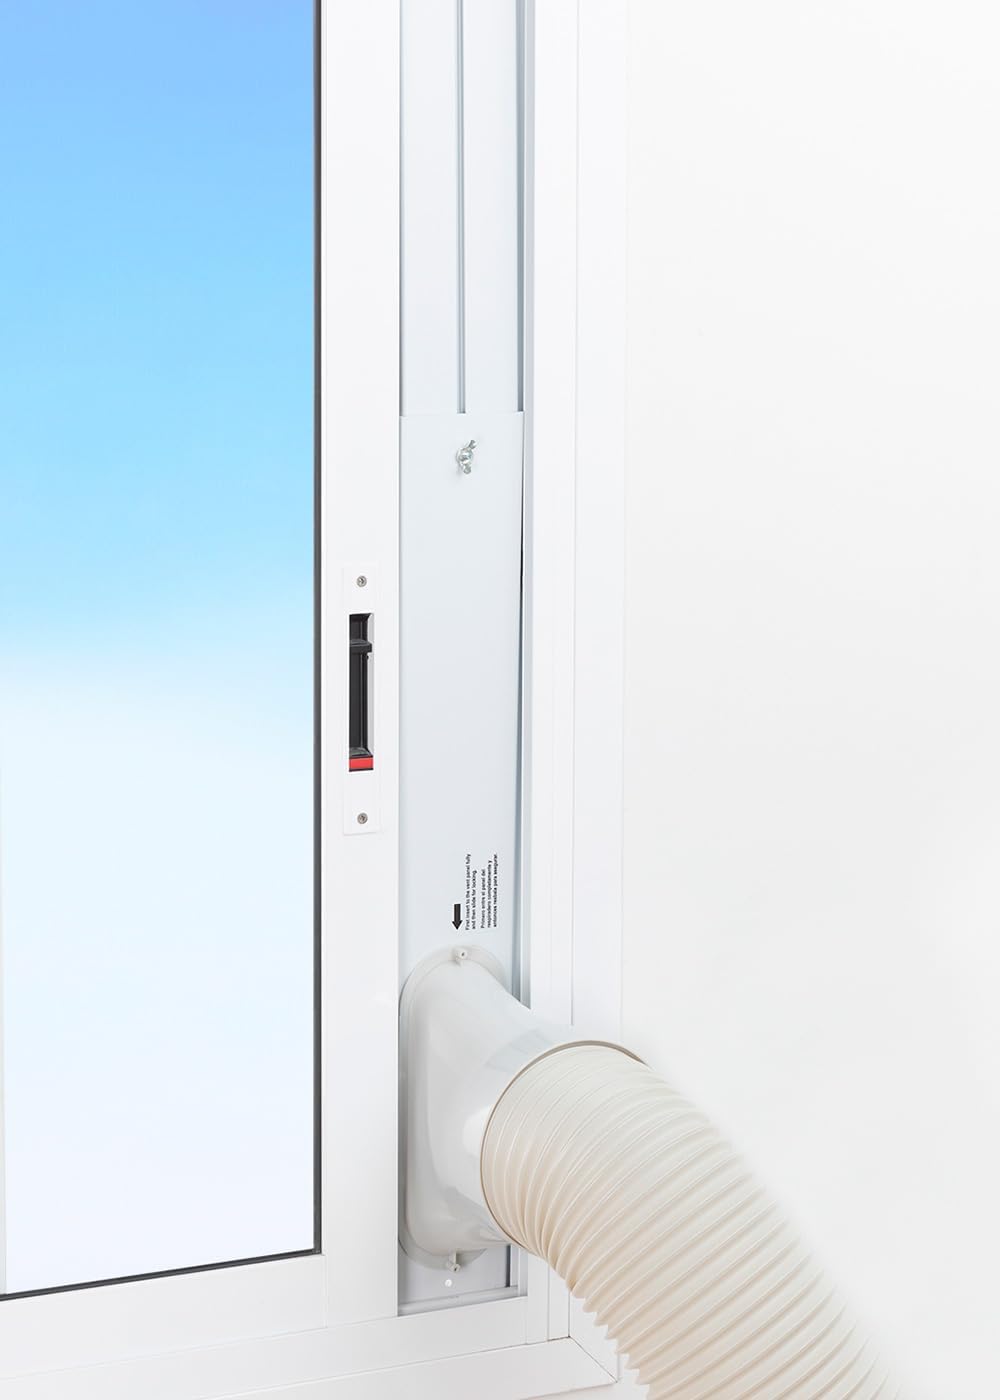
Figure 6: The window sealing kit is shown properly installed in a window frame, with the exhaust hose securely fitted into the kit's opening to vent hot air outside.
6. Operating Instructions
6.1 Using the Control Panel
The control panel on top of the unit allows direct operation.
- Power Button: Press to turn the unit ON or OFF.
- Mode Button: Cycle through Cooling, Fan, and Dehumidifier modes.
- Fan Speed Button: Adjust fan speed (Low, High).
- Temperature Buttons (+/-): Adjust desired temperature in Cooling mode.
- Timer Button: Set the auto-on or auto-off timer (up to 24 hours).
- Sleep Mode Button: Activates a quieter operation mode for nighttime use.
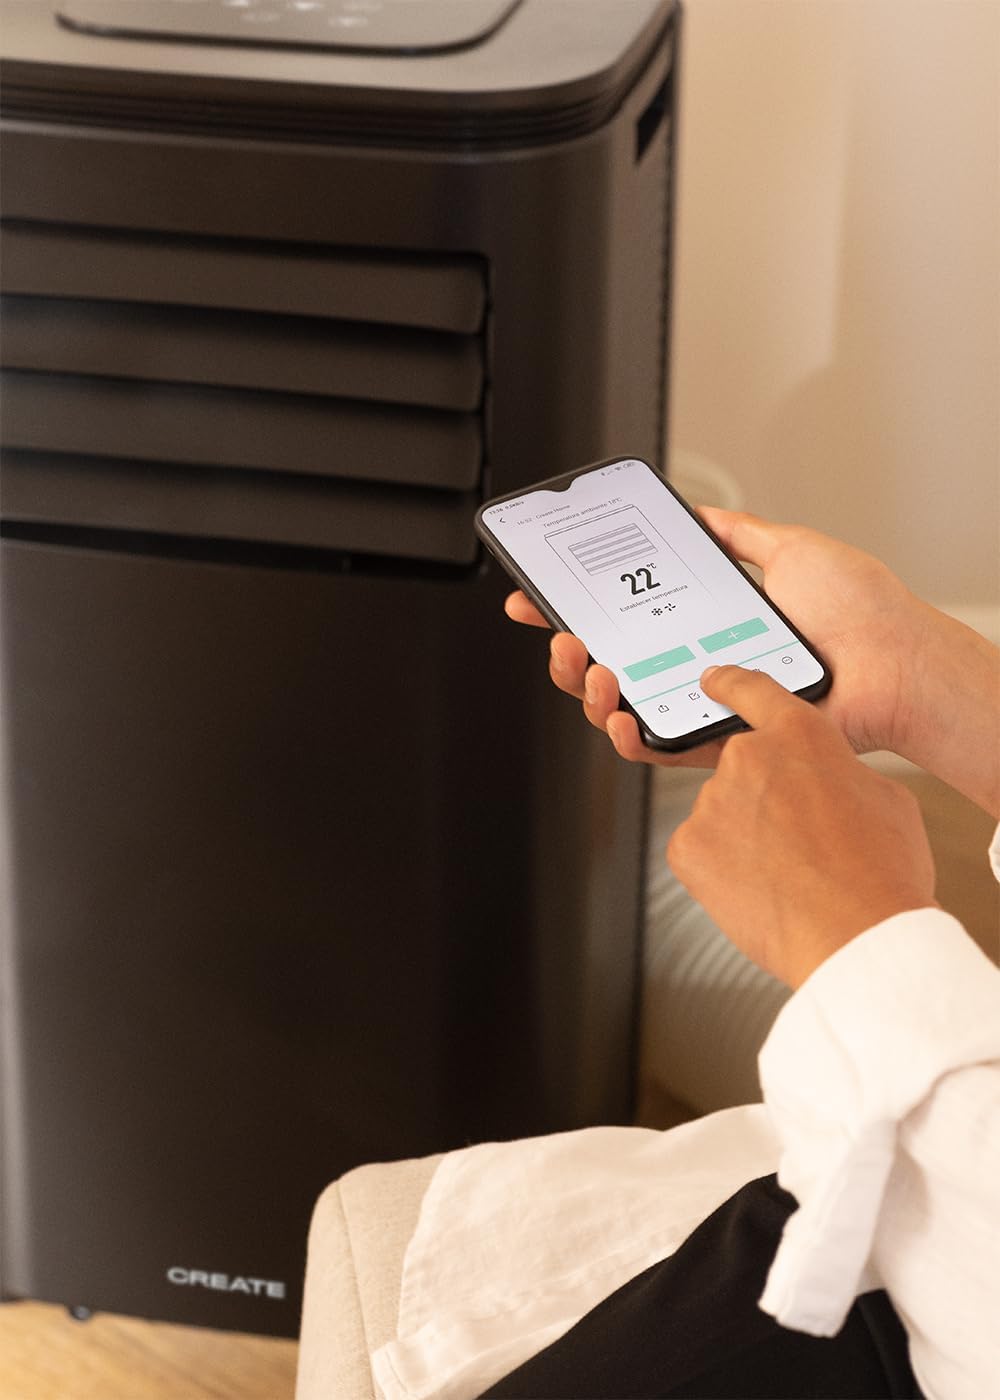
Figure 7: A user's hand interacting with the touch-sensitive control panel located on the top surface of the air conditioner, demonstrating direct manual operation.
6.2 Using the Remote Control
The remote control provides convenient operation from a distance.

Figure 8: A hand holding the dedicated remote control for the air conditioner, illustrating its use for convenient operation from a distance.
6.3 Wi-Fi and App Control
Download the CREATE Home app from your smartphone's app store. Follow the in-app instructions to connect your air conditioner to your home Wi-Fi network. Once connected, you can control all functions of the unit from your smartphone, including mode selection, temperature adjustment, fan speed, and timer settings.
Figure 9: A user interacting with the mobile application on a smartphone to remotely control the air conditioner, showcasing the Wi-Fi connectivity feature.
7. Maintenance
Regular maintenance ensures optimal performance and extends the lifespan of your unit.
7.1 Cleaning the Air Filter
The air filter should be cleaned every two weeks or more frequently depending on usage and air quality.
- Turn off the unit and unplug it from the power outlet.
- Locate the air filter panel on the back of the unit.
- Gently remove the filter.
- Clean the filter with warm, soapy water or a vacuum cleaner. Rinse thoroughly and allow it to air dry completely before reinserting.

Figure 10: Demonstrates the process of removing the air filter from the rear of the air conditioner unit for cleaning or replacement.
7.2 Draining Water
In Dehumidifier mode or high humidity conditions, the internal water tank may fill up. The unit will stop operating when the tank is full. Drain the water from the drainage port at the bottom rear of the unit.
8. Troubleshooting
| Problem | Possible Cause | Solution |
|---|---|---|
| Unit does not turn on | No power; Power cord not plugged in; Water tank full. | Check power outlet; Plug in power cord; Drain water tank. |
| Unit not cooling effectively | Air filter dirty; Exhaust hose not properly installed; Room too large; Doors/windows open. | Clean air filter; Ensure hose is sealed; Use in recommended room size (14-25 m²); Close doors/windows. |
| Loud noise | Unit not on a flat surface; Obstruction in fan. | Place on flat surface; Check for obstructions. |
| Wi-Fi connection issues | Incorrect Wi-Fi password; Router too far; App issues. | Verify password; Move unit closer to router; Restart app/unit. |
9. Specifications
| Feature | Specification |
|---|---|
| Model Number | 64274_145198 |
| Cooling Capacity | 9000 BTU / 2270 Watt |
| Dehumidification Capacity | 24 Liters/Day |
| Airflow | Up to 350 m³/h |
| Recommended Room Size | 14-25 m² |
| Noise Level | 65 dB |
| Refrigerant | R290 (ECO-friendly) |
| Voltage | 240 Volt |
| Wattage | 2600 Watt |
| Dimensions (L x W x H) | 35.5 x 36.5 x 71.3 cm |
| Material | ABS |
| Energy Efficiency Class | A |

Figure 11: The energy efficiency label for the CREATE SILKAIR CONNECT, indicating an A-class energy rating, 2.6 kW cooling capacity, and a noise level of 65 dB. More details can be found at eprel.ec.europa.eu/qr/1580267.
10. Warranty and Support
For warranty information and technical support, please refer to the warranty card included with your product or visit the official CREATE website. Keep your purchase receipt as proof of purchase.
Manufacturer: CREATE
Contact: Refer to CREATE's official support channels.