1. Introduction
This manual provides essential information for the safe and effective use of your DEKOPRO 400W Submersible Water Pump. Please read these instructions carefully before installation, operation, or maintenance to ensure proper function and prevent injury or damage. Keep this manual for future reference.
The DEKOPRO 400W Submersible Water Pump is designed for transferring water from various sources such as garden ponds, water tanks, swimming pools, hot tubs, and flooded areas. Its 400W (1/2 HP) motor delivers a maximum flow rate of 1981 gallons per hour (7500 L/H) and a maximum lift of 16.4 feet (5m).
2. Safety Instructions
WARNING: Failure to follow these safety instructions may result in electric shock, fire, serious injury, or death.
- Always disconnect the pump from the power supply before handling, cleaning, or performing any maintenance.
- Ensure the power supply voltage matches the pump's specifications (110V 60Hz).
- The pump must be connected to a properly grounded outlet. Do not remove the grounding prong or use an ungrounded adapter.
- Do not operate the pump dry. Ensure the pump is fully submerged in water before starting.
- Do not use the pump to transfer flammable, corrosive, or explosive liquids.
- Keep children and unauthorized persons away from the pump and its operating area.
- Do not lift or carry the pump by its power cord or float switch cable. Use the pump handle.
- Inspect the power cord and plug for damage before each use. Do not use if damaged.
- The pump is equipped with thermal overload protection. If the pump overheats, it will automatically shut off. Allow it to cool down before restarting.
3. Product Components
Familiarize yourself with the main parts of your DEKOPRO Submersible Water Pump:

Image Description: This image displays the DEKOPRO 400W Submersible Water Pump with key components labeled. These include the Cable, Pump handle, Output Tie-in (discharge port), Switch (float switch), and Water suction port (at the base). The pump features a black and silver body with an orange handle and float switch.
- Pump Handle: For carrying and positioning the pump.
- Cable: Power supply cable.
- Float Switch: Automatically turns the pump on and off based on water level.
- Output Tie-in (Discharge Port): Where the discharge hose connects.
- Water Suction Port: Located at the base, where water enters the pump.
4. Setup
4.1 Connecting the Discharge Hose
The pump comes with various fittings to accommodate different hose sizes. Choose the appropriate fitting for your application:

Image Description: This diagram illustrates the different outlet diameters available for the pump's discharge port. It shows three types of adapters: NPT 5/8" or GHT 3/4", NPT 1", and G 1-1/2" (equal to 38mm). The diagram also includes a flow rate curve showing that a larger flow rate corresponds to a lower pumping height.
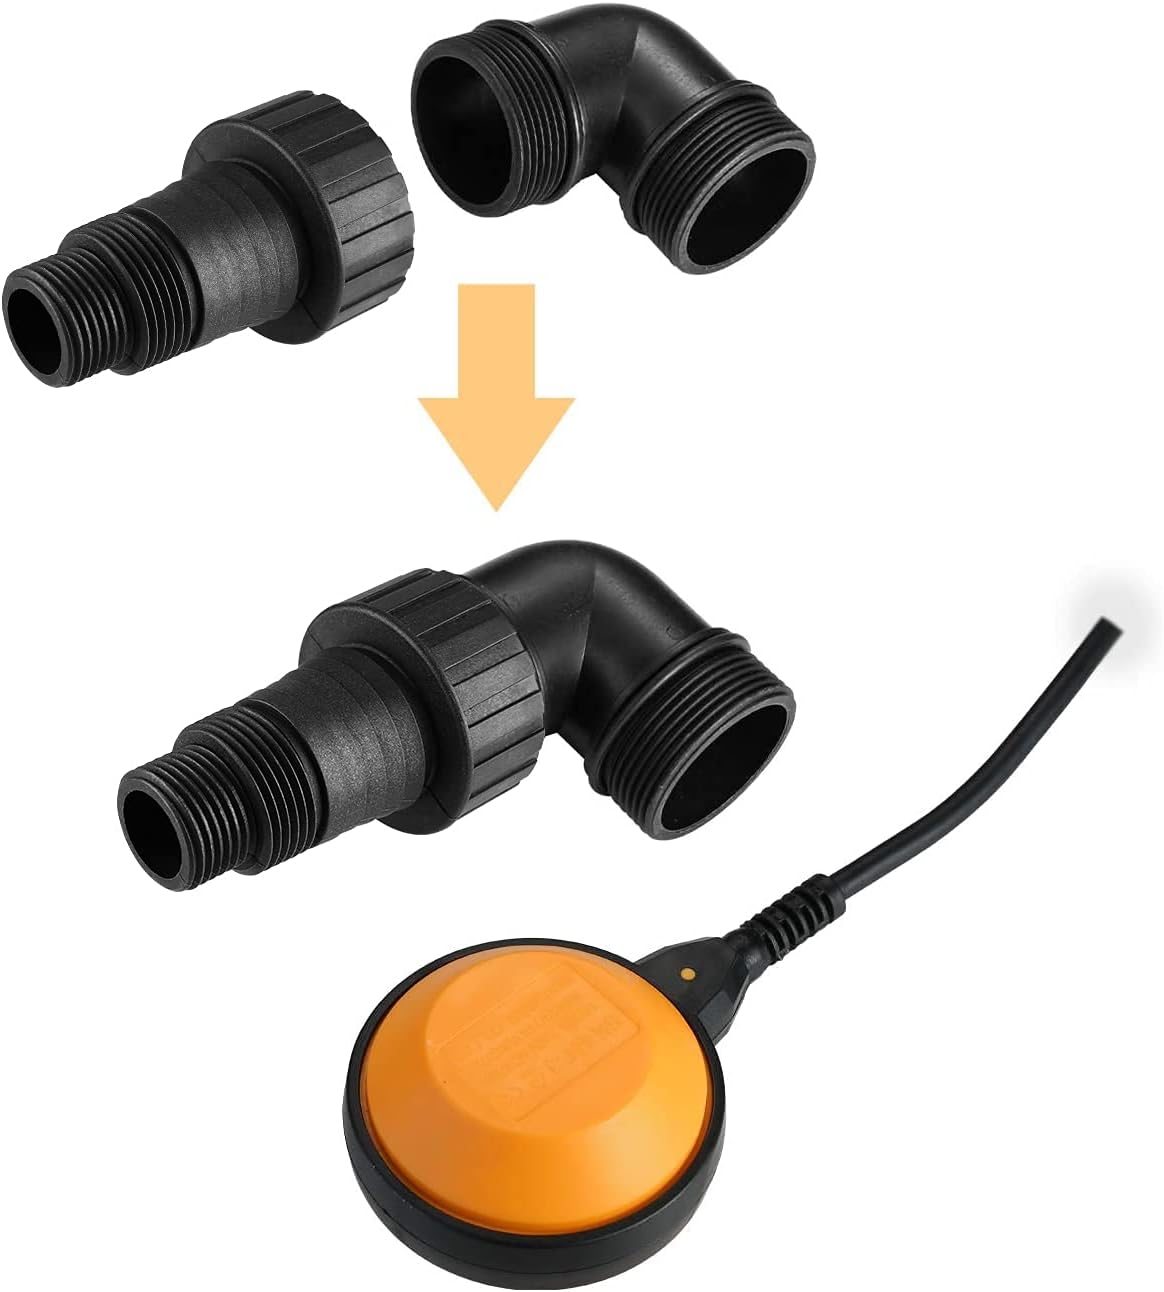
Image Description: This image demonstrates how the different adapter parts connect to form the discharge outlet. It shows a threaded adapter piece and an elbow piece, which can be combined to create the desired connection for the discharge hose. The float switch is also visible in the foreground.
- The pump is equipped with screw threads in GHT 3/4" or NPT 5/8".
- Three fittings with different diameters for outflow are provided: GHT 3/4", NPT 1", and φ38 (G 1-1/2").
- Select the fitting that matches your discharge hose. For higher flow rates, a wider outlet is recommended.
- Securely attach the chosen fitting to the pump's output tie-in.
- Connect your discharge hose to the fitting. Ensure all connections are tight to prevent leaks.
4.2 Positioning the Pump
- Place the pump on a stable, level surface in the area to be drained.
- Ensure the pump is fully submerged in water before connecting to power. The water level must be above the water suction port.
- Position the float switch so it can move freely and is not obstructed by walls or other objects. The float switch determines the automatic on/off operation.
5. Operating Instructions
5.1 Automatic Operation with Float Switch
The DEKOPRO 400W Submersible Water Pump features an automatic float switch for hands-free operation:

Image Description: A hand is shown lowering the DEKOPRO submersible pump into clear water. The pump is partially submerged, and the orange float switch is visible floating on the water surface. A black corrugated discharge hose is connected to the pump's outlet.
- Once the pump is submerged and the discharge hose is connected, plug the pump into a grounded electrical outlet.
- The pump will automatically start when the water level rises above approximately 4.7 inches (12 cm), causing the float switch to lift.
- The pump will continue to operate until the water level drops below approximately 4.7 inches (12 cm), at which point the float switch will drop, and the pump will automatically shut off.
- Ensure the float switch has enough space to move freely to activate and deactivate the pump correctly.
5.2 Manual Operation (if applicable)
While primarily designed for automatic operation, if you need to operate the pump continuously or override the float switch for specific tasks, ensure the float switch is manually held in the 'up' position. However, continuous manual operation without monitoring is not recommended to prevent dry running.
6. Maintenance
Regular maintenance ensures the longevity and efficient operation of your pump.
- Cleaning: Periodically clean the water suction port at the base of the pump to remove any debris (leaves, sediment, etc.) that may obstruct water intake. Always disconnect power before cleaning.
- Storage: If storing the pump for an extended period, especially in freezing temperatures, drain all water from the pump and hose to prevent damage. Store in a dry, frost-free location.
- Motor: The pump features an oil-free motor, requiring no maintenance or lubrication.
- Inspection: Regularly inspect the power cord, plug, and pump housing for any signs of damage. Do not use a damaged pump.
7. Troubleshooting
If you encounter issues with your pump, refer to the following troubleshooting guide:
| Problem | Possible Cause | Solution |
|---|---|---|
| Pump does not start | No power supply Float switch not activated Thermal overload activated Impeller jammed by debris | Check power connection and circuit breaker Ensure water level is above 4.7 inches and float switch moves freely Disconnect power, allow pump to cool for 30 minutes, then restart Disconnect power, clear debris from suction port |
| Pump runs but no water is discharged | Suction port blocked Discharge hose kinked or blocked Water level too low Air lock in pump | Disconnect power, clear debris from suction port Check and clear the discharge hose Ensure pump is fully submerged Lift and lower the pump slightly while running to release trapped air |
| Reduced flow rate | Partial blockage in suction or discharge Pump operating against too high a head (lift) Worn impeller | Disconnect power, clear any blockages Ensure the discharge height is within the pump's specifications Contact customer support for service |
| Pump cycles on and off frequently | Float switch obstructed Water level fluctuating rapidly | Ensure float switch moves freely Check for external factors causing water level fluctuations |
If the problem persists after attempting these solutions, please contact DEKOPRO customer support.
8. Specifications
| Feature | Specification |
|---|---|
| Power | 400W (1/2 HP) |
| Voltage | 110V 60Hz |
| Max Flow Rate (Qmax) | 1981 GPH (7500 L/H) |
| Max Lift (H.Max) | 16.4 ft (5 m) |
| Power Cord Length | 16 feet |
| Pipe Diameter Options | GHT 3/4", NPT 1", φ38 (G 1-1/2") |
| Material | Thermoplastic Composite (Plastic and Metal) |
| Special Features | Auto Float Switch, Thermal Overload Protection, Oil-free Motor |
| Max Solids Diameter | 1/2 inch |
| Item Weight | 38 g (Note: This weight seems incorrect based on typical pump weights. Please refer to product packaging for accurate weight.) |
9. Warranty and Support
For warranty information, technical support, or service inquiries, please contact DEKOPRO customer service through the retailer where the product was purchased or visit the official DEKOPRO website. Please have your product model and purchase date available when contacting support.