1. Introduction
This manual provides detailed instructions for the installation, operation, and maintenance of The ROP Shop Screw Drive Carriage, part number 101484_28. This carriage is designed as a replacement component for specific Genie garage door opener models, including PRO800, PRO8200, PRO8800, and SD2500 series.
The screw drive carriage is a critical component that engages with the screw mechanism inside the garage door opener rail, enabling the smooth movement of your garage door. Proper installation and maintenance are essential for safe and reliable operation.
2. Product Overview
The screw drive carriage assembly includes a magnet and internal teeth designed to connect with the screw drive within the garage door opener rail. This connection facilitates the upward and downward movement of the garage door.
When to Replace: If your garage door opener motor runs and the screw drive turns but the garage door does not move (often accompanied by a grinding or chattering noise), it indicates that the screw drive carriage teeth are worn and require replacement.

Figure 2.1: Main view of the Screw Drive Carriage. This component is crucial for the operation of screw-drive garage door openers.
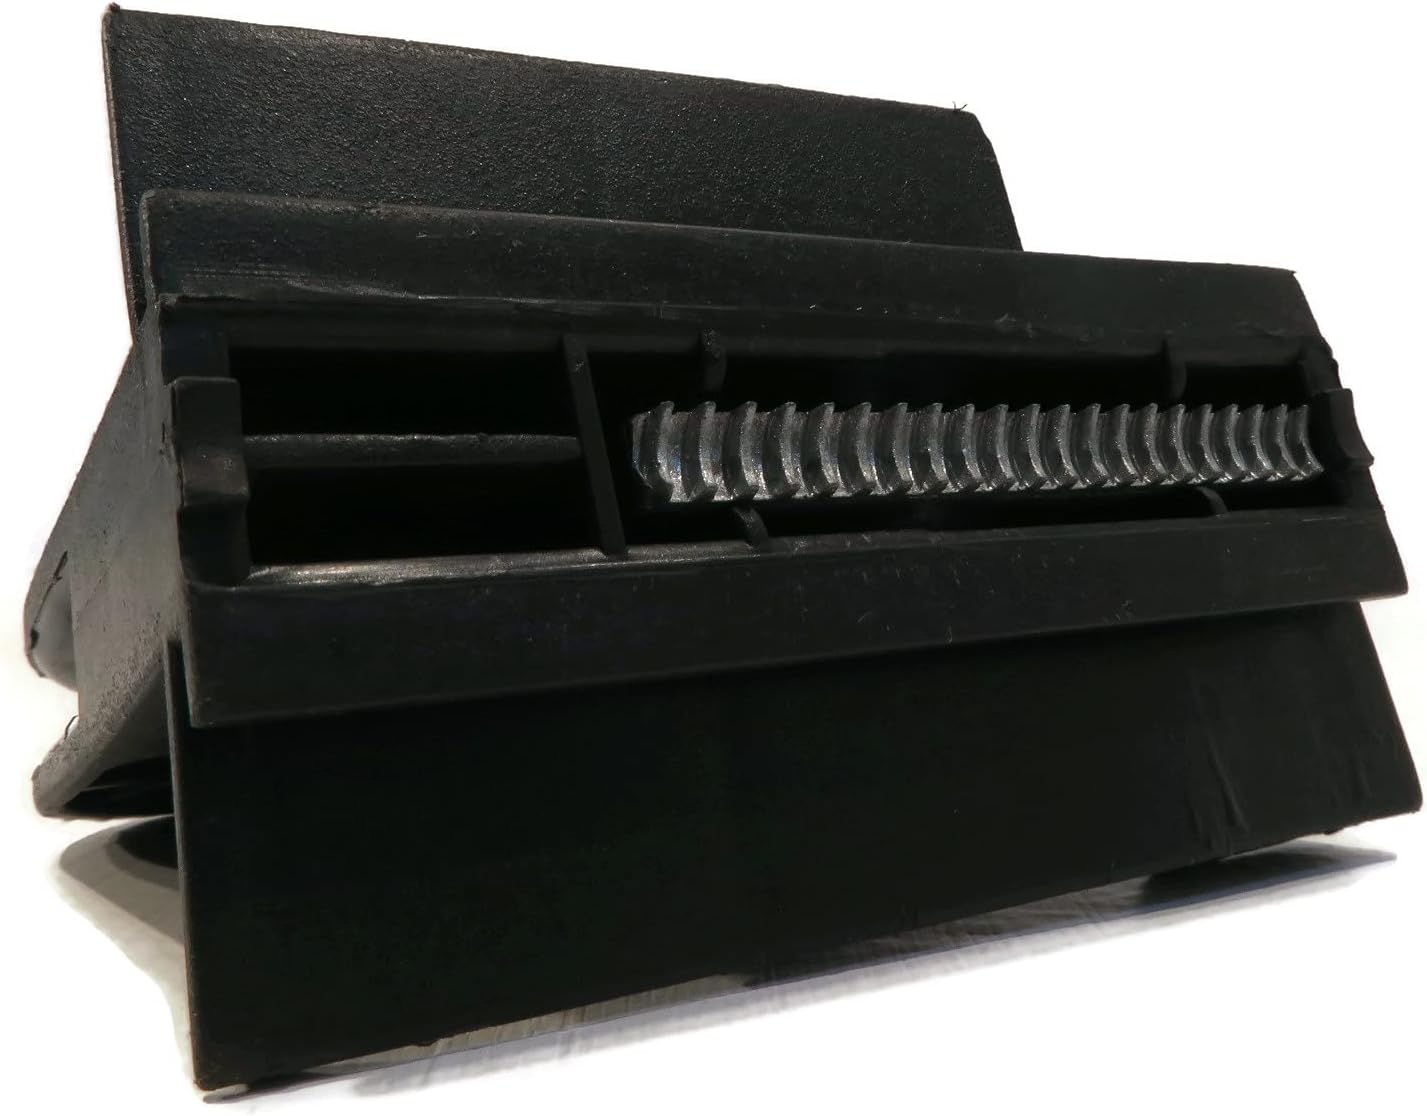
Figure 2.2: Bottom view of the Screw Drive Carriage, illustrating the internal teeth that engage with the screw drive mechanism.
3. Specifications
| Part Number | 101484_28 |
| Manufacturer | The ROP Shop |
| Item Weight | 4.6 ounces |
| Product Dimensions | 9 x 4 x 2.5 inches |
| Color | Black |
| Compatible Models | Genie PRO800, PRO8200, PRO8800, SD2500 Garage Door Openers |

Figure 3.1: Side view with key dimensions: 3/8 inch width and 3 15/16 inches length.

Figure 3.2: Front view with key dimensions: 3 5/8 inches height and 2 1/2 inches depth.
4. Installation Instructions
Safety Precaution: Before beginning any installation or repair, ensure the garage door opener is unplugged from its power source to prevent accidental operation and injury.
Step 1: Disengage the Old Carriage
With the garage door in the closed position, disengage the existing screw drive carriage by pulling the red emergency release cord. After pulling the release cord, slide the old worn-out carriage approximately 6 inches from the door end of the rail.
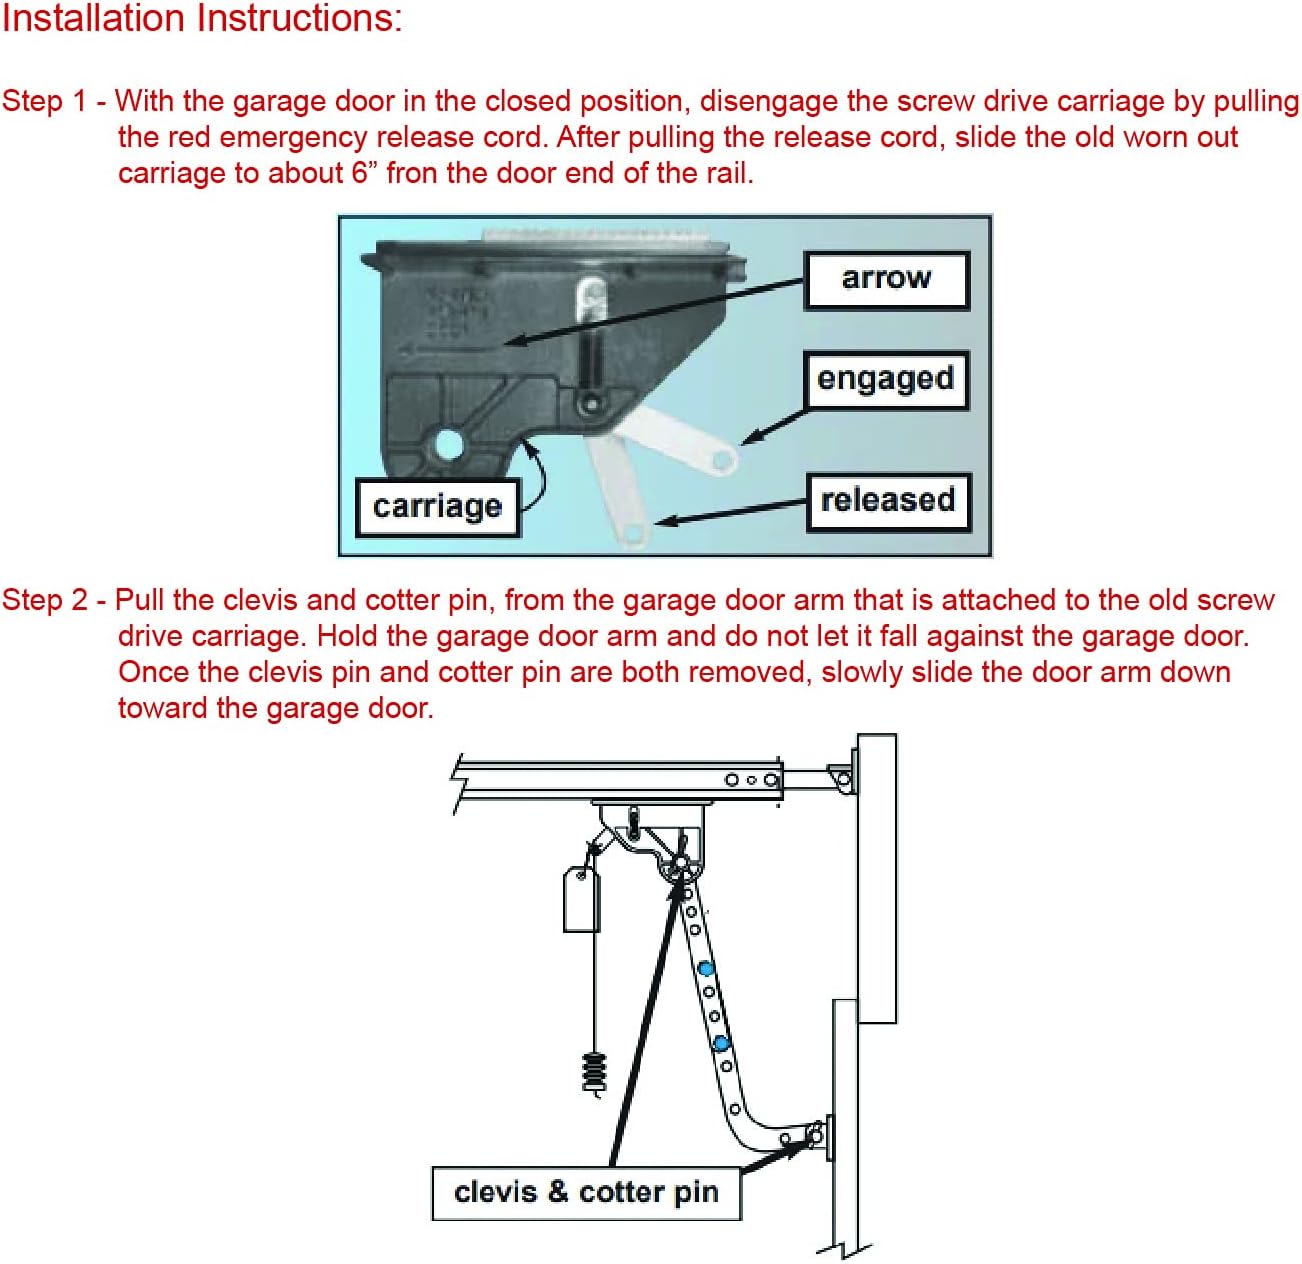
Figure 4.1: Illustration of the carriage in engaged and released positions, with an arrow indicating the direction towards the door.
Step 2: Disconnect Garage Door Arm
Pull the clevis and cotter pin from the garage door arm that is attached to the old screw drive carriage. Hold the garage door arm to prevent it from falling against the garage door. Once both the clevis pin and cotter pin are removed, slowly slide the garage door arm down towards the garage door.
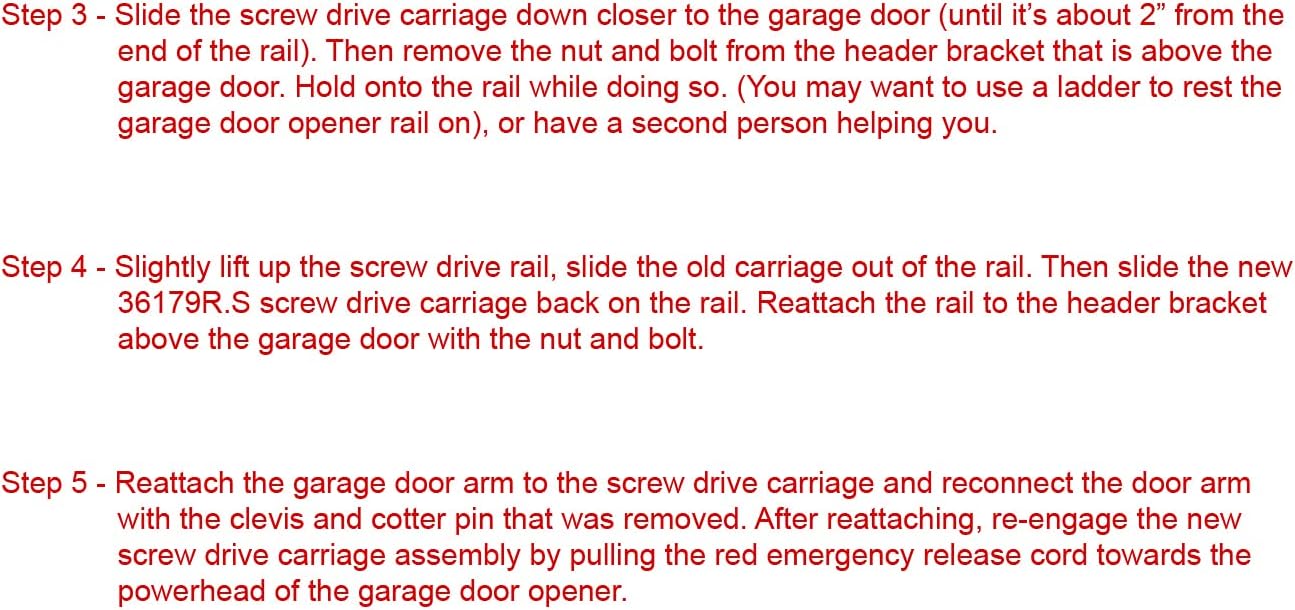
Figure 4.2: Diagram highlighting the clevis and cotter pin connection point on the garage door arm.
Step 3: Prepare Rail for Carriage Removal
Slide the screw drive carriage further down closer to the garage door (until it's about 2 inches from the end of the rail). Then, remove the nut and bolt from the header bracket located above the garage door. Hold onto the rail while performing this step. Assistance from a second person or using a ladder to support the garage door opener rail may be beneficial.
Step 4: Replace Carriage
Slightly lift the screw drive rail and slide the old carriage out of the rail. Then, slide the new 101484_28 screw drive carriage back onto the rail. The carriage features an arrow pointing towards the door to ensure correct orientation. Reattach the rail to the header bracket above the garage door using the nut and bolt previously removed.
Step 5: Reconnect and Re-engage
Reattach the garage door arm to the new screw drive carriage and reconnect the door arm with the clevis and cotter pin that were removed earlier. After reattaching, re-engage the new screw drive carriage assembly by pulling the red emergency release cord towards the powerhead of the garage door opener.
5. Operating Instructions
Once the new screw drive carriage is installed and re-engaged, the garage door opener should function normally. Operate the garage door using its standard controls (wall button, remote control) to verify proper movement and ensure the carriage engages and disengages correctly.
Listen for any unusual noises during operation. Smooth, consistent movement without grinding or chattering indicates correct installation.
6. Maintenance
To extend the life and maximize the performance of your screw drive carriage and garage door opener system, it is recommended to apply low-temperature grease to the screw drive mechanism during carriage replacement and periodically thereafter. The carriage is designed to protect the screw drive from excessive wear.

Figure 6.1: The carriage component, indicating the recommendation for Genie-specific lubricant.
Always refer to your specific Genie garage door opener manual for recommended lubricant types and maintenance schedules.
7. Troubleshooting
- Grinding or Chattering Noise, Door Not Moving: If the motor runs and the screw drive turns but the door does not move, and you hear grinding or chattering, this confirms the screw drive carriage teeth are worn. Replacement of the carriage is necessary.
- Door Not Engaging: Ensure the red emergency release cord is pulled towards the powerhead to re-engage the carriage after installation or manual release.
- Difficulty Sliding Carriage: Check for obstructions in the rail or ensure the rail is properly aligned.
If issues persist after following these steps, consult a qualified garage door technician.
8. Warranty Information
Specific warranty details for this replacement part are typically provided at the point of purchase or on the manufacturer's official website. Please retain your proof of purchase for any warranty claims.
For warranty inquiries, contact The ROP Shop directly through their official channels.
9. Support and Contact
For further assistance, technical support, or questions regarding product compatibility, please contact The ROP Shop customer service.
When contacting support, please be prepared to provide the following information:
- Product Part Number: 101484_28
- Your Genie Garage Door Opener Model and/or Sub-model
- Description of the issue
You can typically find contact information on the product packaging or by visiting The ROP Shop's Amazon Storefront.