Introduction
Welcome to your new Aqua Vista 4-inch Centerset Two-Handle Low-Arc Bathroom Faucet. This manual provides detailed instructions for the safe installation, proper operation, and effective maintenance of your faucet. Please read all instructions carefully before beginning installation or use to ensure optimal performance and longevity of your product.

Image: Aqua Vista Two Handle Bathroom Sink Faucet in Polished Brass, highlighting the pop-up drain and polished brass finish.
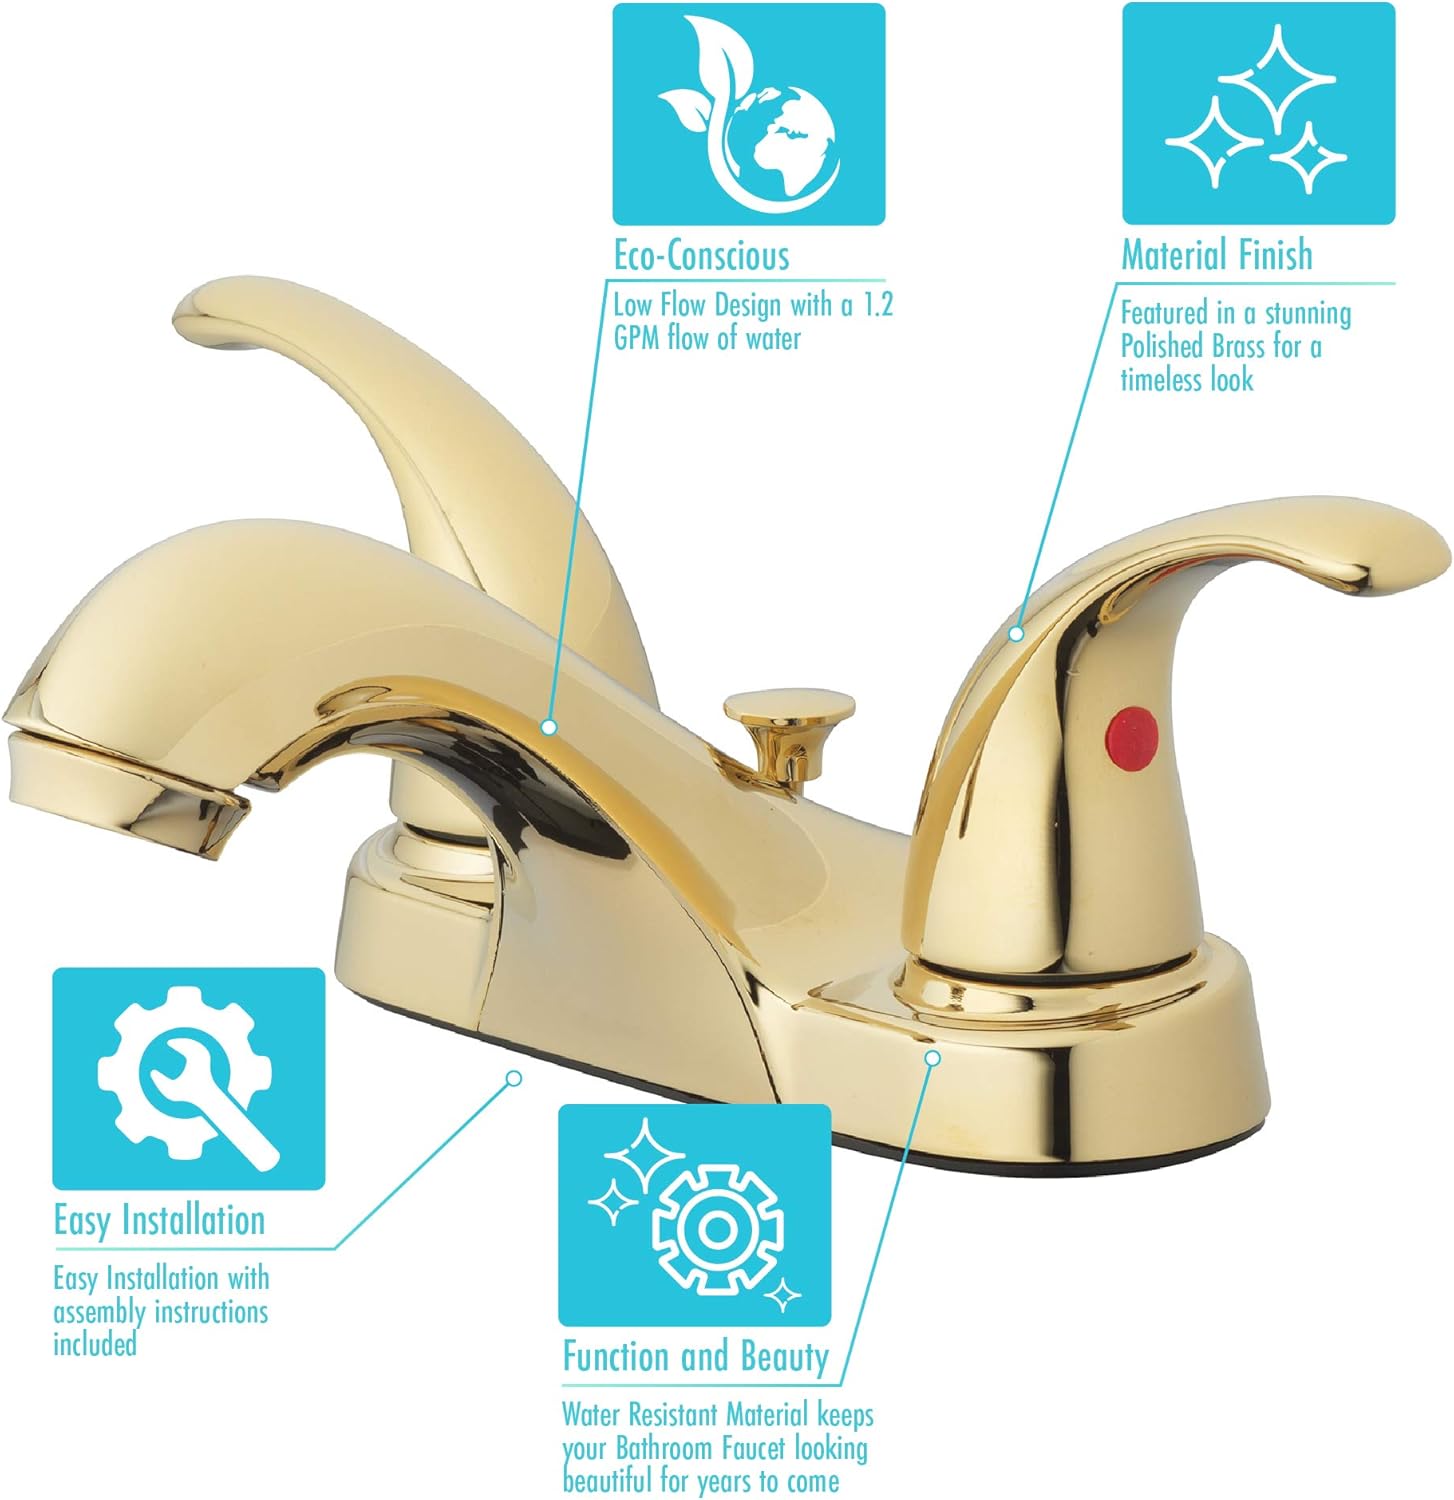
Image: Key features of the Aqua Vista faucet, including its eco-conscious low flow design, polished brass finish, easy installation, and durable, water-resistant material.
Safety Information
Always observe the following safety precautions during installation and use:
- Turn off the main water supply before beginning any installation or repair work.
- Wear appropriate personal protective equipment, such as safety glasses, during installation.
- Ensure all connections are secure to prevent leaks. Do not overtighten.
- If you are unsure about any part of the installation process, consult a qualified plumber.
- This faucet is designed for bathroom sink use only.

Image: Comparison illustrating the benefits of Aqua Vista's Lead-Free Certified Fixtures, ensuring fresh, clean, and safe drinking water.
Package Contents
Verify that all components are present before beginning installation:
- Two Handle Bathroom Faucet (Main Body)
- Quick Install Pop-up Drain Assembly
- Mounting Hardware
- Hot and Cold Water Supply Lines (typically integrated or included)
Tools Required
The following tools are typically required for installation:
- Adjustable Wrench
- Phillips Head Screwdriver
- Plumber's Putty or Silicone Sealant
- Flashlight (optional, for under-sink visibility)
- Basin Wrench (optional, for tight spaces)
Specifications
| Brand | Aqua Vista |
| Model Number | 15-B42WP-PB-AV |
| Finish Type | Polished Brass |
| Material | Brass |
| Number of Handles | 2 |
| Maximum Flow Rate | 1.2 Gallons Per Minute (GPM) |
| Spout Height | 4.9 Inches |
| Spout Reach | 6 Inches |
| Hole Count | 3 |
| Installation Type | Centerset, Deck Mount |
| Product Dimensions | 5.75"D x 9.25"W x 3.38"H |
| Item Weight | 2.59 pounds (1.18 Kilograms) |
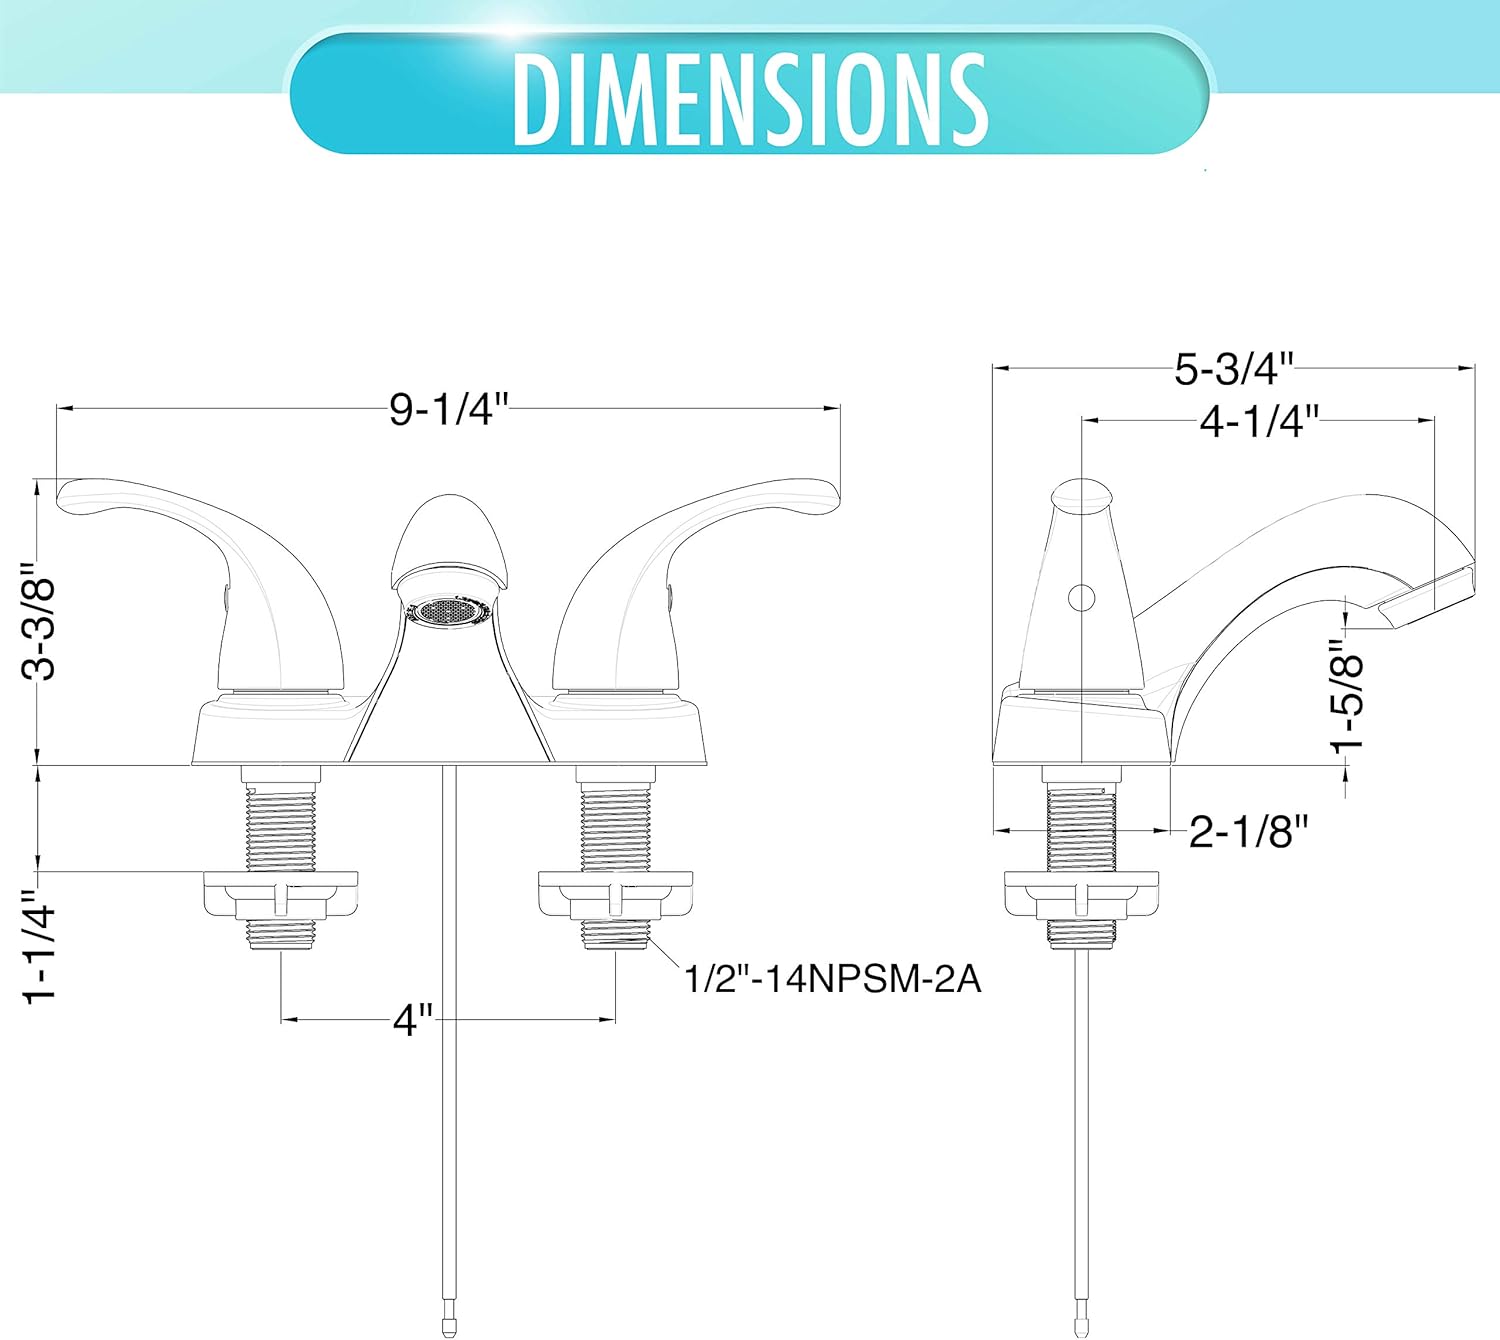
Image: Detailed diagram showing the dimensions of the Aqua Vista Two Handle Bathroom Sink Faucet, including spout height, spout reach, and centerset measurements.
Installation Instructions
Before You Begin
- Ensure the sink area is clean and free of debris.
- Confirm that the existing sink has three pre-drilled holes for a centerset faucet.
- Turn off the hot and cold water supply valves under the sink or at the main water supply.
Step-by-Step Installation
- Prepare the Faucet: Apply a thin bead of plumber's putty or silicone sealant around the base of the faucet body where it will meet the sink deck.
- Mount the Faucet: Insert the faucet body and handles through the holes in the sink deck. Ensure the hot handle is on the left and the cold handle is on the right.
- Secure the Faucet: From underneath the sink, place the rubber washer, metal washer, and mounting nuts onto the threaded shanks of the faucet. Hand-tighten the nuts, then use an adjustable wrench to secure them firmly, but do not overtighten.
- Connect Water Supply Lines: Attach the hot and cold water supply lines to the corresponding inlets on the faucet shanks. Use an adjustable wrench to tighten the connections, ensuring a watertight seal. Connect the other ends of the supply lines to your hot and cold water supply valves.
- Install Pop-up Drain Assembly: Follow the instructions provided with the Quick Install Pop-up Drain Assembly. Typically, this involves placing the drain body into the sink drain hole, applying sealant, and securing it from underneath with a washer and nut. Connect the drain stopper mechanism to the lift rod on the faucet body.
- Test for Leaks: Once all connections are made, slowly turn on the hot and cold water supply valves. Check all connections for leaks. If leaks occur, tighten the connections slightly until they stop.
- Flush the Faucet: Remove the aerator from the spout. Turn on both hot and cold water for approximately one minute to flush out any debris from the lines. Turn off the water, reattach the aerator, and test the faucet operation.
Operation
Your Aqua Vista two-handle faucet provides precise control over water temperature and flow:
- Water Flow: Turn the handles counter-clockwise to open the water flow and clockwise to close it.
- Temperature Control: The left handle controls hot water, and the right handle controls cold water. Adjust both handles to achieve your desired water temperature.
- Pop-up Drain: Push down on the lift rod located on the back of the faucet body to close the drain. Pull up on the lift rod to open the drain.
Maintenance and Care
Proper care will help maintain the finish and functionality of your faucet:
- Cleaning: Clean the faucet regularly with a soft, damp cloth and mild soap. Rinse thoroughly with clean water and dry with a soft cloth to prevent water spots.
- Avoid Harsh Cleaners: Do not use abrasive cleaners, harsh chemicals, ammonia-based products, or polishes containing alcohol. These can damage the polished brass finish.
- Aerator Maintenance: If water flow decreases, the aerator may be clogged. Unscrew the aerator from the spout, clean any debris from the screen, and reattach it.
- Cartridge Replacement: In case of persistent drips or leaks from the handles, the ceramic disc cartridges may need replacement. Consult a plumber or Aqua Vista customer support for guidance on obtaining and installing replacement cartridges.
Troubleshooting
Refer to the table below for common issues and their solutions:
| Problem | Possible Cause | Solution |
|---|---|---|
| Faucet leaks from spout | Worn cartridge | Replace ceramic disc cartridge. |
| Leaks from handle base | Loose packing nut or worn O-ring/cartridge | Tighten packing nut or replace O-ring/cartridge. |
| Low water flow | Clogged aerator or partially closed supply valve | Clean aerator or fully open supply valves. |
| No hot or cold water | Supply valve closed or supply line kinked | Open supply valve or straighten supply line. |
Warranty and Support
Aqua Vista products are manufactured to high-quality standards. For specific warranty information or technical support, please refer to the warranty card included with your product or visit the official Aqua Vista website. Our customer service team is available to assist with any questions or concerns regarding your faucet.