Introduction
This manual provides essential information for the proper installation and maintenance of your genuine Casio watch band adjustment links. These links are designed to allow for precise sizing of your watch band, ensuring a comfortable and secure fit for compatible Casio G-Shock models, including GW-M5600BC, GW-M5610, and GW-5600BCJ. Each set includes two adjustment links and two spring bars for installation.
Product Overview
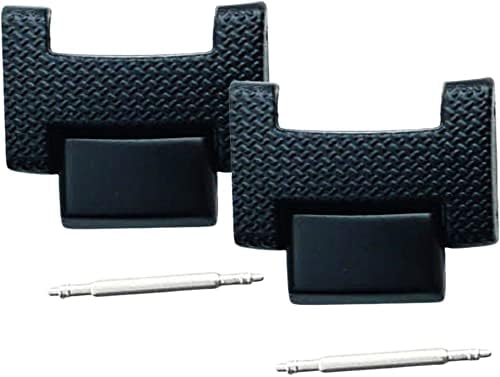
Image Description: This image displays two black watch band adjustment links, each with a textured surface and a smooth, rectangular attachment point. Below them are two slender, silver-colored spring bars, which are used to secure the links to the watch band. The items are arranged on a plain white background.
The adjustment links are crucial components for customizing the length of your watch band. They are made from durable materials to match the original quality of your Casio G-Shock watch band. The included spring bars are essential for securely attaching these links.
Setup and Installation
Proper installation of the adjustment links is vital for the integrity and comfort of your watch band. It is recommended to use appropriate watch repair tools for this process to avoid damage to your watch or the links.
Required Tools:
- Spring bar tool or small flat-head screwdriver
- Soft cloth or mat to protect your watch
Installation Steps:
- Prepare Workspace: Lay your watch face down on a soft cloth or mat to prevent scratches.
- Identify Adjustment Points: Locate the existing links on your watch band that you wish to replace or add to. These are typically connected by spring bars.
- Remove Existing Spring Bar (if replacing): Using a spring bar tool, carefully depress one end of the spring bar that connects the link you want to remove. Gently pull the link away from the band. Repeat for the other end of the spring bar.
- Insert New Link: Align the new adjustment link with the watch band. Insert one end of a new spring bar into one of the lug holes on the link.
- Secure Link: Position the other end of the spring bar against the opposite lug hole. Using the spring bar tool, depress the spring bar and guide it into the lug hole. Ensure both ends of the spring bar are securely seated in their respective holes. Gently tug on the link to confirm it is firmly attached.
- Repeat as Necessary: If adding multiple links, repeat steps 4 and 5 for each additional link.
- Check Fit: Once all links are installed, try on the watch to ensure the band is now the desired length and fit.
If you are unsure about the installation process, it is recommended to seek assistance from a professional watch repair technician.
Operating Principles
Once installed, the adjustment links function as integral parts of your watch band, maintaining the desired length and fit. They do not require any active "operation" beyond their initial installation. Their purpose is to provide a stable and secure connection within the watch band structure.
Maintenance
To ensure the longevity and appearance of your adjustment links, follow these simple maintenance guidelines:
- Cleaning: Wipe the links periodically with a soft, damp cloth to remove dirt, sweat, and oils. Avoid using harsh chemicals or abrasive materials, which can damage the finish.
- Inspection: Regularly inspect the links and spring bars for any signs of wear, damage, or looseness. Ensure the spring bars are fully seated in their lug holes.
- Storage: When not in use, store your watch in a clean, dry place away from direct sunlight and extreme temperatures.
Troubleshooting
If you encounter issues with your adjustment links, consider the following:
- Links feel loose after installation: Ensure that both ends of the spring bars are fully seated within the lug holes of the links and the watch band. A gentle tug should confirm a secure connection. If still loose, the spring bar might be bent or incorrect; replace it with a new, correctly sized spring bar.
- Difficulty installing spring bars: Ensure you are using the correct spring bar tool and applying adequate, but not excessive, pressure. The spring bar should compress easily. If not, check for obstructions in the lug holes or a bent spring bar.
- Links do not match existing band: While these are genuine Casio parts, slight variations in color or texture can occur over time due to wear on your original band. Ensure the model compatibility is correct.
For persistent issues, contact a professional watch repair service or Casio customer support.
Specifications
| Product Name | Casio G-Shock Watch Band Adjustment Links |
| Compatible Models | GW-M5600BC, GW-M5610, GW-5600BCJ |
| Manufacturer Part Number | 10569412-2 |
| Quantity | 2 Adjustment Links, 2 Spring Bars |
| First Available Date (Amazon.co.jp) | June 1, 2020 |
Warranty and Support
Information regarding specific warranty terms for these adjustment links was not provided in the product details. For warranty inquiries or technical support, please contact Casio customer service directly or refer to the official Casio website for your region.
You may also refer to the seller, Kinkoudou, for purchase-related support.