
Introduction
This manual provides detailed instructions for the proper installation, operation, and maintenance of your Velvac 748355 Heated Mirror Kit. Please read this manual thoroughly before beginning installation to ensure correct procedure and safe use. This kit is designed to add heating functionality to vehicle mirrors, improving visibility in cold or foggy conditions.
Safety Information
Always prioritize safety during installation and operation. Failure to follow these safety guidelines may result in personal injury or damage to the product or vehicle.
- Disconnect the vehicle's battery before performing any electrical work.
- Ensure all wiring connections are secure and properly insulated to prevent short circuits.
- Wear appropriate personal protective equipment, such as safety glasses and gloves.
- If you are unsure about any part of the installation process, consult a qualified automotive technician.
- Do not modify the kit components. Use only genuine Velvac parts.
Setup and Installation
The Velvac 748355 Heated Mirror Kit is designed for vehicle-specific fit and door mount installation. No assembly of the kit components is required prior to installation into the mirror housing.
Components Included:
- Heated Mirror Kit (includes heating elements and necessary wiring)
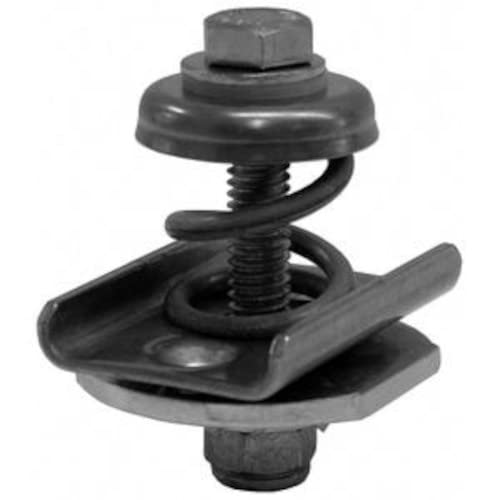
Figure 1: Velvac 748355 Heated Mirror Kit components. This image displays the various parts included in the kit, such as the heating pads and electrical connectors, ready for installation.
Installation Steps:
- Prepare the Vehicle: Park the vehicle on a level surface and engage the parking brake. Disconnect the negative terminal of the vehicle's battery to prevent electrical hazards.
- Access Mirror Housing: Carefully remove the existing mirror glass from its housing. Refer to your vehicle's service manual for specific instructions on mirror glass removal, as this can vary by vehicle model.
- Install Heating Elements: Adhere the heating elements from the kit to the back of the mirror glass. Ensure the surface is clean and dry before application for optimal adhesion. Position the elements to cover the maximum possible surface area of the mirror.
- Route Wiring: Route the wiring from the heating elements through the mirror housing and into the vehicle's door panel. Ensure wiring is secured and does not interfere with mirror movement or window operation.
- Electrical Connection: Connect the heating element wiring to a suitable power source. This typically involves tapping into an existing heated mirror circuit, a defroster circuit, or installing a new fused circuit with a dedicated switch. Ensure all connections are crimped securely and insulated with heat shrink tubing or electrical tape. The kit is designed for both left and right mirror positions.
- Reassemble Mirror: Carefully reattach the mirror glass to its housing. Reinstall any trim panels removed during the process.
- Reconnect Battery: Reconnect the negative terminal of the vehicle's battery.
- Test Functionality: Turn on the vehicle and activate the heated mirror function (if integrated with the vehicle's defroster) or the dedicated switch. Verify that the mirrors begin to warm up.
Operating Instructions
Once installed, the Velvac 748355 Heated Mirror Kit operates by warming the mirror surface to clear frost, ice, or fog. The activation method depends on how the kit was wired into your vehicle's electrical system:
- Integrated with Vehicle Defroster: If wired to the vehicle's rear window defroster circuit, the heated mirrors will activate automatically when the rear defroster is turned on.
- Dedicated Switch: If a separate switch was installed, activate the heated mirrors by pressing this switch.
- Automatic Activation: Some advanced vehicle systems may allow for automatic activation based on ambient temperature, if wired accordingly.
Allow a few minutes for the heating elements to reach optimal temperature and begin clearing the mirror surface. Turn off the heating function when no longer needed to conserve vehicle power.
Maintenance
The Velvac 748355 Heated Mirror Kit requires minimal maintenance. Regular inspection and cleaning are recommended to ensure optimal performance and longevity.
- Cleaning: Clean the mirror glass regularly with a standard automotive glass cleaner. Avoid abrasive cleaners or tools that could scratch the mirror surface or damage the heating elements.
- Wiring Inspection: Periodically inspect all visible wiring and connections for signs of wear, corrosion, or damage. Ensure connections remain secure.
- Functionality Check: Test the heated mirror function periodically, especially before cold weather seasons, to ensure it activates and heats properly.
Troubleshooting
If your Velvac 748355 Heated Mirror Kit is not functioning as expected, refer to the following troubleshooting guide:
| Problem | Possible Cause | Solution |
|---|---|---|
| Mirror not heating |
|
|
| Intermittent heating |
|
|
| Mirror heats unevenly |
|
|
If troubleshooting steps do not resolve the issue, contact Velvac customer support or a qualified automotive technician.
Specifications
| Brand | Velvac |
| Model Number | 748355 |
| Product Name | Heated Mirror Kit |
| Item Weight | 347 g |
| Package Dimensions | 20.32 x 10.16 x 2.54 cm |
| Position | Left, Right |
| Mirror Lens Type | Convex |
| Mounting Type | Door Mount |
| Fit Type | Vehicle Specific Fit |
| Assembly Required | No (for the kit itself) |
| Included Components | Heated Mirror Kit |
Warranty Information
Specific warranty details for the Velvac 748355 Heated Mirror Kit are not provided in this manual. For information regarding product warranty, please refer to the documentation included with your purchase or visit the official Velvac website. Retain your proof of purchase for warranty claims.
Customer Support
If you have questions, require technical assistance, or need to report an issue with your Velvac 748355 Heated Mirror Kit, please contact Velvac customer support. Contact information can typically be found on the product packaging or the official Velvac website.