1. Introduction
This manual provides detailed instructions for the safe and efficient installation, operation, and maintenance of your XtremepowerUS 1.5HP High Flow Pool Pump. This self-priming pump is designed for above-ground swimming pools and spas, featuring a 1.5-inch strainer basket filter and a powerful 1.5HP motor for optimal water circulation and filtration.
2. Safety Information
WARNING: Read and follow all instructions carefully before installing or operating this product. Failure to do so could result in serious injury or death.
- Always disconnect power before servicing the pump.
- Ensure the pump is installed on a solid, level surface.
- Do not operate the pump if the power cord is damaged.
- Keep children away from the pump and pool area during operation.
- Ensure proper grounding to prevent electrical shock.
- Do not run the pump dry; always ensure it is primed with water.
- Consult a qualified electrician for electrical connections if unsure.
3. Components Overview
The XtremepowerUS 1.5HP High Flow Pool Pump system typically includes the following main components:
- Pump Unit: Main motor and housing with strainer basket.
- Strainer Basket: Collects debris before it reaches the pump impeller.
- Strainer Lid: Clear lid for easy inspection of the basket.
- Mounting Base: Provides a stable platform for the pump and filter.
- Hose Adapters: For connecting hoses (may be sold separately).
- Hose Clamps: To secure hose connections.
- Filter Unit (Sand Filter): (If purchased as a system) Filters water from the pump.
- Multi-port Valve: Controls water flow through the filter (part of filter unit).
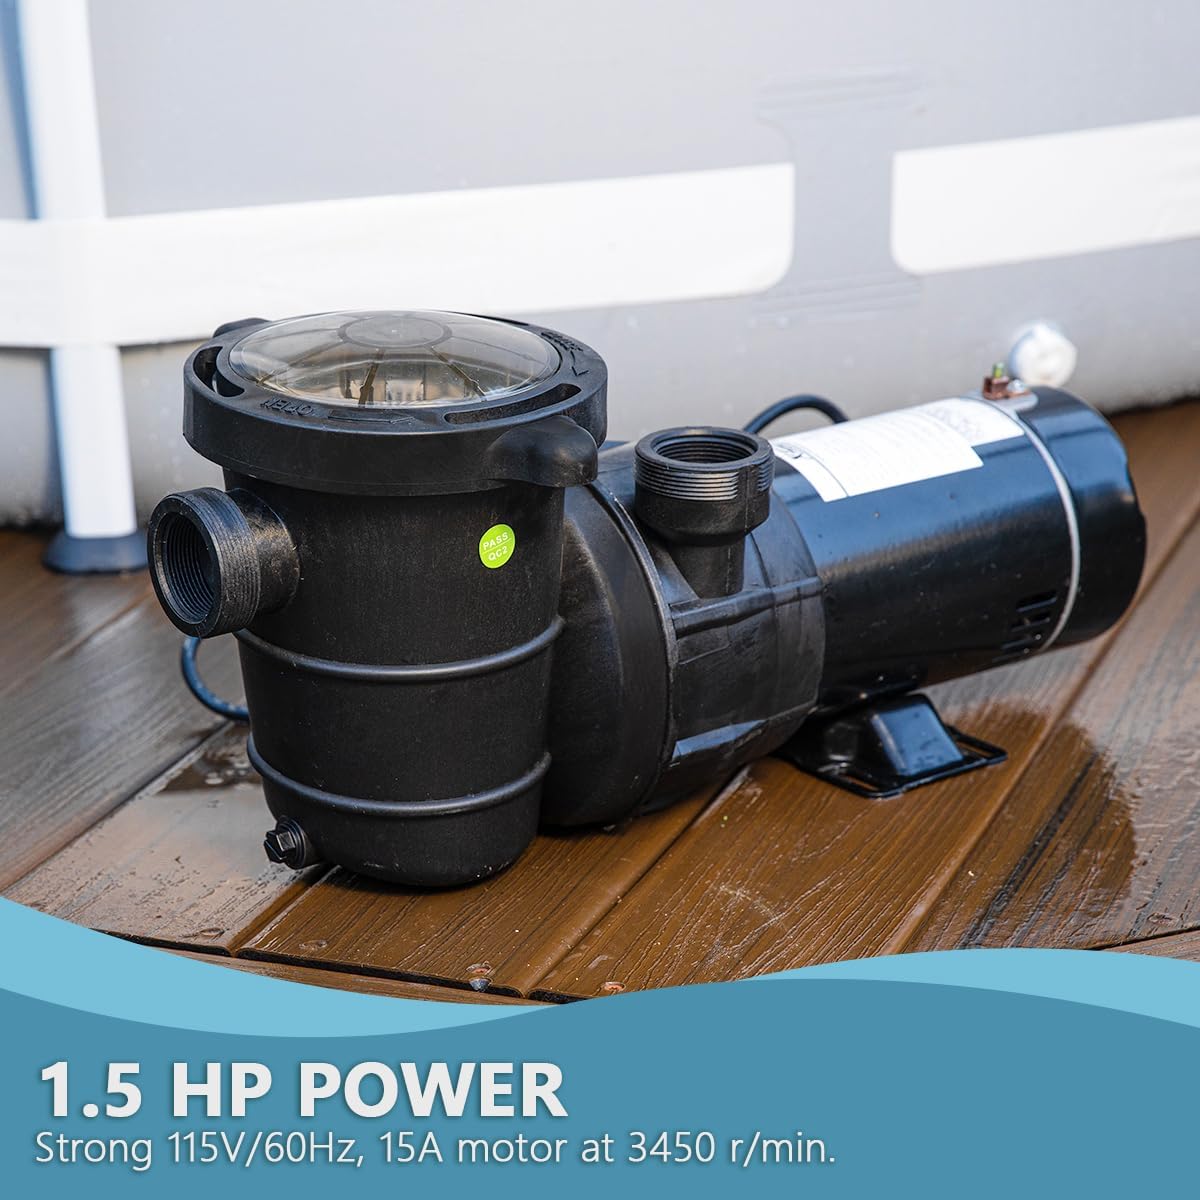
Image: The XtremepowerUS 1.5HP High Flow Pool Pump unit, showing the motor and the strainer basket with its clear lid.
4. Setup and Installation
Follow these steps for proper installation of your pool pump system. Refer to the video below for a visual guide.
Video: Installation guide for the XtremepowerUS 1.5HP Above Ground Pool Pump. This video demonstrates the steps for assembling the pump and connecting it to a pool filter and an above-ground pool.
4.1. Mounting the Pump
- Place Pump on Base: Position the pump unit onto the mounting base. Ensure the pump's screw holes align with the corresponding holes on the base, typically marked with a triangle symbol.
- Insert Nuts: Flip the mounting base over. Insert all four nuts into the designated mounting spaces on the underside of the base.
- Secure Pump: Flip the mounting base back. Place the bolts into the screw holes and tighten all four bolts using a socket wrench until secure.
Image: The pool pump securely mounted on its base, ready for hose connections.
4.2. Connecting Hoses
- Install Hose Adapters: If not already installed, screw the hose adapters onto the pump's inlet and outlet ports. Note: Hose adapters may not be included and might need to be purchased separately.
- Place Filter on Base: If using a sand filter, place it onto the mounting base next to the pump.
- Prepare Hoses: Secure the hoses and insert an O-ring into the hose fitting groove on both ends of each hose to ensure a watertight seal.
- Connect Pump to Filter: Connect one hose from the pump's discharge port to the filter's inlet port. Twist the connection tight.
- Connect Pool Outlet to Pump: Connect a hose from the pool's outlet (skimmer or main drain) to the pump's intake hose adapter. Ensure the O-ring is properly seated and tighten the hose clamp.
- Connect Filter to Pool Return: Connect a hose from the filter's return line port (marked as "POOL" on the multi-port valve) to the pool's return inlet. Tighten the hose clamp.

Image: The XtremepowerUS pool pump and filter system fully connected to an above-ground pool, showing the hose routing.
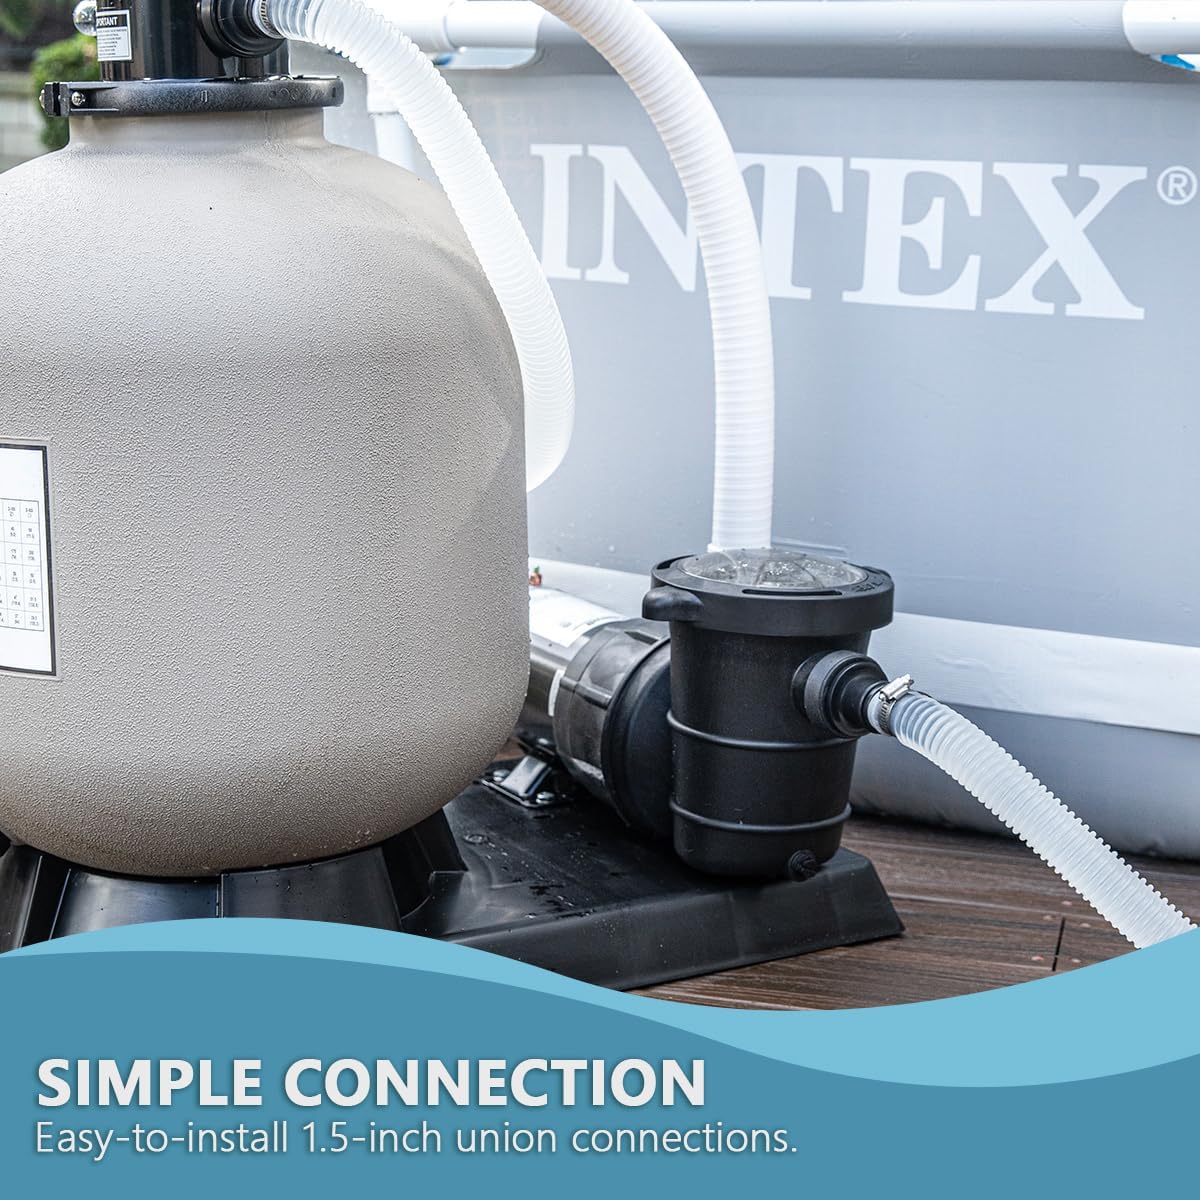
Image: A close-up view of the hose connection to the pool pump, highlighting the secure fitting.
5. Operation
5.1. Priming the Pump
Before starting the pump for the first time or after cleaning the strainer basket, it is crucial to prime the pump to ensure it is filled with water. Running the pump dry can cause severe damage.
- Ensure all valves are open, allowing water to flow from the pool to the pump.
- Remove the strainer lid and fill the strainer housing with water until it overflows.
- Replace the strainer lid and ensure it is securely tightened.
- Turn on the pump. The pump should begin to draw water and expel air. If water does not flow within a few minutes, turn off the pump and repeat the priming process.
5.2. Starting the Pump
Once primed, plug the pump into a grounded electrical outlet. The pump will begin circulating water. Monitor the pressure gauge on your filter (if applicable) to ensure it operates within the recommended range.

Image: Visual representation of the pump's high flow rate (90 GPM / 5,400 GPH) and 3450 RPM motor, indicating powerful water circulation.
6. Maintenance
Regular maintenance ensures the longevity and efficient operation of your pool pump.
6.1. Cleaning the Strainer Basket
The pump features an extra-large debris basket with a clear cover, allowing you to easily see when it needs cleaning. A clogged basket reduces pump efficiency and can lead to damage.
- Turn Off Power: Always turn off the pump and disconnect it from the power source before cleaning.
- Close Valves: Close any isolation valves between the pool and the pump to prevent water flow.
- Remove Lid: Unscrew and remove the clear strainer lid.
- Remove Basket: Carefully lift out the strainer basket.
- Clean Basket: Empty any debris from the basket and rinse it thoroughly with a garden hose.
- Inspect O-ring: Check the lid's O-ring for cracks or wear. Replace if necessary.
- Reassemble: Place the clean basket back into the housing, ensure the O-ring is properly seated, and securely tighten the lid.
- Prime Pump: Follow the priming steps in Section 5.1 before restarting the pump.

Image: A close-up of the pump's large debris basket with a clear lid, designed for easy monitoring and reduced cleaning frequency.
6.2. Winterization
In colder climates, proper winterization is essential to prevent freeze damage. Consult your pool professional for specific winterization procedures for your pool type.
- Drain all water from the pump and filter.
- Disconnect hoses and store them in a dry, protected area.
- Store the pump in a warm, dry location during winter months.
7. Troubleshooting
This section addresses common issues you might encounter with your pool pump.
| Problem | Possible Cause | Solution |
|---|---|---|
| Pump does not start | No power, tripped breaker, faulty motor. | Check power connection, reset breaker, contact support if motor is faulty. |
| Low water flow | Clogged strainer basket, air leak in suction line, low water level in pool, clogged filter. | Clean strainer basket, check hose connections for leaks, ensure adequate pool water level, backwash/clean filter. |
| Pump is noisy | Air in system, cavitation, worn bearings. | Prime pump, check for suction leaks, contact support for worn bearings. |
| Water leaking from pump | Loose connections, damaged O-rings/seals, cracked housing. | Tighten connections, replace O-rings/seals, contact support for cracked housing. |
8. Specifications
Technical specifications for the XtremepowerUS 1.5HP High Flow Pool Pump, Model 75125:
| Feature | Detail |
|---|---|
| Brand | XtremepowerUS |
| Model Number | 75125 |
| Horsepower | 1.5 HP |
| Voltage | 115V/60Hz |
| Amperage | 15 Amps |
| Speed | 3450 r/min |
| Maximum Flow Rate | 90 GPM / 5,400 GPH |
| Inlet Internal Fitting | 1.5" NPT |
| Maximum Temperature | 122°F (50°C) |
| Waterproof Level | IPX5 |
| Product Dimensions | 22.5"L x 7.5"W x 10"H |
| Item Weight | 25 Pounds |
| Power Source | Corded Electric |
| Specific Uses | Above-Ground Pool |

Image: Diagram illustrating the universal design and key dimensions of the XtremepowerUS pool pump, compatible with 1.5" NPT inlet/outlet fittings.
9. Warranty & Support
For warranty information, technical support, or to purchase replacement parts, please contact XtremepowerUS customer service. Refer to your product packaging or the official XtremepowerUS website for the most current contact details and warranty terms.
Website: XtremepowerUS Official Store


