1. Introduction
This manual provides detailed instructions for the installation, operation, and maintenance of your Future Way CCP520 Pool Filter Cartridges. These cartridges are designed to provide efficient filtration for your pool, ensuring clear and clean water. Please read this manual thoroughly before installation and use.
2. Product Overview and Compatibility
The Future Way CCP520 Pool Filter Cartridges are high-quality replacements designed for specific pool filter systems. Each cartridge features a trilobal pleated design for enhanced debris capture.
2.1. Dimensions
- Outer Diameter: 7 inches
- Inner Diameter: 3-1/16 inches
- Height: 32 inches
It is crucial to confirm these dimensions match your existing filter system requirements to ensure proper fit and function.

Image 2.1: Visual representation of the CCP520 filter cartridge dimensions and its fit within a compatible pool filter housing.
2.2. Compatibility
These filter cartridges are compatible with the following pool filter systems and replacement part numbers:
- Pentair Clean & Clear Plus 520
- Pentair 160332
- Pentair 178585
- Pentair R173578
- Pleatco PCC130
- Unicel C-7472 / C-7472RA
- Filbur FC-1978 / FC-6475
- Pure N Clean PC-1978 / PC-6475
All manufacturer names and part numbers are used for compatibility reference only.

Image 2.2: Guide to confirm the correct filter model based on dimensions and filter area.
3. Features and Certification
These filter cartridges are engineered for superior performance and durability.
3.1. NSF/ANSI 50 Certification
The Future Way CCP520 Pool Filter Cartridges are tested and certified by NSF International against NSF/ANSI 50 for the use of safe materials and structural integrity requirements. This certification ensures the product meets rigorous standards for public health and safety.
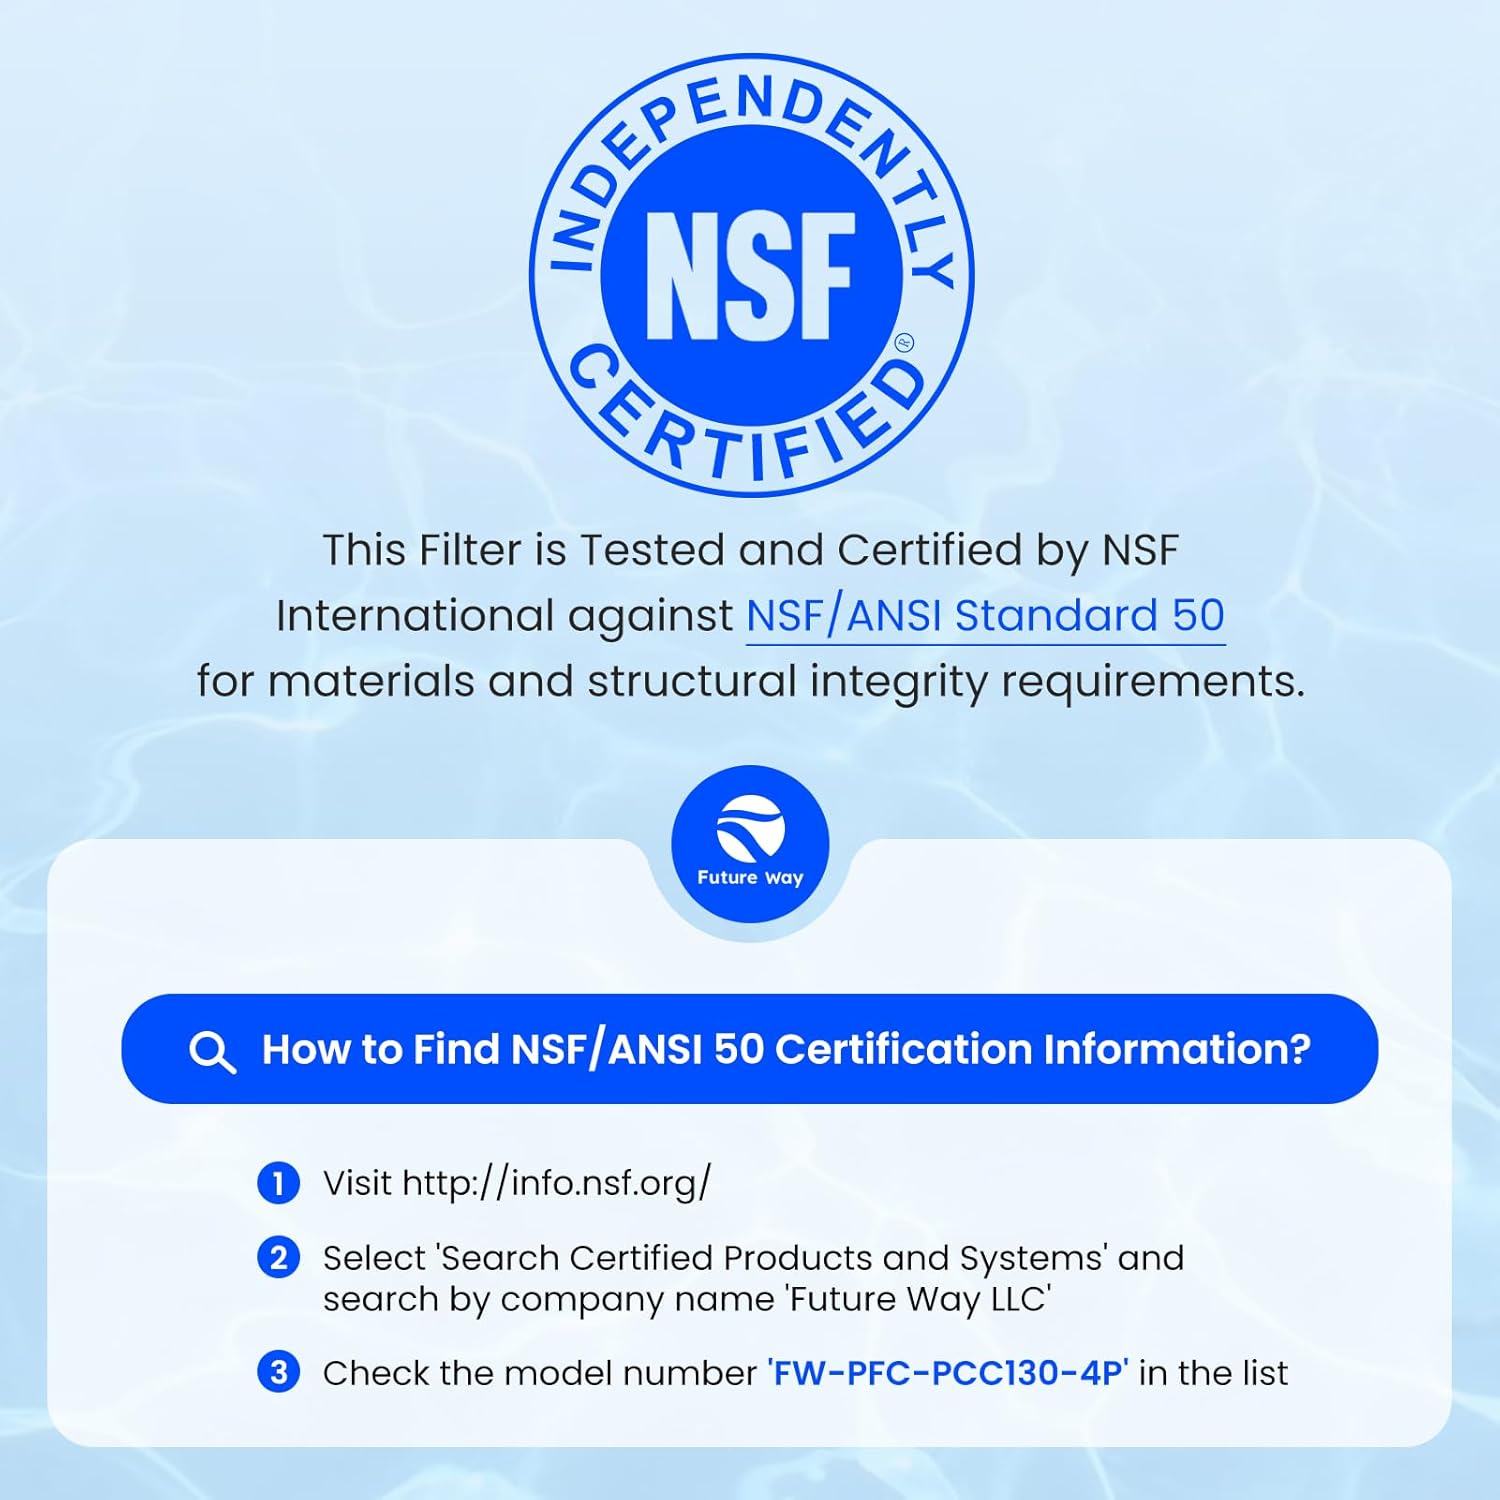
Image 3.1: NSF/ANSI 50 Certification details and verification steps.
3.2. Advanced Filtration Technology
The cartridges feature a trilobal pleated design, which provides a higher density and 30% more surface area compared to standard fabrics. This design allows the filter to trap significantly more debris, including leaves, hair, sand, and oils, leading to clearer pool water.

Image 3.2: Explanation of the trilobal filtration technology.
3.3. Durable Construction
Constructed with spunbond polyester and a strong inner core, these cartridges are designed to withstand high-pressure water flow and offer extended durability, ensuring a worthwhile investment for your pool maintenance.

Image 3.3: Details on the robust construction of the filter cartridges.
4. Installation
Follow these steps to install your new filter cartridges:
- Prepare the Filter System: Turn off the pool pump and close all necessary valves to isolate the filter. Release any pressure from the filter tank.
- Open the Filter Housing: Carefully open the filter housing according to your pool filter system's manufacturer instructions.
- Remove Old Cartridges: Remove the old, dirty filter cartridges from the housing. Dispose of them properly.
- Inspect Housing: Clean the inside of the filter housing and inspect gaskets or O-rings for any damage. Replace if necessary.
- Install New Cartridges: Carefully insert the new Future Way CCP520 filter cartridges into the housing. Ensure they are seated correctly and securely.
- Close Filter Housing: Securely close the filter housing, ensuring all clamps or bolts are tightened according to the manufacturer's specifications.
- Restore System: Open the valves and slowly turn on the pool pump, allowing the filter system to prime and operate. Check for any leaks.

Image 4.1: Visual steps for filter cartridge setup, cleaning, and reuse.
5. Operation
Once installed, the filter cartridges will begin to filter your pool water. Monitor your pool's water clarity and the pressure gauge on your filter system. An increase in pressure indicates that the cartridges are collecting debris and may require cleaning.
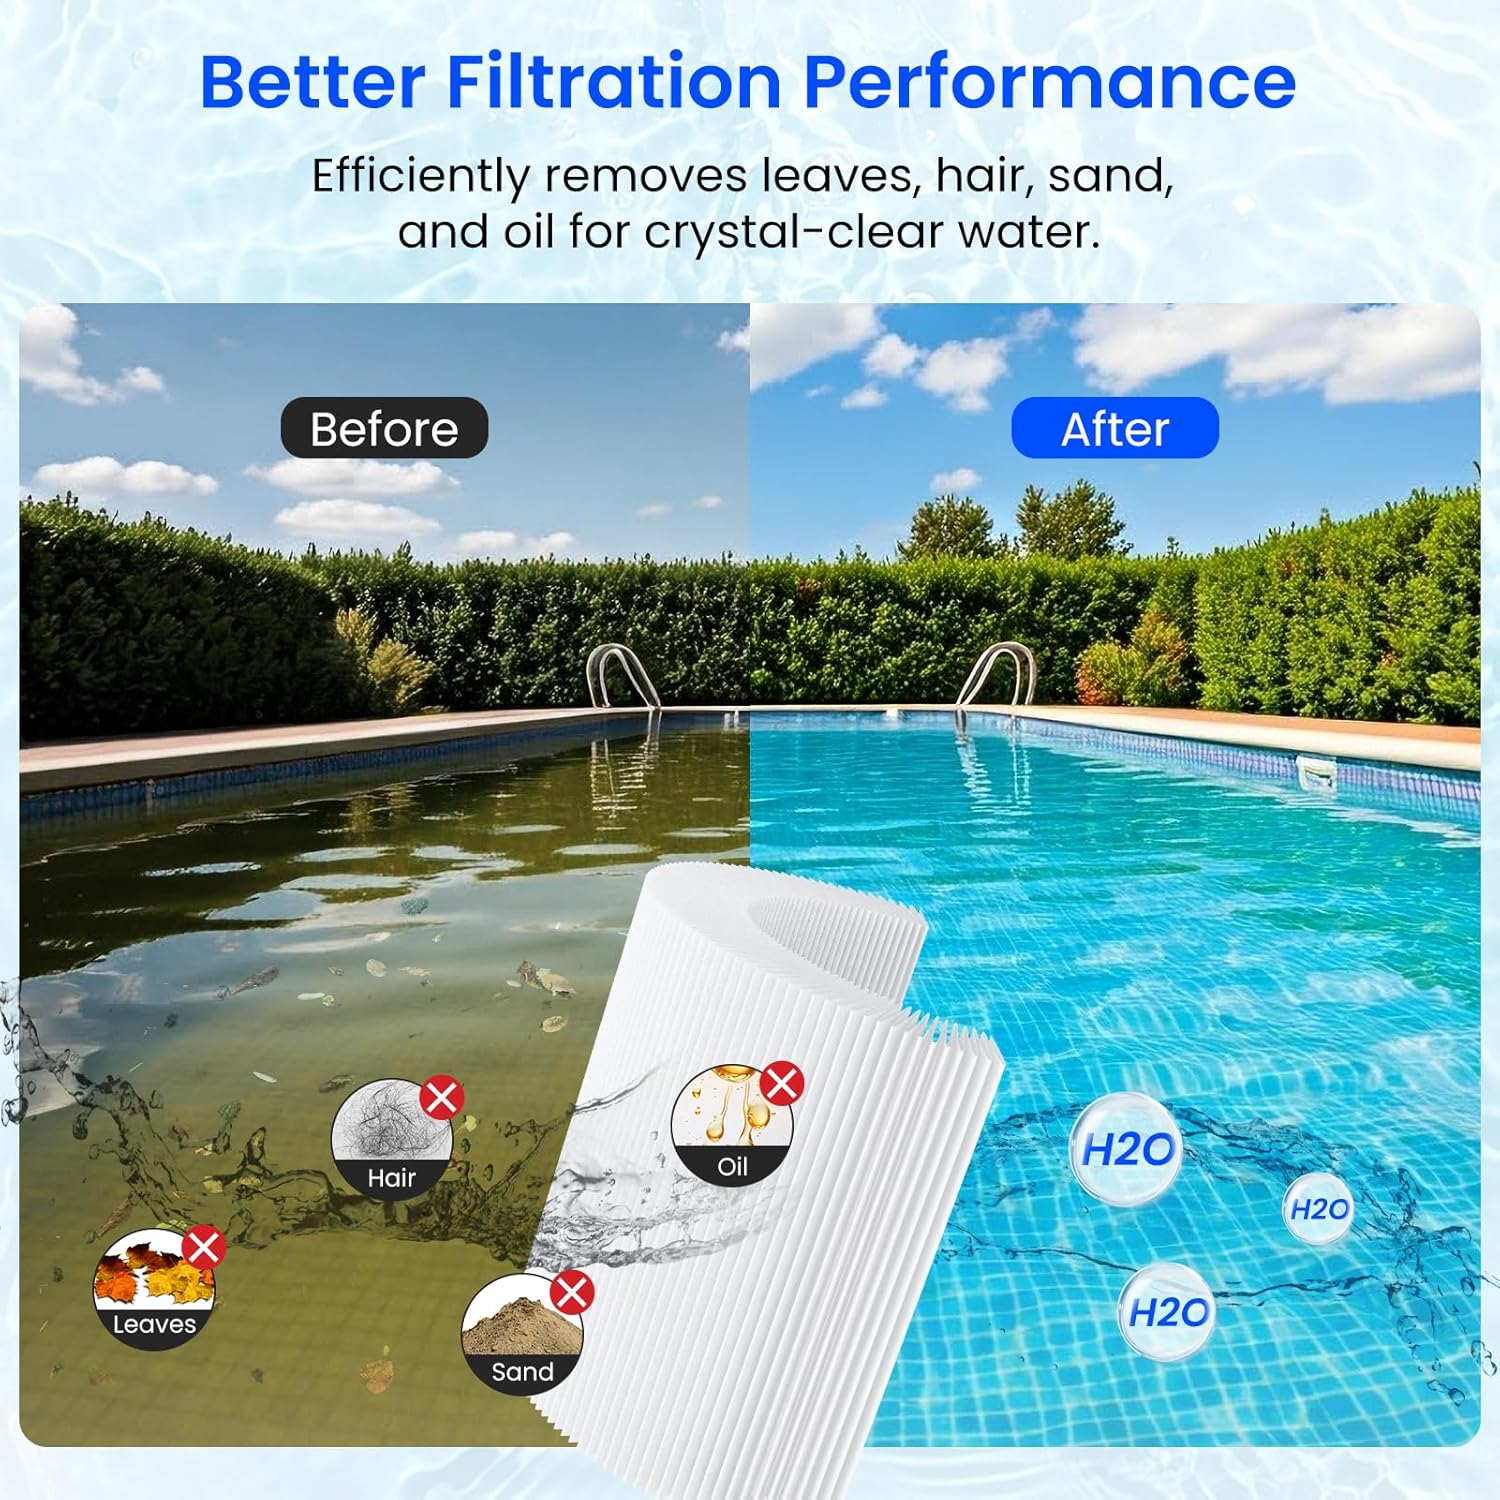
Image 5.1: Demonstration of improved water clarity after filtration.
6. Maintenance
Regular cleaning of your filter cartridges is essential for optimal performance and longevity. It also helps minimize water usage.
6.1. Cleaning Frequency
It is recommended to clean the filter cartridge monthly to maximize its effectiveness and ensure a clean swimming experience. Clean the cartridge when the pool filtration system pressure hits 8-10 psi above its clean operating pressure.
6.2. Cleaning Procedure
- Turn Off System: Turn off the pool pump and release pressure from the filter tank.
- Remove Cartridges: Open the filter housing and carefully remove the cartridges.
- Rinse: Use a garden hose with a strong nozzle to rinse the cartridge. Spray at an angle from the top and work your way down, ensuring water penetrates deep into the pleats to dislodge trapped debris.
- Deep Cleaning (Optional): For stubborn dirt or oils, use a specialized filter cleaning solution. Follow the product instructions for soaking and rinsing.
- Reinstall: Once clean, reinstall the cartridges as described in the Installation section.
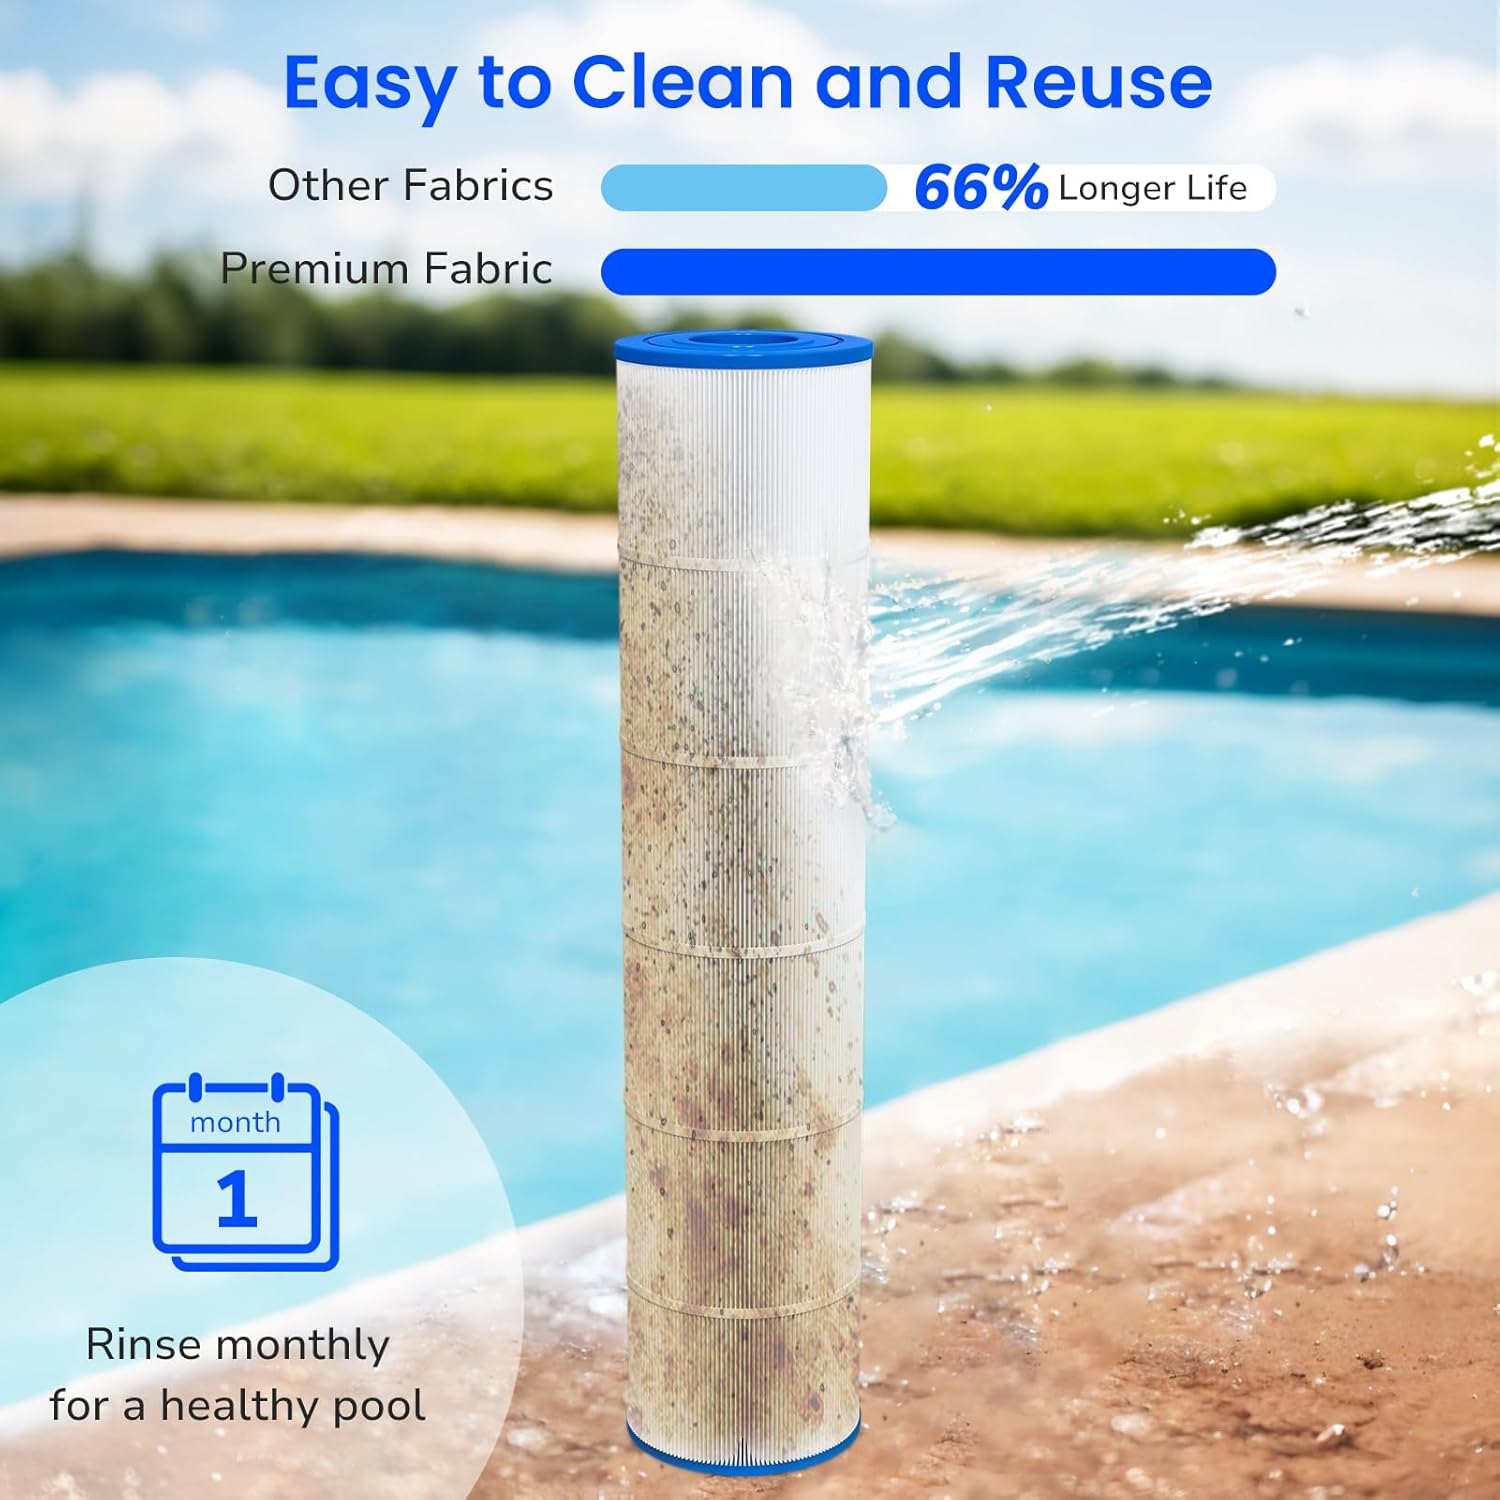
Image 6.1: Visual guide for cleaning the filter cartridge.
7. Troubleshooting
If you encounter issues with your pool filtration, consider the following common problems and solutions:
- Cloudy Water:
- Check if cartridges are dirty and require cleaning.
- Ensure proper chemical balance in the pool.
- Verify pump run time is sufficient.
- Low Water Flow/High Pressure:
- Cartridges are likely clogged; perform a thorough cleaning.
- Check for blockages in the skimmer basket or pump impeller.
- Filter Leaks:
- Ensure filter housing is properly sealed and clamps are tightened.
- Inspect the housing O-ring for damage or improper seating.
If problems persist after following these steps, consult a qualified pool technician.
8. Specifications
| Attribute | Value |
|---|---|
| Model Number | FW-PFC-PCC130-4P |
| Outer Diameter | 7 inches |
| Inner Diameter | 3-1/16 inches |
| Height | 32 inches |
| Filter Area | 520 sq.ft (for 4-pack total) |
| Material | Spunbond Polyester |
| Certification | NSF/ANSI 50 |
| Package Dimensions | 33.5 x 15.5 x 15 inches |
| Item Weight | 23.6 pounds |
| Manufacturer | Future Way |
9. Warranty and Support
Future Way offers a warranty for its products. These filter cartridges are eligible for free replacement if damaged within 6 months of purchase. For any support inquiries or to claim warranty, please contact Future Way customer service through their official channels or the retailer where the product was purchased.
10. Video Resources
No official product videos from the seller were provided in the product data for embedding in this manual.