Introduction
Welcome to the ChiButtons Pro 25mm (1") Metric Button Maker Machine B400 Kit. This all-metal craft press is designed for creating tiny buttons, mini badges, and custom pins with ease and precision. This manual provides essential information for setting up, operating, maintaining, and troubleshooting your button maker machine to ensure optimal performance and longevity.
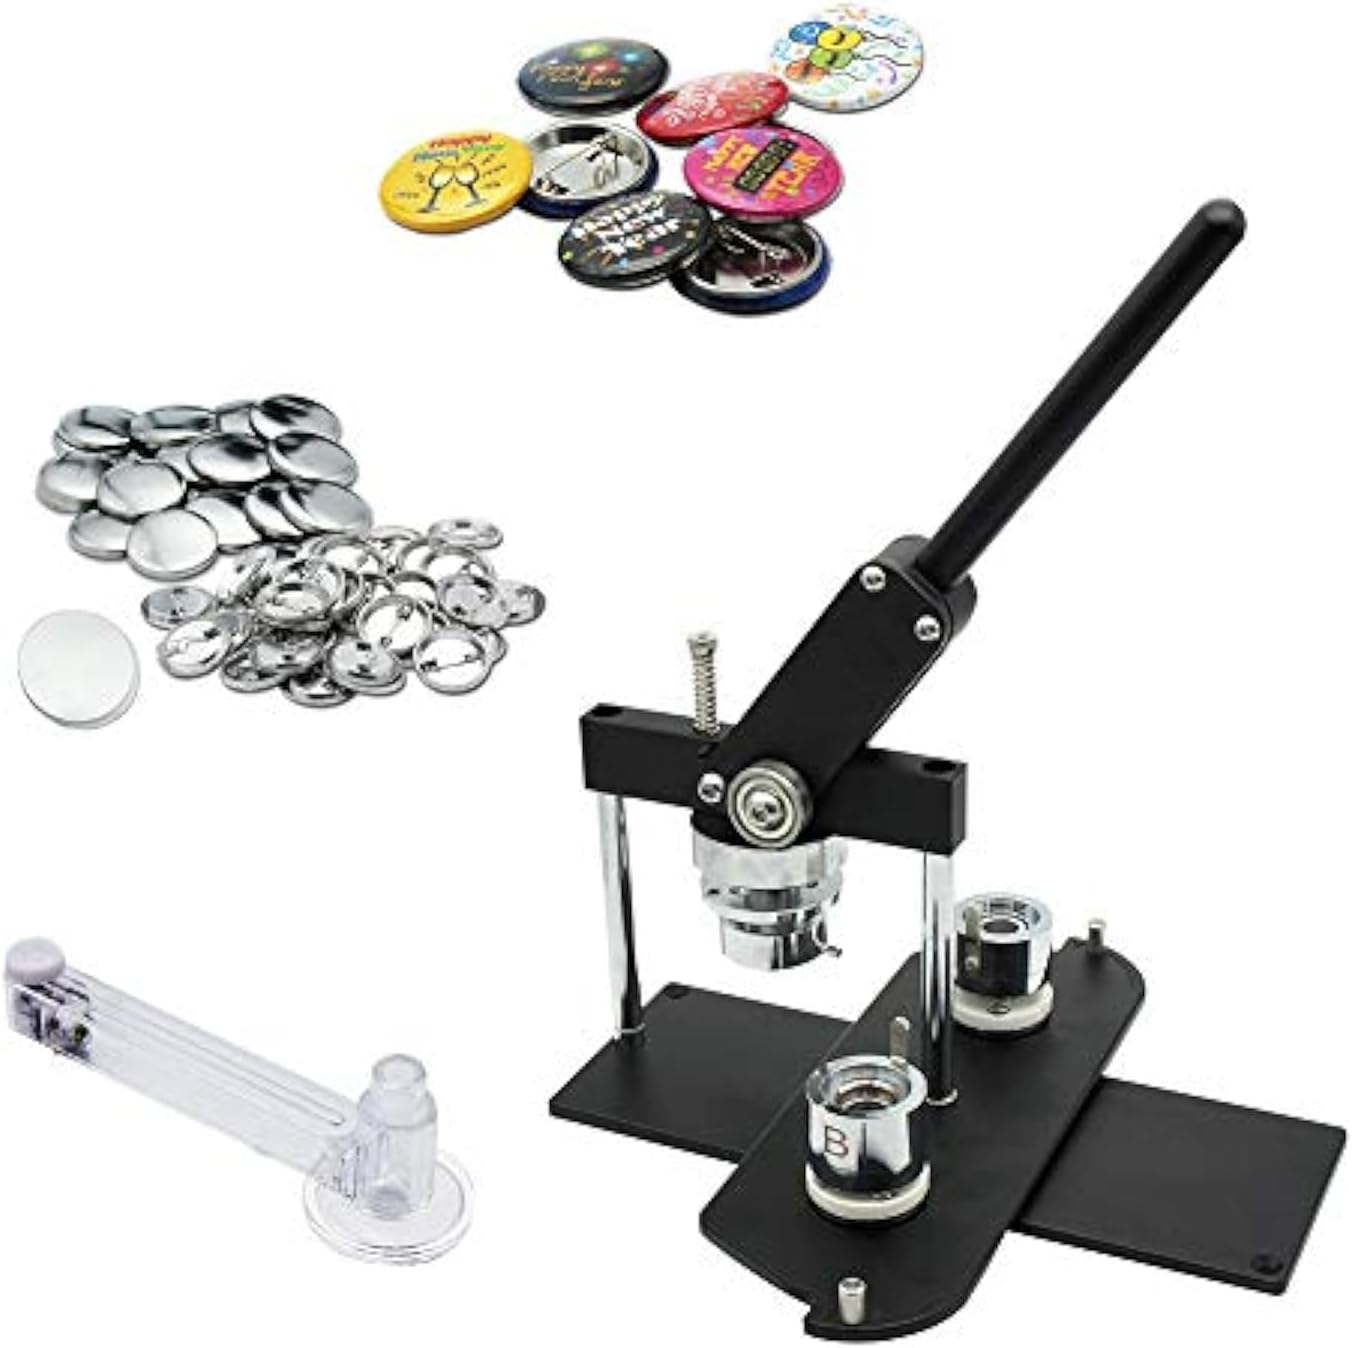
Figure 1: ChiButtons Pro 25mm Button Maker Machine B400 Kit, including the press, button components, and circle cutter.
Setup Instructions
Your ChiButtons B400 Button Maker Machine comes largely pre-assembled for your convenience. Follow these steps for initial setup and mould installation:
- Unpacking: Carefully remove all components from the packaging. Ensure all items listed in your kit are present: Button Maker-B400, 25mm round die mould, 500 sets of pre-pinned buttons components, an adjustable circle cutter, and photo paper.
- Placement: Place the button maker machine on a stable, flat surface to ensure proper operation and prevent tipping.
- Mould Installation:
- Identify the upper mould socket and the little pin on the mould.
- Align the little pin with the socket to securely install the mould.
- Insert the mould into the upper mould socket.
- Install mould A into the holes marked "A", and mould B into the holes marked "B" on the swivel plate.
- Ensure the protruding location pin on Moulds A and B face each other and not facing away for correct alignment.

Figure 2: Detailed steps for installing the button maker moulds, emphasizing pin and socket alignment.
Operating Instructions: Making a Button
Follow these steps to create a 25mm pin badge button using your ChiButtons B400 machine:
- Prepare Components: Gather your button components: upper shell, paper design, Mylar film, gasket (note: no gasket in 25mm moulds), and pin-back.
- Load Mould A: Insert the upper shell, followed by your paper design, and then the Mylar film into mould A.
- Press First Stage: Pull down the handle firmly to press the components in mould A.
- Load Mould B: Rotate the mould support so mould B faces you. Place the gasket (if applicable for your mould size) first, followed by the pin-back into mould B.
- Press Second Stage: Pull down the handle once again firmly to complete the button assembly.
- Retrieve Button: Take the finished button from the mould.

Figure 3: Step-by-step process for creating a button, from loading components to retrieving the finished product.
Maintenance
To ensure the longevity and optimal performance of your ChiButtons B400 Button Maker Machine, regular maintenance is recommended:
- Cleaning: After each use, wipe down the machine with a soft, dry cloth to remove any dust or debris. Avoid using abrasive cleaners or solvents.
- Lubrication: Periodically apply a small amount of machine oil to moving parts, such as the handle pivot points and mould slides, to ensure smooth operation.
- Storage: Store the machine in a dry, dust-free environment when not in use.
- Mould Care: Keep moulds clean and free of residue. If components stick, gently clean the mould surfaces.
Troubleshooting
If you encounter issues while using your button maker, refer to the common problems and solutions below:
| Problem | Possible Cause | Solution |
|---|---|---|
| Button not forming correctly / Incomplete press | Incorrect component placement or insufficient pressure. | Ensure all components (shell, design, Mylar, pin-back) are correctly seated in the moulds. Apply firm and consistent pressure when pulling the handle. Verify mould alignment (A and B cups). |
| Machine jammed | Multiple button backs or components inserted at once. | Carefully inspect the moulds for jammed components. If accessible, gently remove them. Avoid forcing the handle. If the jam persists, contact customer support. |
| Moulds not aligning properly | Incorrect mould installation or loose pins. | Refer to the "Mould Installation" section in Setup. Ensure the protruding location pin on Moulds A and B face each other. Check that moulds are securely seated. |
| Buttons are loose or fall apart | Insufficient pressure or incorrect component type. | Apply more firm pressure during both pressing stages. Ensure you are using compatible button components for the 25mm mould. |
Specifications
| Feature | Detail |
|---|---|
| Brand | ChiButtons |
| Model Number | B400BLK-25C-500N-CA |
| Material | Aluminum |
| Color | Black-New |
| Operation Mode | Manual |
| Item Weight | 6.5 Kilograms (14.3 pounds) |
| Product Dimensions | 16.34 x 5.51 x 11.81 inches |
| Compatible Mould Sizes (Round) | 25mm, 32mm, 37mm, 44mm, 58mm, 75mm, 100mm (additional moulds sold separately) |

Figure 4: Dimensions of the ChiButtons B400 Button Maker Machine.
Warranty Information
The ChiButtons Pro 25mm (1") Metric Button Maker Machine B400 Kit includes a 1-year warranty on machines and moulds from the date of purchase. This warranty covers manufacturing defects and ensures the quality of your product. For any warranty claims or questions, please contact ChiButtons customer service.
Customer Support
ChiButtons is committed to providing professional and efficient customer service. If you have any questions, require assistance, or need to purchase refillable components and other supplies, please visit the official ChiButtons store or contact their support team directly.