Introduction
This manual provides instructions for the ORICO 2-Bay USB 3.0 SATA External Hard Drive Enclosure, Model 3529U3. This device is designed to house two 2.5-inch or 3.5-inch SATA SSDs or HDDs, offering up to 32TB of storage capacity for data backup and expansion. It features a USB 3.0 interface for high-speed data transfer and an integrated cooling system to ensure stable operation.

Figure 1: The ORICO 2-Bay USB 3.0 SATA External Hard Drive Enclosure.
Package Contents
- 1x 2-Bay Hard Drive Enclosure
- 1x 12V Power Adapter
- 1x 1M USB 3.0 Type-A Data Cable
- 1x User Manual
Specifications
| Brand | ORICO |
| Model Number | 3529U3 |
| Memory Storage Capacity | Up to 32 TB (2x16TB) |
| Compatible Devices | Desktop, Laptop, PS4, Router, Xbox |
| Hard Disk Form Factor | 2.5 Inches, 3.5 Inches |
| Max Number of Supported Devices | 2 |
| Data Transfer Rate | 5 Gigabits Per Second (USB 3.0) |
| Hardware Interface | USB 3.0 Type A, USB 3.0 Type B |
| Power Supply | 48W Power Adapter |
| Material | Aluminum Alloy |
| Compatible OS | Windows XP/7/8/8.1/10/VISTA, Linux, Mac 9.1/10.2 or higher |
Setup Instructions
- Prepare Hard Drives: Ensure your 2.5-inch or 3.5-inch SATA SSDs/HDDs are ready for installation.
- Open Enclosure Bays: Gently pull the drive bay handles to open the bays.
- Install Drives: Slide each hard drive into an empty bay until it clicks into place. For 3.5-inch drives, ensure they are securely seated. For 2.5-inch drives, you may need an adapter (not included) or ensure they are properly aligned and secured within the tray if the enclosure supports direct 2.5-inch installation without an adapter. The enclosure features screw fixation for stable and shockproof installation.
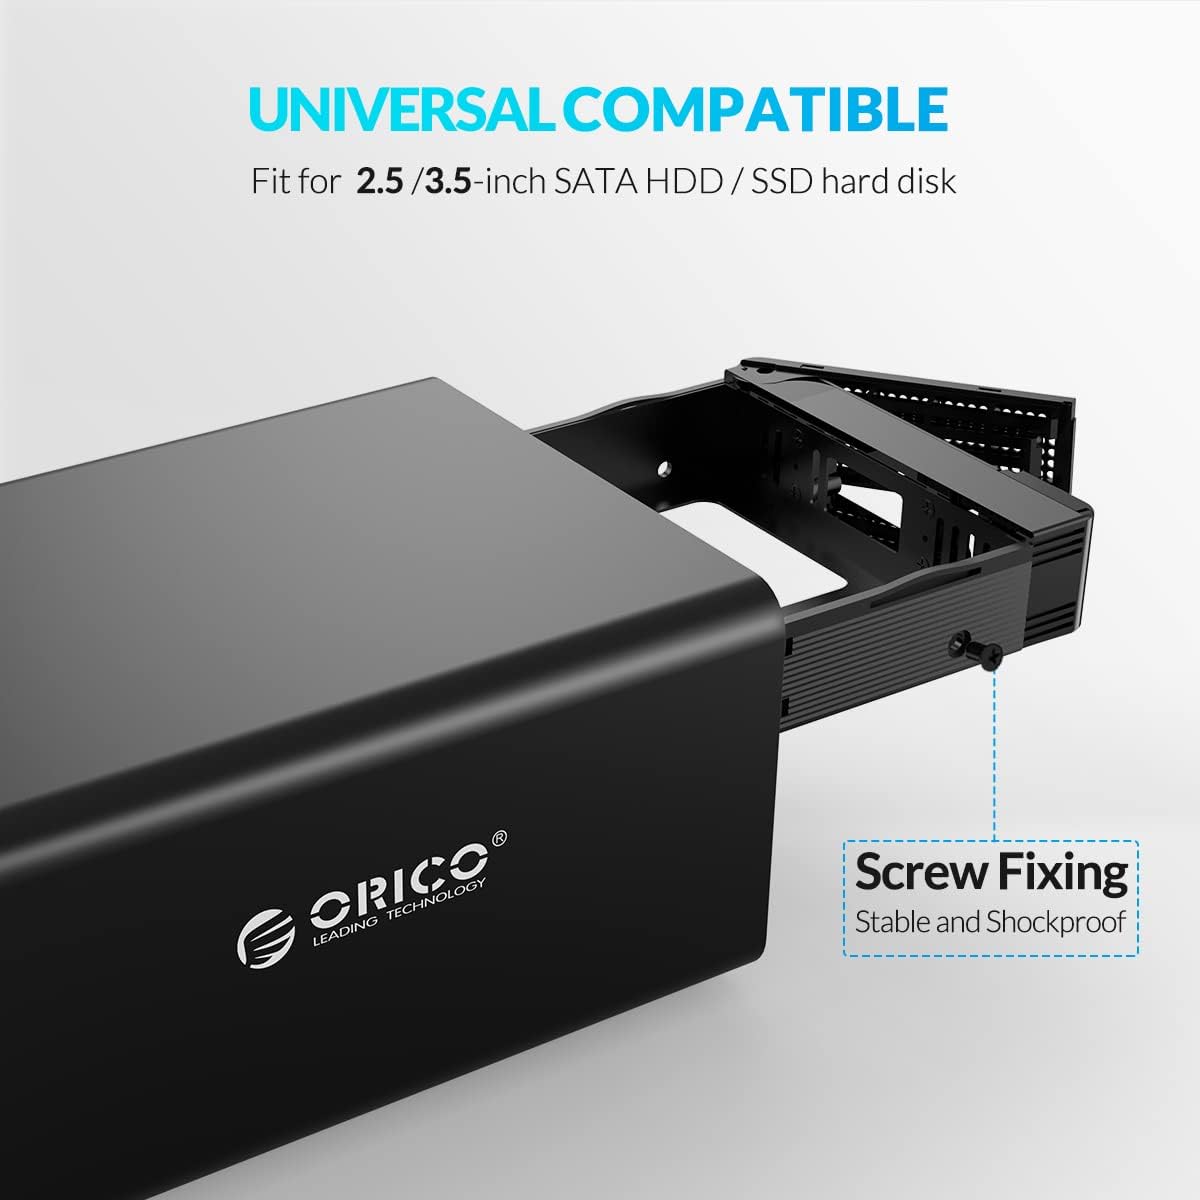
Figure 2: Installing a hard drive into the enclosure bay, highlighting the screw fixing mechanism for secure placement.
- Close Enclosure Bays: Push the drive bay handles back until they are flush with the enclosure.
- Connect Power Adapter: Connect the provided 48W power adapter to the enclosure's DC input port and then to a power outlet.

Figure 3: Connecting the 48W external power adapter to the enclosure.
- Connect Data Cable: Connect one end of the 1M USB 3.0 Type-A data cable to the enclosure's USB 3.0 port and the other end to an available USB 3.0 port on your computer or compatible device.
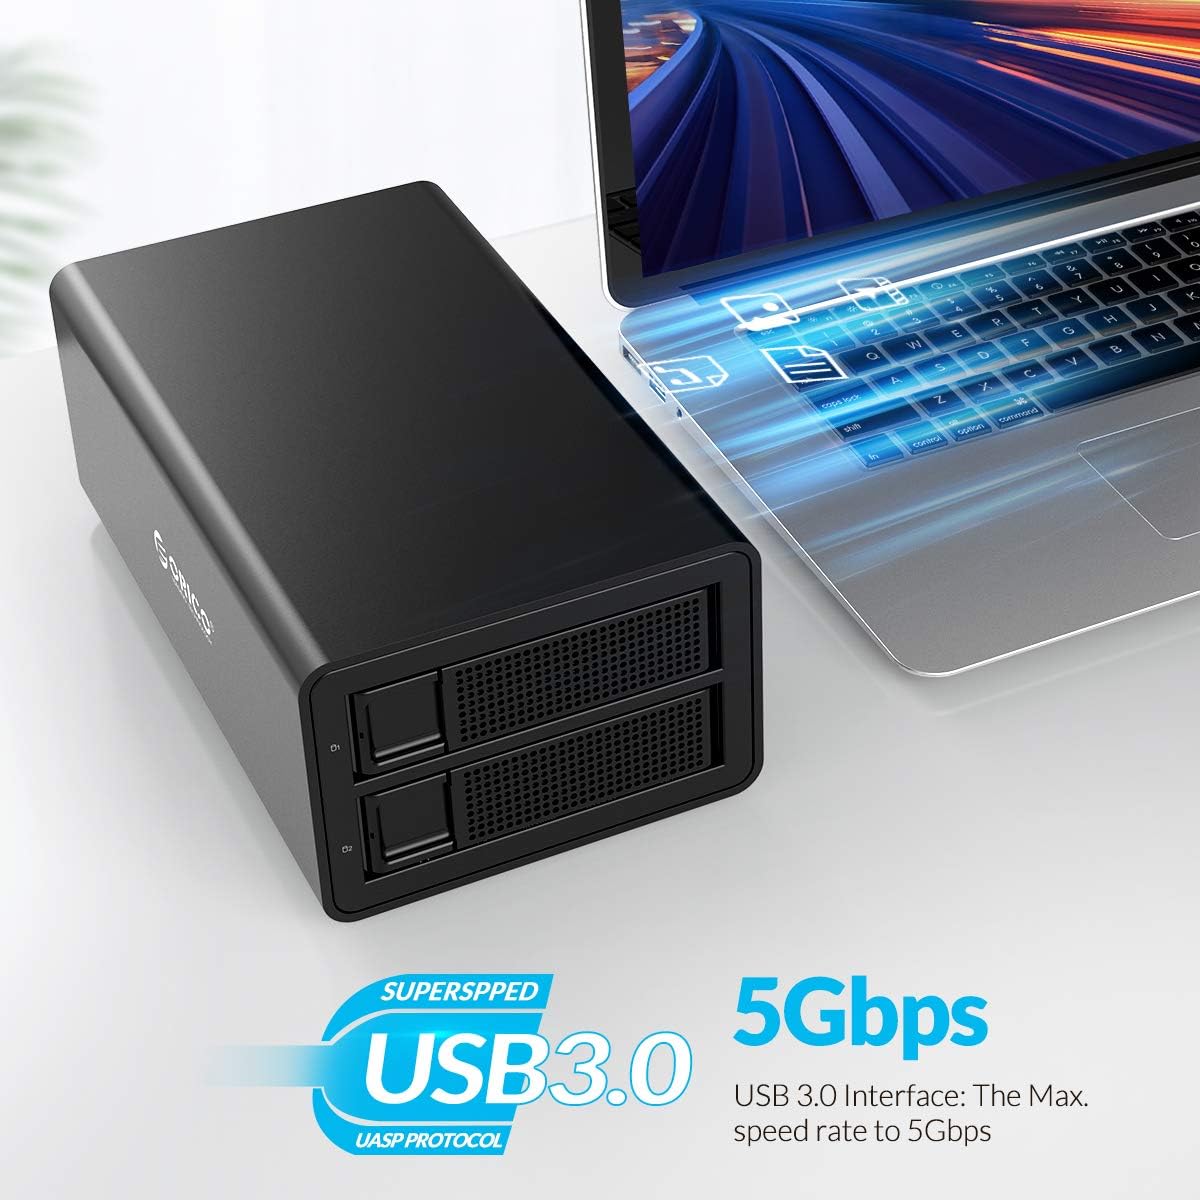
Figure 4: The ORICO enclosure connected to a laptop, demonstrating USB 3.0 connectivity and 5Gbps transfer speed.
- Power On: Press the power button on the enclosure. The LED indicators on the front panel will illuminate, indicating power and drive activity.

Figure 5: Detailed view of the enclosure's features, including LED indicators for drive status.
Operating Instructions
Once the enclosure is connected and powered on, your operating system should detect the new drives. You may need to initialize and format the drives before use, especially if they are new or have been used in a different system.
Drive Initialization and Formatting
For new hard drives or drives that are not recognized by your system, you will need to initialize and format them. The process varies slightly depending on your operating system.
Formatting in Windows:
Refer to the video below for a step-by-step guide on how to format hard drives in a Windows operating system.
Video 6: Instructions on how to format a hard drive partition in Windows. This video demonstrates accessing Disk Management, creating a new simple volume, and formatting the drive with NTFS.
Formatting in macOS:
Refer to the video below for a step-by-step guide on how to format hard drives in a macOS system.
Video 7: Instructions on how to format a hard drive partition in macOS. This video demonstrates using Disk Utility to erase and format a drive.
Formatting in Linux:
Refer to the video below for a step-by-step guide on how to format hard drives in a Linux operating system.
Video 8: Instructions on how to format a hard drive partition in Linux. This video demonstrates using the Disks utility to format a drive.
Data Transfer
Once formatted, the drives will appear as accessible storage devices on your computer. You can drag and drop files, or use backup software to transfer data to and from the enclosure. The USB 3.0 interface supports data transfer speeds up to 5Gbps.
Auto-Sleep Function
The enclosure features a 10-minute auto-sleep function. If there is no data activity for 10 minutes, the drives will enter sleep mode to prolong their service life and conserve energy. Drives will automatically wake up upon access.
Video 9: This video highlights the 10-minute auto-sleep feature of the ORICO hard drive enclosure, designed to extend the lifespan of the hard drives.
Maintenance
- Cleaning: Use a soft, dry cloth to clean the exterior of the enclosure. Do not use liquid cleaners or solvents.
- Cooling System: The enclosure is equipped with a cooling fan and ventilation holes. Ensure these are not obstructed to maintain optimal heat dissipation and extend the lifespan of your drives.
Figure 10: The 40x40mm cooling fan and ventilation holes designed for effective heat dissipation.
- Environmental Conditions: Operate the enclosure in a well-ventilated area, away from direct sunlight, excessive heat, and moisture.
Troubleshooting
- Drives Not Detected:
- Ensure the power adapter is securely connected and the enclosure is powered on.
- Verify the USB data cable is firmly connected to both the enclosure and your computer. Try a different USB port or cable.
- Check if the hard drives are properly seated in their bays.
- For new drives, ensure they are initialized and formatted through your operating system's Disk Management (Windows) or Disk Utility (macOS/Linux). Refer to the "Operating Instructions" section for video guides.
- Slow Transfer Speeds:
- Ensure you are using a USB 3.0 port on your computer and the provided USB 3.0 cable.
- Verify that your operating system and drivers are up to date.
- Performance can be affected by the speed of the installed hard drives.
- Enclosure Overheating:
- Ensure the ventilation holes and cooling fan are not blocked.
- Place the enclosure in an area with good airflow.
- Intermittent Disconnections:
- Check all cable connections (power and USB).
- Ensure the power adapter is providing stable power.
- Avoid placing the enclosure near strong electromagnetic interference sources.
Warranty and Support
ORICO products come with a standard manufacturer's warranty. For specific warranty details, technical support, or service inquiries, please refer to the warranty card included with your product or visit the official ORICO website. Please retain your proof of purchase for warranty claims.


