1. Introduction
The ORICO 2 Bay RAID Hard Drive Enclosure (Model 3529RU3) is designed for expanding storage capacity and data backup. This enclosure supports two 2.5-inch or 3.5-inch SATA I, II, or III hard disk drives (HDDs) or solid-state drives (SSDs), with a total capacity of up to 32TB (16TB per drive). It features a USB 3.0 interface for high-speed data transfer up to 5Gbps and offers RAID 0, RAID 1, and JBOD modes for flexible data management. The aluminum alloy casing and built-in cooling fan ensure efficient heat dissipation and stable operation. This manual provides detailed instructions for installation, configuration, and usage.
2. What's in the Box
- 1x ORICO 2 Bay RAID Hard Drive Enclosure (Model 3529RU3)
- 1x USB 3.0 Type-A Data Cable
- 1x 12V Power Adapter
- 1x User Manual
3. Setup Instructions
3.1 Hard Drive Installation
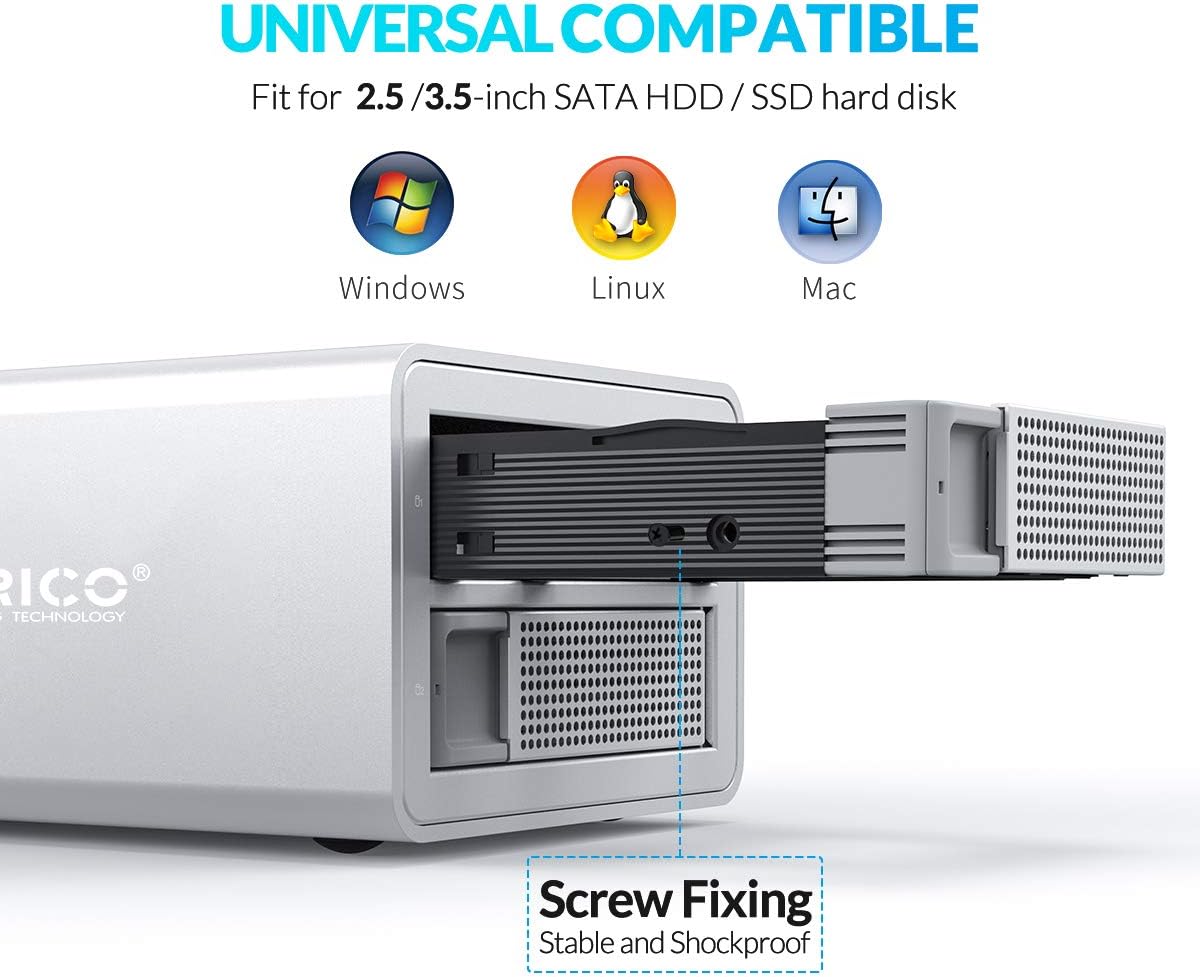
The enclosure supports both 2.5-inch and 3.5-inch SATA HDDs/SSDs. Ensure the enclosure is powered off and disconnected from your computer before installation.
- Gently pull out the drive trays from the front of the enclosure.
- For 3.5-inch drives, align the drive with the screw holes on the tray and secure it using the provided screws. For 2.5-inch drives, use the adapter bracket (if included) or secure directly if the tray supports it.
- Slide the loaded drive tray back into the enclosure until it clicks into place. Repeat for the second drive.
3.2 Connecting the Enclosure
- Connect the 12V power adapter to the enclosure's power input port and then to a power outlet.
- Connect the USB 3.0 data cable from the enclosure's USB port to an available USB 3.0 port on your computer.
- Power on the enclosure using the power switch. The LED indicators on the front panel will illuminate.

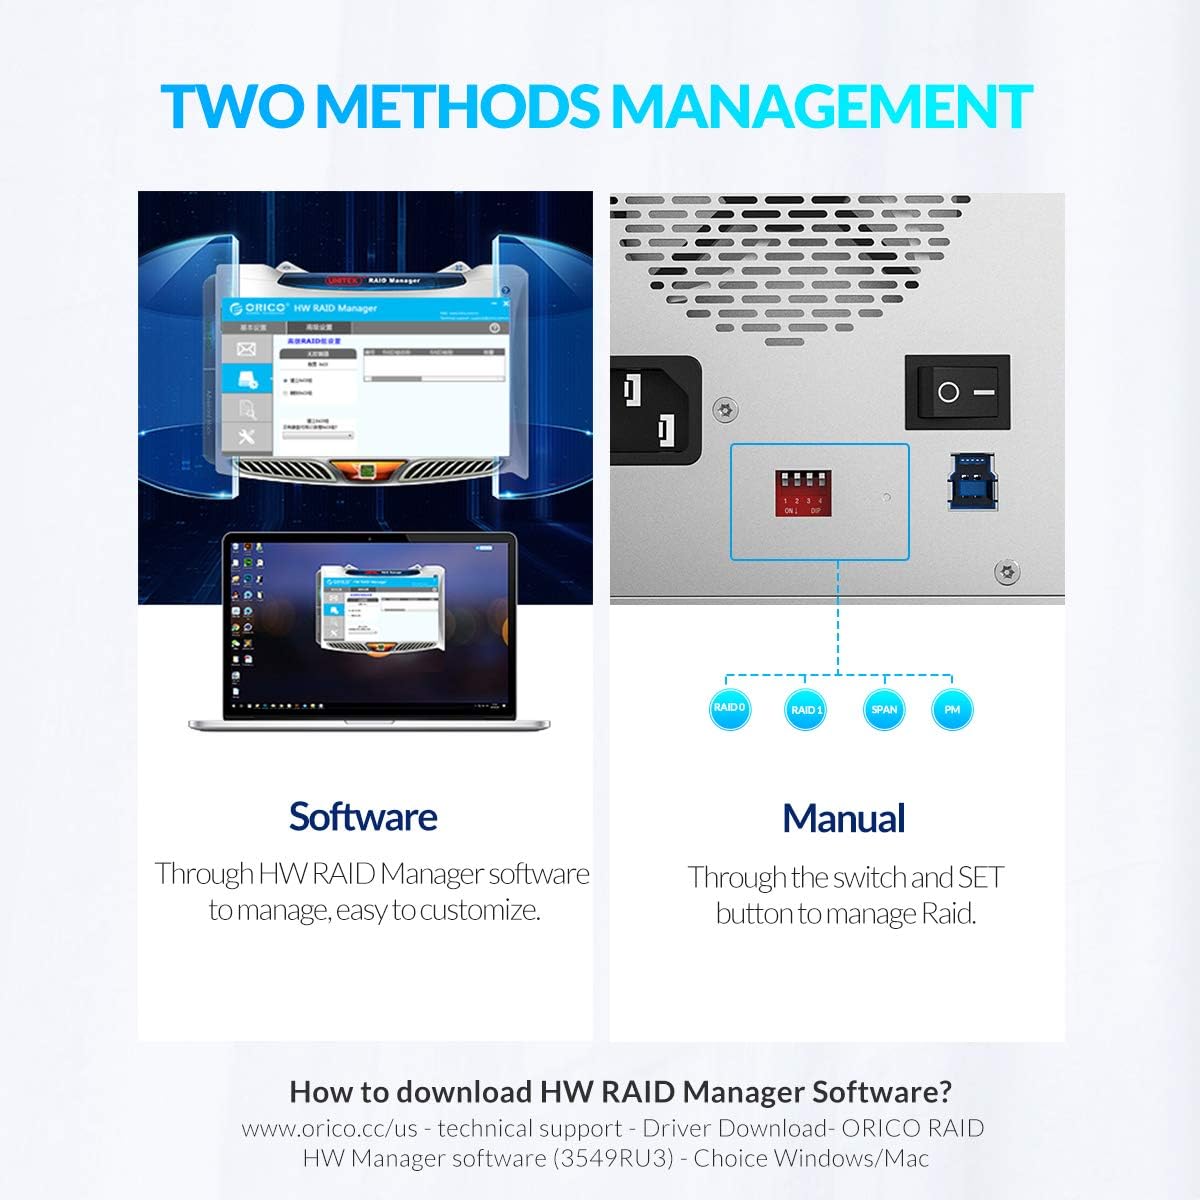
3.3 RAID Mode Configuration
The enclosure supports RAID 0 (Striping), RAID 1 (Mirroring), and JBOD (Just a Bunch Of Disks) modes. You can configure these modes either manually via DIP switches or using the ORICO HW RAID Manager software.
Important: Changing RAID modes will erase all data on the drives. Back up any important data before proceeding.
Manual Configuration (DIP Switches)
- Ensure the enclosure is powered off and disconnected from your computer.
- Locate the DIP switches on the rear panel of the enclosure.
- Set the DIP switches according to the desired RAID mode (refer to the diagram below or the enclosure's label for specific switch positions).
- Press and hold the 'SET' button (usually located near the DIP switches) while powering on the enclosure. Continue holding until the mode is confirmed (e.g., LED indication).
- Release the 'SET' button. The new RAID mode is now configured.
Software Configuration (ORICO HW RAID Manager)
Download the ORICO HW RAID Manager software from the official ORICO website (www.orico.cc/us - Technical Support - Driver Download - ORICO RAID HW Manager software). Follow the software's instructions to configure your desired RAID mode.
4. Operating Instructions
4.1 Initial Drive Formatting
After installing new hard drives and configuring the RAID mode, the drives must be formatted before they can be used. This process creates a file system that your operating system can recognize.
Watch the video below for detailed steps on how to format your hard drive on Windows, macOS, and Linux systems:
4.2 Data Transfer
Once formatted, your drives are ready for data transfer. Connect the enclosure to your computer via the USB 3.0 cable. The enclosure will appear as a new drive or drives (depending on your RAID configuration) in your operating system's file explorer. You can then drag and drop files or use backup software to transfer data.


4.3 Auto-Sleep Function
The enclosure features an auto-sleep function that activates after 10 minutes of inactivity. This feature helps to conserve power and prolong the lifespan of your hard drives by reducing wear and tear when not in use.
5. Maintenance
5.1 Cooling System
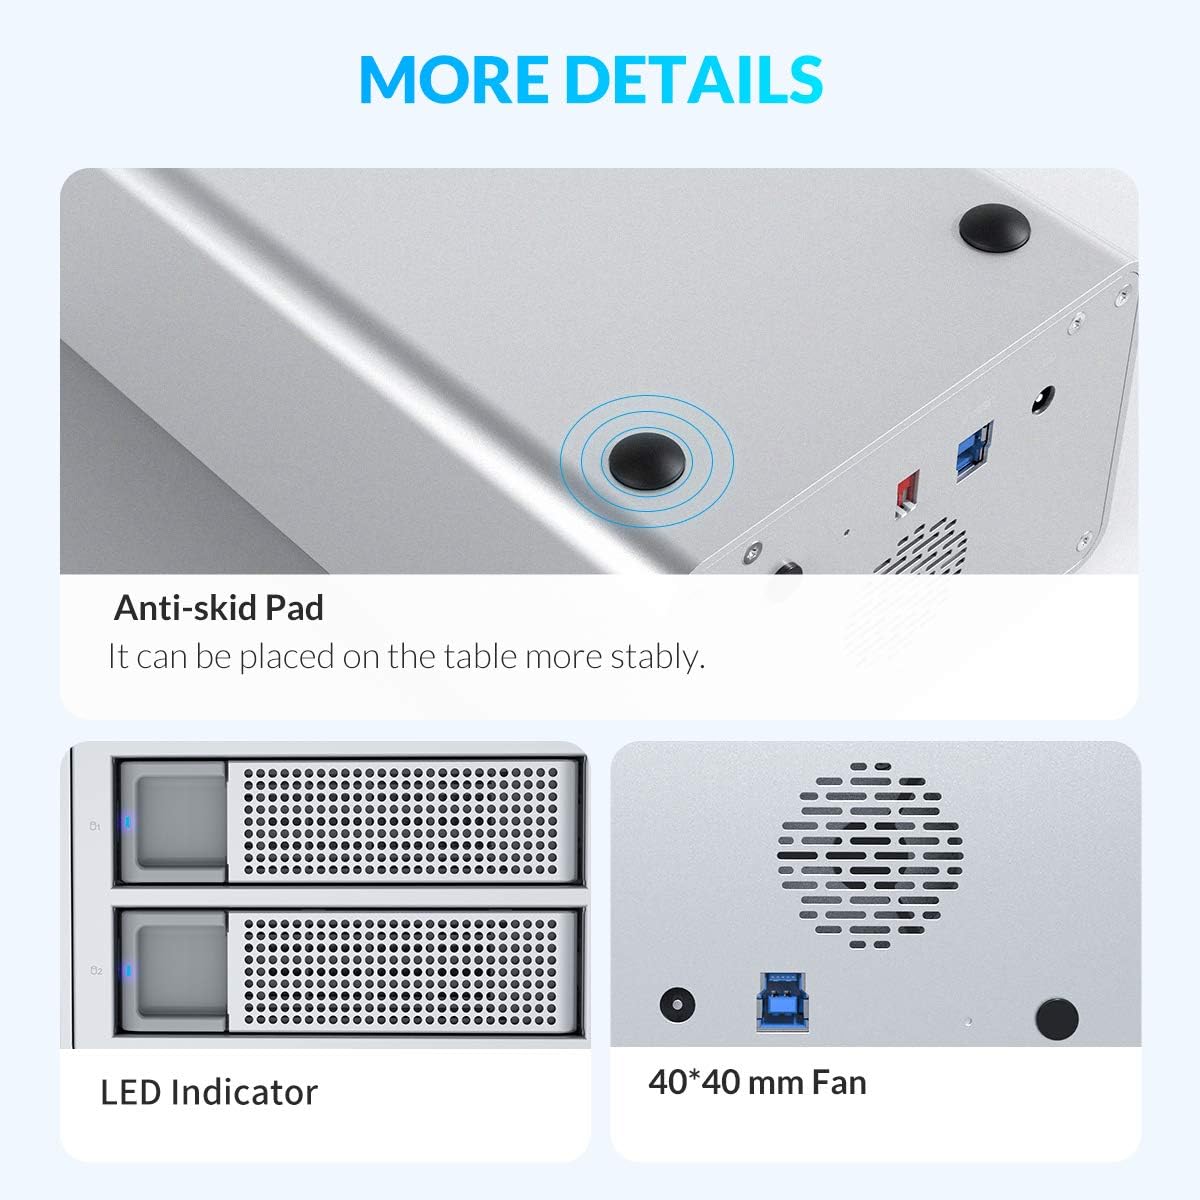
The ORICO 3529RU3 enclosure is equipped with an aluminum alloy shell, ventilation holes, and a built-in 40x40mm cooling fan. These features work together to speed up air circulation and effectively dissipate heat, ensuring optimal performance and extending the lifespan of your drives. Ensure the ventilation areas are not obstructed.
5.2 Cleaning
To clean the enclosure, power it off and disconnect all cables. Use a soft, dry cloth to wipe the exterior. Avoid using liquid cleaners or abrasive materials that could damage the finish or internal components.
6. Troubleshooting
- Drive Not Recognized:
- Ensure the enclosure is powered on and properly connected to your computer via the USB cable.
- Verify that the hard drives are correctly seated in their trays and the trays are fully inserted into the enclosure.
- Check the RAID mode settings. If you changed the RAID mode, the drives might need re-initialization and formatting.
- For new drives, ensure they are initialized and formatted through your operating system's Disk Management (Windows) or Disk Utility (macOS/Linux). Refer to Section 4.1 for formatting instructions. - Slow Data Transfer Speed:
- Ensure you are using a USB 3.0 port on your computer and the provided USB 3.0 cable.
- Check if other USB devices are consuming significant bandwidth.
- The actual transfer speed can be affected by the performance of the installed hard drives and your computer's system. - Enclosure Overheating:
- Ensure the enclosure is placed in a well-ventilated area and the cooling fan/vents are not obstructed.
- High ambient temperatures or continuous heavy load can contribute to heat. - Data Corruption:
- Always safely eject the enclosure from your operating system before disconnecting power or the USB cable.
- Ensure stable power supply. Use the provided 48W power adapter.
- If data corruption occurs, it may indicate a drive failure or an issue with the RAID configuration. Consider backing up data immediately and re-evaluating your setup.
7. Specifications
| Feature | Specification |
|---|---|
| Model Number | 3529RU3 |
| Drive Bays | 2 |
| Compatible Drives | 2.5/3.5 inch SATA I/II/III HDD/SSD |
| Max Capacity | 32TB (2 x 16TB) |
| RAID Modes | RAID 0, RAID 1, JBOD |
| Interface | USB 3.0 Type-A |
| Data Transfer Rate | Up to 5Gbps |
| Power Supply | 48W External Power Adapter |
| Cooling | Built-in 40x40mm fan, Aluminum alloy casing |
| Compatibility | Windows XP/7/8/8.1/10/VISTA, Linux, Mac 9.1/10.2 or higher |
| Dimensions (L x W x H) | 9.21 x 5.31 x 3.69 inches |
| Material | Metal |

8. Warranty and Support
ORICO products come with a standard warranty. For specific warranty terms, technical support, or service inquiries, please refer to the warranty card included with your product or visit the official ORICO website at www.orico.cc. You can also contact ORICO customer service directly for assistance.


