
1. Important Safety Information
Before operating the BARWING X2 Stationary Exercise Bike, please read and understand all safety instructions. Retain this manual for future reference.
- Consult a Physician: Before starting any exercise program, especially if you have pre-existing health conditions, consult your doctor.
- Weight and Height Limits: This exercise bike is designed for users with a maximum weight of 160 kg (350 lbs) and a recommended height range of 4'11" to 6'6".
- Proper Assembly: Ensure all parts are correctly assembled and tightened before use. Regularly check all bolts and connections.
- Clearance: Maintain a safe clearance area of at least 0.6 meters (2 feet) around the exercise bike during use.
- Stable Surface: Place the exercise bike on a flat, stable surface to prevent tipping.
- Children and Pets: Keep children and pets away from the exercise bike during operation.
- Proper Attire: Wear appropriate exercise clothing and athletic shoes. Avoid loose clothing that could get caught in moving parts.
- Listen to Your Body: Stop exercising immediately if you feel pain, dizziness, or shortness of breath.
- Elderly Users: Elderly individuals should adjust their exercise intensity according to their personal physical condition.
2. Product Overview
The BARWING X2 Stationary Exercise Bike is a versatile 5-in-1 foldable indoor cycling bike designed for home workouts. It features 16 levels of magnetic resistance, adjustable seating, and a multi-function LCD display.

Figure 2.1: BARWING X2 Stationary Exercise Bike (X2-grey)
3. Setup and Assembly
Assembly typically takes 1 to 2 hours. It is recommended to have a second person assist with certain steps.
3.1 Unpacking
- Carefully remove all components from the packaging.
- Check the parts list against the included hardware to ensure all items are present.
- Lay out all parts on a clean, flat surface.
3.2 Assembly Steps (General Guidelines)
- Attach the front and rear stabilizer bars to the main frame.
- Install the pedals. Ensure they are threaded correctly (left pedal is reverse-threaded) and tighten them firmly using the provided wrench to prevent clicking noises during use.
- Mount the seat post and seat, adjusting to your preferred height and angle.
- Install the handlebars and the LCD monitor. Connect the sensor wires to the monitor.
- Attach any additional accessories, such as resistance bands.
- Double-check all bolts, nuts, and connections to ensure they are secure.
Video 3.1: Official BARWING X2 Exercise Bike Assembly Guide. This video demonstrates the step-by-step process for assembling the exercise bike, including attaching the base, pedals, seat, handlebars, and connecting the monitor.
4. Operating Instructions
4.1 Adjusting the Bike
- Seat Height: The seat offers 8 levels of height adjustment. Loosen the adjustment knob below the seat, slide the seat post to the desired height, and re-tighten securely.
- Seat Angle: The seat backrest can be adjusted to 2 different angles for comfort.
- Workout Posture: The bike supports three main postures: upright, reclined, and folded. Adjust the frame according to your desired workout style.

Figure 4.1: Seat Height and Angle Adjustments
4.2 Setting Resistance
The BARWING X2 features 16 levels of magnetic resistance. Turn the resistance knob located on the main frame clockwise to increase resistance (higher intensity) and counter-clockwise to decrease resistance (lower intensity).

Figure 4.2: Resistance Adjustment Knob
4.3 Using the LCD Monitor
The LCD monitor tracks your workout data. It requires 2 AAA batteries (not included).
- Functions: Displays Time, Speed, Distance, Calories Burned, Odometer, and Pulse (if equipped with pulse sensors).
- SCAN Mode: Automatically cycles through all display functions.
- MODE Button: Press to select a specific display function or to exit SCAN mode.
- SET Button: Used to set target values for time, distance, or calories (refer to monitor-specific instructions for detailed use).
- RESET Button: Press and hold to clear all current workout data.

Figure 4.3: LCD Monitor Display
4.4 Multifunctional Workouts
The BARWING X2 offers various workout configurations:
- Upright Standard: Traditional cycling posture.
- Upright Competitive: More aggressive cycling posture.
- Relaxing Cycling: Comfortable, less intense cycling.
- Arm Strength Training: Utilize the integrated resistance bands for upper body exercises while cycling.
- Leg Stretch: Use the resistance bands for lower body stretching or light resistance exercises.

Figure 4.4: 5-in-1 Multifunctional Bike Configurations
4.5 Folding and Storage
The bike can be folded for compact storage. It also features transport wheels for easy movement.
- To fold, follow the instructions in the assembly guide for reversing the folding mechanism. Ensure the bike is securely locked in the folded position.
- To move, tilt the bike onto its front transport wheels and roll it to the desired location.
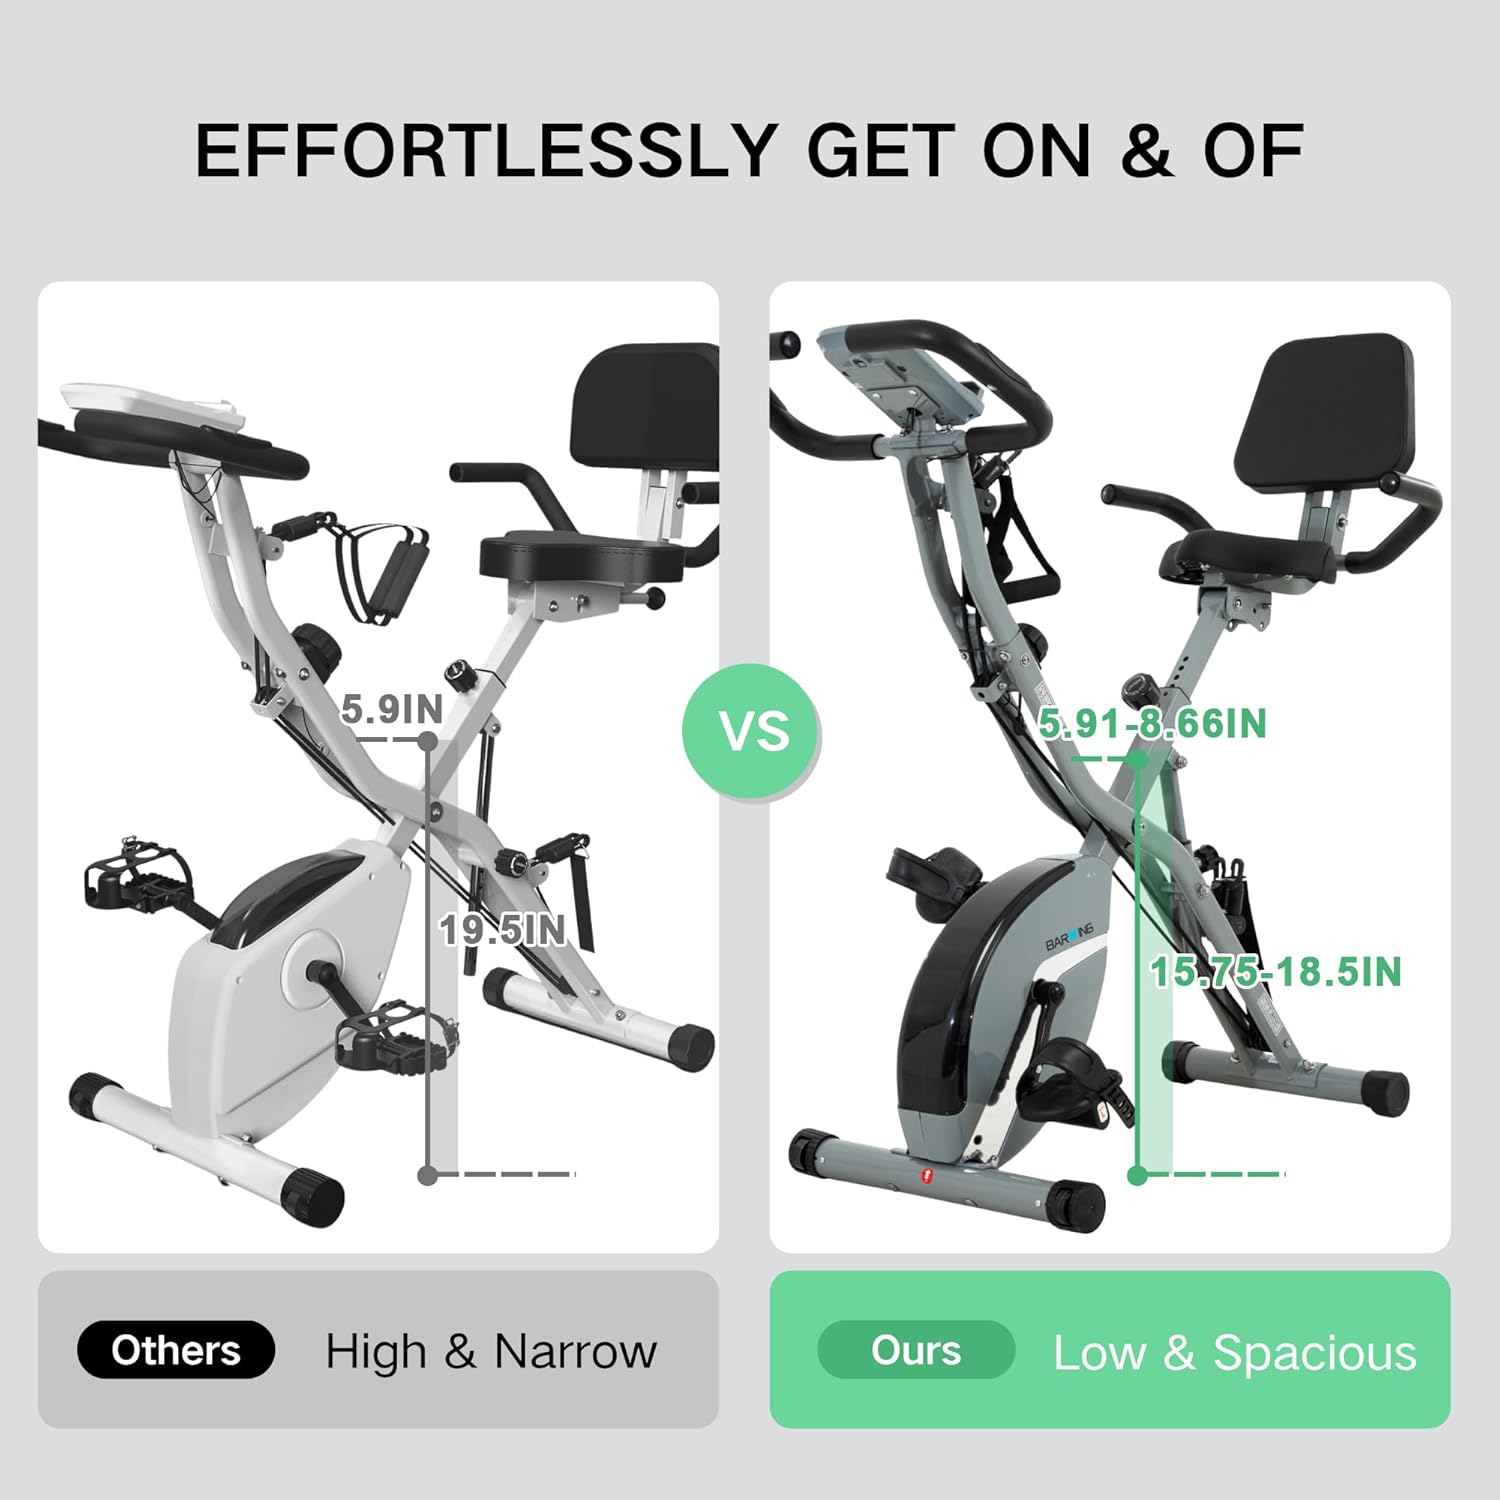
Figure 4.5: Folding and Transporting the Exercise Bike
5. Maintenance
Regular maintenance ensures the longevity and safe operation of your exercise bike.
- Cleaning: Wipe down the bike with a damp cloth after each use to remove sweat and dust. Avoid abrasive cleaners.
- Check Connections: Periodically inspect all bolts, nuts, and moving parts for tightness. Re-tighten as necessary.
- Lubrication: The belt drive system requires minimal maintenance. Consult the manufacturer if you notice any unusual noises or friction that might indicate a need for lubrication.
- Battery Replacement: Replace the AAA batteries in the LCD monitor when the display becomes dim or stops functioning.
6. Troubleshooting
| Problem | Possible Cause | Solution |
|---|---|---|
| Clicking noise during pedaling | Loose pedals or other connections. | Ensure pedals are firmly tightened. Check and tighten all assembly bolts. |
| LCD monitor not displaying data | Dead batteries; loose sensor connection. | Replace AAA batteries. Check that the sensor wire is securely connected to the monitor. |
| Resistance not changing | Resistance knob not properly engaged; internal mechanism issue. | Ensure the resistance knob is turning freely and engaging. If the issue persists, contact customer support. |
| Bike feels unstable | Uneven surface; loose stabilizer bolts. | Place the bike on a flat, level surface. Check and tighten all bolts on the stabilizer bars. |
7. Specifications
| Feature | Detail |
|---|---|
| Brand | BARWING |
| Model Number | BW-SPN06 (GT-818) |
| Product Dimensions (L x W x H) | 55.88 x 81.28 x 121.92 cm (22 x 32 x 48 inches) |
| Item Weight | 18.14 kg (40 lbs) |
| Maximum Weight Recommendation | 160 kg (350 lbs) |
| Recommended User Height | 4'11" to 6'6" |
| Resistance Mechanism | Magnetic |
| Number of Resistance Levels | 16 |
| Drive System | Belt |
| Power Source | Pedal-powered (Bike), 2 AAA batteries (Monitor) |
| Material | Alloy Steel (Frame), Stainless Steel (Handle) |
| Special Features | Adjustable Seat, Foldable Design, Transport Wheels, Resistance Bands, Phone Holder |
| Noise Level | <20dB |

Figure 7.1: Product Dimensions and Details
8. Warranty and Support
BARWING is committed to providing excellent customer service.
- Warranty: This product comes with a 1-year warranty service.
- Returns: Free return and exchange are available within 30 days of purchase.
- Customer Support: For any questions or concerns, please contact us. We guarantee a satisfied solution within 24 hours.
- Manufacturer Contact: Kurono Fitness
- Email Support: service@barwing.cc