1. Introduction
The RaeSung TES-135A is a portable color meter designed for precise measurement of color differences between two samples. This device is equipped with an LCD display and a USB interface for data logging, making it suitable for various industrial and scientific applications requiring accurate color analysis. This manual provides detailed instructions for the proper setup, operation, and maintenance of your TES-135A Color Meter.

Figure 1.1: Front view of the TES-135A Color Meter, showing the LCD display and control buttons.
2. Package Contents
Before proceeding with the setup, please verify that all items listed below are present in your package:
- RaeSung TES-135A Color Meter
- Instruction Manual
- 9V Battery
- USB Cable
- Software CD
- Protective Carrying Case (if included with your model)
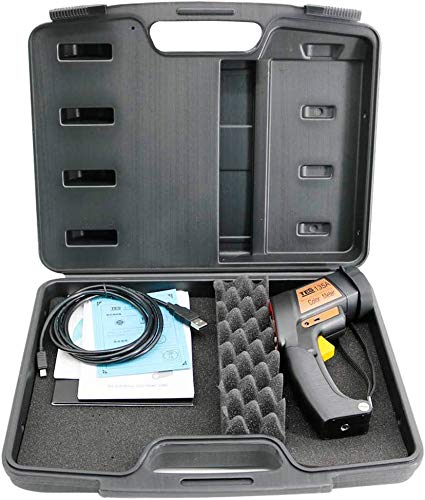
Figure 2.1: Included accessories: TES-135A meter, USB cable, software CD, and instruction manual.
3. Setup
3.1 Battery Installation
- Locate the battery compartment cover on the back of the device.
- Slide or unclip the cover to open it.
- Insert one 9V battery, ensuring correct polarity (+/-).
- Replace the battery compartment cover securely.
3.2 Software Installation (for USB Datalogging)
To utilize the USB datalogging features, install the provided software on your computer:
- Insert the software CD into your computer's CD-ROM drive.
- Follow the on-screen instructions to install the TES-135A data logging software.
- If your computer lacks a CD drive, please visit the RaeSung official website for software downloads.
3.3 Connecting to a Computer via USB
After installing the software, you can connect the color meter to your computer:
- Ensure the TES-135A is powered off.
- Connect one end of the supplied USB cable to the USB port on the side of the color meter.
- Connect the other end of the USB cable to an available USB port on your computer.
- Power on the TES-135A. The computer should detect the device, and the installed software can now be used to transfer data.

Figure 3.1: Detail of the measurement sensor and USB port for data connection.
4. Operating Instructions
4.1 Powering On/Off
- To power on the device, press the Power button (usually marked 'T' or a power symbol).
- The LCD display will illuminate, showing the current measurement mode.
- To power off, press and hold the Power button until the display turns off. The device also features an auto power-off function after approximately 3 minutes of inactivity.
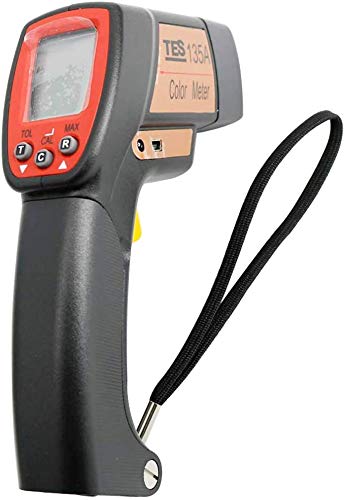
Figure 4.1: Side view showing the control buttons and wrist strap attachment point.
4.2 Basic Color Measurement
The TES-135A measures color difference between a target sample and a reference sample.
- Calibration: Before first use or after prolonged storage, perform a white calibration. Place the meter's sensor firmly against the standard white plate (usually included) and press the CAL button.
- Set Reference: Place the meter's sensor firmly against your reference sample. Press the T (Target) button to store this as the reference color. The display will indicate that the target color has been set.
- Measure Sample: Place the meter's sensor firmly against the sample you wish to compare. Press the R (Read) button.
- View Results: The display will show the color difference values (e.g., ΔL*, Δa*, Δb*) between the sample and the reference.
The device supports various color difference and color space displays:
- Color difference: Δ(L*,a*,b*), Δ(E*ab,C*ab, H*ab), Δ(Y, x, y), Δ(X, Y, Z) or Δ(Rs, Gs, Bs)
- Color space: (L*, a*, b*), (L*, C*ab, hab), (Y, x, y), (X, Y, Z) or (Rs, Gs, Bs)
Refer to the on-screen menu or specific buttons (if available) to cycle through these display modes.
4.3 Advanced Functions
- Maximum, Minimum, and Average Function: Press the MAX/MIN/AVG button (or similar) to cycle through these statistical values for a series of measurements.
- Tolerance Function: Activate the tolerance function to set acceptable color difference limits. The device will indicate if a measured sample falls within or outside these limits (e.g., PASS/FAIL). Consult the manual for specific button presses to set tolerance values.
- Auto Memory (99 sets) & Read Function: The device automatically stores up to 99 sets of measurement data. Use the MEM or READ buttons to recall stored data.
- Target Color Memory (8 channels): The device can store 8 different target colors. These can be set by measurement or manually entered via the keypad (if available).
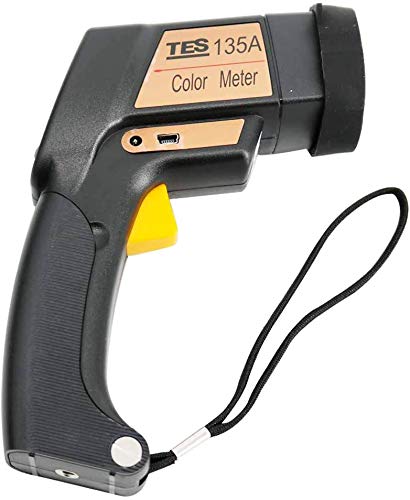
Figure 4.2: The measurement trigger button, typically used to initiate a reading.
5. Maintenance
5.1 Cleaning the Device
- Wipe the exterior of the device with a soft, dry cloth.
- For stubborn dirt, a slightly damp cloth with mild detergent can be used, followed by a dry wipe.
- Important: Do not use abrasive cleaners, solvents, or immerse the device in water. Keep the measurement sensor clean and free from dust or debris to ensure accurate readings.
5.2 Battery Replacement
When the battery indicator on the LCD display shows low power, replace the 9V battery as described in Section 3.1. Always dispose of used batteries responsibly according to local regulations.
5.3 Storage
Store the TES-135A Color Meter in its protective carrying case when not in use. Keep it in a cool, dry place, away from direct sunlight, extreme temperatures, and high humidity.
- Storage temperature/humidity range: -10°C to 40°C (14°F to 104°F); less than 70% relative humidity.
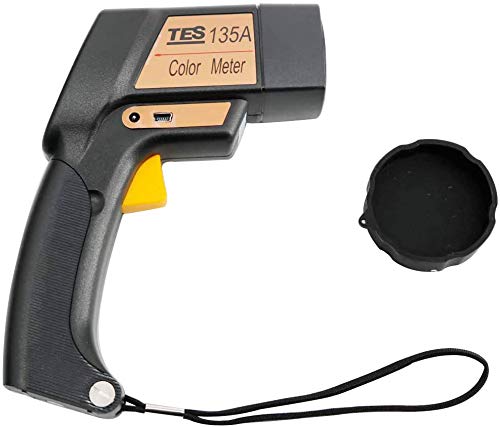
Figure 5.1: The color meter with its protective cap, essential for sensor protection during storage.

Figure 5.2: The color meter and accessories neatly stored in the carrying case.
6. Troubleshooting
This section addresses common issues you might encounter with your TES-135A Color Meter.
| Problem | Possible Cause | Solution |
|---|---|---|
| Device does not power on. | Low or dead battery; incorrect battery installation. | Replace the 9V battery. Ensure correct polarity. |
| Inaccurate or inconsistent readings. | Sensor lens is dirty; improper calibration; unstable measurement surface. | Clean the sensor lens. Perform white calibration. Ensure the meter is held firmly and flat against the sample. |
| USB data transfer not working. | Software not installed; incorrect USB cable connection; device not powered on. | Install the software from the CD or manufacturer's website. Ensure the USB cable is securely connected. Power on the device. |
| Display shows "LOW BATT". | Battery is low. | Replace the 9V battery immediately. |
7. Specifications
Detailed technical specifications for the RaeSung TES-135A Color Meter:
| Feature | Detail |
|---|---|
| Display | Triple 4-digit LCD display |
| Illuminating/Viewing Geometry | 45° / 0° - 1 illumination at 45°, measurement at 0° |
| Measuring Area | Approx. φ10mm |
| Display Modes (Color Difference) | Δ(L*,a*,b*), Δ(E*ab,C*ab, H*ab), Δ(Y, x, y), Δ(X, Y, Z) or Δ(Rs, Gs, Bs) |
| Display Modes (Color Space) | (L*, a*, b*), (L*, C*ab, hab), (Y, x, y), (X, Y, Z) or (Rs, Gs, Bs) |
| Target Color Memory | 8 channels; set by measurement or keypad |
| Measuring Range | L* : 10 to 100 |
| Measurement Conditions | Observe: CIE 2° Standard Observer. Illuminant: White LED lamp. |
| Repeatability | Standard deviation within ΔE*ab 0.5 (Average of measurements of standard white plate) |
| Minimum Interval between Measurements | Approx. 2 seconds |
| Auto Data Memory & Read | 99 sets |
| Auto Power Off | Approx. 3 minutes |
| Power Source | One 9V battery and DC 9V AC adapter input |
| Battery Life | Approx. 500 measurements at 10-sec intervals |
| Operating Temperature/Humidity Range | 0°C to 40°C (32°F to 104°F); less than 85% relative humidity |
| Storage Temperature/Humidity Range | -10°C to 40°C (14°F to 104°F); less than 70% relative humidity |
| Dimensions | 172mm × 118mm × 46mm |
| Weight | Approx. 220g |
| Accessories | Instruction manual, Battery, USB cable, software CD |
8. Warranty and Support
For warranty information, technical support, or service inquiries, please refer to the warranty card included with your product or contact RaeSung customer service directly. Contact details can typically be found on the manufacturer's official website or in the product packaging.
Please retain your purchase receipt as proof of purchase for warranty claims.