1. Introduction
The Jebao Doser 2.4 is an advanced 4-channel auto dosing pump designed for saltwater reef aquariums. This device enables precise and automated dispensing of various solutions, helping to maintain stable tank parameters. It features Wi-Fi connectivity for convenient programming and control via a mobile application. Each pump can be programmed for up to 24 daily doses, with adjustable volumes.
2. Package Contents
Verify that all items are present in the package:
- Jebao Doser 2.4 Dosing Pump x1
- Power Adapter x1
- Instruction Manual x1

Image: The Jebao Doser 2.4 unit shown with its accompanying power adapter.
3. Setup
3.1 Initial Placement and Connections
Place the dosing pump in a secure, dry location near your aquarium. Ensure the dosing solution containers are positioned below the dosing dispense point to prevent siphoning in case of pump failure. Connect the power adapter to the dosing pump and a suitable power outlet.

Image: The Jebao Doser 2.4 with dosing tubes connected to each of its four channels.
3.2 Wi-Fi Connection and App Setup
The Doser 2.4 connects to your home Wi-Fi network (2.4GHz only) via the Jebao Aqua app.
- Download the "Jebao Aqua" app from your device's app store (available for iOS and Android).
- Open the app and create an account or log in.
- Ensure your mobile device is connected to a 2.4GHz Wi-Fi network.
- In the app, navigate to "My Devices" and tap the "+" icon to add a new device.
- Select "Doser" from the list of device types.
- Follow the on-screen instructions to put the dosing pump into pairing mode. This typically involves pressing the ESC button for 5 seconds until the Wi-Fi indicator light blinks.
- Enter your Wi-Fi network name and password when prompted.
- Once connected, the device will appear in your "My Devices" list.

Image: Screenshot of the Jebao Aqua app's 'My Devices' screen, prompting to add a new device.

Image: Screenshot of the Jebao Aqua app's 'Add device' screen, highlighting the 'Doser' option.

Image: Screenshot of the Jebao Aqua app showing instructions to press the power button for 5 seconds to enter pairing mode.

Image: Screenshot of the Jebao Aqua app's 'My Devices' screen, showing a successfully added device.
Note on Wi-Fi Connectivity: Some users with mesh Wi-Fi systems or combined 2.4GHz/5GHz networks may experience difficulty connecting. It may be necessary to temporarily disable the 5GHz band or use a dedicated 2.4GHz access point during the initial setup. Ensure "Private Wi-Fi Address" and "Limit IP Address Tracking" are disabled on your iOS device during setup, and grant all necessary permissions to the Jebao Aqua app.
3.3 Calibration
Accurate dosing requires proper calibration. Use a 100mL graduated cylinder for this process.
- Access the calibration function within the Jebao Aqua app for each channel.
- Place the output tube of the channel into the graduated cylinder.
- Initiate a calibration dose (e.g., 100mL).
- Observe the actual volume dispensed into the cylinder.
- Adjust the calibration settings in the app to match the actual dispensed volume. Repeat if necessary for optimal accuracy.
4. Operating Instructions
4.1 Programming Dosing Schedules via App
The Jebao Aqua app allows for comprehensive programming of each dosing channel.
- From the "My Devices" screen, tap on your Doser 2.4 device.
- You will see the main control screen with ON/OFF button and channels (CH1-CH4).
- Tap and hold on a specific channel (e.g., CH1) to access its settings page.
- Select "Automatic program" to set up a dosing schedule.
- You can set the "Day Interval" (e.g., 0 for daily dosing).
- Add multiple dosing times and volumes for each channel. The pump supports up to 24 doses per day per channel.
- Enter the desired "Dosing volume (ml)" and "Dosing time" for each entry.
- Save your settings.

Image: Front panel of the Jebao Doser 2.4, showing the display and control buttons.

Image: Screenshot of the Jebao Aqua app's main control screen, displaying the ON/OFF button and individual channel controls.

Image: Screenshot of the Jebao Aqua app's channel settings page, showing options for manual or automatic program.
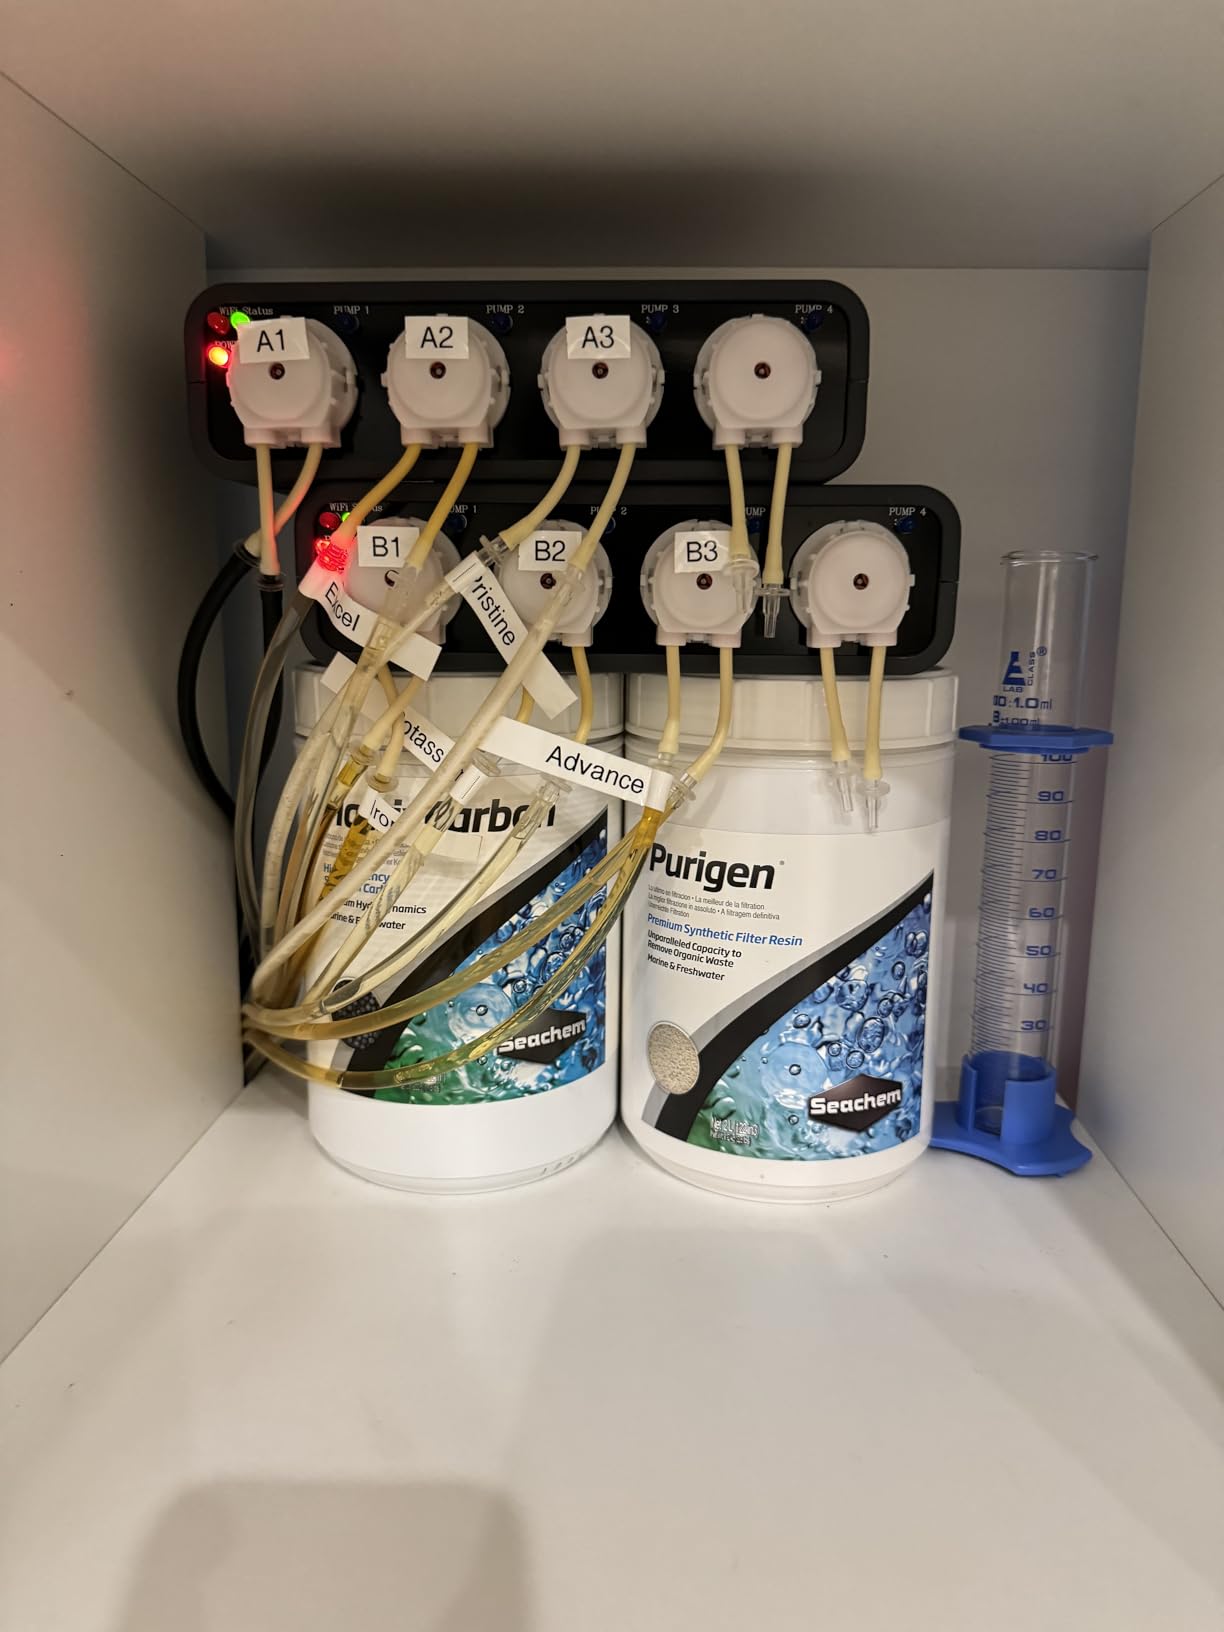
Image: Screenshot of the Jebao Aqua app's dosing schedule interface, allowing users to set dosing volume and time.
4.2 Manual Control
For immediate dosing, you can manually activate a channel through the app or directly on the unit.
- Via App: On the channel settings page, select "Run program" or a similar manual dose option.
- Via Unit: Use the physical buttons on the dosing pump to navigate to the manual dose option and select the desired channel and volume.
5. Maintenance
5.1 Regular Calibration Checks
To ensure continued accuracy, it is recommended to re-calibrate your dosing pump every 3-6 months, or if you notice any inconsistencies in your tank parameters.
5.2 Cleaning and Tube Replacement
- Periodically inspect dosing tubes for blockages, kinks, or wear. Replace tubes as needed to prevent leaks or dosing inaccuracies.
- Clean the exterior of the unit with a damp cloth. Avoid using harsh chemicals.
- If using solutions that can precipitate or clog, periodically flush the dosing lines with distilled water.
6. Troubleshooting
6.1 Wi-Fi Connection Issues
- Ensure your router is broadcasting a 2.4GHz signal.
- Temporarily disable 5GHz band on your router during initial setup if you have a combined network.
- Move the dosing pump closer to your Wi-Fi router or a 2.4GHz access point.
- Check app permissions on your mobile device (Location, Local Network, Bluetooth, Photos).
- Reset the dosing pump's Wi-Fi by pressing the ESC button for 5 seconds until the indicator blinks, then retry pairing.
6.2 Inaccurate Dosing
- Perform a calibration check using a graduated cylinder and adjust settings in the app.
- Inspect dosing tubes for blockages, air bubbles, or wear.
- Ensure dosing solution containers are placed below the output point to prevent siphoning. Consider using check valves if siphoning is suspected.
6.3 Pump Not Dispensing
- Check power connection to the unit.
- Verify the dosing schedule is correctly programmed and enabled in the app.
- Ensure there is sufficient dosing solution in the containers.
- Inspect tubes for severe kinks or complete blockages.
7. Specifications
| Feature | Detail |
|---|---|
| Model Number | 2.4 |
| Brand | Jebao |
| Channels | 4 |
| Power | DC 12V 7.5W |
| Maximum Flow Rate | 50 Liters Per Minute |
| Maximum Head | 1.5m (4.9ft) |
| Dimensions (L x W x H) | 8.25" x 5.15" x 2.35" |
| Item Weight | 2 Pounds |
| Material | Plastic, Metal |
| Connectivity | Wi-Fi (2.4GHz), Manual Controller |
| Dosing Volume per Channel | 1 to 9999ml per day |
| Dosing Frequency | Up to 24 times per day |
| Dosing Interval | Up to 30 days |
8. Warranty
The Jebao Doser 2.4 comes with a 180-day manufacturer warranty. Please retain your proof of purchase for any warranty claims. The warranty covers defects in materials and workmanship under normal use. It does not cover damage resulting from misuse, accident, modification, or unauthorized repair.
9. Support
For further assistance, technical support, or to inquire about replacement parts, please contact Jebao customer service. Refer to the product packaging or the official Jebao website for the most current contact information.