1. Introduction
This user manual provides comprehensive instructions for the safe and efficient operation of the TFCFL JMB-170 Pneumatic Dot Peen Marking Machine. This powerful and portable tool is designed for precise marking on various metal surfaces, including steel, stainless steel, iron, copper, aluminum, and alloys, as well as hard non-metal labels and accessories. The JMB-170 is ideal for applications such as VIN code engraving, chassis numbering, and general part identification. Please read this manual thoroughly before operating the machine to ensure proper usage and to maximize its performance and longevity.
2. Safety Information
Always adhere to the following safety guidelines to prevent injury and damage to the equipment.
- Personal Protective Equipment (PPE): Always wear appropriate safety glasses and hearing protection when operating the machine.
- Work Area: Ensure your work area is clean, well-lit, and free from obstructions. Keep children and unauthorized personnel away from the operating machine.
- Power Supply: Connect the machine only to a grounded power outlet with the correct voltage. Do not use damaged power cords.
- Air Supply: Ensure the pneumatic system is properly connected and the air pressure is within the recommended range (0.3-0.6 MPa). Disconnect air supply before performing maintenance.
- Machine Stability: Ensure the machine is placed on a stable, level surface during operation.
- Maintenance: Disconnect power and air supply before cleaning, adjusting, or performing any maintenance on the machine.
- Emergency Stop: Familiarize yourself with the location and operation of the emergency stop button.
3. Package Contents
Verify that all items listed below are present in your package. If any items are missing or damaged, please contact customer support.
- JMB-170 Pneumatic Dot Peen Marking Machine (Main Unit)
- Control Box
- Air Pressure Regulator with Gauge
- Air Hose (Black, corrugated)
- Blue Air Tube
- Power Cable
- USB Data Cable
- Software CD
- User Manual (this document)

Figure 3.1: Overview of the JMB-170 marking machine and its included accessories. This image displays the main marking unit, the separate control box, the air pressure regulator, various cables (power and USB), and the air hoses.
4. Setup
Follow these steps to set up your JMB-170 marking machine.
- Unpacking and Placement: Carefully remove all components from the packaging. Place the main marking unit and the control box on a stable, flat surface. Ensure there is adequate space around the machine for operation and ventilation.

Figure 4.1: The main marking unit and control box positioned for setup.
- Connect Control Box to Main Unit: Connect the multi-pin cable from the main marking unit to the corresponding port on the control box. Ensure the connection is secure.

Figure 4.2: The control box, which connects to the main marking unit.
- Connect Air Supply:
- Attach the air pressure regulator to your compressed air source.
- Connect the black corrugated air hose from the main marking unit to the air pressure regulator.
- Connect the blue air tube from the air pressure regulator to the designated inlet on the main marking unit.

Figure 4.3: The air hoses and tubes required for pneumatic operation.
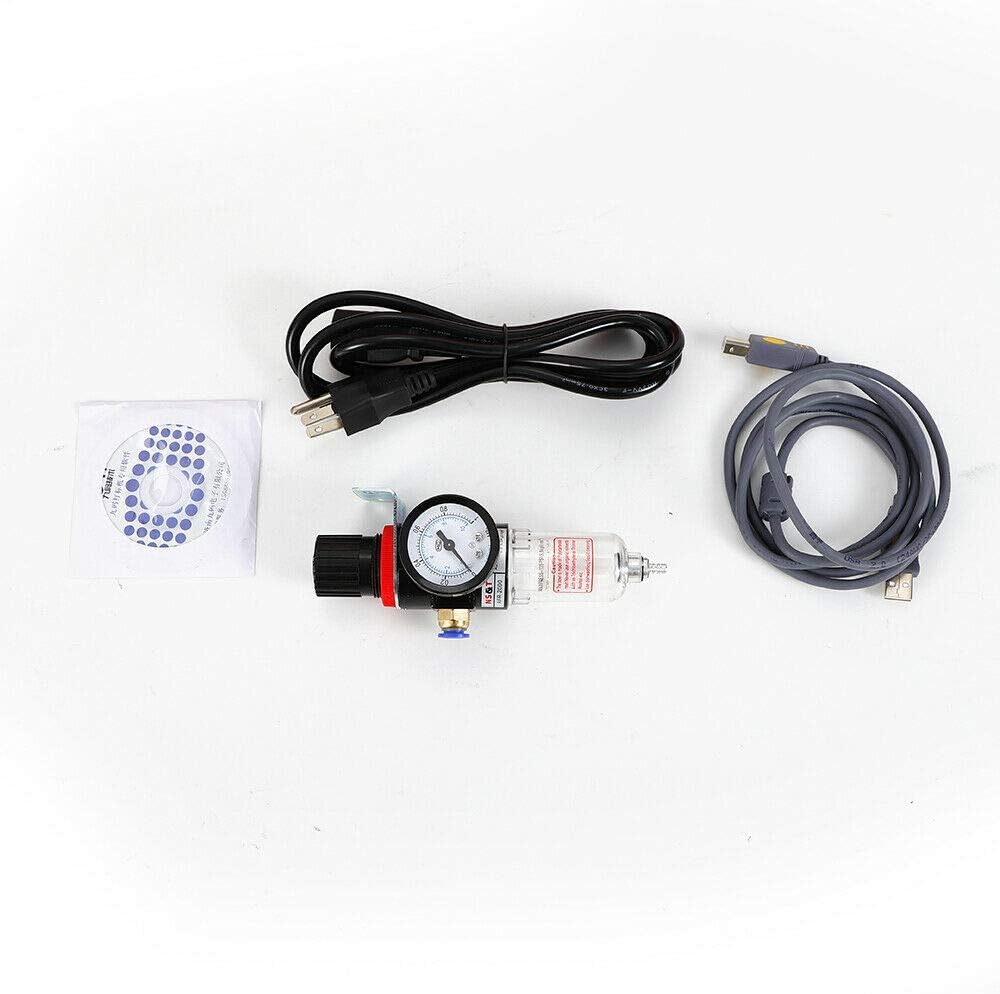
Figure 4.4: The air pressure regulator and other accessories.
- Connect to Computer: Use the provided USB data cable to connect the control box to your computer.
- Install Software: Insert the software CD into your computer and follow the on-screen instructions to install the marking software. The machine is compatible with Windows XP and Windows 7 operating systems.
- Power Connection: Connect the power cable to the control box and then plug it into a grounded electrical outlet.
5. Operating Instructions
This section details the steps for operating your TFCFL JMB-170 marking machine.
5.1. Initial Power-Up and Software Launch
- Turn on the power switch on the control box.
- Launch the installed marking software on your computer.
- Ensure the software recognizes the connected machine.
5.2. Preparing for Marking
- Material Placement: Place the material to be marked securely under the marking head. The machine supports marking on various metals and hard non-metal labels.
- Air Pressure Adjustment: Adjust the air pressure regulator to the recommended operating pressure (typically 0.3-0.6 MPa) for optimal marking depth and clarity.
- Software Configuration:
- Input the text, numbers, or VIN codes you wish to engrave into the software interface.
- Select the desired font, size, and spacing.
- Choose the marking direction: up, down, left, right, or flat sector marking. The machine also supports rotary marking for cylindrical objects.
- Adjust the engraving speed. The machine can engrave approximately one letter per second, with adjustable speed settings.
- Preview the marking path in the software to ensure correct positioning and layout.
5.3. Executing the Marking Process
- Once all settings are configured and the material is in place, initiate the marking process from the software.
- The marking head will move across the material, creating precise indentations.
- Monitor the process to ensure proper operation. The machine is designed for low noise operation.
- Upon completion, the machine will stop. Carefully remove the marked material.

Figure 5.1: Examples of precise VIN code and serial number markings achievable with the JMB-170.
6. Maintenance
Regular maintenance ensures the longevity and optimal performance of your marking machine. Always disconnect power and air supply before performing any maintenance.
- Cleaning: Regularly clean the marking head and surrounding areas to remove dust and debris. Use a soft, dry cloth. Avoid using abrasive cleaners or solvents.
- Air Filter: Periodically check and clean the air filter on the pressure regulator to ensure clean air supply to the machine.
- Stylus Inspection: Inspect the marking stylus for wear or damage. Replace if necessary to maintain marking quality.
- Cable Connections: Ensure all electrical and pneumatic connections remain secure.
- Storage: When not in use, store the machine in a clean, dry environment within the recommended temperature range (-1°C to 45°C).
7. Troubleshooting
Refer to the table below for common issues and their potential solutions.
| Problem | Possible Cause | Solution |
|---|---|---|
| Machine does not power on. | Power cable not connected; power switch off; faulty outlet. | Check power cable connection; ensure power switch is ON; test outlet with another device. |
| No marking or weak marking. | Insufficient air pressure; worn stylus; incorrect software settings. | Check air pressure regulator (0.3-0.6 MPa); inspect and replace stylus if worn; verify marking depth settings in software. |
| Machine not recognized by computer. | USB cable disconnected; software driver issues. | Ensure USB cable is securely connected; reinstall software drivers from CD. |
| Marking is inconsistent or distorted. | Unstable material; incorrect marking speed; stylus issue. | Secure the material firmly; adjust marking speed in software; check stylus for damage. |
8. Specifications
Technical specifications for the TFCFL JMB-170 Pneumatic Dot Peen Marking Machine.
| Feature | Specification |
|---|---|
| Model | JMB-170 |
| Marking Range | 110 x 70 mm |
| Marking Depth | 0.01 - 1 mm (material dependent) |
| Marking Speed | Approx. 1 letter/second (adjustable) |
| Applicable Materials | Steel, Stainless Steel, Iron, Copper, Aluminum, Alloys, Hard Non-metal Labels |
| Operating Air Pressure | 0.3 - 0.6 MPa |
| Computer Compatibility | Windows XP, Windows 7 |
| Working Temperature | -1°C to 45°C |
| Marking Directions | Up, Down, Left, Right, Flat Sector, Rotary |
9. Warranty and Support
For warranty information and technical support, please refer to the documentation provided at the time of purchase or contact your retailer.
For general inquiries or assistance, you may also visit the TFCFL Store on Amazon: TFCFL Amazon Store.


