1. Introduction
This manual provides essential information for the safe and efficient operation of your DL 10-in-1 Vintage Bluetooth Record Player. This versatile audio system integrates a turntable, CD player, cassette player, AM/FM radio, Bluetooth connectivity, and USB recording capabilities. Please read this manual thoroughly before use and retain it for future reference.
2. Safety Instructions
Observe the following safety precautions to prevent electric shock, fire, or damage to the unit:
- Do not expose this appliance to rain or moisture.
- Do not block any ventilation openings. Install in accordance with the manufacturer's instructions.
- Do not install near any heat sources such as radiators, heat registers, stoves, or other apparatus (including amplifiers) that produce heat.
- Protect the power cord from being walked on or pinched, particularly at plugs, convenience receptacles, and the point where they exit from the apparatus.
- Only use attachments/accessories specified by the manufacturer.
- Unplug this apparatus during lightning storms or when unused for long periods of time.
- Refer all servicing to qualified service personnel. Servicing is required when the apparatus has been damaged in any way, such as power-supply cord or plug is damaged, liquid has been spilled or objects have fallen into the apparatus, the apparatus has been exposed to rain or moisture, does not operate normally, or has been dropped.
3. Package Contents
Verify that all items listed below are included in your package:
- 1 x DL 10-in-1 Stereo Turntable Unit
- 1 x 45 RPM Adapter
- 1 x Replacement Stylus Needle
- 1 x Instruction Manual (this document)
- 1 x AC Power Adapter
4. Product Overview
The DL 10-in-1 Vintage Bluetooth Record Player combines multiple audio playback options in a classic design. Familiarize yourself with the main components and controls.
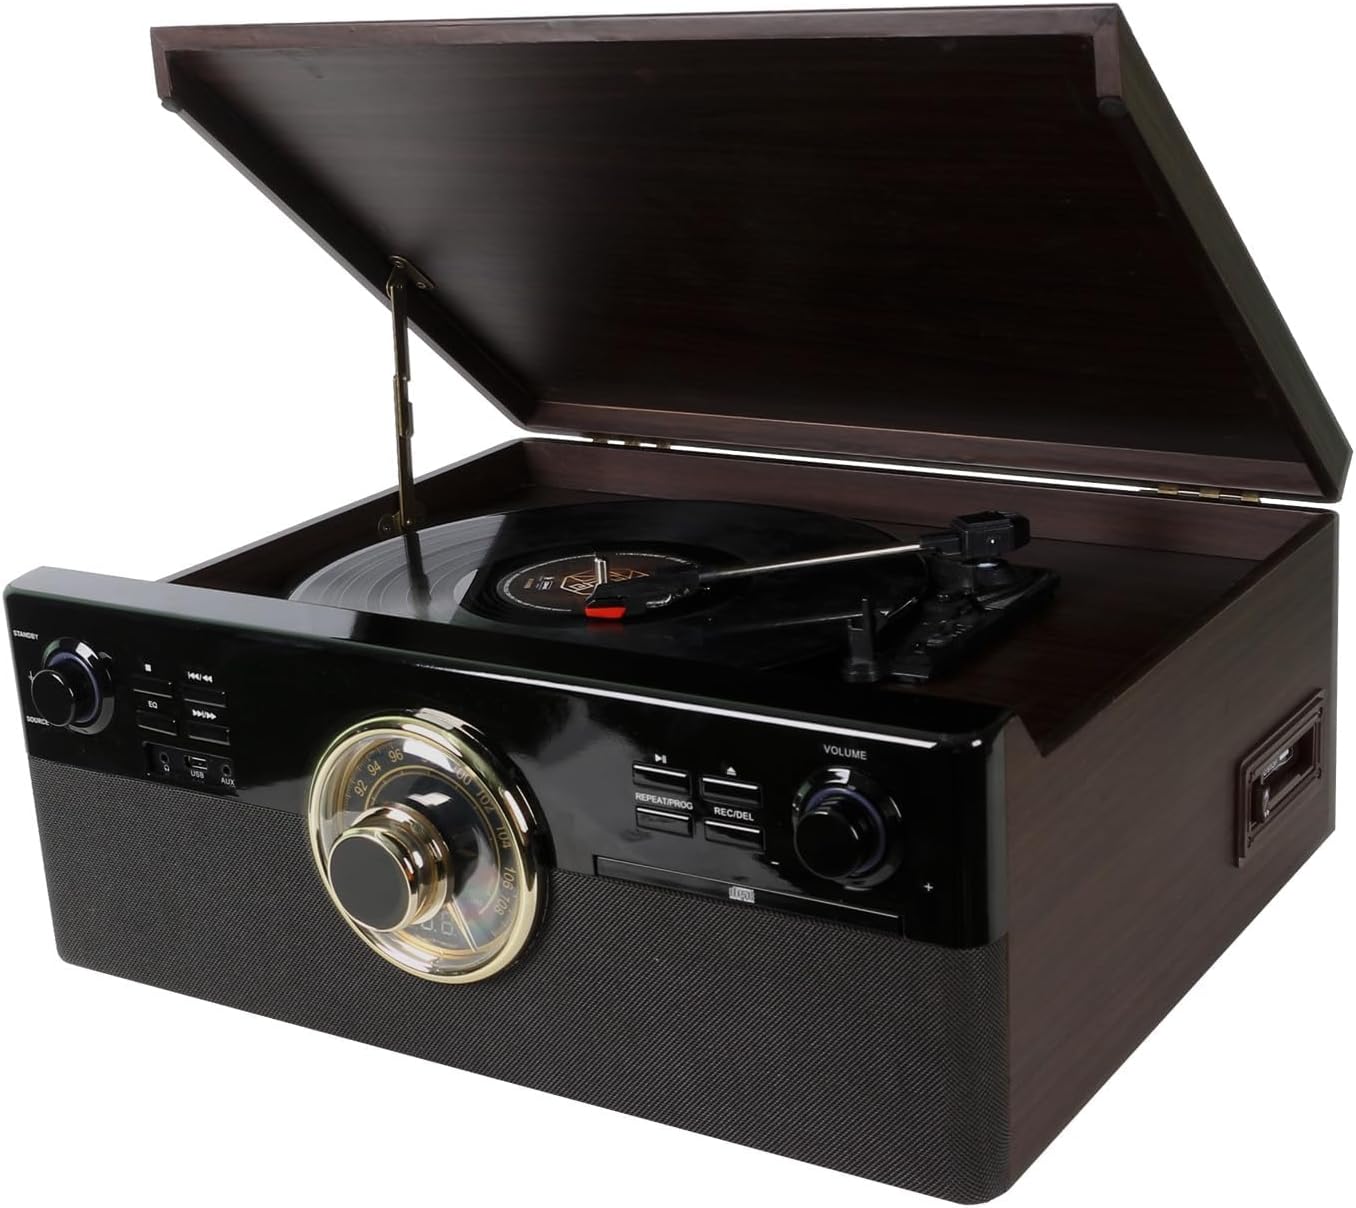
Image: Front-angle view of the DL 10-in-1 Vintage Bluetooth Record Player with the turntable lid open, showcasing its classic design and integrated controls.

Image: Visual representation of the 10 integrated functions: Vinyl Record, CD, Cassette, Bluetooth, FM Radio, USB, Stereo Speaker, Headphone, Aux In, and Line Out.
4.1 Front Panel Controls
- Power/Volume Knob: Turns the unit on/off and adjusts the master volume.
- Source Selector Knob: Switches between Phono, CD, Cassette, Radio, Bluetooth, and AUX input modes.
- Radio Tuner Dial: For selecting AM/FM radio stations.
- CD Player Controls: Play/Pause, Stop, Skip Forward/Backward, Repeat, Program.
- USB Port: For playing MP3 files and recording audio.
- REC/DEL Button: Initiates USB recording or deletes files.

Image: Detailed view showing the turntable's ruby stylus, the radio tuner dial, and the volume knob with surrounding playback controls.
4.2 Rear Panel Connections
- Line Out (RCA): Connect to external amplifiers or powered speakers.
- AC Power Input: Connect the provided AC power adapter.

Image: Close-up of the USB port and AUX input, located on the front or side panel for easy access.

Image: Close-up of the circular radio tuner dial with frequency markings, used for selecting AM/FM stations.
5. Setup
Follow these steps to set up your record player:
- Unpacking: Carefully remove the unit from its packaging. Retain the packaging for future transport or storage.
- Placement: Place the unit on a flat, stable surface away from direct sunlight, heat sources, and excessive dust or vibration.
- Power Connection: Connect the AC power adapter to the AC power input on the rear of the unit, then plug the adapter into a wall outlet.
- Turntable Preparation: Remove the protective cap from the stylus. Ensure the tone arm is unlocked from its rest.
- Antenna (Radio): Extend the FM wire antenna for optimal radio reception.
6. Operating Instructions
6.1 Power On/Off and Volume
- Rotate the Power/Volume Knob clockwise to turn the unit on. The indicator light will illuminate.
- Continue rotating clockwise to increase volume; rotate counter-clockwise to decrease volume.
- Rotate the Power/Volume Knob counter-clockwise until it clicks to turn the unit off.
6.2 Playing Vinyl Records
- Lift the turntable lid.
- Place a record on the turntable platter. If playing a 45 RPM single, place the 45 RPM adapter on the center spindle.
- Select the appropriate speed (33 1/3, 45, or 78 RPM) using the speed selector switch.
- Rotate the Source Selector Knob to 'PHONO'.
- Gently lift the tone arm from its rest and position it over the desired track on the record.
- Lower the tone arm slowly onto the record. Playback will begin automatically.
- At the end of the record, the turntable will stop automatically (if auto-stop is enabled). Lift the tone arm and return it to its rest.
6.3 Playing CDs
- Rotate the Source Selector Knob to 'CD'.
- Press the EJECT button to open the CD tray.
- Place a CD with the label side facing up into the tray.
- Press the EJECT button again to close the tray. The unit will read the CD.
- Press the PLAY/PAUSE button to start playback.
- Use the SKIP buttons to navigate between tracks.

Image: Close-up of the CD player tray, showing a compact disc being inserted for playback.
6.4 Playing Cassettes
- Rotate the Source Selector Knob to 'TAPE'.
- Insert a cassette tape into the cassette slot on the side of the unit.
- Press the PLAY button on the cassette deck to begin playback.
- Use the FAST FORWARD and REWIND buttons as needed.
- Press the STOP/EJECT button to stop playback and remove the tape.

Image: Close-up of the cassette player slot, indicating the 'AUTO STOP' feature for tape playback.
6.5 Bluetooth Operation
- Rotate the Source Selector Knob to 'BLUETOOTH'. The Bluetooth indicator will flash.
- Enable Bluetooth on your smartphone or tablet and search for available devices.
- Select 'DL-179D99' (or similar name) from the list of devices.
- Once paired, the Bluetooth indicator will stop flashing and remain solid.
- You can now stream audio from your device to the record player.
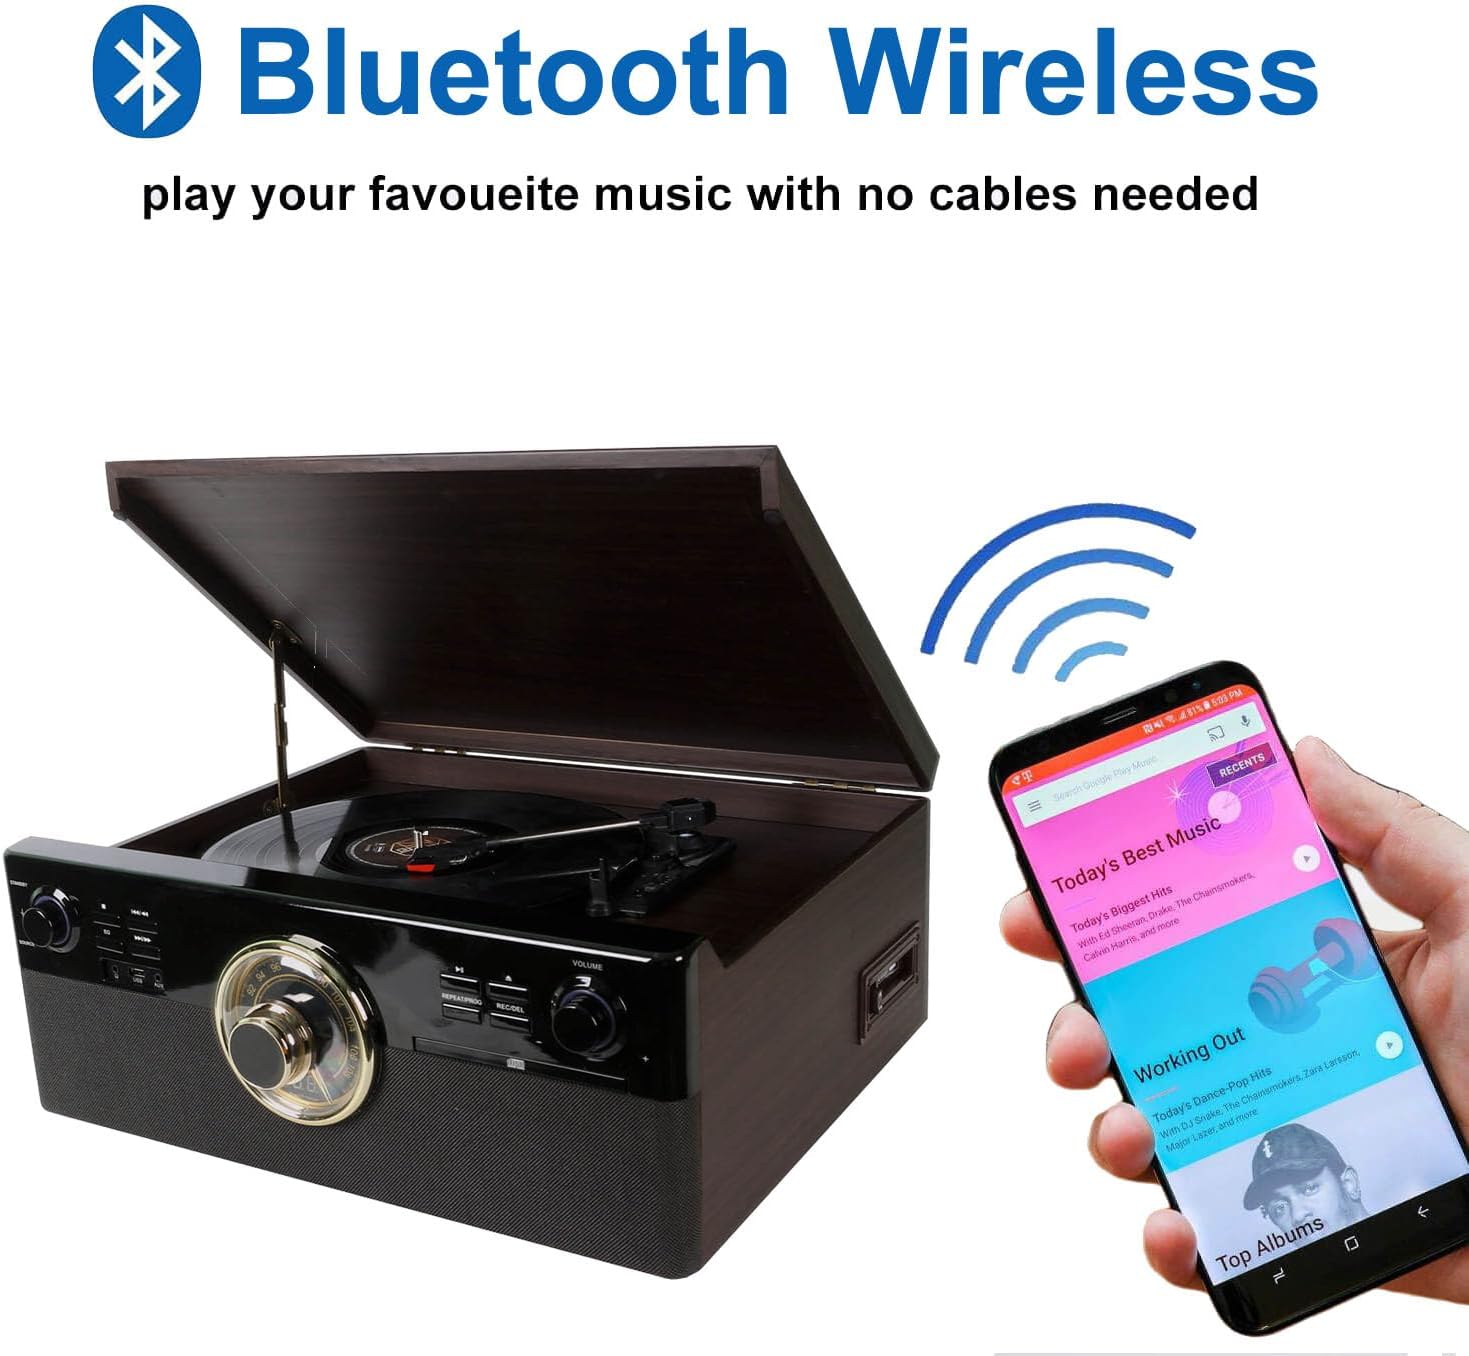
Image: The record player with a smartphone displaying a music app, illustrating wireless Bluetooth connectivity for audio streaming.
6.6 USB Playback and Recording
- USB Playback: Insert a USB drive into the USB port. Rotate the Source Selector Knob to 'USB'. The unit will automatically detect and play MP3 files. Use the playback controls to navigate.
- USB Recording (from Vinyl, CD, Cassette, AUX):
- Insert a USB drive into the USB port.
- Select the desired source (PHONO, CD, TAPE, or AUX).
- Start playback on the source (e.g., play a record, CD, or cassette).
- Press the REC/DEL button. The recording indicator will flash, and recording will begin.
- Press the REC/DEL button again to stop recording. The recorded file will be saved as an MP3 on the USB drive.
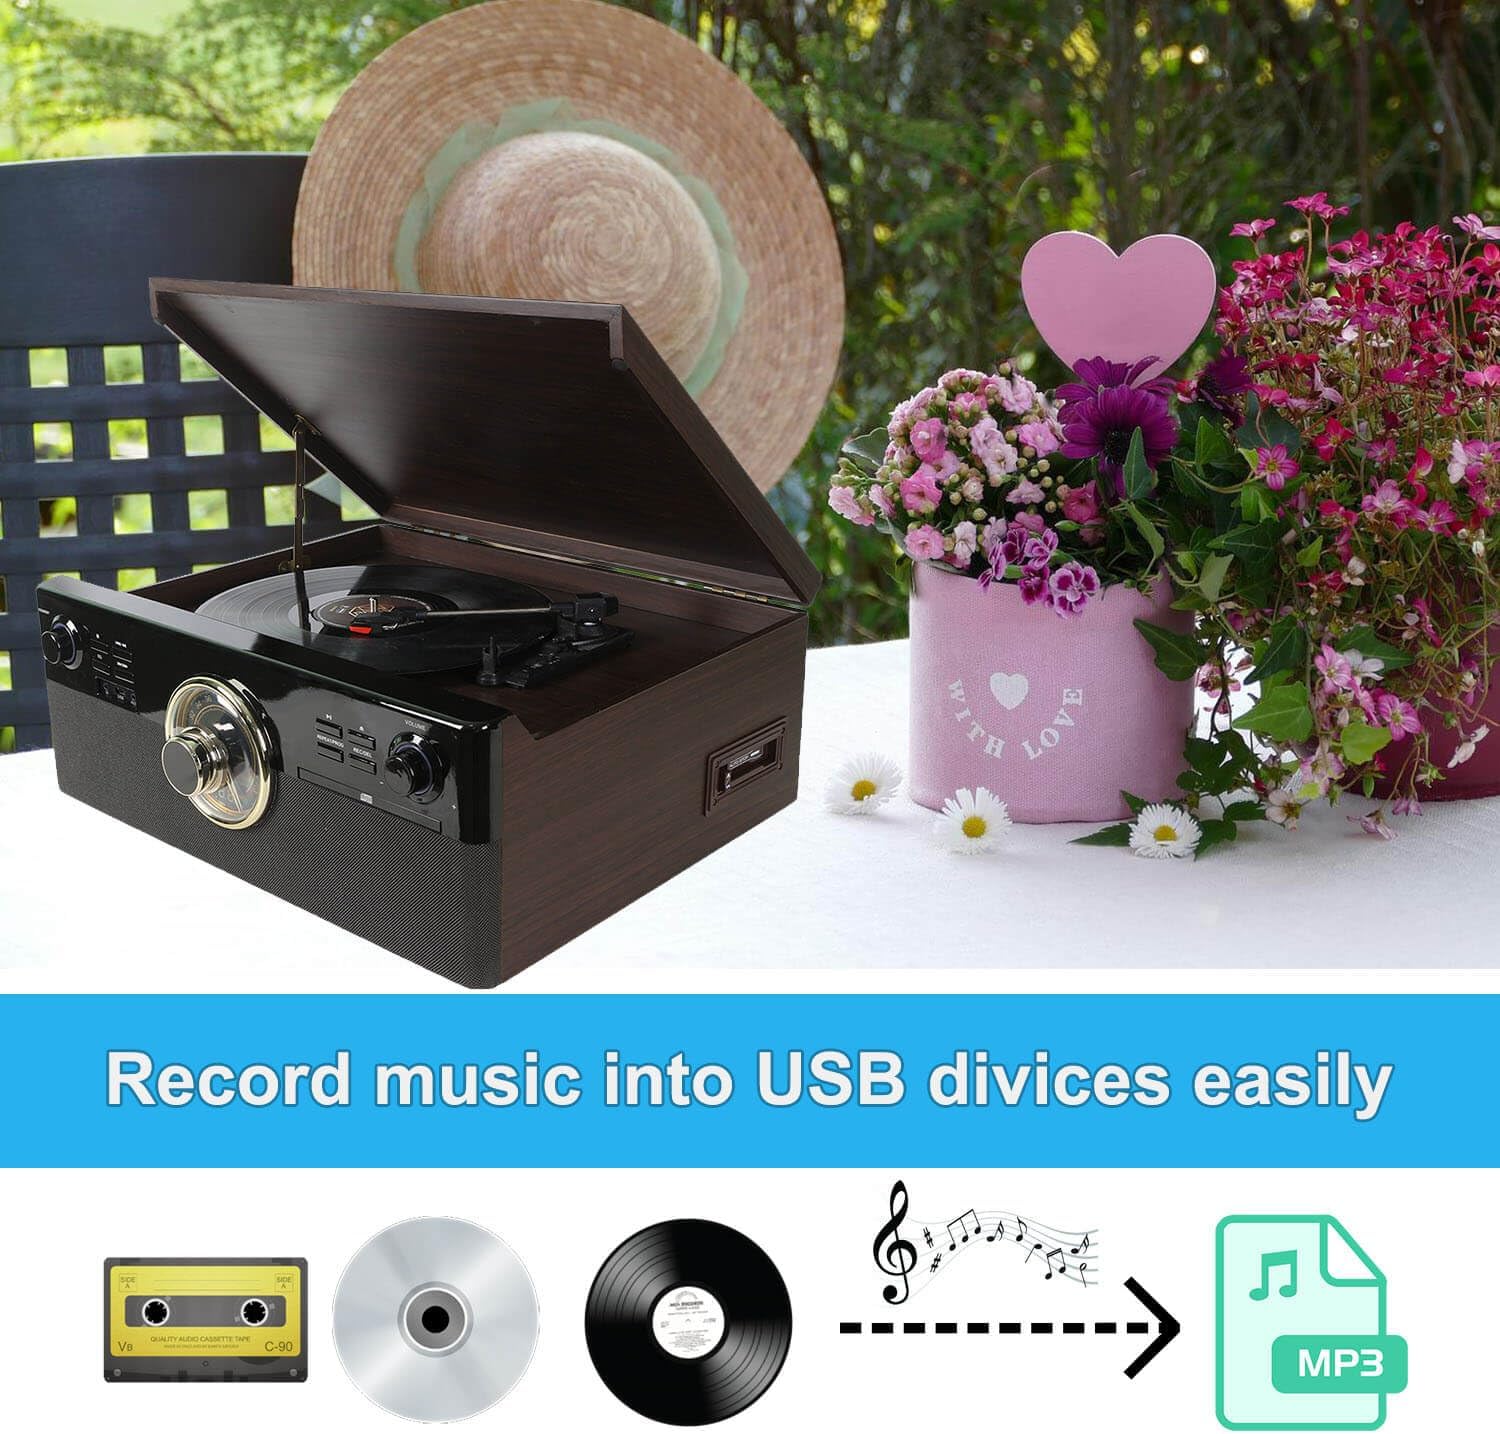
Image: A visual diagram illustrating the process of recording audio from cassette, CD, or vinyl records directly to a USB device as MP3 files.
6.7 Radio Operation
- Rotate the Source Selector Knob to 'RADIO'.
- Adjust the Radio Tuner Dial to select your desired AM or FM station.
- Extend the FM wire antenna for better reception.
6.8 External Audio Input (AUX IN)
- Connect an external audio device (e.g., MP3 player) to the AUX IN port using a 3.5mm audio cable (not included).
- Rotate the Source Selector Knob to 'AUX'.
- Play audio from your connected device.
6.9 External Audio Output (LINE OUT)
- Connect the RCA LINE OUT jacks on the rear of the unit to the audio input jacks of an external amplifier or powered speakers using an RCA cable (not included).
- Ensure the external amplifier/speakers are powered on and set to the correct input.
- Audio from the record player will now be routed through the external system.

Image: Diagram illustrating the connection of the RCA Line Out ports on the back of the unit to external speakers for enhanced audio output.
7. Maintenance
7.1 Cleaning the Unit
- Wipe the unit with a soft, dry cloth. Do not use abrasive cleaners or solvents.
- Keep the dust cover closed when not in use to protect the turntable.
7.2 Stylus Replacement
The stylus (needle) is a consumable part and should be replaced after approximately 300-500 hours of use to maintain sound quality and prevent damage to your records. A replacement stylus is included in your package.
- Gently pull the old stylus cartridge downwards and forwards to detach it from the tone arm.
- Align the new stylus cartridge with the tone arm.
- Push the new stylus cartridge upwards and backwards until it clicks into place.
8. Troubleshooting
If you experience issues with your unit, refer to the following table for common problems and solutions:
| Problem | Possible Cause | Solution |
|---|---|---|
| No power | Power cord not connected; Unit not turned on. | Ensure power cord is securely plugged in; Rotate Power/Volume knob clockwise to turn on. |
| No sound | Volume too low; Incorrect source selected; External speakers not connected/powered. | Increase volume; Select correct source; Check external speaker connections and power. |
| Turntable not spinning | Unit not powered on; Belt dislodged; Tone arm locked. | Ensure unit is on; Check if the drive belt is properly seated (refer to maintenance); Unlock tone arm. |
| Bluetooth not pairing | Incorrect source; Device too far; Bluetooth not enabled on external device. | Select 'BLUETOOTH' source; Move device closer; Enable Bluetooth on your smartphone/tablet. |
| Poor radio reception | Antenna not extended; Weak signal. | Fully extend the FM wire antenna; Try repositioning the unit. |
| CD skipping | CD dirty or scratched; Unit on unstable surface. | Clean CD with a soft cloth; Place unit on a stable, vibration-free surface. |
9. Specifications
- Model: DL-179D99
- Product Dimensions: 18.9 x 17.52 x 7.68 inches
- Item Weight: 17.81 pounds
- Power Consumption (On-mode): 9 watts
- Turntable Speeds: 33 1/3, 45, 78 RPM
- Motor Type: DC Motor
- Connectivity: Bluetooth, USB, AUX In, Line Out (RCA)
- Media Playback: Vinyl records, CDs, Cassette tapes, AM/FM Radio, USB MP3
- Recording: Vinyl, CD, Cassette to USB MP3
- Included Components: Stereo Turntable, 45 RPM Adapter, Replacement Stylus Needle, Instruction Manual, AC Power Adapter
10. Warranty and Support
This product is covered by a standard manufacturer's warranty against defects in materials and workmanship. For specific warranty terms, duration, and to register your product, please refer to the warranty card included in your package or contact the manufacturer directly.
For technical support, troubleshooting assistance, or to inquire about replacement parts, please contact DL customer service through the retailer where the product was purchased or visit the official DL website for contact information.