1. Introduction
Thank you for choosing the Einhell TE-HA 18 Li Power X-Change 18V Cordless Hot Air Gun. This tool is a versatile member of the Power X-Change family, designed for various applications such as shaping plastics, removing adhesive films, and stripping paint. This manual provides essential information for safe and efficient operation, setup, maintenance, and troubleshooting.
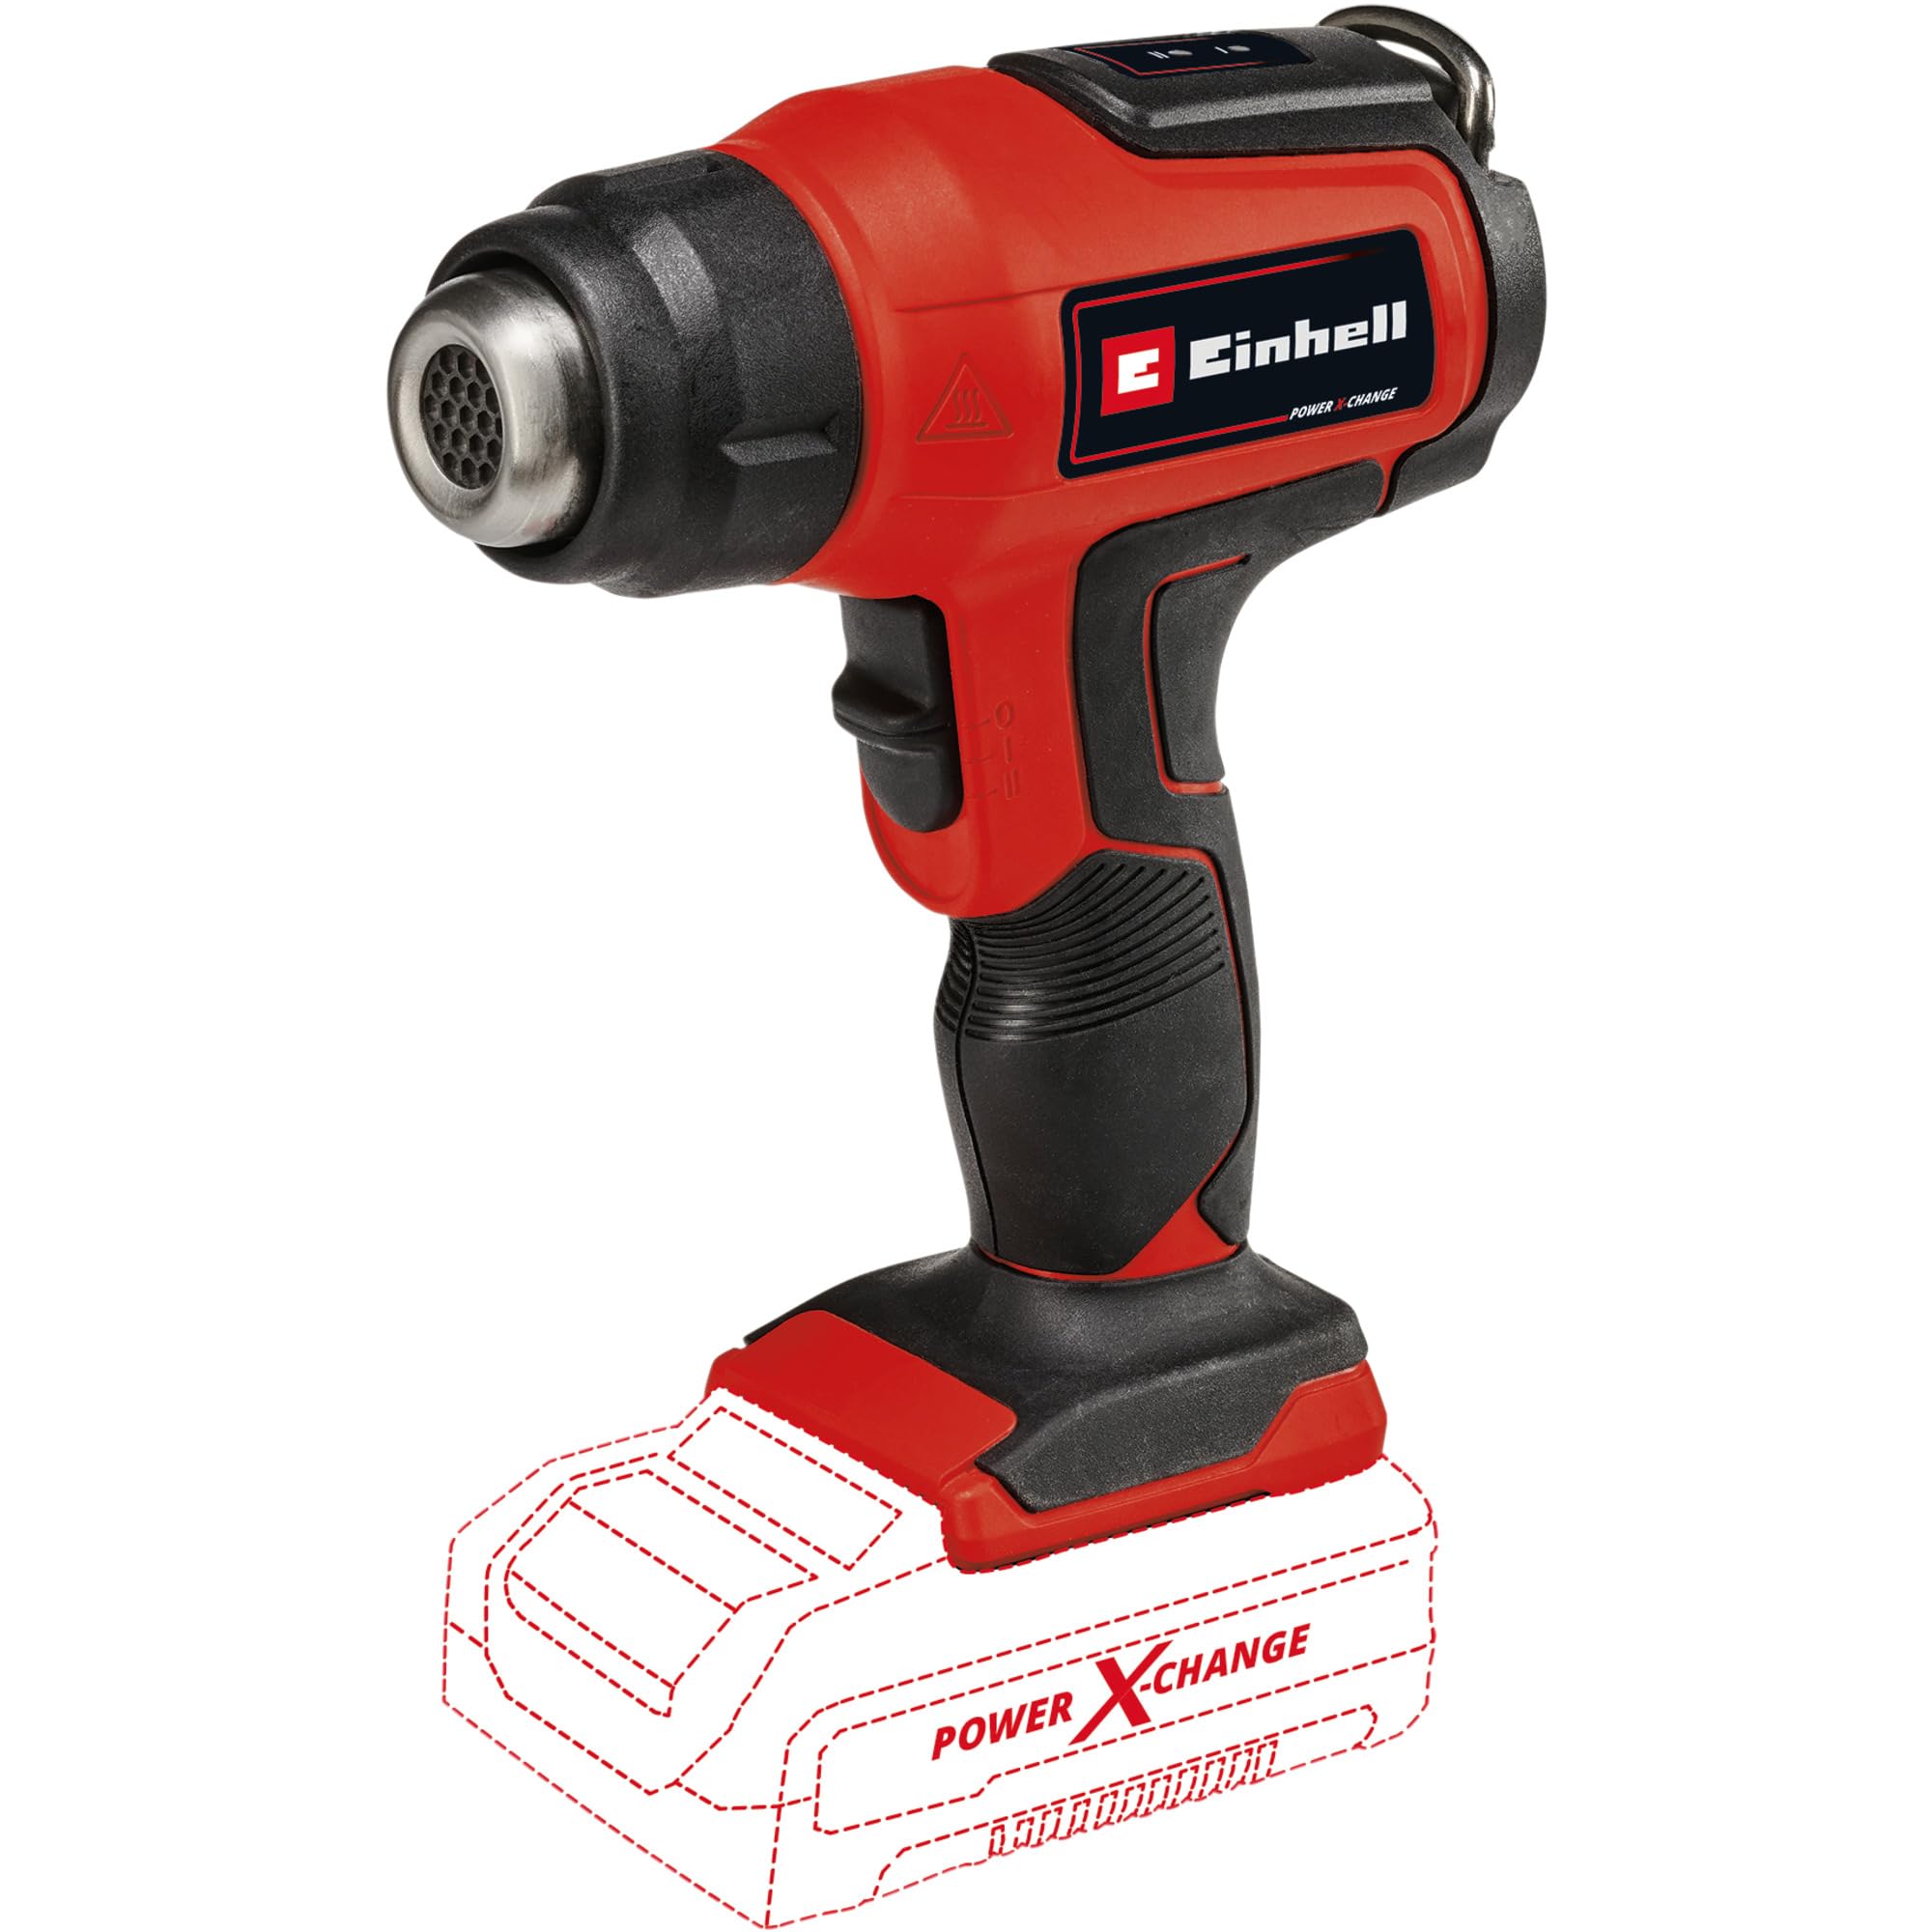
Figure 1: Einhell TE-HA 18 Li Cordless Hot Air Gun. This image shows the main unit of the hot air gun, highlighting its compact and ergonomic design.
As part of the Power X-Change series, this hot air gun is compatible with all Power X-Change batteries. Please note that the battery and charger are not included with this product and must be purchased separately.
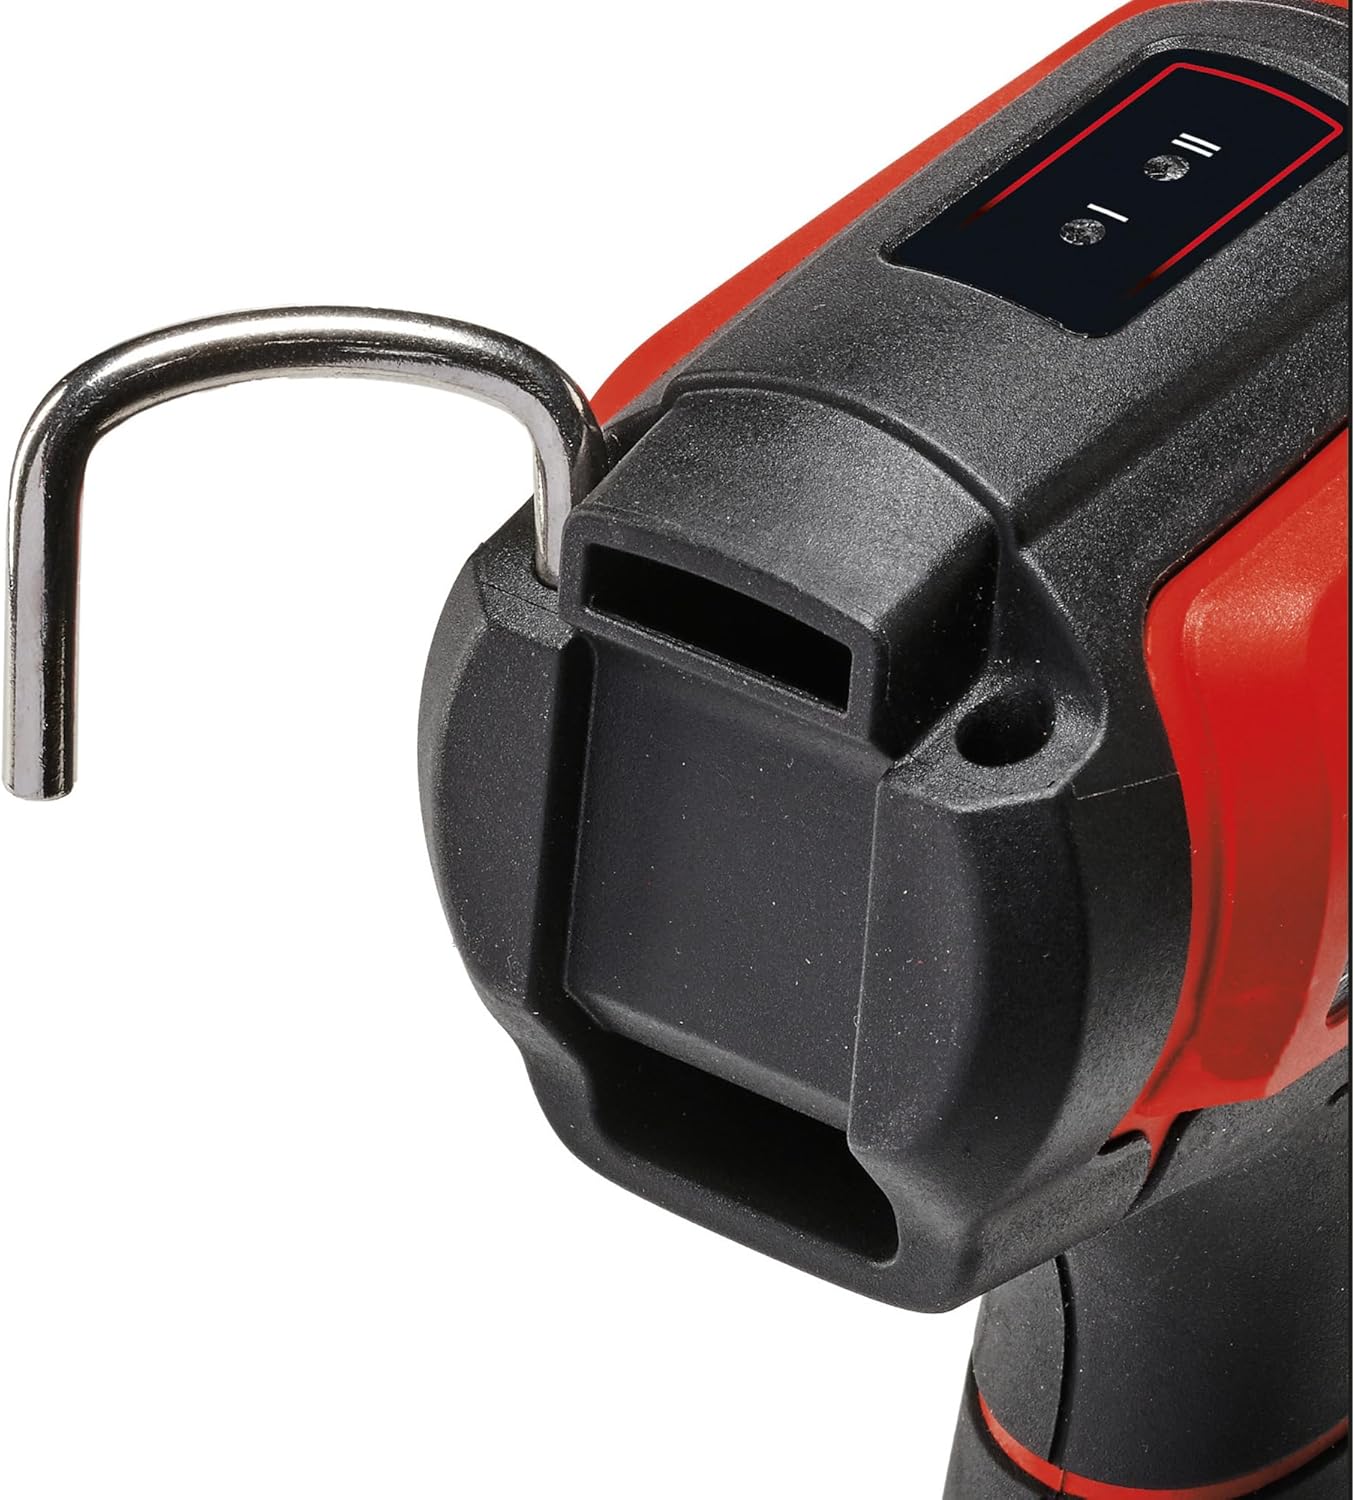
Figure 2: Illustration indicating that the battery and charger are not included with the hot air gun. Users need to acquire these components separately for operation.

Figure 3: Diagram illustrating the Einhell Power X-Change system, showing various compatible tools and batteries. This hot air gun is part of this interchangeable battery system.
2. Safety Instructions
WARNING: Read all safety warnings, instructions, illustrations, and specifications provided with this power tool. Failure to follow all instructions listed below may result in electric shock, fire, and/or serious injury.
- Keep Work Area Clean and Well Lit: Cluttered or dark areas invite accidents.
- Do Not Operate in Explosive Atmospheres: Do not use power tools in the presence of flammable liquids, gases, or dust.
- Stay Alert: Pay attention to what you are doing and use common sense when operating a power tool.
- Dress Properly: Do not wear loose clothing or jewelry. Keep hair and clothing away from moving parts.
- Use Personal Protective Equipment: Always wear eye protection. Use a dust mask, non-skid safety shoes, hard hat, or hearing protection for appropriate conditions.
- Avoid Accidental Starting: Ensure the switch is in the off-position before connecting to a battery pack, picking up or carrying the tool.
- Do Not Overreach: Keep proper footing and balance at all times.
- Maintain Tools with Care: Keep cutting tools sharp and clean. Follow instructions for lubricating and changing accessories.
- Disconnect Battery Pack: Remove the battery pack from the tool before making any adjustments, changing accessories, or storing power tools.
- Heat Hazard: The nozzle and accessories become extremely hot during and after use. Allow sufficient time for cooling before handling. Do not touch hot surfaces.
- Ventilation: Ensure adequate ventilation when working, especially when stripping paint, as fumes can be toxic.
- Fire Hazard: Do not direct hot air at flammable materials or surfaces. Be aware of hidden flammable materials behind work surfaces.
- Children and Bystanders: Keep children and bystanders away while operating a power tool.
3. Product Components
The Einhell TE-HA 18 Li hot air gun is designed for ease of use and versatility. Key components include:
- Hot Air Nozzle: The primary outlet for heated air.
- Temperature Setting Display: An LED display to show the selected temperature level.
- Ergonomic Handle with Soft Grip: Provides a comfortable and secure hold during operation.
- Mechanical Nozzle Ejector: For easy and safe removal of accessories.
- Fold-out Metal Hook: For flexible work and convenient storage.
- Flat Surface: Allows for stable stationary use.

Figure 4: Close-up view of the hot air nozzle, showing its robust construction designed for efficient heat delivery.

Figure 5: The LED display on the hot air gun, which clearly indicates the currently selected temperature setting for precise control.

Figure 6: The integrated fold-out metal hook, providing a convenient option for hanging the tool during or after use, enhancing flexibility and storage.
4. Setup
4.1 Battery Installation
- Ensure the hot air gun is switched off.
- Align the battery pack with the receptacle at the base of the tool.
- Slide the battery pack into the tool until it clicks securely into place.
- To remove, press the battery release button and slide the battery pack out.
4.2 Nozzle Attachment
The hot air gun comes with various nozzles (reducer, wide jet, reflector) for different applications.
- Ensure the tool is cool and the battery is removed before attaching or removing nozzles.
- Select the appropriate nozzle for your task.
- Slide the nozzle onto the hot air outlet until it is firmly seated.
- To remove, use the mechanical nozzle ejector for safe detachment, especially when hot.

Figure 7: Visual guide demonstrating the process of attaching a nozzle to the hot air gun. Ensure the nozzle is securely fitted before operation.
5. Operating Instructions
5.1 Powering On and Temperature Selection
- Ensure a charged Power X-Change battery is installed.
- Switch the tool on using the power switch.
- Select the desired temperature setting using the control buttons:
- Setting I: Approximately 350°C for gentle applications.
- Setting II: Approximately 550°C for more intensive tasks.
- The selected temperature level will be visible on the LED display.
5.2 Applications
The TE-HA 18 Li is suitable for a variety of tasks:
- Plastic Shaping: Ideal for model-making and bending plastic components.
- Adhesive Film Removal: Gently heat adhesive films for easy removal without damaging surfaces.
- Paint Stripping: Effective for softening old lacquer and paint layers for removal.
- Resin Curing: Can be used for curing resin projects.
- Crafts: Suitable for various craft applications requiring controlled heat.

Figure 8: A user demonstrating the application of the hot air gun for removing adhesive film from a surface, showcasing its utility in delicate tasks.
5.3 Stationary Use
For tasks requiring both hands, the hot air gun can be placed on its flat surface for stable stationary operation. Ensure the surface is heat-resistant and stable.
6. Maintenance
6.1 Cleaning
- Always remove the battery pack before cleaning.
- Clean the tool's housing with a soft, damp cloth. Do not use harsh chemicals or abrasive cleaners.
- Ensure the air vents are free from dust and debris to prevent overheating. Use compressed air if necessary.
- Clean nozzles after use, ensuring no residue builds up.
6.2 Storage
- Store the hot air gun in a dry, secure place, out of reach of children.
- Ensure the tool is completely cool before storing.
- If storing for extended periods, remove the battery pack.
7. Troubleshooting
| Problem | Possible Cause | Solution |
|---|---|---|
| Tool does not turn on. | Battery not installed correctly or discharged. | Ensure battery is fully inserted. Charge or replace battery. |
| No heat or insufficient heat. | Incorrect temperature setting. Overheating protection activated. | Check LED display for temperature setting. Allow tool to cool down if overheating protection is active. |
| Reduced airflow. | Air vents blocked. | Clean air vents to ensure proper airflow. |
| Nozzle difficult to remove. | Nozzle is hot. | Allow nozzle to cool completely or use the mechanical nozzle ejector. |
8. Specifications
- Model: TE-HA 18 Li - Solo
- Voltage: 18 V
- Power Source: Battery Powered (Power X-Change system)
- Temperature Settings:
- Setting I: Approx. 350°C
- Setting II: Approx. 550°C
- Item Weight: 0.69 Kilograms
- Product Dimensions: 0.39"L x 0.39"W x 0.39"H (Note: These dimensions seem generic and might not represent the actual tool size accurately. Refer to manufacturer's official documentation for precise measurements.)
- Compatible Material: Metal (for accessories/nozzles, tool itself is plastic/metal)
- Included Components: Hot Air Gun (Solo), Reducer Nozzle, Wide Jet Nozzle, Reflector Nozzle. (Battery and Charger Not Included)
9. Warranty and Support
For warranty information, please refer to the documentation provided with your purchase or visit the official Einhell website. If you encounter any issues or require technical assistance, please contact Einhell customer support directly. Keep your proof of purchase for warranty claims.
Einhell Official Website: www.einhell.com