Introduction
Thank you for choosing the Hatteker 6-in-1 Electric Shaver. This versatile grooming device is designed for efficient and comfortable hair removal and personal care. Please read this manual carefully before using the product to ensure safe operation and optimal performance. Keep this manual for future reference.
Product Components
The Hatteker 6-in-1 Electric Shaver comes with a main unit and six interchangeable attachment heads, along with essential accessories:
- Main Shaver Body
- Body Shaver Head
- Nose Trimmer Head
- Eyebrow Trimmer Head
- Facial Cleaning Brush Head
- Massaging Head
- Silicone Cleansing Head
- USB Charging Cable
- Cleaning Brush

Image: The main shaver unit displayed with its six interchangeable heads: Body Shaver, Nose Trimmer, Eyebrow Trimmer, Facial Cleaning Brush, Massaging Head, and Silicone Cleansing Head.
Safety Precautions
- This appliance is intended for household use only.
- Do not use the appliance if it is damaged. Contact customer support for assistance.
- Keep the appliance away from children.
- Ensure the charging port is dry before connecting the USB cable.
- Do not disassemble or attempt to repair the appliance yourself.
- Avoid using the shaver on irritated, damaged, or infected skin.
- The appliance is waterproof and suitable for wet and dry use, but avoid prolonged submersion.
Charging the Device
The Hatteker Electric Shaver features convenient USB charging. Ensure the device is turned off before charging.
- Locate the charging port at the lower hanging hole of the main unit.
- Connect the USB charging cable to the shaver's charging port.
- Plug the other end of the USB cable into a USB charger, power bank, computer, or laptop.
- The charging indicator light will illuminate to show the device is charging.
- A full charge takes approximately 1.5 hours and provides up to 45 minutes of work time.

Image: Illustration showing the USB charging capability of the shaver, indicating a 1.5-hour charging time for 45 minutes of operation, compatible with various USB power sources.
Assembly and Disassembly of Attachment Heads
To change the attachment heads:
- Ensure the shaver is turned off.
- To remove a head, grip the main unit firmly and gently twist or pull the attached head upwards until it detaches. Refer to the specific head's design for removal (some may twist, others pull straight off).
- To attach a head, align the desired head with the main unit's connector. Push down or twist until it clicks securely into place.
Operating Instructions
Press the power button on the main unit to turn the shaver on or off. The device can be used for both wet and dry shaving.
1. Body Shaver Head
- Use for general body hair removal on legs, arms, underarms, and bikini line.
- Hold the shaver at a 90-degree angle to the skin and move it gently against the direction of hair growth.
2. Nose Trimmer Head
- Carefully insert the trimmer tip into the nostril or ear canal.
- Move the trimmer in a circular motion to trim unwanted hair. Do not insert too deeply.
3. Eyebrow Trimmer Head
- Use for precise trimming and shaping of eyebrows.
- Gently glide the trimmer along the desired eyebrow line, removing stray hairs.
4. Facial Cleaning Brush Head
- Attach this brush for deep facial cleansing.
- Apply your preferred facial cleanser to your face or the brush head.
- Gently move the brush in circular motions across your face.
5. Massaging Head
- Use this head for a gentle facial massage.
- Move the massaging head in slow, circular motions over your face to promote relaxation.
6. Silicone Cleansing Head
- This head is designed for a softer, more gentle facial cleansing experience.
- Apply cleanser and move the silicone brush gently over your face.

Image: A woman demonstrating the use of the electric shaver for underarm hair removal, highlighting its ergonomic design for various body areas.
Cleaning and Maintenance
Regular cleaning ensures optimal performance and hygiene of your shaver. The device is 100% waterproof, allowing for easy cleaning.
- Ensure the shaver is turned off and disconnected from the charging cable before cleaning.
- Remove the attachment head.
- Use the provided cleaning brush to remove any loose hairs from the head and the main unit's connector.
- Rinse the attachment heads and the main unit under running water. For thorough cleaning, you may use mild soap.
- Allow all parts to air dry completely before reassembling or storing.
- Do not use abrasive cleaners or harsh chemicals.
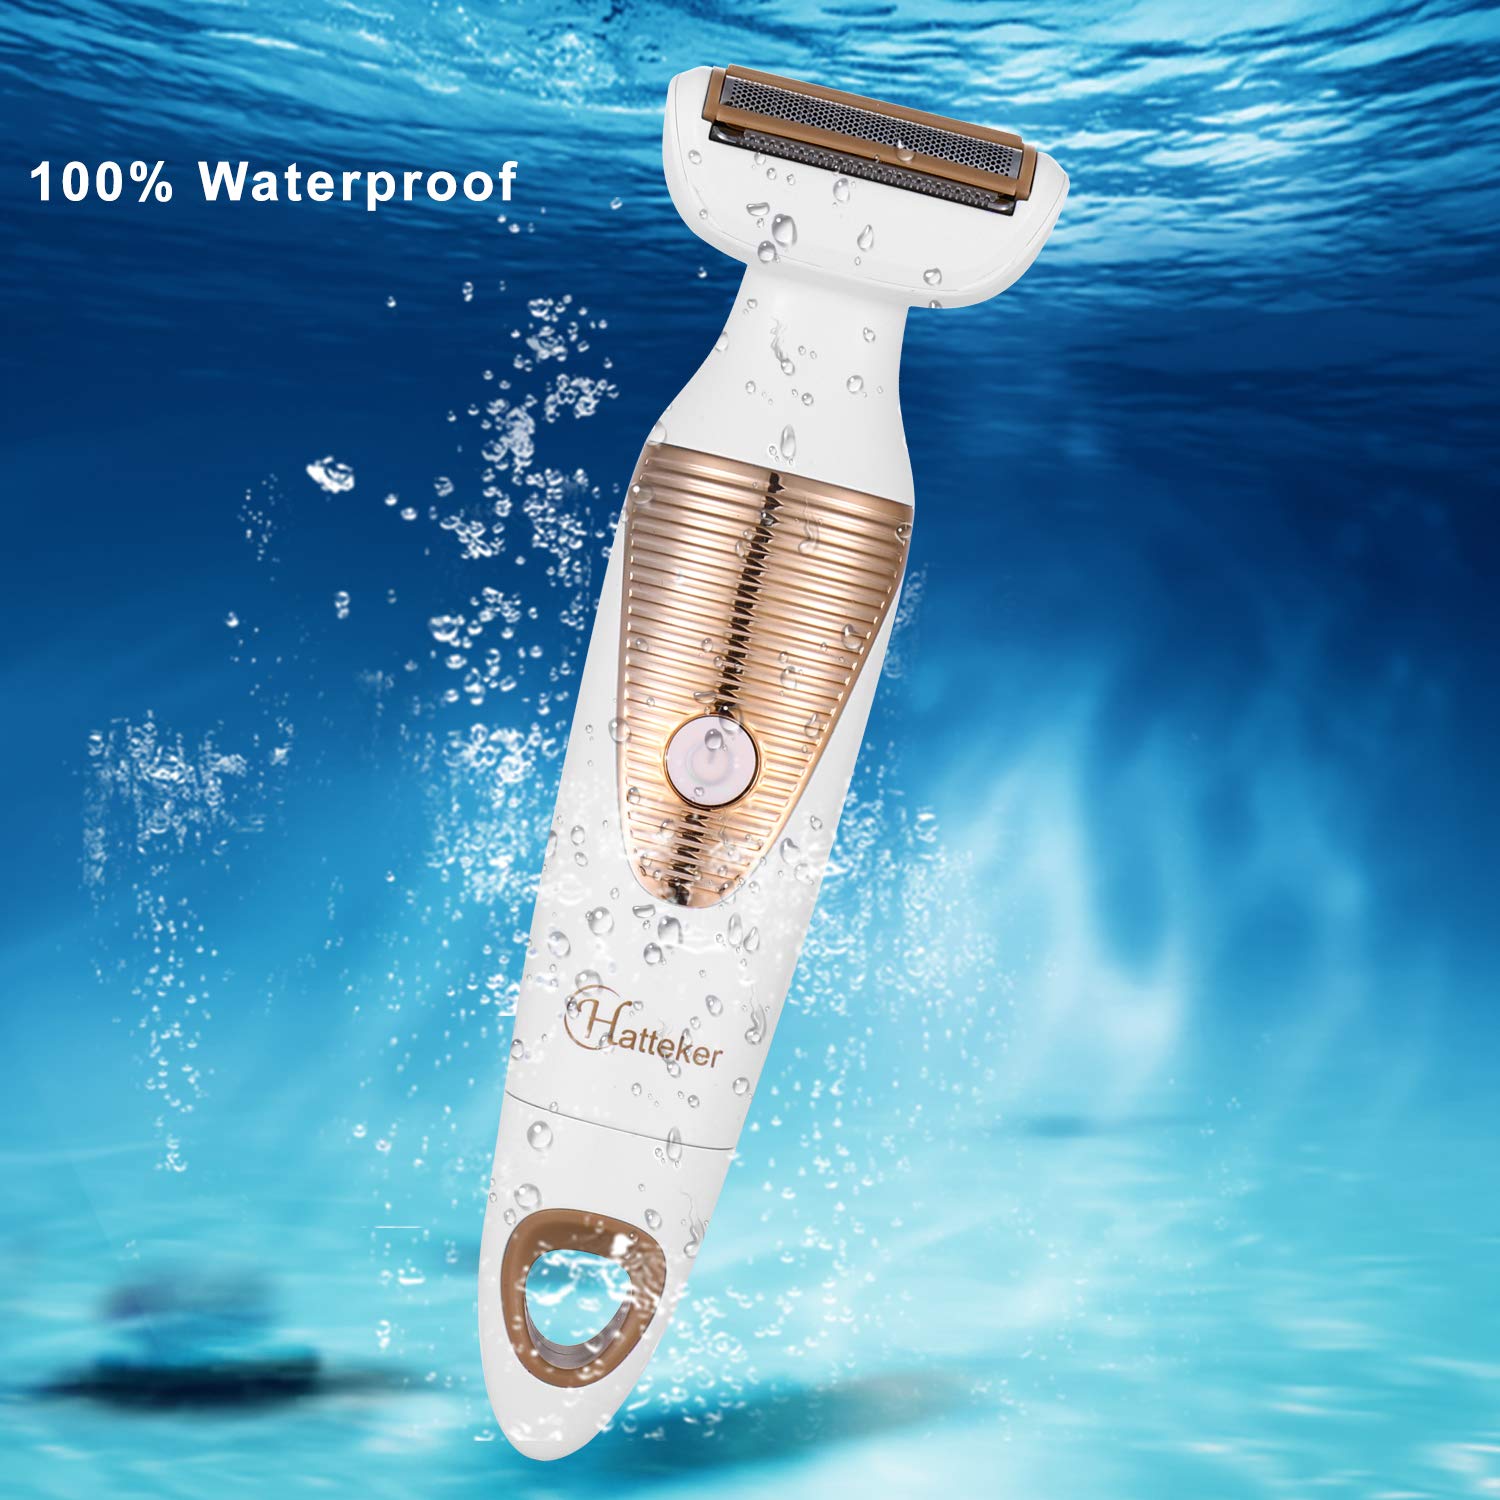
Image: The Hatteker electric shaver shown partially submerged in water, illustrating its 100% waterproof design for easy cleaning and wet use.
Storage
Store the shaver in a cool, dry place when not in use. The main unit features a bottom hanging hole for convenient storage.
- Ensure the device is clean and dry before storing.
- Keep all attachment heads and accessories together to prevent loss.
- Store away from direct sunlight and extreme temperatures.

Image: The Hatteker shaver hanging from a hook by its integrated bottom hole, demonstrating a practical storage solution.
Troubleshooting
| Problem | Possible Cause | Solution |
|---|---|---|
| Shaver does not turn on. | Battery is depleted. | Charge the shaver for 1.5 hours. |
| Shaver does not charge. | Charging cable or adapter is faulty; charging port is dirty. | Try a different USB cable/adapter. Ensure charging port is clean and dry. |
| Poor shaving performance. | Attachment head is clogged with hair; head is not properly attached. | Clean the attachment head thoroughly. Ensure the head is securely attached. |
| Device makes unusual noise. | Hair caught in the mechanism; head not properly seated. | Clean the head and main unit. Reattach the head securely. If problem persists, discontinue use. |
Product Specifications
- Model Number: HF-5178
- Power Source: Battery Powered (1 Lithium Ion battery included)
- Special Features: Rechargeable, Cordless, Waterproof
- Charging Time: Approximately 1.5 hours
- Work Time: Approximately 45 minutes
- Recommended Uses: Armpit, Eyebrow, Leg, Nose Hair, Facial Cleansing, Facial Massage
- Manufacturer: HATTEKER
- Package Dimensions: 8.7 x 5.7 x 2.8 inches
- Item Weight: 11.99 ounces
Warranty and Support
For warranty information or customer support, please refer to the product packaging or contact your retailer. Keep your purchase receipt as proof of purchase.