Introduction
This manual provides comprehensive instructions for the assembly, operation, and maintenance of your PLUS MODEL 1/72 KDA-1 Firebee model kit. Please read this manual thoroughly before beginning assembly to ensure proper construction and enjoyment of your model.
The KDA-1 Firebee is a highly detailed 1/72 scale model, replicating the iconic drone. This kit is designed for model enthusiasts aged 14 years and up.
Product Overview

Figure 1: Assembled KDA-1 Firebee Model. This image displays the completed model from a slightly elevated front-side angle, highlighting the detailed paint scheme and overall shape.
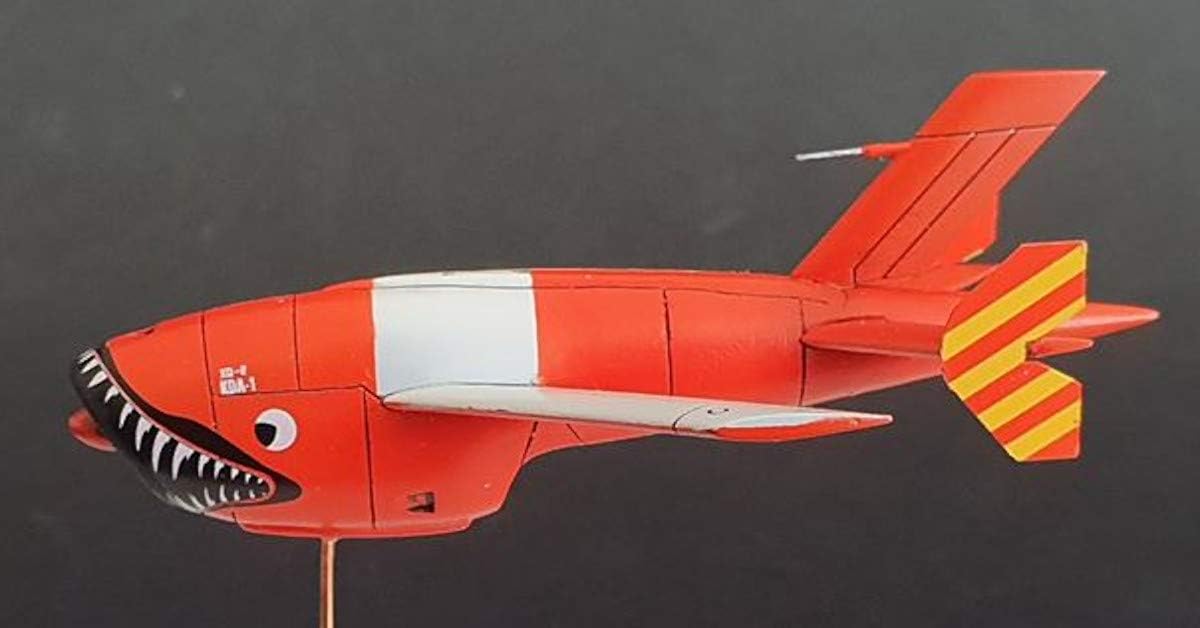
Figure 2: Side View of Assembled KDA-1 Firebee Model. This image provides a clear side profile of the model, emphasizing its aerodynamic design and the distinct markings on the fuselage and tail.
The PLUS MODEL KDA-1 Firebee kit allows for the creation of a highly accurate replica. Key features include:
- Detailed 1/72 scale components.
- Authentic markings and decals (if included in kit).
- High-quality plastic parts for precise fit.
Setup and Assembly
Before starting assembly, ensure you have a clean, well-lit workspace and the necessary tools. Recommended tools include:
- Hobby knife or sprue cutters
- Plastic cement (model glue)
- Fine-grit sandpaper or sanding sticks
- Tweezers
- Paint and brushes (optional, for finishing)
Assembly Steps:
- Part Identification: Carefully unbox all components and compare them against the parts list provided in your kit. Familiarize yourself with each part.
- Preparation: Gently remove parts from the sprues using a hobby knife or sprue cutters. Clean any excess plastic (flash) from the parts using sandpaper or a hobby knife.
- Fuselage Assembly: Join the two halves of the fuselage. Apply a thin layer of plastic cement to the mating surfaces and press them firmly together. Hold in place until the glue sets.
- Wing Attachment: Attach the main wings to the fuselage. Ensure proper alignment before the glue dries.
- Tail Section: Assemble and attach the horizontal and vertical stabilizers to the rear of the fuselage.
- Detailing: Attach smaller components such as landing gear (if applicable), antennae, and other external details.
- Decals: Once the model is fully assembled and painted (if desired), apply the provided decals according to the placement guide in your kit. Use decal setting solution for best results.
Note: Always work in a well-ventilated area when using adhesives and paints. Allow sufficient drying time between steps.
Operating (Display and Handling)
This model is designed for display purposes. Proper handling will ensure its longevity and preserve its detailed finish.
- Display Location: Place your model on a stable, flat surface away from direct sunlight, extreme temperatures, and high humidity. These conditions can cause warping, fading, or damage to the paint and decals.
- Handling: Always handle the model by its main body or sturdy sections. Avoid touching delicate parts like antennae, small fins, or propellers (if applicable) to prevent breakage.
- Dust Protection: Consider displaying the model in a dust-proof display case to minimize dust accumulation and the need for frequent cleaning.
Maintenance
Regular, gentle maintenance will keep your KDA-1 Firebee model looking its best.
- Dusting: Use a soft, dry brush (such as a clean makeup brush or a dedicated model dusting brush) to gently remove dust from the model's surface. For stubborn dust, a can of compressed air (held at a distance) can be used, but be cautious not to dislodge small parts.
- Cleaning: Avoid using liquid cleaners, solvents, or abrasive materials, as these can damage the paint, decals, or plastic. If absolutely necessary, a very lightly dampened cloth (with plain water) can be used on unpainted plastic, but ensure no moisture remains.
- Repairs: In case of accidental breakage, use plastic cement to reattach parts. For paint chips, touch up with appropriate model paints.
Troubleshooting
Most issues encountered with model kits relate to assembly. Here are some common problems and their solutions:
| Problem | Possible Cause | Solution |
|---|---|---|
| Parts do not fit together properly. | Excess plastic (flash) on parts; misalignment during gluing. | Carefully trim flash with a hobby knife or sand down edges. Ensure parts are correctly oriented before applying glue. |
| Glue marks visible on the model. | Too much glue applied; glue squeezed out during assembly. | Use a minimal amount of plastic cement. If marks are dry, they may be carefully sanded or painted over. |
| Decals do not adhere or wrinkle. | Surface not smooth; insufficient water; no decal setting solution. | Ensure surface is smooth and clean. Use enough water to slide the decal. Apply decal setting solution to help it conform to surfaces. |
If you encounter issues not covered here, please refer to online modeling forums or contact the manufacturer's support.
Specifications
Detailed specifications for the PLUS MODEL KDA-1 Firebee model kit (PLMAL7036):
- Product Dimensions: 3.94 x 3.94 x 1.97 inches
- Item Weight: 4.6 ounces
- Item Model Number: PLMAL7036
- Manufacturer: PLUS MODEL
- Recommended Age: 14 years and up
- Release Date: March 5, 2024
- Color (as depicted on box/model): Red with White stripe (main body), Yellow and Red (tail fins)
- Theme: Military
- Scale: 1/72
Warranty and Support
PLUS MODEL strives to provide high-quality model kits. While specific warranty details for individual components may vary, the manufacturer stands behind the quality of its products.
For missing or defective parts, or for assembly assistance, please contact PLUS MODEL directly through their official website or the retailer from whom you purchased the kit. Please have your model number (PLMAL7036) and proof of purchase ready when contacting support.
Manufacturer Contact Information:
- Manufacturer: PLUS MODEL
- Refer to the packaging or official PLUS MODEL website for the most current contact details.