AGLUCKY Z5880-RED
AGLUCKY Countertop Ice Maker User Manual
Model: Z5880-RED | Brand: AGLUCKY
1. Introduction
Thank you for choosing the AGLUCKY Countertop Ice Maker. This manual provides essential information for the safe and efficient operation, maintenance, and troubleshooting of your new ice maker. Please read it thoroughly before first use and keep it for future reference.
Important Safety Information
- Always ensure the ice maker is placed on a stable, level surface away from direct sunlight or heat sources.
- Use only potable water.
- Do not immerse the appliance, cord, or plug in water or other liquids.
- Unplug the ice maker before cleaning or when not in use for extended periods.
- Keep ventilation openings clear of obstructions.
- Do not use mechanical devices or other means to accelerate the defrosting process.
- This appliance uses flammable refrigerant. Handle with care and do not puncture refrigerant tubing.
2. Product Components
Familiarize yourself with the parts of your AGLUCKY ice maker:

Figure 2.1: Overall view of the AGLUCKY Countertop Ice Maker.
- Ice Maker Unit: The main body of the appliance.
- Ice Basket: Removable basket to collect produced ice cubes.
- Ice Scoop: For convenient scooping of ice.
- Control Panel: Buttons and indicator lights for operation.
- Transparent Lid: Allows you to view the ice-making process.
- Water Reservoir: Internal tank for water supply.
- Drain Plug: Located at the bottom for water drainage.
3. Setup Guide
3.1 Unpacking
Carefully remove all packaging materials and inspect the ice maker for any damage. Ensure all accessories (ice basket, ice scoop) are present.
3.2 Placement
Place the ice maker on a flat, stable surface. Ensure there is at least 4 inches (10 cm) of space around the unit for proper ventilation, especially at the back where the exhaust fan is located.

Figure 3.1: The compact design allows for easy placement on countertops.
3.3 Initial Cleaning
Before first use, clean the interior of the ice maker. The unit features a self-cleaning function:
- Add water to the reservoir up to the MAX fill line.
- Press and hold the ON/OFF button for 5 seconds to activate the self-cleaning mode.
- The cleaning cycle will run for a few minutes. Once complete, drain the water from the unit using the drain plug at the bottom.
- Wipe the interior dry with a soft cloth.

Figure 3.2: The self-cleaning function ensures hygiene.
4. Operating Instructions
4.1 Adding Water
Open the lid and pour potable water into the reservoir. Do not exceed the 'MAX' fill line. The 'ADD WATER' indicator light will illuminate if the water level is too low.
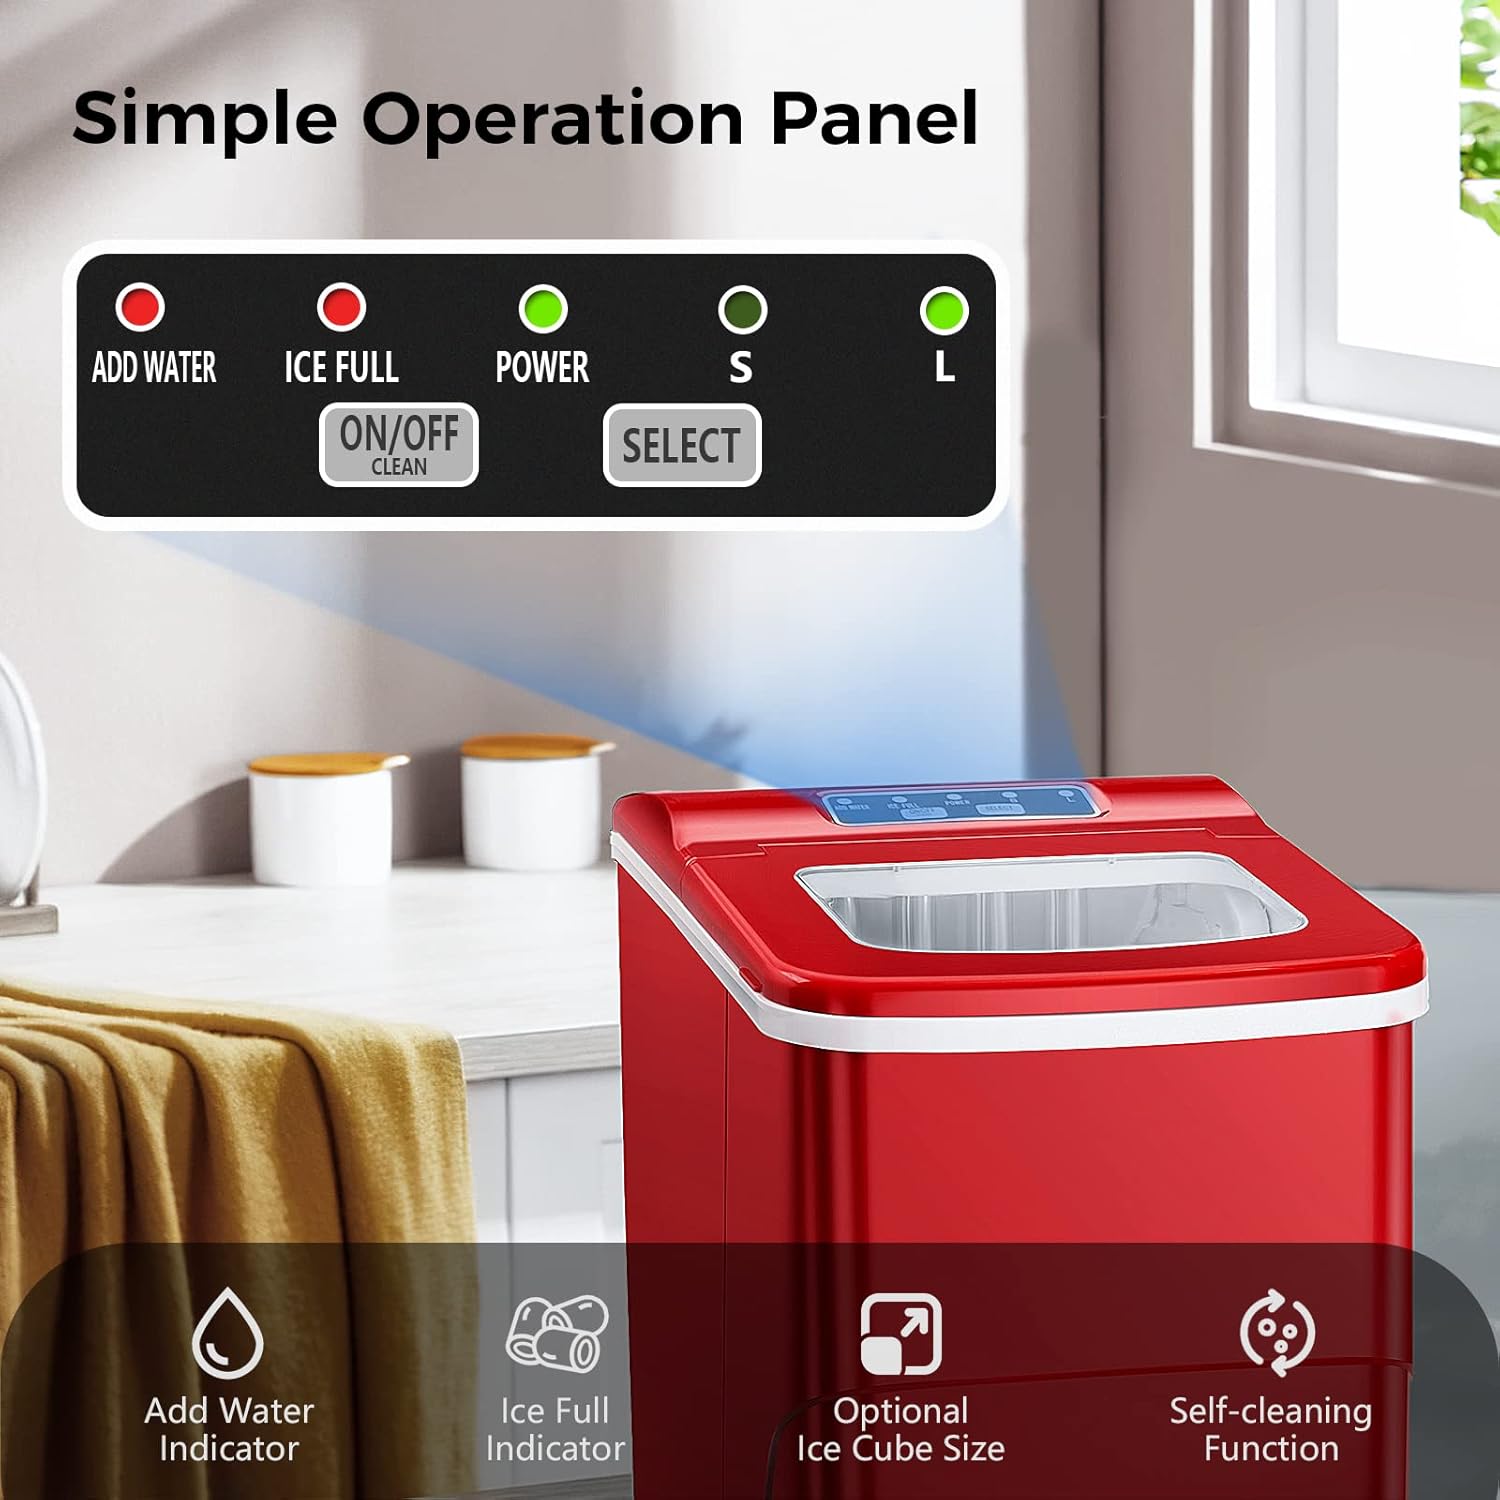
Figure 4.1: Control panel with indicator lights.
4.2 Making Ice
- Plug the ice maker into a grounded electrical outlet.
- Press the 'ON/OFF' button to turn on the appliance. The 'POWER' indicator will light up.
- Press the 'SELECT' button to choose your desired ice cube size: 'S' for small or 'L' for large.
- The ice maker will begin the ice-making cycle. It produces 9 ice cubes in approximately 6-8 minutes.
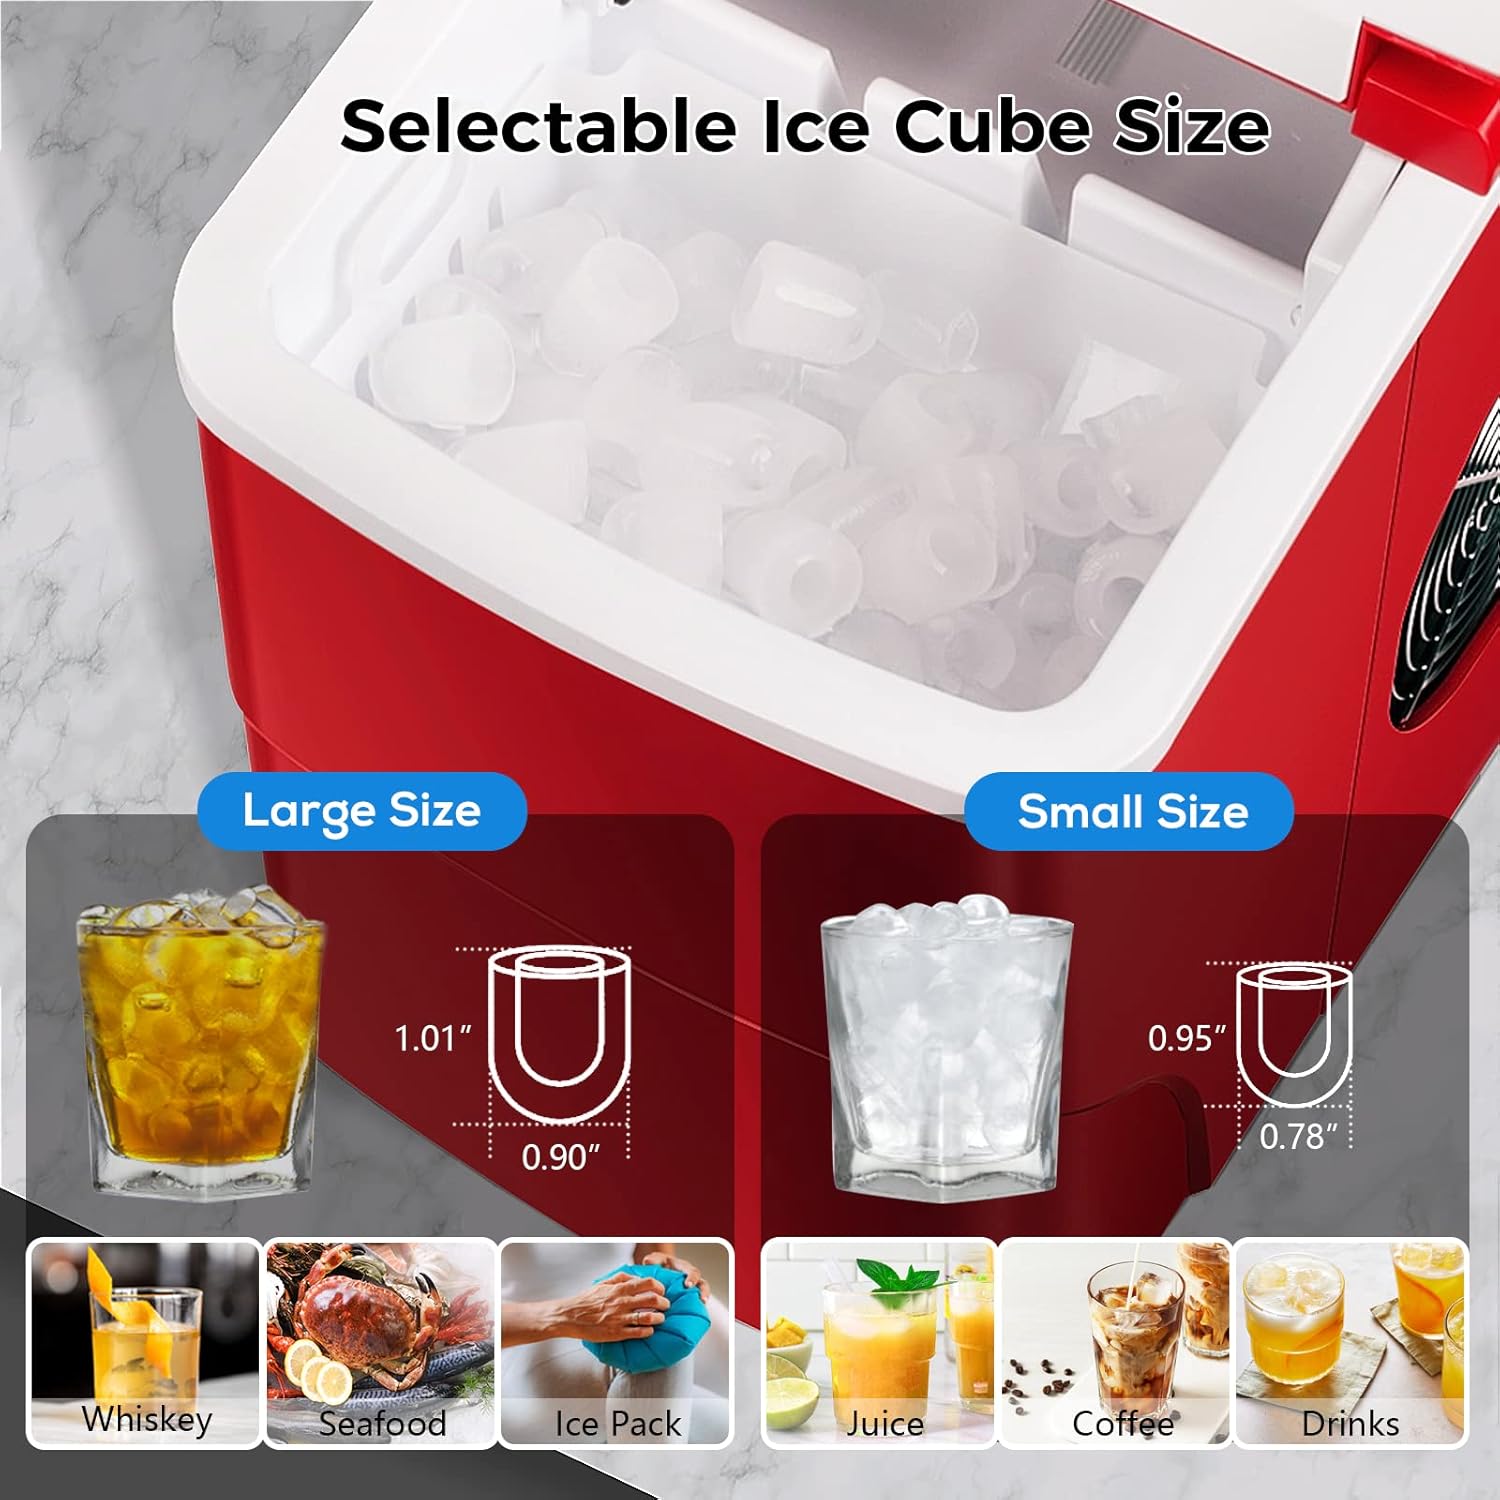
Figure 4.2: Choose between small or large bullet-shaped ice cubes.
4.3 Ice Collection
Once the ice basket is full, the 'ICE FULL' indicator light will illuminate, and the ice maker will automatically stop producing ice. Remove the ice from the basket using the provided scoop.
Video 4.1: AGLUCKY Countertop Ice Maker Machine in action.
4.4 Low Noise Operation
The AGLUCKY ice maker is designed with a quick and quiet cooling system, ensuring minimal disturbance during operation.

Figure 4.3: Enjoy quiet ice production.
5. Care and Maintenance
5.1 Regular Cleaning
To maintain the quality of your ice and the longevity of your machine, regular cleaning is recommended. Use the self-cleaning function as described in Section 3.3. For deeper cleaning, unplug the unit and wipe down all surfaces with a soft cloth and mild detergent. Rinse thoroughly.
5.2 Draining Water
When not in use for an extended period, or for thorough cleaning, drain all water from the reservoir. Locate the drain plug at the bottom of the unit, remove it, and allow all water to empty. Replace the plug securely.
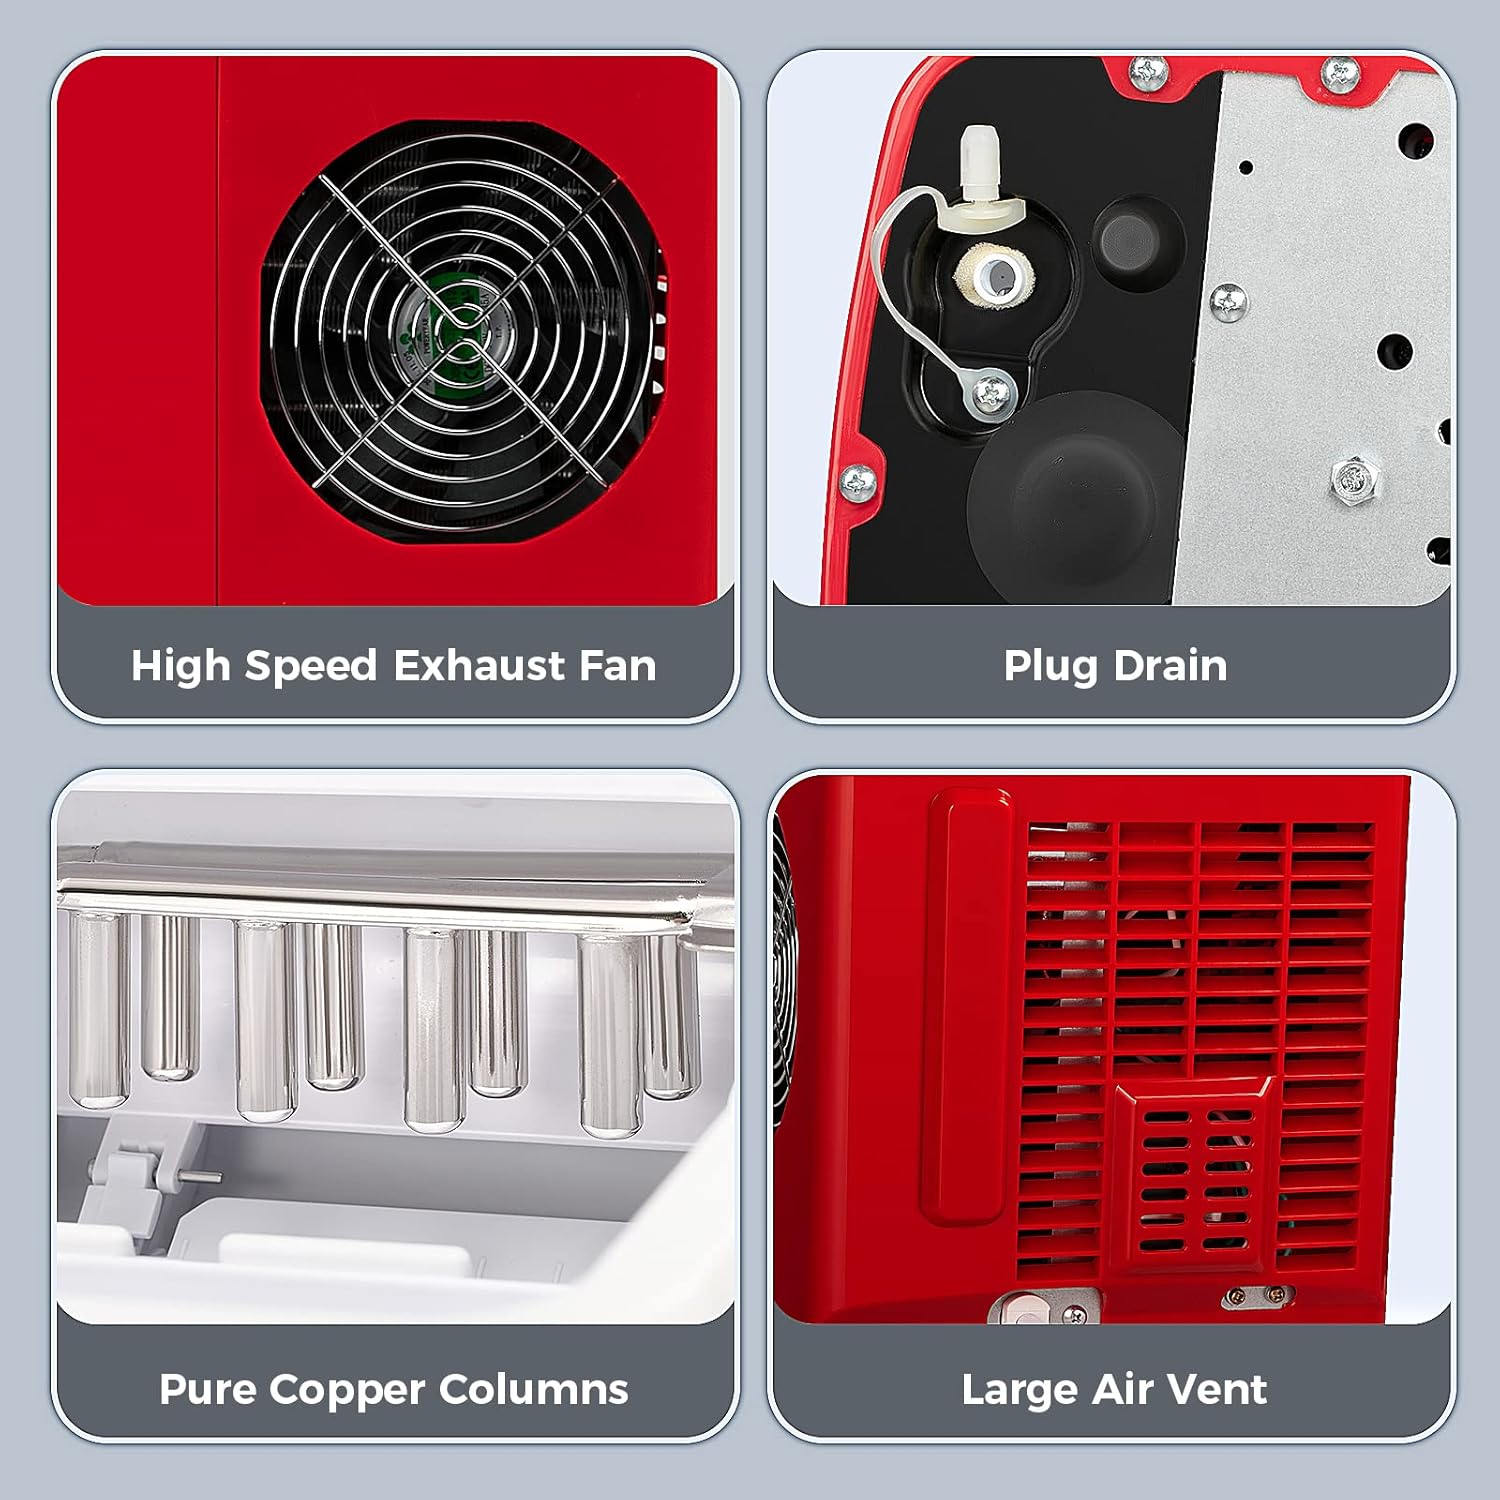
Figure 5.1: Locate the drain plug at the bottom of the unit.
6. Troubleshooting
If you encounter issues with your ice maker, please refer to the table below for common problems and solutions:
| Problem | Possible Cause | Solution | ||||||||||
|---|---|---|---|---|---|---|---|---|---|---|---|---|
| Ice maker not working | No power; Water level too low; Ice basket full. | Check power connection; Add water; Empty ice basket. | ||||||||||
| Ice cubes are too small or cloudy | Water temperature too high; Mineral buildup. | Use colder water; Perform self-cleaning cycle. | ||||||||||
Related Documents - Z5880-RED
Ask a question about this manualAsk about setup, troubleshooting, compatibility, parts, safety, or missing instructions. Manuals+ will review the question and use this page’s manual context to help answer it. |


