
Introduction
This manual provides comprehensive instructions for the safe and effective use of your amadecohome 2 Pack 200 LED Solar String Lights. These lights are designed for both indoor and outdoor decoration, featuring solar power, 8 lighting modes, and a waterproof design. Please read this manual thoroughly before installation and operation.
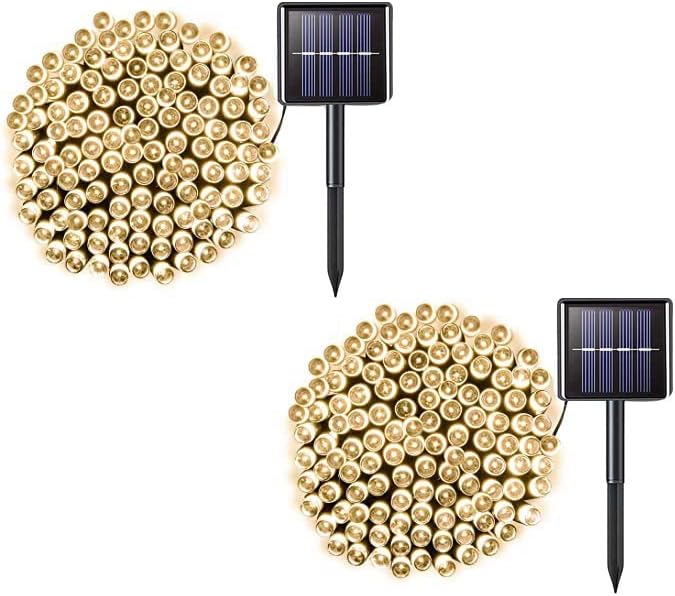
Image: Two coiled sets of warm white solar string lights, each with an attached solar panel and ground stake, presented against a white background.
Safety Information
- Ensure the solar panel is placed in an area that receives direct sunlight for at least 6-8 hours daily for optimal charging.
- Do not attempt to modify or disassemble the product. This may void the warranty and pose safety risks.
- Keep the solar panel clean from dust, debris, and snow to maintain charging efficiency.
- While the lights are waterproof (IP44), avoid submerging the solar panel or string lights in water for extended periods.
- Keep away from open flames or high heat sources.
- Handle the wires carefully during installation to prevent damage.
Package Contents
Each package contains the following items:
- 2 x 100 LED Warm White Solar String Lights
- 2 x Solar Panels
- 2 x Plastic Ground Stakes
Product Overview
Watch this video for a quick overview of the amadecohome Solar String Lights, demonstrating their features and ease of installation.
Video: An overview of the 2 Pack 100 LED Solar String Lights, showcasing their design, solar panel, and various lighting effects in an outdoor setting.
Setup Instructions
- Unpack Components: Carefully remove all items from the packaging.
- Assemble Solar Panel Stake: Attach the plastic ground stake to the solar panel. The stake typically consists of two parts that connect to form a longer stake.
- Position Solar Panel: Choose a location for the solar panel that receives maximum direct sunlight throughout the day (6-8 hours recommended). Insert the assembled stake firmly into the ground. Ensure the solar panel is facing the sun.
- Remove Protective Film: Gently peel off the protective film from the surface of the solar panel to ensure optimal charging.
- Arrange String Lights: Uncoil the 42.6ft string lights and arrange them as desired. The lead wire from the solar panel to the first light is 9.8ft, providing flexibility for placement.

Image: Assembly of the solar panel with its ground stake. The stake is inserted into the back of the solar panel unit.

Image: A solar panel with arrows illustrating sunlight hitting its surface, emphasizing the need for direct sun exposure.

Image: A diagram illustrating the total length of the string lights (42.6ft) and the 9.8ft lead wire from the solar panel to the first LED bulb.
Operating Instructions
Your solar string lights are equipped with a power switch and a mode button located on the back of the solar panel unit.

Image: A close-up view of the solar panel unit, highlighting the "Power Switch" (On/Off) and "Mode Switch" buttons.
- Power On/Off: Locate the "ON/OFF" button on the back of the solar panel. Press it once to turn the lights on. The lights will automatically turn on at dusk and off at dawn, provided the solar panel has charged sufficiently during the day. Press again to turn off.
- Select Lighting Mode: Use the "MODE" button to cycle through the 8 available lighting effects. Each press will change the mode.
- Combination
- In Waves
- Sequential
- Slo-Glo
- Chasing/Flash
- Slow Fade
- Twinkle/Flash
- Steady On
- Initial Charge: For first-time use, ensure the solar panel is exposed to direct sunlight for at least 8-12 hours with the power switch in the "ON" position to fully charge the internal battery.
Maintenance
- Cleaning: Regularly wipe the solar panel with a soft, damp cloth to remove dirt, dust, or snow. A clean panel ensures efficient charging.
- Weather Protection: The lights are IP44 waterproof, suitable for outdoor use in various weather conditions. However, during extreme weather events (e.g., hurricanes, heavy snowstorms), it is advisable to temporarily store the lights indoors to prolong their lifespan.
- Storage: If storing the lights for an extended period, ensure the battery is fully charged, then turn off the power switch. Store in a cool, dry place.
Troubleshooting
| Problem | Possible Cause | Solution |
|---|---|---|
| Lights do not turn on at night. | 1. Solar panel not receiving enough sunlight. 2. Power switch is off. 3. Battery is not charged or is depleted. | 1. Relocate the solar panel to an area with 6-8 hours of direct sunlight daily. 2. Ensure the "ON/OFF" switch is in the "ON" position. 3. Allow the solar panel to charge for a full day in direct sunlight. |
| Lights are dim or only stay on for a short time. | 1. Insufficient charging due to cloudy weather or obstruction. 2. Solar panel is dirty. 3. Battery capacity reduced over time. | 1. Ensure the solar panel is clean and receives ample direct sunlight. 2. Clean the solar panel surface. 3. Consider replacing the internal rechargeable battery if performance does not improve after cleaning and full charging. |
| Lights or wires appear damaged. | Physical stress or manufacturing defect. | Inspect the wires and bulbs for any visible damage. If significant damage is present, discontinue use and contact customer support. |
Specifications
- Brand: amadecohome
- Model Number: 01
- Light Color: Warm White
- Number of LEDs: 200 (100 per string, 2 strings included)
- Total Length: 85.2 ft (42.6 ft per string)
- Lead Wire Length: 9.8 ft
- Power Source: Solar Powered
- Light Source Type: LED
- Waterproof Rating: IP44
- Lighting Modes: 8 (Combination, In Waves, Sequential, Slo-Glo, Chasing/Flash, Slow Fade, Twinkle/Flash, Steady On)
- Material: Plastic
- Color Temperature: 3000 Kelvin
- Wattage: 1 watts
- Item Weight: 15.8 ounces
Warranty and Support
Specific warranty information for this product is not provided in the available documentation. For any product inquiries, technical support, or warranty claims, please refer to the retailer's return policy or contact amadecohome customer service directly through their official channels.