VEVOR E300-0.8M (Model a7dahou03p)
VEVOR Manual Tile Cutter E300-0.8M User Manual
Model: E300-0.8M (a7dahou03p) | Brand: VEVOR
Introduction
Thank you for choosing the VEVOR Manual Tile Cutter E300-0.8M. This manual provides essential information for the safe and efficient operation, maintenance, and troubleshooting of your new tile cutter. Please read this manual thoroughly before use and keep it for future reference.
This manual tile cutter is designed for precise and clean cutting of various tile types, including ceramic, porcelain, normal floor tiles, and polished tiles. Its robust all-steel construction ensures durability and stability for long-term use.
Safety Instructions
Always follow these safety precautions to prevent injury and damage to the tool:
- Wear appropriate personal protective equipment (PPE), including safety glasses and gloves, when operating the tile cutter.
- Ensure the work area is clean, well-lit, and free from obstructions.
- Keep children and bystanders away from the operating area.
- Inspect the tile cutter for any damage or loose parts before each use. Do not operate if damaged.
- Place the tile cutter on a stable, level surface to prevent tipping during operation.
- Handle tiles carefully, as edges can be sharp after cutting.
- Do not force the cutting wheel; apply steady, even pressure.
- Store the tile cutter in a dry, secure place when not in use.
Components Overview
Familiarize yourself with the main components of your VEVOR Manual Tile Cutter:

Figure 1: Complete VEVOR Manual Tile Cutter E300-0.8M with included accessories such as wrenches and a spare cutting wheel.

Figure 2: Detailed dimensions of the tile cutter, showing its length, width, and height for proper placement and storage.

Figure 3: Close-up view highlighting the robust all-steel frame construction, ensuring durability and stability during operation.

Figure 4: View of the improved sliding machine head, designed for smoother and more precise cutting action.

Figure 5: The high-quality alloy cutting wheel, essential for clean and accurate scores, with a free spare included.

Figure 6: All included accessories: wrenches, spare cutting wheel, and other small components for assembly and maintenance.
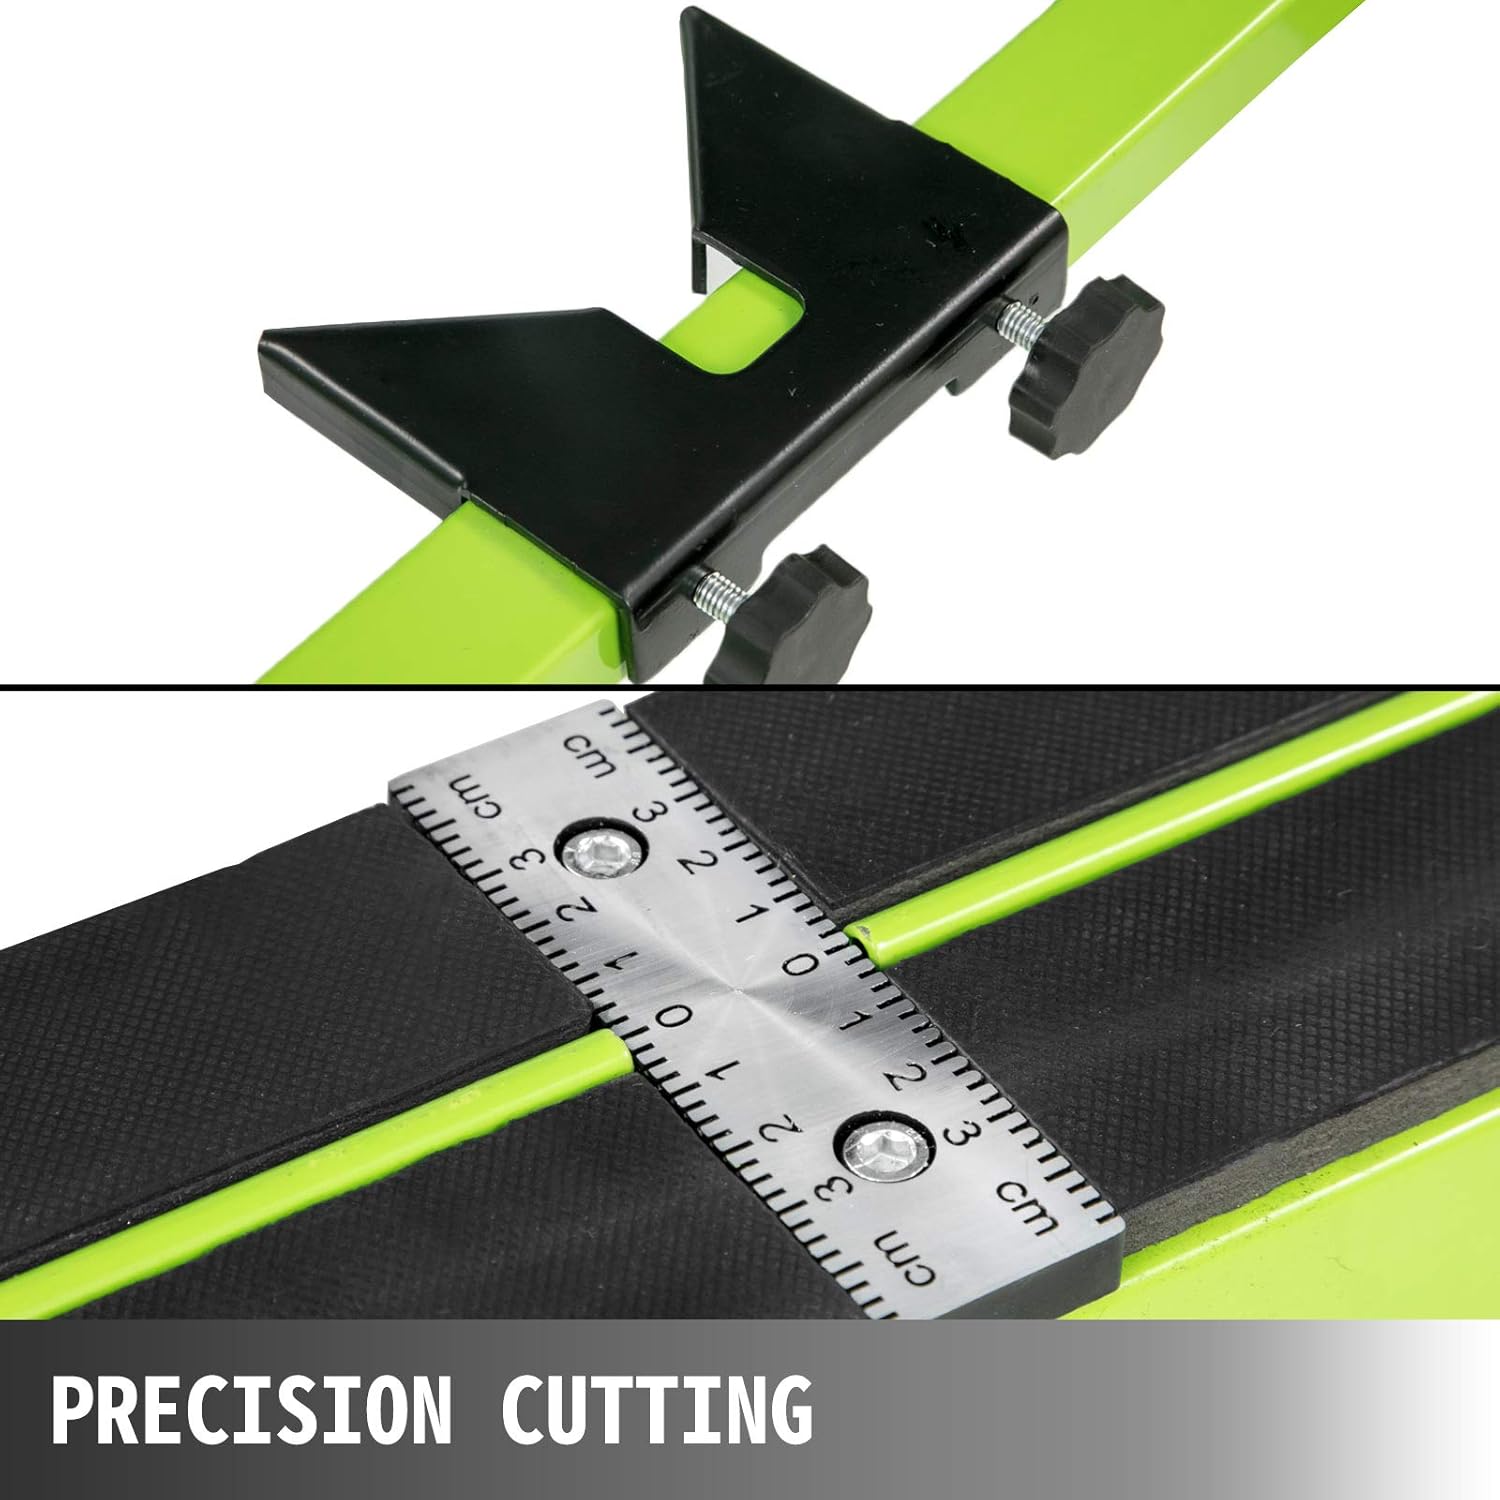
Figure 7: Close-up of the precision cutting guide and integrated ruler, allowing for accurate measurements and repeatable cuts.
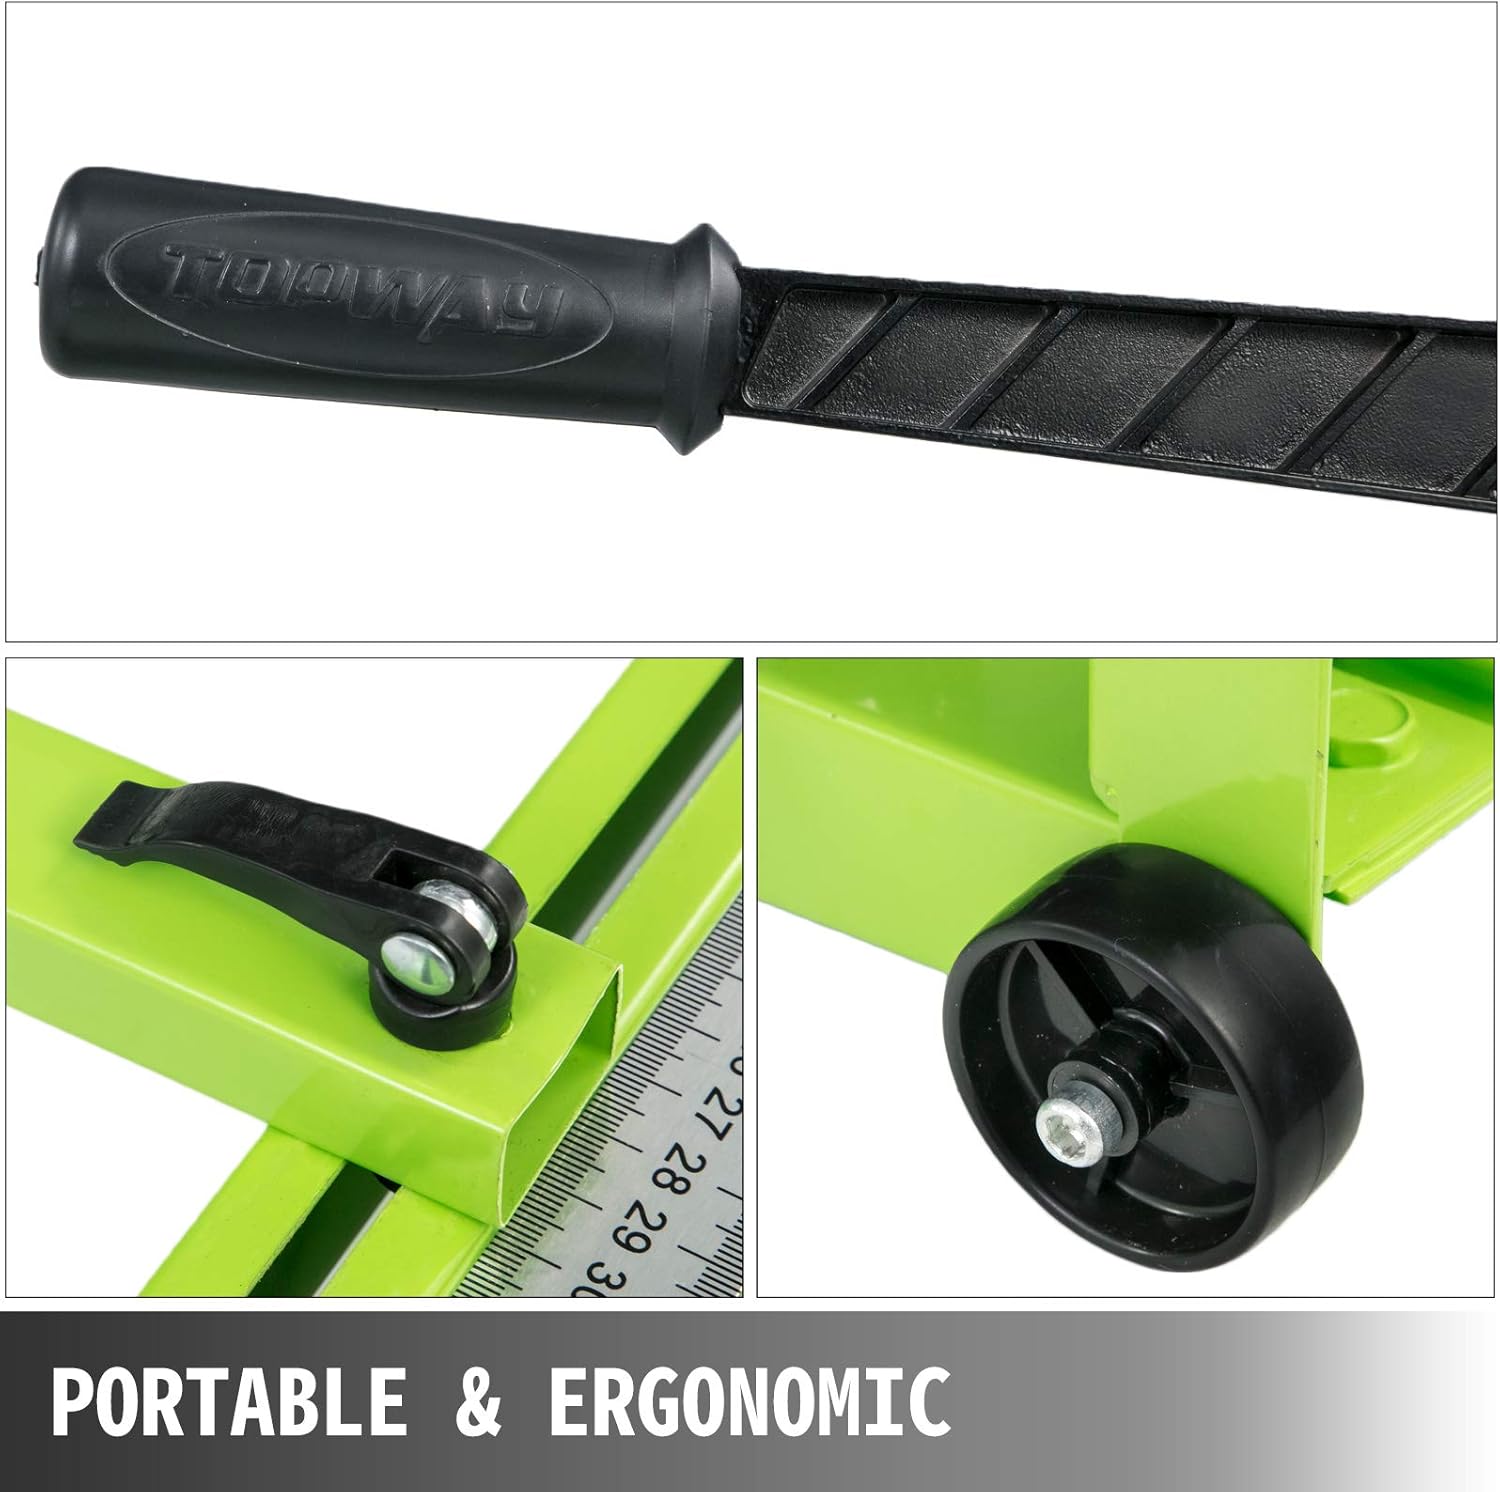
Figure 8: Features contributing to portability and ergonomics, including the comfortable non-slip rubber handle and transport wheels.

Figure 9: Examples of different tile materials that can be cut with this tool, demonstrating its wide application versatility.
Setup
Before using your tile cutter, some assembly may be required. Follow these steps:
- Unpack all components: Carefully remove all parts from the packaging and verify against the packing list.
- Assemble the support legs (if detachable): Attach any separate support legs or extensions to the main frame, ensuring they are securely fastened.
- Install the cutting wheel: Ensure the cutting wheel is properly seated in the sliding machine head. Refer to Figure 5 for visual guidance.
- Attach the ruler/guide: Secure the adjustable ruler or angle guide to the base as shown in Figure 7. This will be used for precise measurements.
- Check all fasteners: Before first use, ensure all screws, bolts, and clamps are tightened securely.
- Position the laser guide (if applicable): If your model includes a laser guide, ensure it is properly aligned. Some models may require battery installation.
Operating Instructions
Follow these steps for effective and safe tile cutting:
- Prepare the Tile: Clean the tile surface. Mark the desired cutting line clearly on the tile.
- Position the Tile: Place the tile on the cutter's base, aligning the marked cutting line with the scoring line on the machine. Use the adjustable ruler/guide (Figure 7) to ensure accuracy.
- Score the Tile:
- Lower the cutting handle so the cutting wheel makes contact with the tile surface at the edge furthest from you.
- Apply firm, consistent pressure to the handle.
- Push the cutting head smoothly and steadily along the tile, scoring a single, continuous line from one end to the other. Avoid multiple passes, as this can lead to chipping.
- Break the Tile:
- Once the scoring is complete, position the breaking foot (or pressure pad) directly over the scored line, near the center of the tile.
- Apply quick, downward pressure to the handle. The tile should snap cleanly along the scored line.
- For longer tiles, you may need to apply pressure at both ends of the score line to ensure a clean break.
- Clean Up: Carefully remove the cut tile pieces. Dispose of waste properly.
Tip: For optimal results, ensure the cutting wheel is clean and sharp. Replace worn wheels promptly (a spare is included, see Figure 5).
Maintenance
Regular maintenance ensures the longevity and performance of your tile cutter:
- Cleaning: After each use, wipe down the entire machine with a dry cloth to remove tile dust and debris. For stubborn grime, use a damp cloth and mild detergent, then dry thoroughly.
- Lubrication: Periodically apply a light machine oil to the sliding rail and moving parts of the cutting head to ensure smooth operation.
- Cutting Wheel Inspection: Regularly inspect the cutting wheel for wear, chips, or dullness. A dull wheel can lead to poor cuts and chipping. Replace the wheel when necessary.
- Fastener Check: Periodically check all nuts, bolts, and screws for tightness. Tighten any loose fasteners.
- Storage: Store the tile cutter in a clean, dry environment, away from direct sunlight and extreme temperatures.
Troubleshooting
Here are solutions to common issues you might encounter:
| Problem | Possible Cause | Solution |
|---|---|---|
| Tile not scoring cleanly / Chipping | Dull cutting wheel; Insufficient pressure; Multiple scoring passes; Incorrect tile type. | Replace cutting wheel; Apply firm, consistent pressure; Score only once; Ensure tile is suitable for manual cutting. |
| Tile not breaking cleanly | Insufficient score depth; Breaking foot not centered on score line; Uneven pressure. | Ensure a deep, continuous score; Center the breaking foot precisely; Apply quick, decisive pressure. |
| Sliding head is stiff or rough | Lack of lubrication; Dust/debris on rail. | Clean the rail thoroughly; Apply light machine oil to the rail and sliding components. |
| Laser guide not working (if applicable) | Dead batteries; Laser emitter obstructed or damaged. | Replace batteries; Clean laser emitter; Contact support if damaged. |
Specifications
Technical specifications for the VEVOR Manual Tile Cutter E300-0.8M:
- Model: E300-0.8M (a7dahou03p)
- Brand: VEVOR
- Max. Cutting Length: 31.5 inches (800 mm)
- Cutting Thickness: 0.24 - 0.6 inches (6 - 15 mm)
- Product Dimensions (L x W x H): 109.98 x 30.99 x 14.99 cm (approx. 43.3 x 12.2 x 5.9 inches)
- Frame Material: All-steel heavy-duty construction
- Cutting Wheel Material: Super hard alloy
- Features: Laser infrared positioning, ergonomic non-slip handle, portable design with wheels.
Warranty and Support
VEVOR products are designed for durability and performance. While specific warranty details may vary by region and retailer, VEVOR is committed to customer satisfaction.
For technical support, parts replacement, or warranty inquiries, please contact your original point of purchase or visit the official VEVOR website. Please have your model number (E300-0.8M or a7dahou03p) and purchase information ready when contacting support.
Note: Information regarding spare parts availability for this specific model is currently unavailable. Please contact VEVOR customer service for assistance with parts.
Ask a question about this manual
Ask about setup, troubleshooting, compatibility, parts, safety, or missing instructions. Manuals+ will review the question and use this page’s manual context to help answer it.