1. Introduction
This manual provides essential information for the setup, operation, maintenance, and troubleshooting of your HP ScanJet Pro 2000 s2 Document Scanner. Please read this manual thoroughly before using the device to ensure proper functionality and to maximize its performance.
2. Product Overview
The HP ScanJet Pro 2000 s2 is a compact and efficient duplex document scanner designed for various scanning needs, including documents, photos, receipts, and cards. It features a 50-page Automatic Document Feeder (ADF) and offers fast, two-sided scanning.

Figure 2.1: HP ScanJet Pro 2000 s2 in operation, scanning a document through the ADF.
2.1 Scanner Components

Figure 2.2: Key components of the HP ScanJet Pro 2000 s2, including the document input tray, output tray, control buttons, and ports.
- Document Input Tray with Extension: Holds documents for scanning.
- Sliding Paper Guides: Adjust to fit various document widths.
- On/Off Button: Powers the scanner on or off.
- Scan Button: Initiates a scan job.
- USB 3.0 Port: Connects the scanner to a computer.
- Power Connection: Connects the power adapter.
- Document Output Tray with Extension: Collects scanned documents.
- Latch to Access Paper Path: Allows access for clearing paper jams or cleaning.
- Slot for Optional Cable-Type Security Lock: For securing the device.
2.2 Rear View and Connections
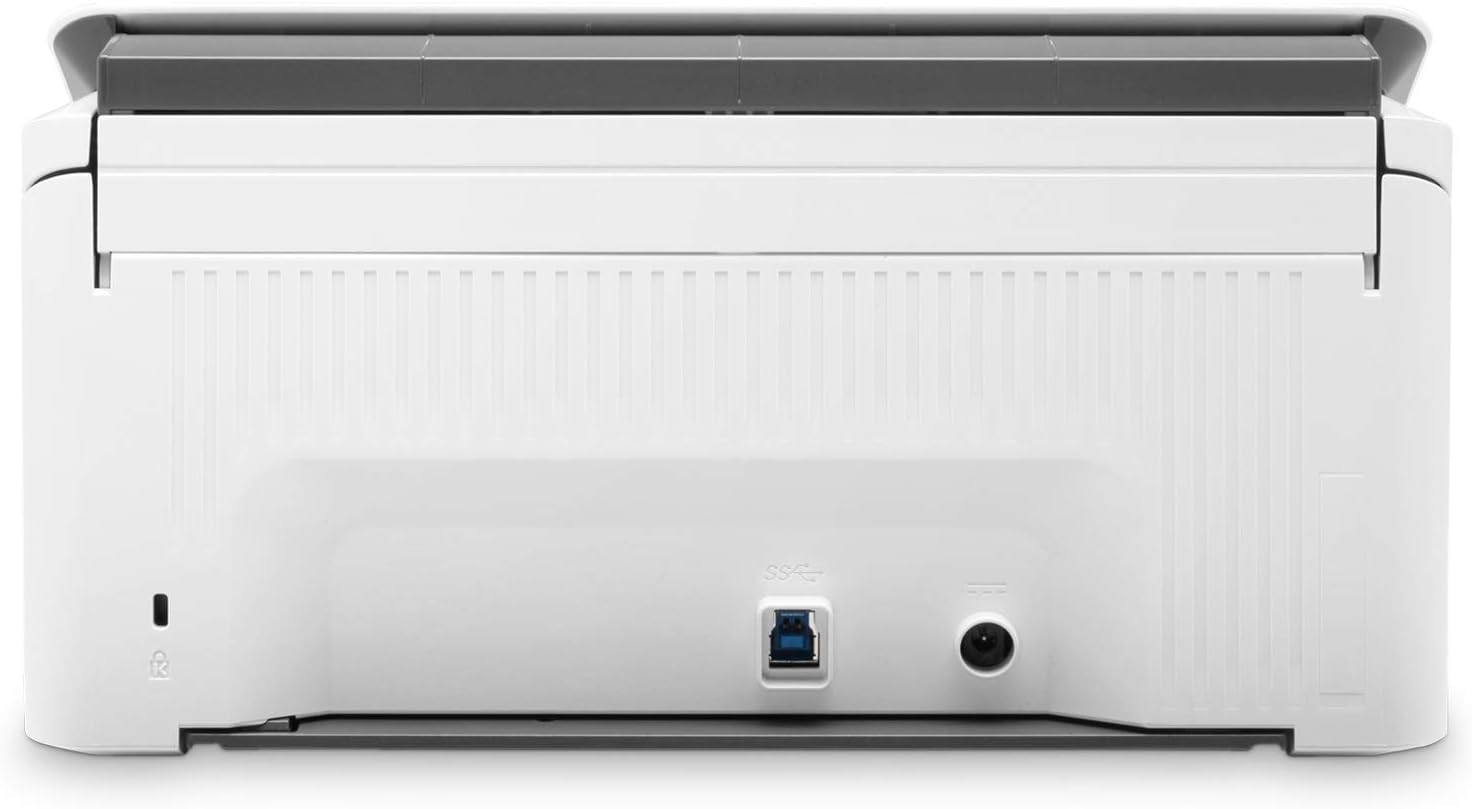
Figure 2.3: Rear view of the scanner, highlighting the USB 3.0 port and power input.
The rear of the scanner houses the primary connectivity ports:
- USB 3.0 Port: For high-speed data transfer to your computer.
- Power Input: For connecting the provided power adapter.
3. Setup Guide
3.1 Unpacking and Placement
- Carefully remove the scanner and all accessories from the packaging.
- Place the scanner on a stable, flat surface with adequate space for document feeding and output.
- Remove all protective tapes and packing materials from the scanner.
3.2 Connecting the Scanner
- Connect the power adapter to the scanner's power input port and then plug it into an electrical outlet.
- Connect one end of the USB cable to the USB 3.0 port on the scanner and the other end to an available USB port on your computer.
3.3 Software Installation
- Turn on the scanner using the On/Off button.
- Insert the provided software installation disc into your computer's optical drive, or download the latest drivers and software from the official HP support website.
- Follow the on-screen instructions to install the HP Scan software and necessary drivers (TWAIN/ISIS).
- Restart your computer if prompted after installation.
Note: Ensure your operating system is compatible with the scanner software. Refer to HP's support website for system requirements.
4. Operating Instructions
4.1 Loading Documents
- Extend the document input tray and output tray.
- Adjust the sliding paper guides to the width of your documents.
- Load up to 50 pages into the Automatic Document Feeder (ADF). Ensure documents are aligned and free of staples or paper clips.
- For mixed media sizes, ensure the stack is uniform to prevent jams.
4.2 Initiating a Scan
- Ensure the scanner is powered on and connected to your computer.
- Open the HP Scan software on your computer.
- Select your desired scan profile or create a new one. Profiles allow you to configure settings such as:
- Scan destination (e.g., folder, email, application)
- File format (e.g., PDF, JPEG, TIFF)
- Resolution (DPI)
- Color mode (color, grayscale, black & white)
- Duplex scanning (two-sided)
- Automatic document correction features
- Optical Character Recognition (OCR) for editable text
- Place your documents in the ADF.
- Press the Scan button on the scanner or click the scan button within the HP Scan software to begin.
- The scanner will process documents at speeds up to 35 pages per minute (ppm) or 70 images per minute (ipm) for two-sided scans.
4.3 Using TWAIN/ISIS Drivers
The scanner includes full-featured TWAIN and ISIS drivers, allowing direct integration with various document management and imaging applications. Consult your application's documentation for specific instructions on using these drivers to acquire images from the HP ScanJet Pro 2000 s2.
5. Maintenance
Regular maintenance ensures optimal performance and extends the lifespan of your scanner.
5.1 Cleaning the Scanner
- Power Off: Disconnect the power cord before cleaning.
- Exterior: Wipe the exterior surfaces with a soft, lint-free cloth dampened with water. Avoid abrasive cleaners.
- Glass and Rollers: Open the scanner cover (using the latch to access the paper path) to expose the scanning glass and paper rollers. Gently wipe the glass with a soft cloth and a non-abrasive glass cleaner. Clean the paper rollers with a lint-free cloth dampened with isopropyl alcohol to remove paper dust and residue.
- ADF Tray: Clean any dust or debris from the document input and output trays.
- Allow all components to dry completely before reconnecting power and using the scanner.
Note: Refer to the HP support website for detailed cleaning instructions or recommended cleaning kits.
6. Troubleshooting
This section addresses common issues you might encounter with your scanner.
6.1 Scanner Not Detected or Responding
- Check Connections: Ensure the USB cable is securely connected to both the scanner and the computer, and the power adapter is properly plugged in.
- Power Cycle: Turn off the scanner, unplug the power cord, wait 10 seconds, then plug it back in and turn it on.
- Restart Computer: Sometimes, restarting your computer can resolve connectivity issues.
- USB Port: Try connecting the scanner to a different USB port on your computer.
- Drivers: Verify that the latest scanner drivers are installed. Reinstall them if necessary.
6.2 Paper Jams
- Clear Path: Open the latch to access the paper path and carefully remove any jammed paper.
- Inspect Documents: Ensure documents are free of staples, paper clips, or tears before loading.
- Adjust Guides: Make sure the paper guides are properly adjusted to the width of the documents.
6.3 Poor Scan Quality
- Clean Scanner: Dust or smudges on the scanning glass or rollers can affect image quality. Refer to Section 5.1 for cleaning instructions.
- Software Settings: Adjust resolution, brightness, contrast, and color settings within the HP Scan software.
- Document Condition: Ensure original documents are clean and in good condition.
6.4 Slow Scanning or Software Performance
- Computer Resources: Ensure your computer meets the minimum system requirements and has sufficient RAM and processor speed. Close unnecessary applications.
- USB Connection: Use a USB 3.0 port for optimal speed.
- Software Updates: Check for and install any available updates for the HP Scan software and drivers.
7. Specifications
| Feature | Specification |
|---|---|
| Model Name | Pro 2000 s2 (6FW06A) |
| Scanner Type | Sheet-feed, Duplex Document Scanner |
| Connectivity | USB 3.0 |
| Scan Speed (ADF) | Up to 35 ppm (pages per minute) / 70 ipm (images per minute) |
| Automatic Document Feeder (ADF) Capacity | 50 sheets |
| Optical Resolution | Up to 600 dpi (optical) |
| Output Resolution | 75 to 1200 dpi |
| Color Depth | 24-bit (external), 48-bit (internal) |
| Daily Duty Cycle | Recommended 3,500 pages per day |
| Supported Media Types | Cut Sheet Paper, Printed Paper (Laser and Ink), Pre-punched Paper, Bank Checks, Business Cards, Freight Bills, Carbonless Forms, Plastic Carrier Sheets for easily damaged documents, Previously stapled media with staples removed |
| Minimum Document Size | 2 x 3 inches (50.8 x 76.2 mm) |
| Maximum Document Size | 8.5 x 122 inches (216 x 3098 mm) |
| Product Dimensions (W x D x H) | 11.8 x 6.8 x 6.1 inches (299.7 x 172.7 x 154.9 mm) |
| Item Weight | 6 pounds (2.7 kg) |
| Power Consumption | 24 watts (scanning), 5.4 watts (ready), 1.1 watts (sleep), 0.1 watts (auto-off) |
| Drivers Included | TWAIN, ISIS |

Figure 7.1: Physical dimensions of the HP ScanJet Pro 2000 s2 scanner.
8. Warranty Information
For detailed warranty information regarding your HP ScanJet Pro 2000 s2 scanner, please refer to the warranty card included with your product or visit the official HP support website. Warranty terms and conditions may vary by region.
9. Customer Support
If you require further assistance or have questions not covered in this manual, please contact HP Customer Support through their official website or the contact information provided with your product. Ensure you have your product model number (Pro 2000 s2) and serial number ready when contacting support.
HP Official Support Website: www.hp.com/support