1. Introduction
This manual provides detailed instructions for the safe and efficient operation, setup, and maintenance of the LeTkingok MTC-100 Magnetic Tension Controller. Please read this manual thoroughly before using the device to ensure optimal performance and longevity.
The MTC-100 Magnetic Tensioner is designed to provide stable and precise tension control for coil winding applications. It utilizes a magnetic force mechanism to ensure consistent tension, minimizing wire damage and tension fluctuations commonly associated with mechanical friction tensioners.
2. Product Features
- Magnetic Force Control: Generates magnetic force through adjustable magnetic gaps for precise tension.
- Stable Tension: Excellent tension stability due to minimal mechanical friction (only bearings).
- Prevents Wire Damage: Eliminates issues like wire felt damage and tension fluctuations caused by traditional mechanical systems.
- Enhanced Winding Precision: Ensures high precision in product winding.
3. Safety Information
Always observe the following safety precautions to prevent injury and damage to the equipment:
- Ensure the device is securely mounted before operation.
- Do not attempt to disassemble or modify the tensioner.
- Keep hands and loose clothing away from moving parts during operation.
- Refer to the specific warning label on the device regarding the tension lever position.
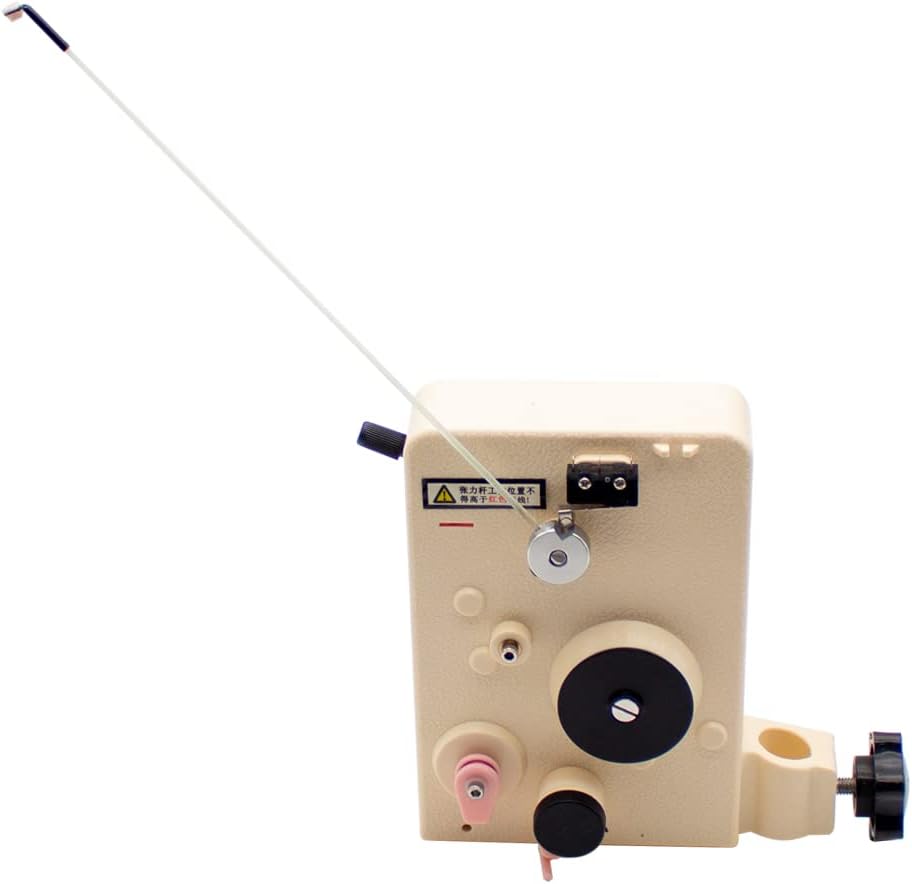
Figure 3.1: Front view of the MTC-100 Magnetic Tension Controller, showing the wire path and warning label. The warning label indicates that the tension lever should not be higher than the red mark.
4. Setup and Installation
- Mounting: Securely attach the MTC-100 tensioner to your coil winding machine using the integrated mounting bracket. Ensure it is stable and level.
- Wire Threading: Carefully thread the wire through the tensioner's guides and pulleys as illustrated in the diagrams below. Ensure the wire runs smoothly without kinks or obstructions.
- Initial Tension Adjustment: Before starting, set the tension dial to a low setting.
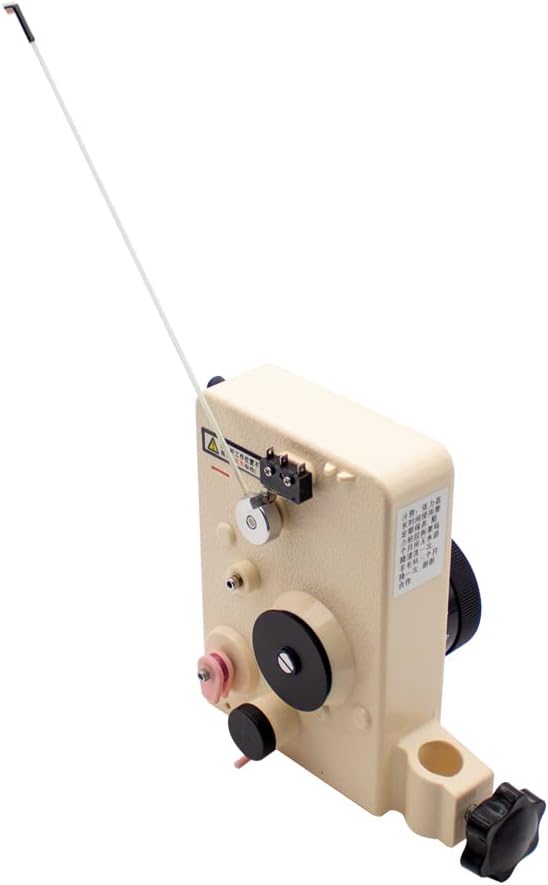
Figure 4.1: Angled view of the MTC-100, illustrating the typical wire threading path through the tensioner's components.

Figure 4.2: Top-down view of the MTC-100, providing a clearer perspective of the wire guides and pulleys for correct wire installation.
5. Operating Instructions
- Power On: Ensure the coil winding machine is ready for operation.
- Adjusting Tension: Rotate the tension adjustment dial (located on the side/back of the unit) to achieve the desired wire tension. The dial typically has markings to indicate relative tension levels.

Figure 5.1: Close-up view of the tension adjustment dial on the MTC-100, used to set the desired wire tension.
- Monitoring Tension: Observe the tension indicator (if present) and the wire's behavior during winding. Make fine adjustments as needed. The tension lever should operate within its specified range, not exceeding the red mark as indicated on the device.
- Operation: Begin the winding process. The magnetic tensioner will maintain consistent tension throughout the operation.
6. Maintenance
Regular maintenance ensures the longevity and optimal performance of your MTC-100 Magnetic Tension Controller.
- Cleaning: Periodically clean the exterior of the tensioner with a soft, dry cloth. Ensure no dust or debris accumulates in the wire path or around moving parts.
- Bearing Inspection: The only mechanical friction points are the bearings. Inspect them periodically for smooth rotation. If any resistance or noise is detected, consider professional servicing.
- Wire Path Inspection: Check the wire guides and pulleys for wear or damage. Replace any worn components to prevent wire abrasion.
- Storage: When not in use, store the tensioner in a clean, dry environment.
7. Troubleshooting
- Inconsistent Tension:
- Check for proper wire threading.
- Ensure the tension adjustment dial is set correctly.
- Inspect bearings for smooth operation.
- Verify that the tension lever is not exceeding its operational limits (e.g., above the red mark).
- Wire Breakage:
- Reduce the tension setting.
- Inspect wire guides and pulleys for sharp edges or wear.
- Ensure the wire diameter is within the recommended range for the MTC-100 model.
- Device Not Functioning:
- Ensure the device is correctly mounted and all components are securely in place.
- If issues persist, contact customer support.
8. Specifications
The LeTkingok MTC-100 Magnetic Tension Controller is designed for specific wire diameters and tension ranges. Refer to the table below for detailed specifications across different models.

Figure 8.1: Specification table for various MTC models, including recommended wire diameter and tension range.
| Model | Recommended Wire Diameter (mm) | Tension Range (g) |
|---|---|---|
| MT-30 | Φ 0.02 - Φ 0.06 | 3 - 30 |
| MT-100 | Φ 0.04 - Φ 0.12 | 10 - 100 |
| MT-200 | Φ 0.06 - Φ 0.16 | 20 - 200 |
| MT-400 | Φ 0.08 - Φ 0.25 | 50 - 400 |
| MT-600 | Φ 0.12 - Φ 0.35 | 80 - 600 |
| MT-800 | Φ 0.14 - Φ 0.40 | 100 - 800 |
- Manufacturer: LeTkingok
- Item Model Number: T-MTC
- Material: MT-100 (specific model configuration)
- Power Source: Hand-powered
- Included Components: 1 x MTC Winding Machine Magnetic Tensioner
9. Warranty and Support
For warranty information and technical support, please refer to the official LeTkingok website or contact your authorized dealer. Keep your purchase receipt for warranty claims.
For further assistance, you may contact LeTkingok customer service through their official channels. Please have your product model (MTC-100) and purchase details ready.