Henf 3-Drawer Dresser (Black)
Henf 3-Drawer Dresser User Manual
Model: Henf 3-Drawer Dresser (Black)
1. Introduction
This manual provides detailed instructions for the assembly, operation, and maintenance of your Henf 3-Drawer Dresser. Please read this manual thoroughly before assembly and use to ensure safe and proper handling of the product. Keep this manual for future reference.
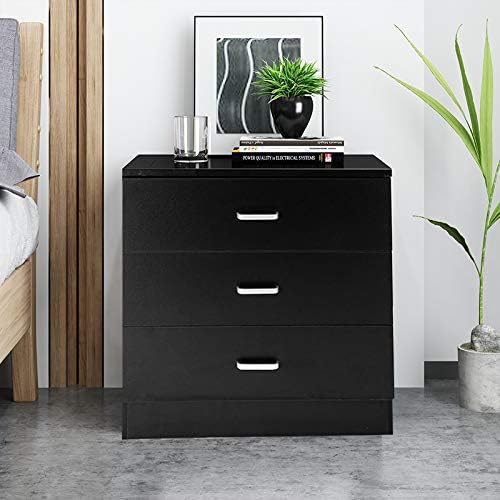
Figure 1.1: The Henf 3-Drawer Dresser, a compact storage solution suitable for various rooms.
2. Safety Instructions
To prevent injury or damage to the product, observe the following safety precautions:
- Always assemble the dresser on a soft, clean surface to prevent scratches.
- Ensure all screws and fasteners are securely tightened before use. Periodically check and re-tighten as needed.
- Do not allow children to climb on or play with the dresser.
- Distribute weight evenly in drawers to prevent tipping.
- If possible, secure the dresser to a wall using anti-tip hardware (not included) to prevent accidental tipping, especially in households with children.
- Keep small parts and packaging materials away from children.
3. Package Contents
Before beginning assembly, verify that all parts listed below are present and undamaged. If any parts are missing or damaged, contact customer support.
| Part | Description | Quantity |
|---|---|---|
| A | Top Panel | 1 |
| B | Side Panels | 2 |
| C | Bottom Panel | 1 |
| D | Back Panel | 1 |
| E | Drawer Fronts | 3 |
| F | Drawer Sides/Backs | 6 / 3 |
| G | Drawer Bottoms | 3 |
| H | Drawer Handles | 3 |
| I | Drawer Slides (Pairs) | 3 |
| J | Hardware Pack (Screws, Dowels, etc.) | 1 |
4. Setup and Assembly
Assembly typically requires two adults and basic tools such as a screwdriver (Phillips head recommended) and a hammer. Follow these general steps:
- Prepare Workspace: Clear a spacious area and lay out all parts on a soft, clean surface to prevent damage.
- Assemble Main Frame: Attach the side panels (B) to the bottom panel (C) and top panel (A) using the provided hardware from pack (J). Ensure all connections are secure.
- Install Back Panel: Slide or fasten the back panel (D) into the grooves or attach it to the rear of the assembled frame.
- Attach Drawer Slides to Frame: Secure the frame portion of the drawer slides (I) to the inside of the dresser frame according to pre-drilled holes. Ensure they are level and aligned.
- Assemble Drawers: For each drawer, connect the drawer sides and back (F) to the drawer front (E). Slide the drawer bottom (G) into the designated grooves. Secure with hardware.
- Attach Drawer Slides to Drawers: Secure the drawer portion of the drawer slides (I) to the sides of each assembled drawer.
- Install Handles: Attach the drawer handles (H) to the front of each drawer using the provided screws.
- Insert Drawers: Carefully align the drawer slides and insert each assembled drawer into the dresser frame. Test each drawer to ensure smooth operation.

Figure 4.1: Dimensional overview of the dresser, useful for planning placement and assembly.
5. Operation
The Henf 3-Drawer Dresser is designed for convenient storage in various rooms.
- Opening/Closing Drawers: Use the handles to smoothly pull drawers open and push them closed. Avoid forcing drawers.
- Weight Distribution: Distribute items evenly within each drawer. Avoid placing excessively heavy items in a single drawer or on the top surface to maintain stability and prevent damage.
- Placement: Position the dresser on a flat, stable surface. It is suitable for bedrooms, living rooms, and kid's rooms.

Figure 5.1: The dresser with drawers open, illustrating the ample storage capacity for various items.

Figure 5.2: Detail of the easy-pull handle and smooth drawer slide mechanism, ensuring effortless operation.
6. Maintenance and Care
Proper care will extend the life and appearance of your dresser.
- Cleaning: Wipe the surface with a dry, soft cloth. Avoid abrasive cleaners or harsh chemicals that may damage the finish.
- Spills: Immediately wipe up any spills with a dry cloth to prevent moisture damage.
- Hardware Check: Periodically check all screws and fasteners to ensure they remain tight. Re-tighten if necessary.
- Sunlight Exposure: Avoid prolonged exposure to direct sunlight, which can cause fading or discoloration of the finish.
7. Troubleshooting
If you encounter issues with your dresser, refer to the following common problems and solutions:
- Dresser Wobbles:
- Ensure the dresser is placed on a level surface.
- Check all assembly screws and tighten any loose connections.
- Drawers Stick or Don't Close Smoothly:
- Verify that the drawer slides are correctly installed and aligned on both the drawer and the dresser frame.
- Ensure drawers are not overloaded or unevenly weighted.
- Check for any obstructions within the drawer or along the slide mechanism.
- Missing or Damaged Parts:
- Refer to the "Package Contents" section and contact customer support with the specific part number or description.
8. Specifications
| Feature | Detail |
|---|---|
| Brand | Henf |
| Model | 3-Drawer Dresser (Black) |
| Material | P2 Wood |
| Color | Black |
| Dimensions (L x W x H) | 25.98" x 13" x 22.05" (66 x 33 x 56 cm) |
| Item Weight | 37.5 lbs (17 kg) |
| Number of Drawers | 3 |
| Recommended Room | Family Room, Bedroom, Living Room |
| Assembly Required | Yes |
| Care Instructions | Wipe with Dry Cloth |
| UPC | 713871998528 |
9. Warranty and Support
For warranty information or technical support, please contact Henf customer service. Keep your purchase receipt and product model information handy when contacting support.
Contact information can typically be found on the product packaging or the official Henf website.
Ask a question about this manual
Ask about setup, troubleshooting, compatibility, parts, safety, or missing instructions. Manuals+ will review the question and use this page’s manual context to help answer it.