
Uniflasy Charbroil Performance 5 Burner Replacement Parts (Compatible with Char-Broil models: 463347519, 463347518, 463243518, 46
Uniflasy Grill Replacement Parts Instruction Manual
For Char-Broil Performance 5 Burner Gas Grills and compatible models.
1. Product Overview
This manual provides detailed instructions for the installation and maintenance of Uniflasy Grill Replacement Parts, designed for various Char-Broil Performance series gas grills. This kit is intended to restore the functionality and performance of your grill's heating system.
1.1 Compatibility
These replacement parts are compatible with Char-Broil Performance 5 Burner Gas Grills, including models such as 463347519, 463347518, 463673517, 463673017, 463376018P2, 463376117, 463376017, 463275517, 463243519, 463243518, 463373019, 463377117, 463673617, 463377017, and 463347017. It is crucial to verify your grill's model number and the dimensions of your existing parts against the specifications provided in this manual before purchasing and installation.

Figure 1.1: Compatible Char-Broil Grill Models. Please confirm your grill model number for proper fit.
1.2 Kit Contents
The 5-pack replacement kit includes the following components:
- 5x Stainless Steel Grill Burners
- 5x Heat Plates (also known as heat tents or flame tamers)
- 4x Adjustable Crossover Tubes
- 1x Installation Guide (this manual)
- 2x Igniters
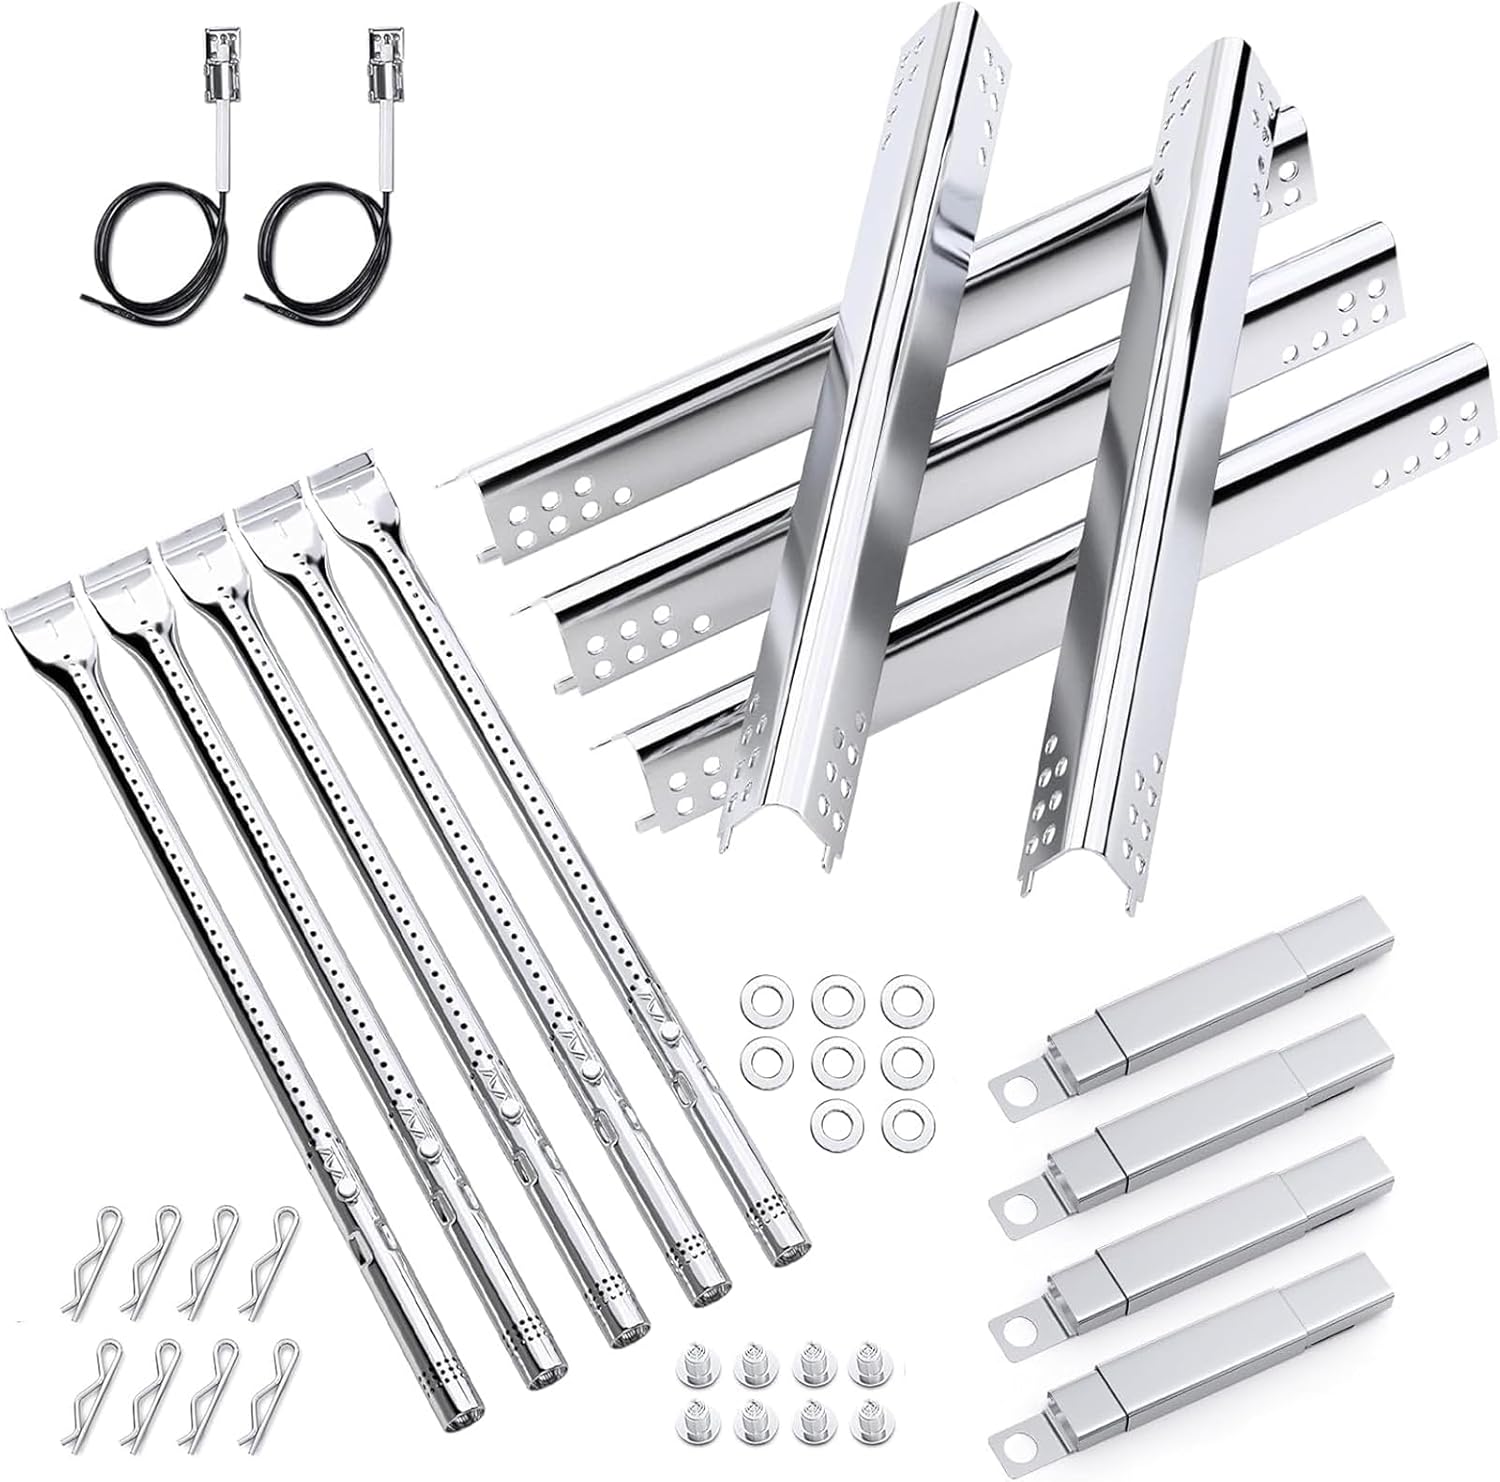
Figure 1.2: Complete Uniflasy Grill Replacement Parts Kit.
2. Specifications
Detailed specifications for the replacement components are provided below to assist with compatibility verification.
| Component | Dimensions | Material | OEM Part Number (Equivalent) |
|---|---|---|---|
| Grill Burners | 17 3/4" (Length) x 3/5" (Diameter) | Heavy-duty Stainless Steel | G470-5200-W1 |
| Heat Plates | 16 15/16" (Length) x 2 1/12" (Width) | High-quality Stainless Steel | G470-0004-W1 |
| Adjustable Crossover Tubes | Adjustable from 5 to 9.5 inches | Stainless Steel | N/A |
| Igniters | Standard size | Ceramic/Metal | N/A |

Figure 2.1: Grill Burner Dimensions and Material.

Figure 2.2: Heat Plate Dimensions. Ensure these match your existing parts.

Figure 2.3: Adjustable Crossover Tube Installation Methods and Lengths.
3. Installation Guide
Before beginning installation, ensure your grill is completely cool and disconnected from its gas supply. It is recommended to wear protective gloves during the process.
3.1 Disassembly of Old Components
- Open the grill lid and remove the cooking grates and warming rack.
- Carefully lift out the old heat plates.
- Disconnect the old burners from the gas manifold and remove them. Note how the crossover tubes are connected.
- Remove any remaining old crossover tubes or igniter wires.
- Thoroughly clean the grill's interior, removing any debris, grease, or rust.
3.2 Installation of New Components
- Install Burners: Insert the new stainless steel burners into their respective positions, ensuring they are properly seated over the gas manifold orifices. Secure them if necessary with the provided pins.
- Connect Crossover Tubes: Attach the adjustable crossover tubes between the burners. These tubes facilitate flame transfer between burners. Adjust their length to fit securely between the burner ports.
- Install Igniters: Connect the new igniters to the appropriate burner or manifold locations. Ensure the wires are routed safely and securely.
- Place Heat Plates: Position the new heat plates over the burners. These plates help distribute heat evenly and protect the burners from dripping grease.
- Reassemble Grill: Replace the cooking grates and warming rack.

Figure 3.1: New Burners and Heat Plates Installed.

Figure 3.2: Crossover Tube Connection Detail.

Figure 3.3: Igniter Components and Durability Features.
After installation, reconnect the gas supply and perform a leak test according to your grill's original manufacturer instructions before first use.
4. Operating Your Grill with New Parts
With the new Uniflasy replacement parts, your Char-Broil grill should exhibit improved performance, including more consistent heating and reliable ignition.
4.1 Enhanced Heat Distribution
The new stainless steel burners are engineered for optimal gas flow, producing consistent flames across the grilling surface. The heat plates ensure even heat distribution, reducing hot spots and promoting uniform cooking.

Figure 4.1: Optimal Gas Flow and Even Flame Distribution.
4.2 Ignition
The included igniters are designed for quick and reliable startup of your grill. If you experience issues with ignition, ensure the igniter wires are securely connected and the igniter tip is clean and properly positioned near the burner port.
5. Maintenance and Care
Regular maintenance of your grill replacement parts will extend their lifespan and ensure continued optimal performance.
- Cleaning Burners and Heat Plates: After each use, once the grill has cooled, brush off any food debris from the burners and heat plates. For deeper cleaning, remove the components and wash them with warm, soapy water. Rinse thoroughly and dry completely before reinstallation. The smooth surface of the stainless steel parts facilitates easy cleaning.
- Inspecting Components: Periodically inspect the burners, heat plates, and crossover tubes for any signs of wear, corrosion, or blockages. While these parts are made from durable stainless steel designed to resist rust, regular inspection is recommended.
- Igniter Care: Keep the igniter tips clean and free from grease buildup to ensure consistent spark.
These parts are constructed from heavy-duty stainless steel, built to withstand high temperatures and resist rusting over time, ensuring long-term performance.
6. Troubleshooting
If you encounter issues after installing your new grill replacement parts, refer to the common problems and solutions below.
| Problem | Possible Cause | Solution |
|---|---|---|
| Burners not lighting or uneven flame |
|
|
| Heat plates do not fit perfectly |
|
|
| Crossover tubes are too short or too long |
|
|
Always ensure your grill's model number matches the compatible models listed in this manual. If issues persist, consult a qualified technician or contact Uniflasy customer support.
7. Customer Support and Warranty
For further assistance, product inquiries, or warranty information, please contact Uniflasy customer support. You can also visit the official Uniflasy store for more products and information.
Uniflasy Store: Visit the Uniflasy Store on Amazon
Please retain your proof of purchase for any warranty claims.
Ask a question about this manual
Ask about setup, troubleshooting, compatibility, parts, safety, or missing instructions. Manuals+ will review the question and use this page’s manual context to help answer it.