1. Introduction
Thank you for choosing the FLYDOG Wireless Call System. This system is designed to enhance communication and service efficiency in various environments such as restaurants, hospitals, offices, and nursing homes. This package includes one CS-200E Wrist Receiver and ten CS-S1 Call Buttons.

Image: Overview of the FLYDOG Wireless Call System components, showing the wrist receiver and ten call buttons.
The wrist receiver is highly sensitive and capable of managing up to 200 call buttons, offering flexible display options and multi-language support. The call buttons are designed for ease of use and reliable signal transmission.

Image: A waiter wearing the wrist receiver, demonstrating its use in a restaurant environment.
2. Setup
2.1 Package Contents
Before setup, please verify that all items are present:
- 1 x CS-200E Wrist Receiver (Black)
- 10 x CS-S1 Call Buttons
- 1 x USB Charging Cable for Wrist Receiver
- Japanese Instruction Manual

Image: Visual representation of the items included in the product package.
2.2 Charging the Wrist Receiver
The CS-200E Wrist Receiver is powered by a rechargeable lithium battery. Before first use, fully charge the device.
- Connect the USB charging cable to the charging port on the wrist receiver.
- Plug the other end of the USB cable into a standard USB power adapter (not included) or a computer USB port.
- The charging indicator on the receiver will show charging status. A full charge typically takes about 1 hour.

Image: The wrist receiver connected to its charging cable, illustrating the charging process and battery life.
2.3 Installing Batteries in Call Buttons
Each CS-S1 Call Button requires two CR1632 coin cell batteries.
- Locate the battery compartment on the back of the call button.
- Use a small screwdriver to loosen the screws securing the battery cover.
- Insert two CR1632 batteries, ensuring correct polarity (+/-).
- Replace the battery cover and tighten the screws.

Image: Detailed view of the call button, including its dimensions and the steps for battery replacement.
2.4 Pairing Call Buttons with Receiver
The wrist receiver and call buttons are typically pre-paired. If new buttons are added or pairing is lost, follow these steps:
- On the wrist receiver, navigate to the 'Add Transmitter' (送信機追加) menu option.
- Follow the on-screen prompts to enter the desired number for the call button.
- Press the call button you wish to pair. The receiver will confirm successful pairing.
The receiver supports up to 200 call buttons, with numbers ranging from 001 to ZZZ.
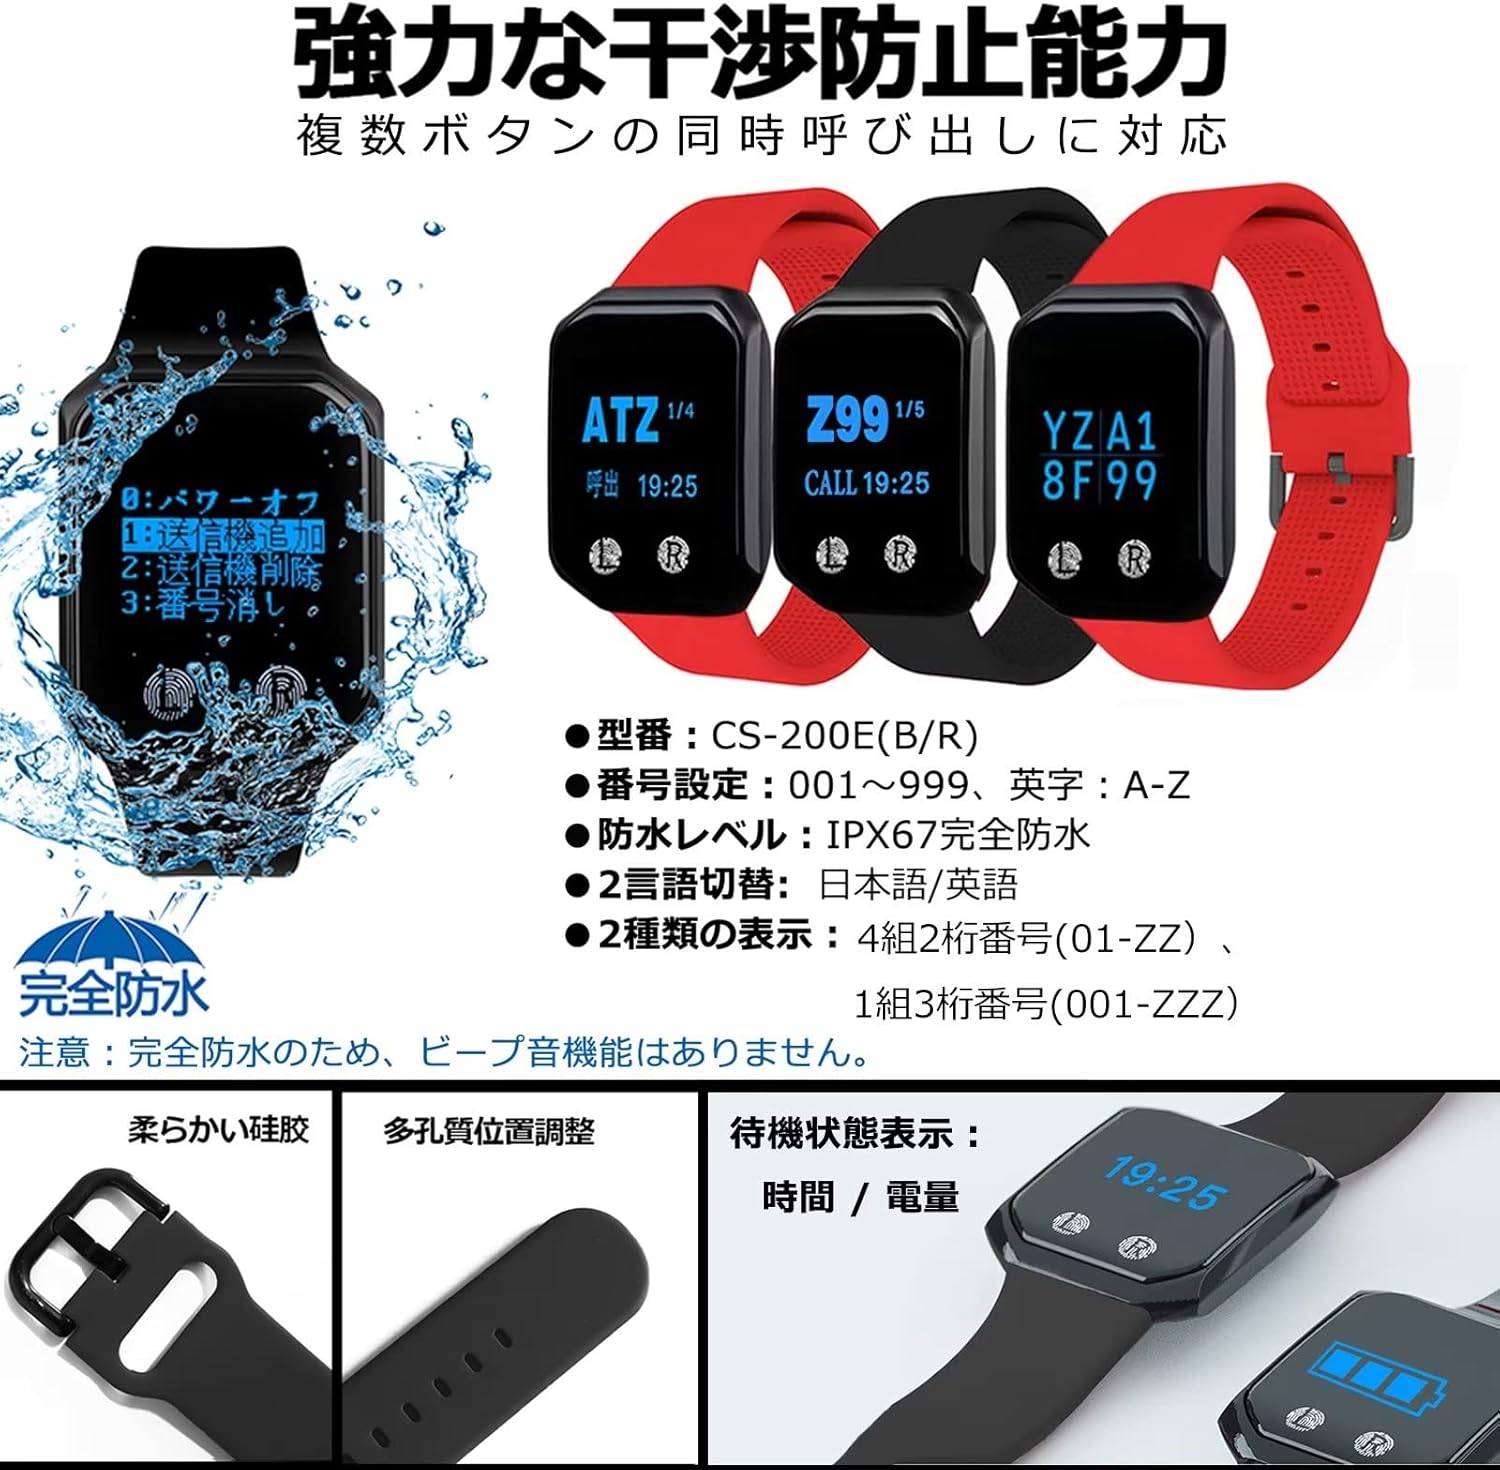
Image: The wrist receiver's interface, highlighting options for adding/deleting transmitters, waterproof rating, and language settings.
2.5 Language and Display Settings
The wrist receiver supports Japanese, English, and Chinese. You can switch between these languages in the settings menu. There are also two display modes for call numbers:
- 3-digit 1-group display (e.g., '001')
- 2-digit 4-group display (e.g., 'A1', 'B2', 'C3', 'D4')
3. Operating Instructions
3.1 Making a Call
To make a call, simply press the 'CALL' button on the CS-S1 Call Button. The button will illuminate briefly to indicate the signal has been sent.
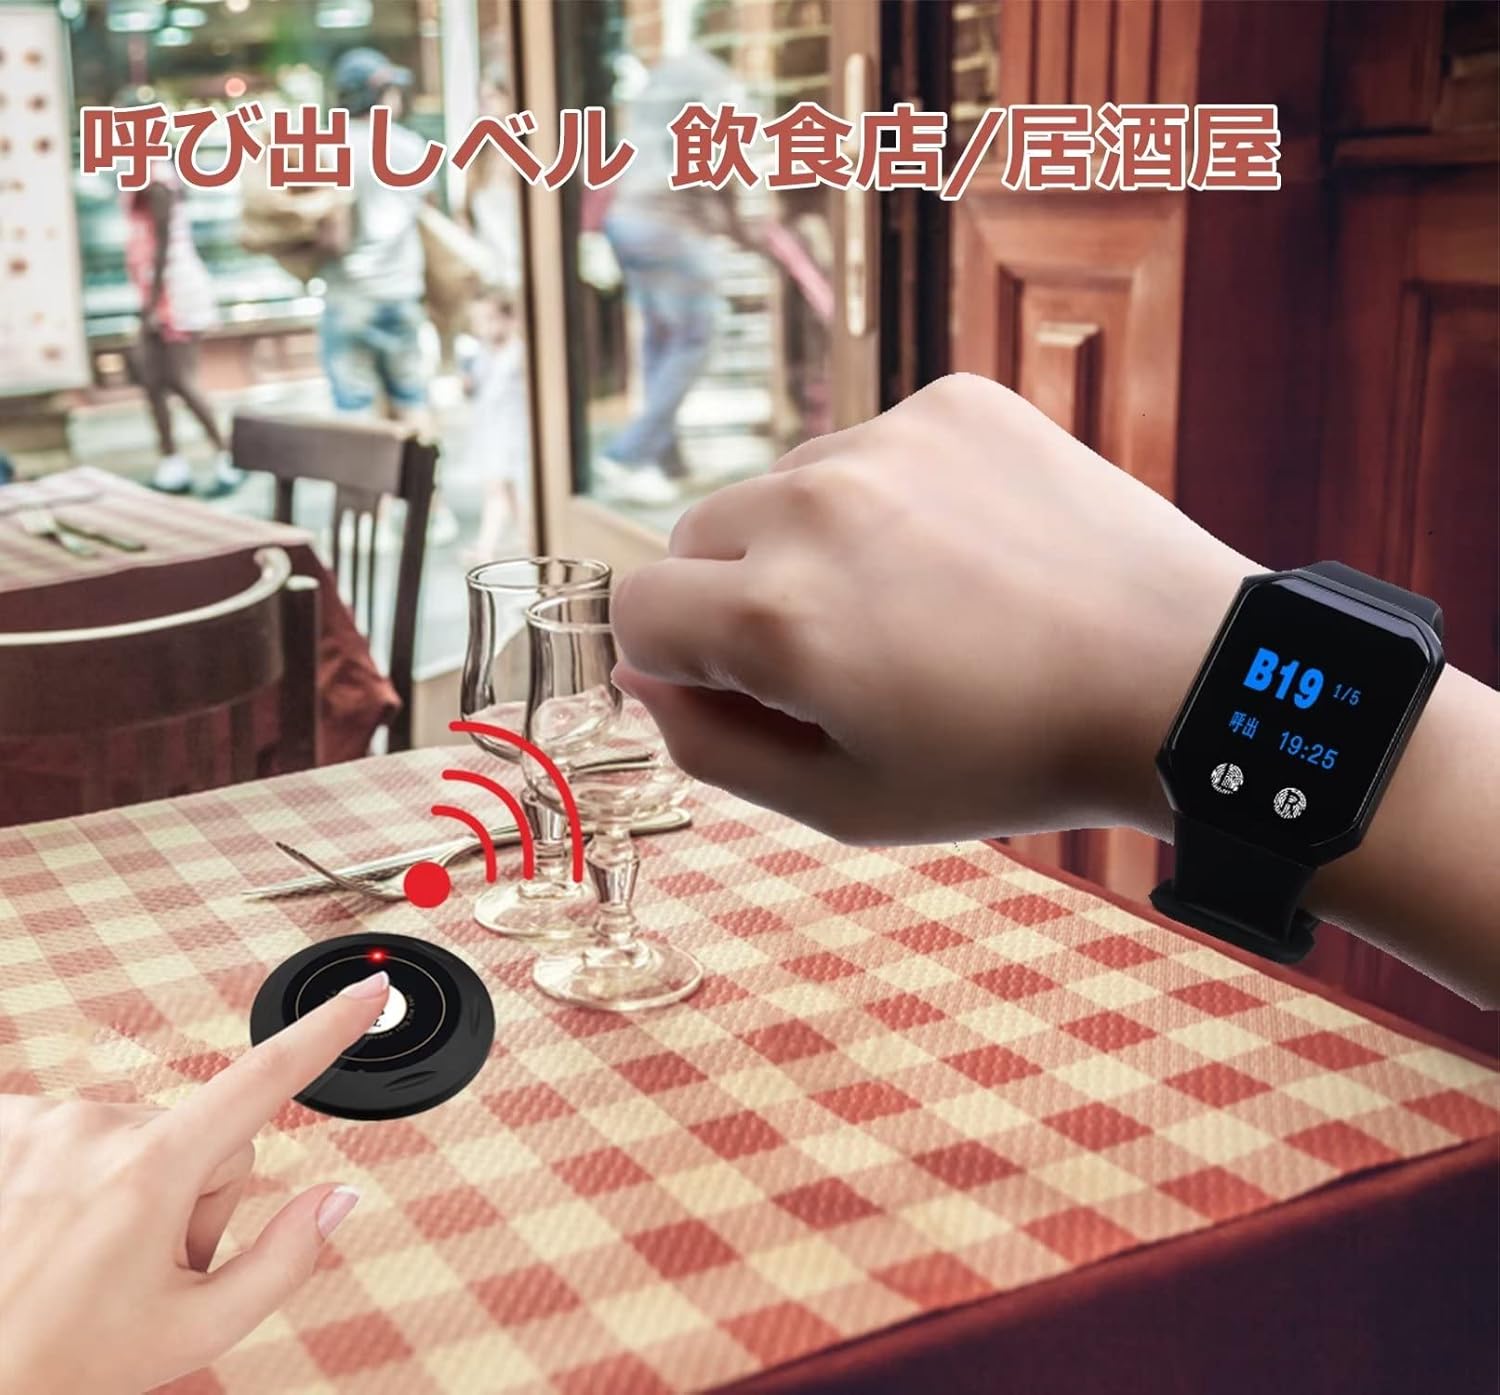
Image: A user pressing a call button, and the wrist receiver displaying the incoming call.
3.2 Receiving a Call
When a call button is pressed, the CS-200E Wrist Receiver will display the corresponding call number and vibrate to alert the wearer. The display will show the time and battery level in standby mode.

Image: Dimensions of the wrist receiver and its standby display showing time and battery.
3.3 Clearing Calls
To clear a call from the receiver's display, refer to the specific instructions in the Japanese instruction manual for navigating the receiver's menu. Typically, there is an option to clear individual calls or all calls.
3.4 Signal Range and Extension
The wireless signal has a maximum reception distance of approximately 100 meters in an open environment. This range may vary depending on obstacles and interference. For larger areas or environments with many obstructions, a signal repeater (sold separately) can be added to extend the range up to 500 meters and transmit signals across multiple floors.

Image: Illustration of how a signal repeater can extend the effective range of the call system.
4. Maintenance
4.1 Cleaning
Wipe the devices with a soft, dry cloth. For stubborn dirt, a slightly damp cloth can be used. Do not use harsh chemicals or abrasive cleaners.
4.2 Waterproofing
The CS-200E Wrist Receiver has an IPX67 waterproof rating, meaning it is protected against temporary immersion in water (up to 1 meter for 30 minutes). The CS-S1 Call Button has a surface waterproof design, allowing for minor splashes, but it is not fully waterproof and should not be immersed in water.

Image: The wrist receiver demonstrating its water resistance with splashes.
4.3 Battery Care
Ensure the wrist receiver is charged regularly to maintain optimal performance. Replace call button batteries when the signal becomes weak or the button fails to respond.
5. Troubleshooting
If you encounter issues with your FLYDOG Wireless Call System, please refer to the following common problems and solutions:
| Problem | Possible Cause | Solution |
|---|---|---|
| Wrist receiver not displaying calls. | Out of range, low battery, call button battery dead, pairing lost. | Move closer to the call button. Charge the wrist receiver. Replace call button batteries. Re-pair the call button (refer to Section 2.4). |
| Call button not responding. | Dead batteries, button malfunction. | Replace call button batteries. If issue persists, the button may be faulty. |
| Short reception range or unstable signal. | Environmental interference, too many obstacles, distance too great. | Reduce obstacles between transmitter and receiver. Consider purchasing a signal repeater for extended range. Ensure no strong electromagnetic interference sources nearby. |
| Wrist receiver not turning on. | Battery completely drained, device malfunction. | Charge the receiver for at least 1 hour. If it still doesn't turn on, contact customer support. |
If the problem persists after trying these solutions, please contact customer support for further assistance.
6. Specifications
| Feature | Detail |
|---|---|
| Manufacturer | BYHUBYENG |
| Product Model (Set) | B-S1-10 |
| Wrist Receiver Model | CS-200E |
| Call Button Model | CS-S1 |
| UPC | 194998946331 |
| Package Dimensions | 12.7 x 10.9 x 6.9 cm |
| Item Weight | 330 g |
| Wrist Receiver Battery | Rechargeable Lithium Metal |
| Call Button Battery | CR1632 x 2 (per button) |
| Wrist Receiver Waterproof Rating | IPX67 |
| Call Button Capacity | Up to 200 (001-ZZZ) |
| Language Support | Japanese, English, Chinese |
| Display Modes | 3-digit 1-group, 2-digit 4-group |
| Reception Distance | Approx. 100m (open area), extendable with repeater |
| Mounting Type | Tabletop Mount (for call buttons) |
7. Warranty and Support
This FLYDOG Wireless Call System comes with a 1-year warranty from the date of purchase. This warranty covers manufacturing defects and malfunctions under normal use. Please retain your proof of purchase for warranty claims.
We also provide lifetime technical support for this product. If you have any questions, require assistance with setup, operation, or troubleshooting, please do not hesitate to contact our customer support team. A detailed Japanese instruction manual is included with your purchase for additional guidance.