
1. Introduction
This manual provides essential instructions for the safe and effective operation and maintenance of your redsun 10 Gallon Abrasive Blaster. This portable unit is designed for surface preparation tasks such as removing paint, rust, and stains from various materials. Please read this manual thoroughly before assembly or operation to ensure proper usage and to prevent injury or damage.

Figure 1: redsun 10 Gallon Abrasive Blaster, a portable unit for surface treatment.
2. Safety Information
Operating abrasive blasting equipment requires strict adherence to safety protocols to prevent injury. Always prioritize safety.
- Personal Protective Equipment (PPE): Always wear appropriate PPE, including a respirator or blast hood, safety glasses, hearing protection, heavy-duty gloves, and protective clothing (e.g., a TYVEX suit) to shield against abrasive media and dust.
- Ventilation: Operate the sandblaster in a well-ventilated area to prevent the accumulation of dust and airborne particles.
- Abrasive Media: Use only approved abrasive blasting media. Do not use beach sand, play sand, or unwashed sand, as these can contain silica, which is hazardous when inhaled, and can clog the equipment.
- Air Compressor: Ensure your air compressor meets the pressure and SCFM requirements for the sandblaster (e.g., 125 psi operating pressure). The compressor must be equipped with a functional air filter and moisture trap.
- Pressure Release: Always release air pressure from the tank before refilling abrasive media or performing any maintenance.
- Electrical Safety: If using an electric air compressor, ensure it is properly grounded and used in a dry environment.
- Children and Bystanders: Keep children and unauthorized personnel away from the operating area.
3. Package Contents
Verify that all components are present and undamaged upon unpacking.
- 10 Gallon Abrasive Blaster Tank with Wheels and Handles
- Blast Hose with Nozzle and Shut-off Valve
- Pressure Gauge
- Gas-Water Separator
- Filling Funnel
- Protective Hood (basic)
- Assorted Nozzles

Figure 2: Main unit with key components indicated.
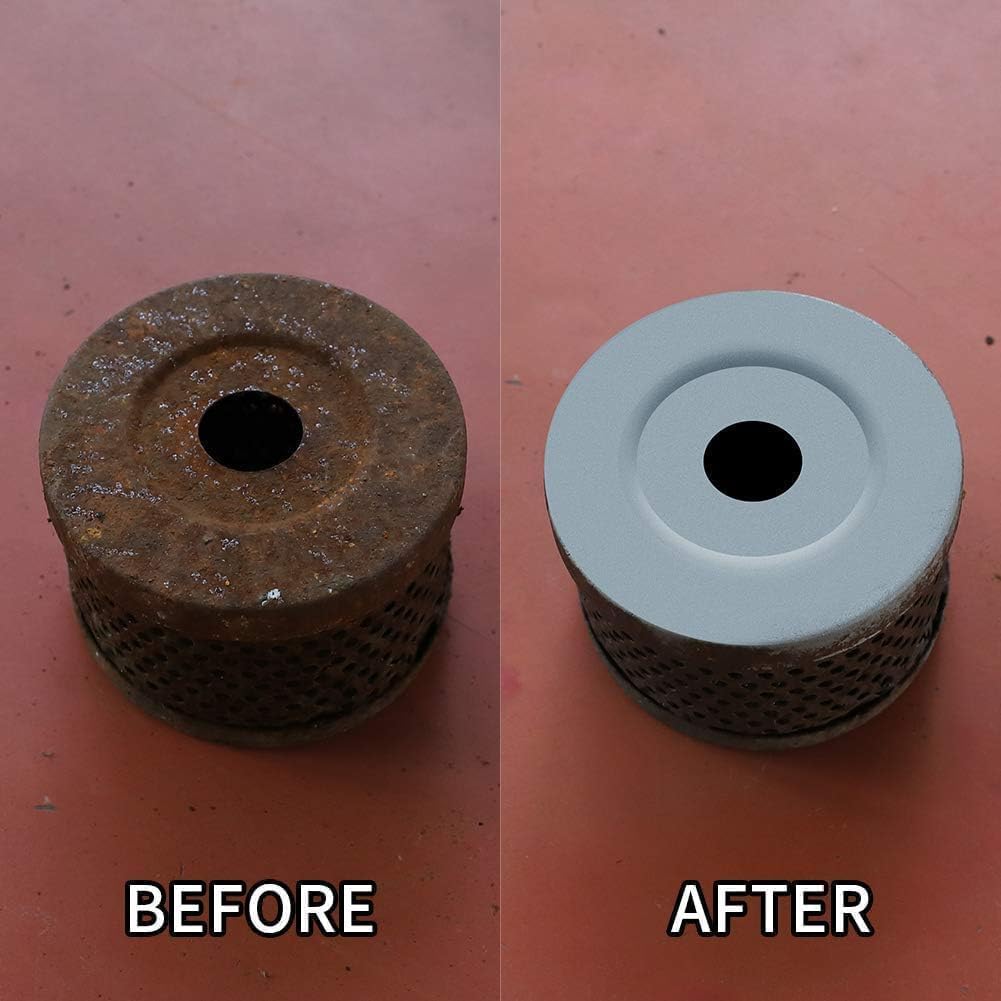
Figure 3: Included accessories such as the funnel, protective hood, and hose.
4. Assembly and Setup
Follow these steps to assemble your abrasive blaster.
- Attach Wheels: Securely attach the two 6-inch rubber wheels to the axle at the base of the tank. Ensure the wheels are firmly in place for easy movement.
- Install Handles: Mount the ergonomic handles to the top of the tank frame. These handles are designed for comfortable maneuvering of the unit.
- Connect Blast Hose: Attach the blast hose to the outlet valve on the tank. Ensure all connections are tight to prevent air leaks.
- Connect Air Compressor: Connect your air compressor to the inlet port of the gas-water separator on the sandblaster. The gas-water separator is crucial for ensuring dry compressed air, which prevents clogging of abrasive media.
- Load Abrasive Media: Open the top fill cap and use the provided funnel to load your chosen abrasive media into the tank. Do not overfill. Close the cap securely.
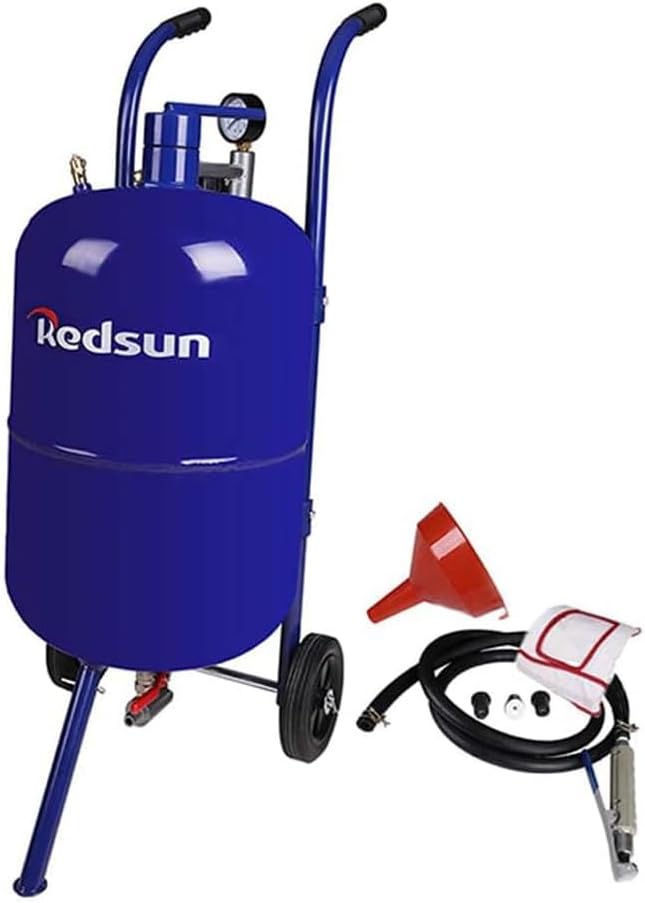
Figure 4: Detail of the rubber wheel and axle attachment.

Figure 5: The 98-inch long blast hose with nozzle and shut-off valve.
5. Operation
Before operating, ensure all safety precautions are followed and PPE is worn.
- Check Air Pressure: Connect the air compressor and gradually increase pressure. Monitor the pressure gauge on the unit. The operating pressure can be achieved up to 125 psi.
- Adjust Media Flow: The sandblaster features a pressurized design, offering 30% more blasting power than siphon units. Adjust the media flow valve at the bottom of the tank to control the abrasive output.
- Begin Blasting: Aim the nozzle at the surface to be treated, maintaining a consistent distance and angle for even removal. Move the nozzle steadily across the surface.
- Monitor Progress: Regularly inspect the workpiece to assess the progress of paint, rust, or stain removal.
- Shut Down: When finished, close the media flow valve, then turn off the air supply from the compressor. Depress the nozzle trigger to release any remaining air pressure in the hose and tank.

Figure 6: Pressure gauge indicating operating pressure.

Figure 7: Example of rust removal using the abrasive blaster.
6. Maintenance
Regular maintenance ensures optimal performance and extends the lifespan of your sandblaster.
- Clean After Use: After each use, empty any remaining abrasive media from the tank. Clean the tank interior and exterior to prevent corrosion and buildup.
- Inspect Hoses and Nozzles: Regularly check the blast hose for wear, cracks, or damage. Inspect nozzles for erosion and replace them as needed to maintain efficient blasting.
- Gas-Water Separator: Periodically drain any accumulated moisture from the gas-water separator to ensure the compressed air remains dry. This prevents media clogging.
- Storage: Store the sandblaster in a dry, clean environment, away from extreme temperatures and moisture.
7. Troubleshooting
| Problem | Possible Cause | Solution |
|---|---|---|
| No abrasive flow or clogging |
|
|
| Low blasting power |
|
|
| Pressure drops quickly |
|
|
8. Specifications
| Feature | Detail |
|---|---|
| Model Number | SB10-US |
| Tank Capacity | 10 Gallons |
| Operating Pressure | Up to 125 psi |
| Hose Length | 98.4 Inches (approx. 2.5 meters) |
| Material | Welded Steel |
| Item Weight | 38 pounds (approx. 17.2 kg) |
| Color | Blue |
| Manufacturer | HS Co.,Ltd |
9. Warranty and Support
For warranty information or technical support regarding your redsun 10 Gallon Abrasive Blaster, please contact the retailer or manufacturer directly. Keep your purchase receipt as proof of purchase.
Manufacturer: HS Co.,Ltd
Brand: redsun


