1. Introduction
This instruction manual provides essential information for the proper installation, care, and maintenance of your ZXMT Motorcycle Fairing Kit. This kit is specifically designed for Suzuki GSXR1000 models manufactured in 2007 and 2008. Adhering to these guidelines will help ensure the longevity and optimal performance of your fairing kit.

Image 1.1: Overview of the ZXMT Motorcycle Fairing Kit components, including various body panels.
2. Safety Information
Always prioritize safety during installation and maintenance. Improper installation can lead to serious injury or damage to your motorcycle.
- Professional Installation Recommended: If you are not experienced with motorcycle fairing installation, it is highly recommended to seek assistance from a qualified motorcycle mechanic.
- Wear Protective Gear: Always wear appropriate safety glasses and gloves when handling tools and components.
- Motorcycle Stability: Ensure the motorcycle is securely supported on a stand before beginning any work.
- Read Instructions Thoroughly: Familiarize yourself with all steps before proceeding with installation.
- Check Fasteners: After installation, double-check all fasteners to ensure they are properly tightened.
3. Package Contents
Your ZXMT Fairing Kit package includes the main fairing components and additional accessories to complete your installation.
- Complete set of ABS plastic fairing panels (specific panels vary by kit, but typically include front cowl, side panels, tail section, etc.)
- Windscreen
- Heat Shield
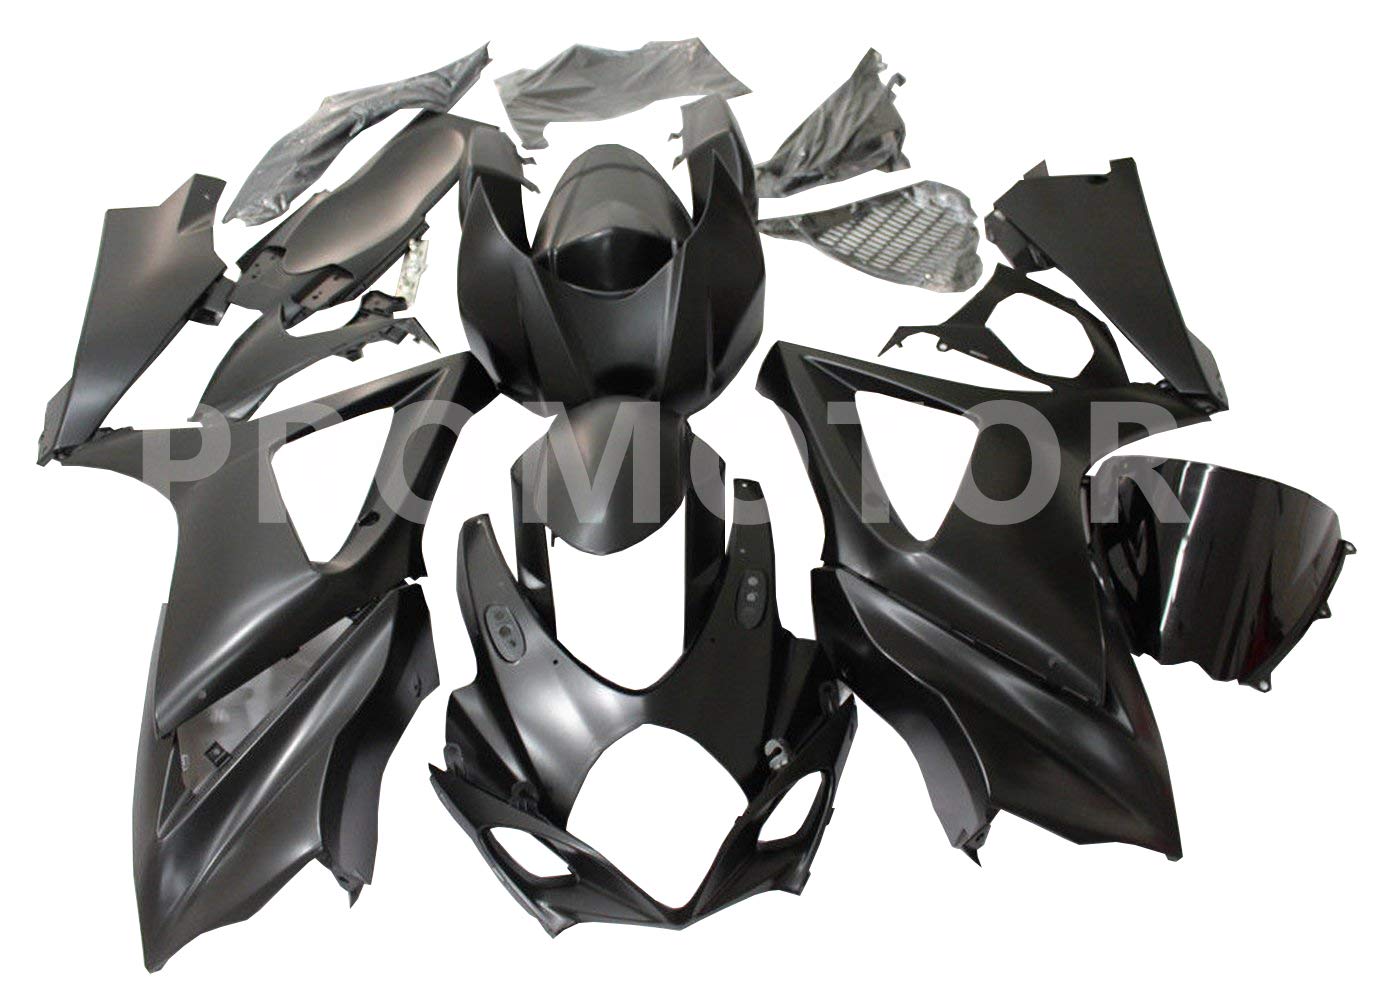
Image 3.1: The included windscreen (left) and heat shield (right) provided with the fairing kit.
4. Installation
This fairing kit is designed for a precise fit, utilizing high-quality ABS plastic and molds that match OEM specifications. While designed for direct replacement, careful installation is crucial.
General Installation Steps:
- Preparation: Park the motorcycle on a stable, level surface. Allow the engine to cool completely. Gather all necessary tools (e.g., screwdrivers, wrenches, plastic trim removal tools).
- Removal of Old Fairings: Carefully remove all existing fairing panels, keeping track of all screws, clips, and mounting hardware. Note the position of each component for reference.
- Test Fit New Fairings: Before final installation, gently test fit the new fairing panels to ensure proper alignment with mounting points and adjacent components. Minor adjustments may be necessary.
- Install Heat Shield: Apply the provided heat shield to the inner surfaces of fairing panels that are in close proximity to the engine or exhaust, following the contours of the plastic.
- Secure New Fairings: Begin attaching the new fairing panels, starting from a central point and working outwards. Use the original mounting hardware or suitable replacements. Do not overtighten fasteners.
- Install Windscreen: Attach the new windscreen to the front cowl using the appropriate screws and grommets.
- Final Inspection: Once all panels are installed, visually inspect all connections and fasteners. Gently shake the fairings to ensure they are securely mounted and do not rattle.
5. Care and Maintenance
Proper care will maintain the appearance and integrity of your fairing kit.
- Cleaning: Use a mild soap and water solution with a soft cloth to clean the fairings. Avoid abrasive cleaners or harsh chemicals that can damage the finish. Rinse thoroughly and dry with a microfiber cloth to prevent water spots.
- Regular Inspection: Periodically check all mounting points and fasteners for tightness. Vibrations from riding can loosen hardware over time.
- Avoid Extreme Temperatures: While the ABS plastic has good heat tolerance, prolonged exposure to extreme heat or direct sunlight when parked can affect the material.
6. Troubleshooting
If you encounter issues during or after installation, consider the following:
- Fitment Issues: If a panel does not align perfectly, re-check that all adjacent panels are correctly seated and that no wires or hoses are obstructing the fit. Sometimes, slight manipulation of the panel or mounting points may be required. Ensure you have the correct fairing kit for your specific motorcycle model and year.
- Loose Panels: If panels feel loose, re-tighten all associated fasteners. Do not overtighten, as this can strip threads or crack plastic.
- Scratches/Damage: For minor scratches, specialized plastic polish may be used. For significant damage, replacement of the affected panel may be necessary.
7. Specifications
| Feature | Detail |
|---|---|
| Brand | ZXMT |
| Model Fitment | Suzuki GSXR1000 (2007-2008) |
| Color | Black |
| Material | Acrylonitrile Butadiene Styrene (ABS) Plastic |
| Exterior Finish | ABS, Plastic |
| Vehicle Service Type | Motorcycle |
| Fit Type | Vehicle Specific Fit |
8. Warranty and Support
Your ZXMT Fairing Kit comes with a commitment to quality and customer satisfaction.
- Warranty: A 30-day money-back guarantee is provided from the date of purchase. This covers manufacturing defects and significant fitment issues not caused by improper installation.
- Customer Support: For any questions, concerns, or assistance with installation or product issues, please contact the seller directly through your purchase platform. Friendly service is available to help resolve any problems you may encounter.


