1. Introduction
This manual provides essential information for the safe and efficient operation, setup, and maintenance of your Canpump CF 3030 G Pressure Washer Pump. Please read this manual thoroughly before installation and use to ensure proper function and longevity of the unit.

Figure 1: Canpump CF 3030 G Pressure Washer Pump. This image displays the main view of the triplex plunger pump, highlighting its robust brass manifold and black anodized aluminum crankcase.
2. Safety Information
Always prioritize safety when operating high-pressure equipment. Failure to follow safety instructions can result in serious injury or property damage.
- Read the Manual: Understand all instructions and warnings before use.
- Wear Protective Gear: Always wear eye protection, hearing protection, and appropriate clothing.
- Stable Surface: Ensure the pressure washer is on a stable, level surface during operation.
- Proper Connections: Verify all hoses and fittings are securely connected before starting.
- Water Supply: Ensure an adequate and continuous water supply to prevent pump damage.
- Oil Level: Check the pump oil level before each use. Do not operate without sufficient oil.
- Keep Clear: Keep hands, feet, and loose clothing away from moving parts.
3. Setup
3.1 Unboxing and Initial Inspection
Upon receiving your pump, carefully unbox all components and inspect for any shipping damage. Ensure all listed accessories are present.
Video 1: Unboxing 3/4" hollow shaft power washer pump for gas engines. This video demonstrates the unboxing process and initial components of the pump, including the detergent tube, extra O-rings, and operating manual.
3.2 Mounting the Pump
The CF 3030 G pump is designed for direct-drive gasoline engines with a 3/4 inch horizontal shaft and a standard SAE J609 mounting flange. Ensure the engine shaft is clean and free of debris.
- Align the pump's shaft with the engine's 3/4 inch horizontal shaft.
- Insert the key (if not already present in the engine shaft) into the keyway.
- Carefully slide the pump onto the engine shaft, ensuring the key aligns with the pump's keyway.
- Secure the pump to the engine using the four mounting bolts. Hand-start the bolts to avoid cross-threading, then tighten them securely.
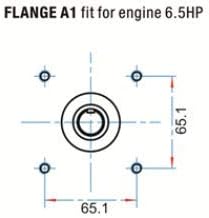
Figure 2: SAE J609 Mounting Flange Diagram. This diagram illustrates the standard mounting dimensions for the pump, compatible with up to 6.5 hp direct-drive gasoline engines.
Video 2: Pump replacement for gas power washer. This video provides a detailed guide on replacing a pressure washer pump, including bolt removal, pump detachment, and proper alignment for the new pump installation.
3.3 Connecting the Unloader Valve
The pump features a detachable unloader valve. Ensure it is securely attached to the pump outlet.
- Screw the inlet filter onto the unloader valve.
- Attach the top half of the unloader valve to the pump.
- Connect the bypass hose with a clamp onto the bypass port of the unloader valve.
- Tighten the clamp to secure the hose.
Video 3: Power washer Unloader with external bypass. This video demonstrates how to set up the external bypass for the unloader valve, including connecting the inlet filter and bypass hose.
3.4 Oil Check
The pump is pre-filled with oil. Before first use and periodically thereafter, check the oil level using the sight glass on the pump. The oil level should be at the halfway mark of the sight glass. Use 10W30 non-detergent oil if topping up or changing.
3.5 Connecting Water Supply and Hoses
Connect a standard 3/4 inch garden hose to the unloader inlet. Connect your high-pressure hose to the quick-connect outlet of the unloader valve.

Figure 3: Canpump Triplex Pump Diagram. This diagram highlights key features including the 3/4-inch hollow shaft, detachable unloader, and durable construction, providing a visual guide for connections.
4. Operating Instructions
4.1 Nozzle Selection
Proper nozzle selection is crucial for optimal performance and to prevent damage. For this 3.1 GPM pump, a 3.5 orifice size is generally recommended. Always check the orifice size on your nozzle.
4.2 Starting the Pressure Washer
- Ensure all connections are secure and the water supply is turned on.
- Bleed air from the system by squeezing the spray gun trigger until a steady stream of water emerges.
- Start the engine according to its manufacturer's instructions.
- Once the engine is running, the pump will pressurize the system.
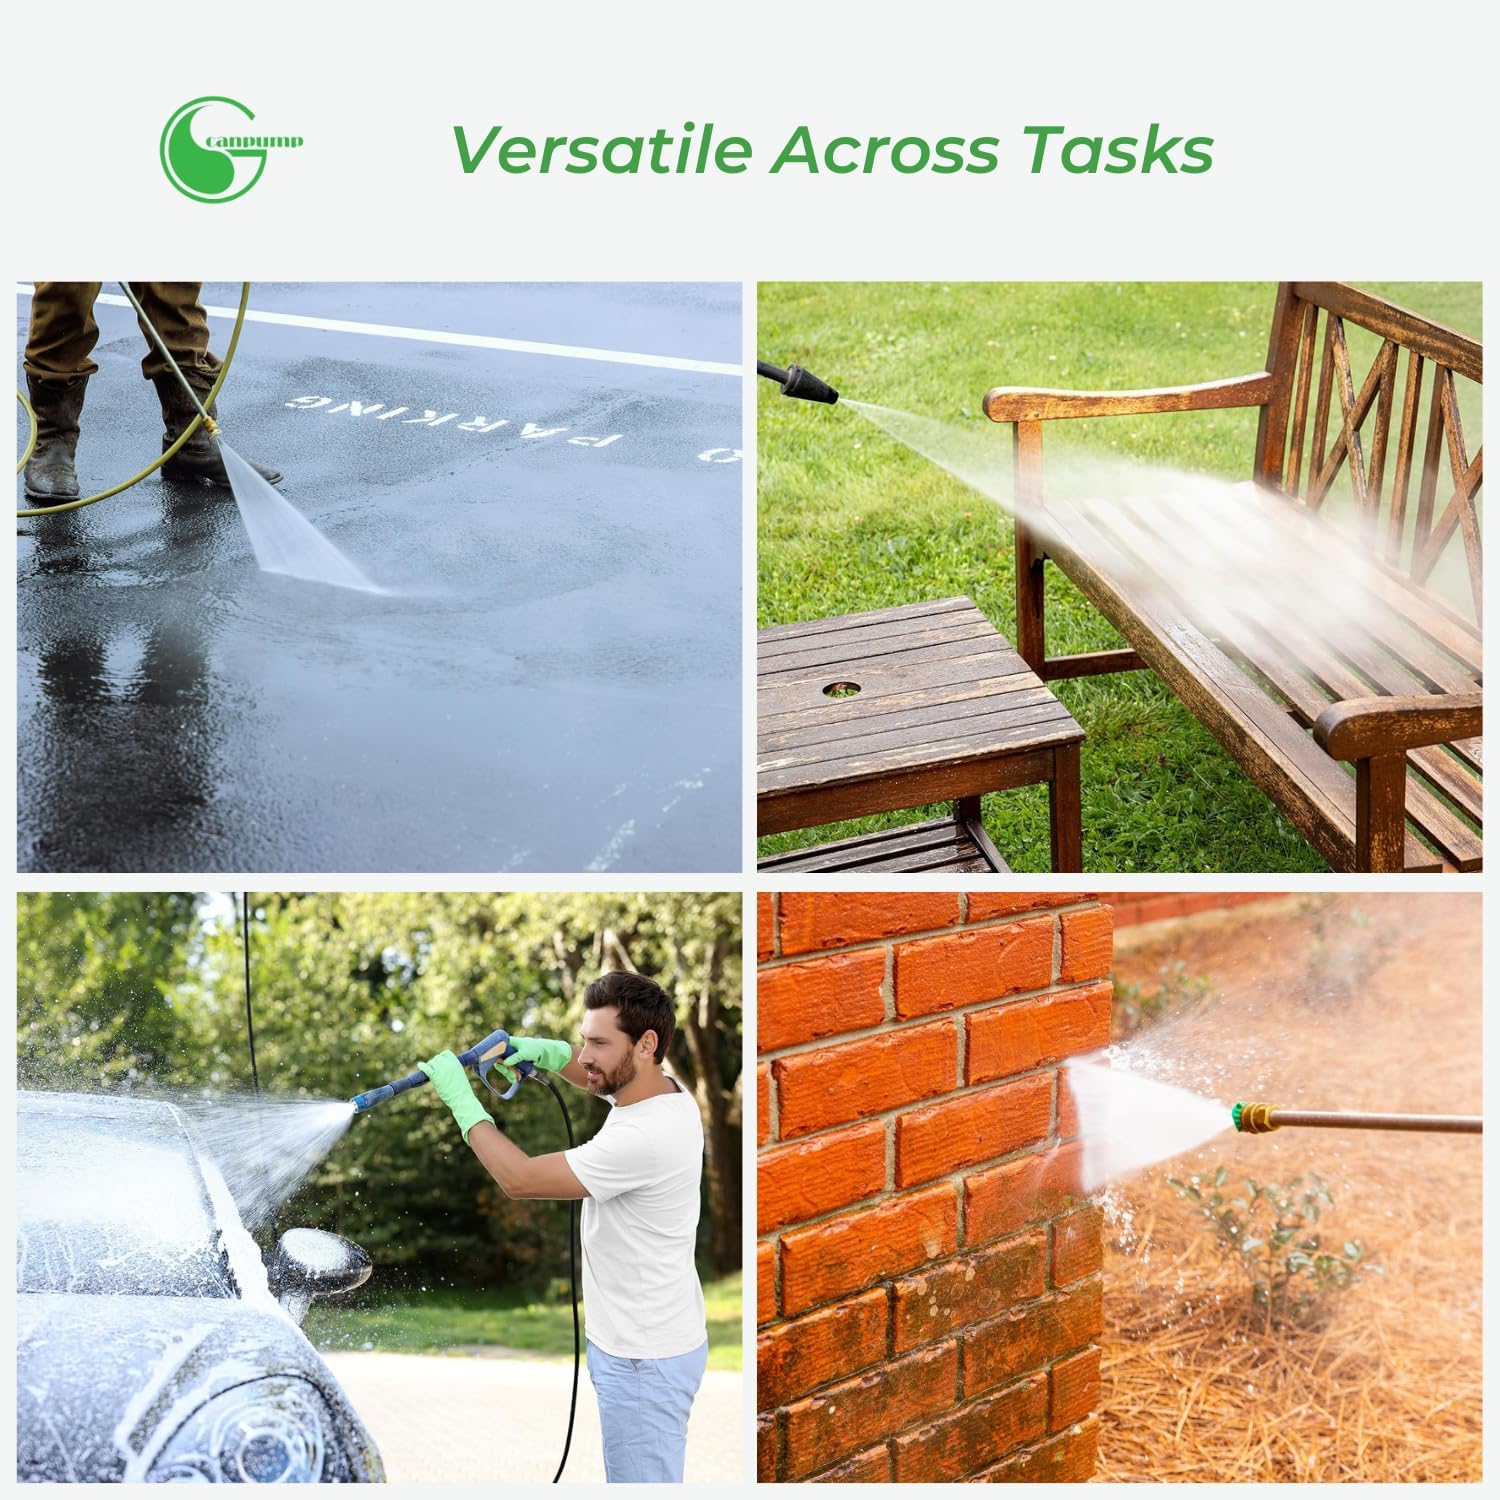
Figure 4: Versatile Pressure Washing Tasks. This image showcases the pump's application in various cleaning scenarios, including driveways, decks, vehicles, and brick walls.
4.3 Adjusting Pressure and Detergent Injection
The unloader valve allows for pressure adjustment. Turn the knob to increase or decrease pressure as needed for different cleaning tasks. The built-in detergent injector allows for easy application of cleaning solutions.
5. Maintenance
Regular maintenance ensures the longevity and optimal performance of your pump.
- Oil Changes: Change the pump oil after the first 20 hours of operation, then every 50 hours or annually, whichever comes first.
- Winterization: In freezing temperatures, always drain the pump completely or use a pump protector solution to prevent damage.
- Seal Replacement: The pump comes with a set of extra O-rings for future maintenance. Refer to the operating manual for detailed instructions on replacing seals.
- Inlet Filter Cleaning: Regularly inspect and clean the inlet filter to prevent debris from entering the pump.
6. Troubleshooting
| Problem | Possible Cause | Solution |
|---|---|---|
| No pressure or low pressure | Insufficient water supply, air in pump, clogged nozzle, worn seals. | Check water supply, bleed air, clean/replace nozzle, inspect/replace seals. |
| Water leaks from pump | Loose fittings, worn O-rings/seals. | Tighten fittings, replace O-rings/seals. |
| Engine stalls when trigger released | Unloader valve issue, incorrect nozzle size. | Adjust/inspect unloader valve, ensure correct nozzle orifice. |
7. Specifications
- Model: CF 3030 G
- Pressure: 3,000 psi (206 bar)
- Flow rate: 3.1 US gpm (11.7 L/min)
- Power: 6.5 hp (recommended engine)
- Pump mechanism: Triplex plunger
- Pump Inlet: 1/2" NPT F
- Pump Outlet: 3/8" NPT F
- Unloader Inlet: 3/4" standard garden hose
- Unloader Outlet: Quick-connect
- Shaft Compatibility: 3/4" horizontal shaft (SAE J609 mounting flange)
- Material: Aluminum, Stainless Steel, Brass, Ceramic
- Product Dimensions: 12.1"L x 8.5"W x 5.1"H
- Item Weight: 18.4 Pounds
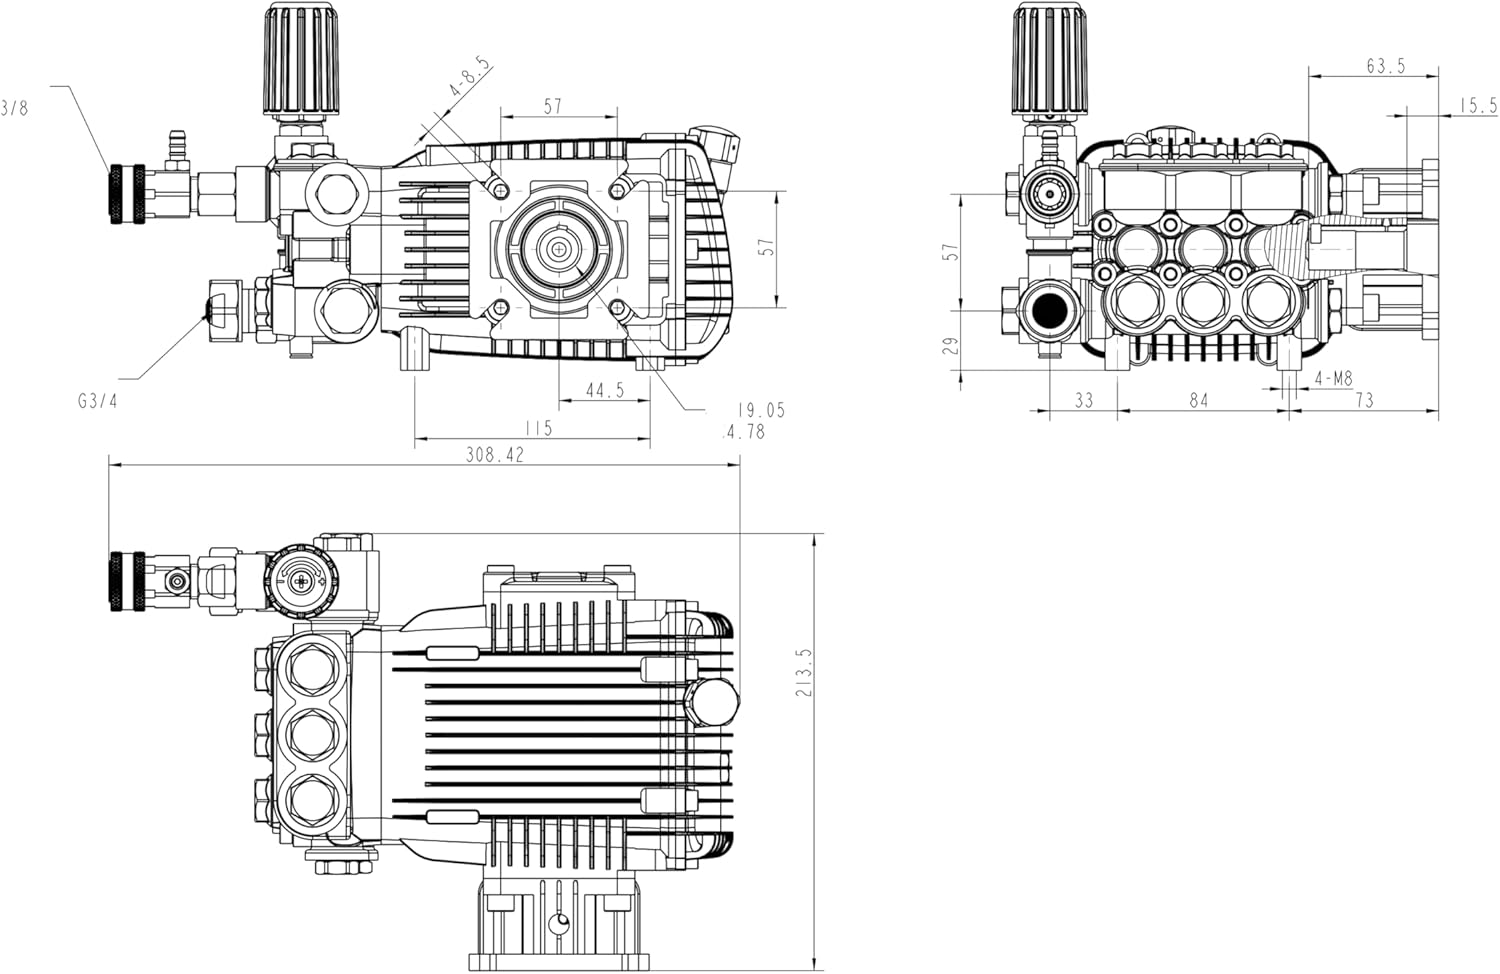
Figure 5: Canpump CF 3030 G Technical Drawing. This detailed drawing provides precise measurements and port locations for the pump.
8. Warranty and Support
For warranty information and technical support, please refer to the operating manual included with your pump. Canpump offers 7x5 toll-free phone, email, and live chat support from Canada.
For additional resources, visit the official CANPUMP Store on Amazon.