VEVOR TrainHorn150D
VEVOR 150 dB Train Air Horn Kit User Manual
Model: TrainHorn150D
1. Introduction
Thank you for choosing the VEVOR 150 dB Train Air Horn Kit. This manual provides essential information for the safe and efficient operation, installation, and maintenance of your new air horn system. Please read this manual thoroughly before installation and use, and keep it for future reference.
The VEVOR Train Air Horn Kit is designed to deliver an extremely loud and clear warning sound, making it ideal for a wide range of vehicles including trucks, boats, RVs, and other large vehicles where a powerful horn is essential for safety.
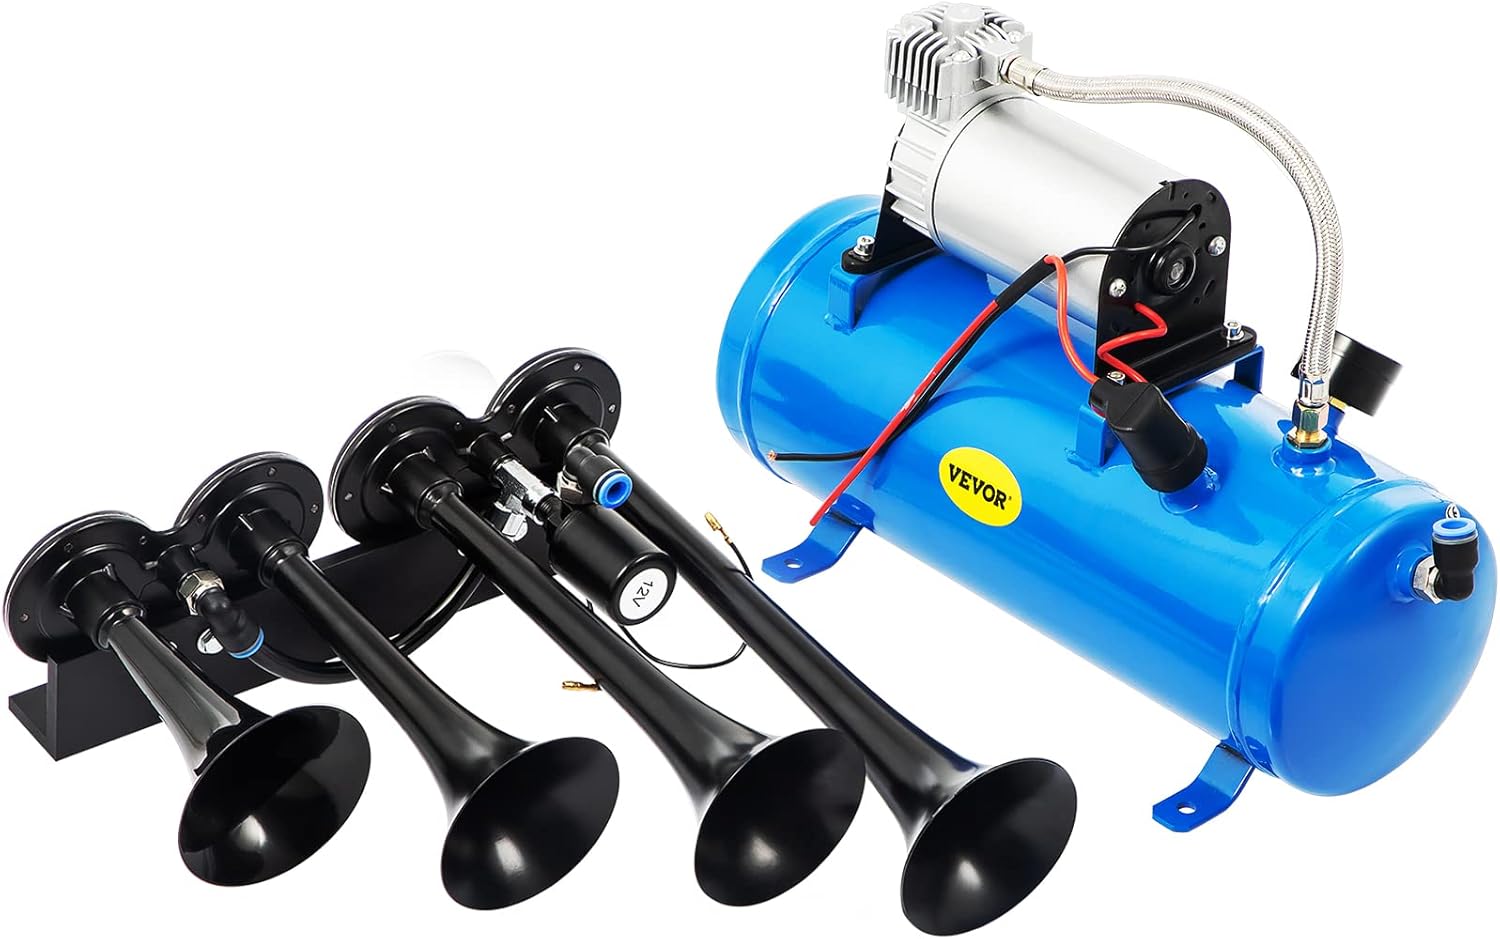
Figure 1.1: VEVOR 150 dB Train Air Horn Kit components.
2. Product Features
- Powerful 150 dB Sound: The four stainless steel trumpets produce an extremely loud warning sound, audible for miles, ensuring maximum safety and presence on the road.
- Robust 150 PSI Air Compressor: Equipped with a 6L air tank and an integrated pressure switch that automatically shuts off when air pressure reaches 150 PSI. Features 4 anti-vibration pads and a 30A fuse for enhanced safety and stability.
- High-Quality Construction: Horn trumpets are made of durable stainless steel, and the compressor body is constructed from carbon steel, ensuring maximum strength and longevity even in harsh weather conditions.
- Easy Installation: The kit includes all necessary mounting hardware, an additional 6.56 ft (16.7 cm) air hose, and sealing tape, allowing for flexible and portable installation without professional assistance.
- Versatile Applications: Compatible with most 12V DC vehicles, including cars, boats, trucks, tractors, vans, and motorcycles, making it ideal for large vehicles in heavy traffic or emergency situations.

Figure 2.1: Key features of the VEVOR Train Horn Kit.
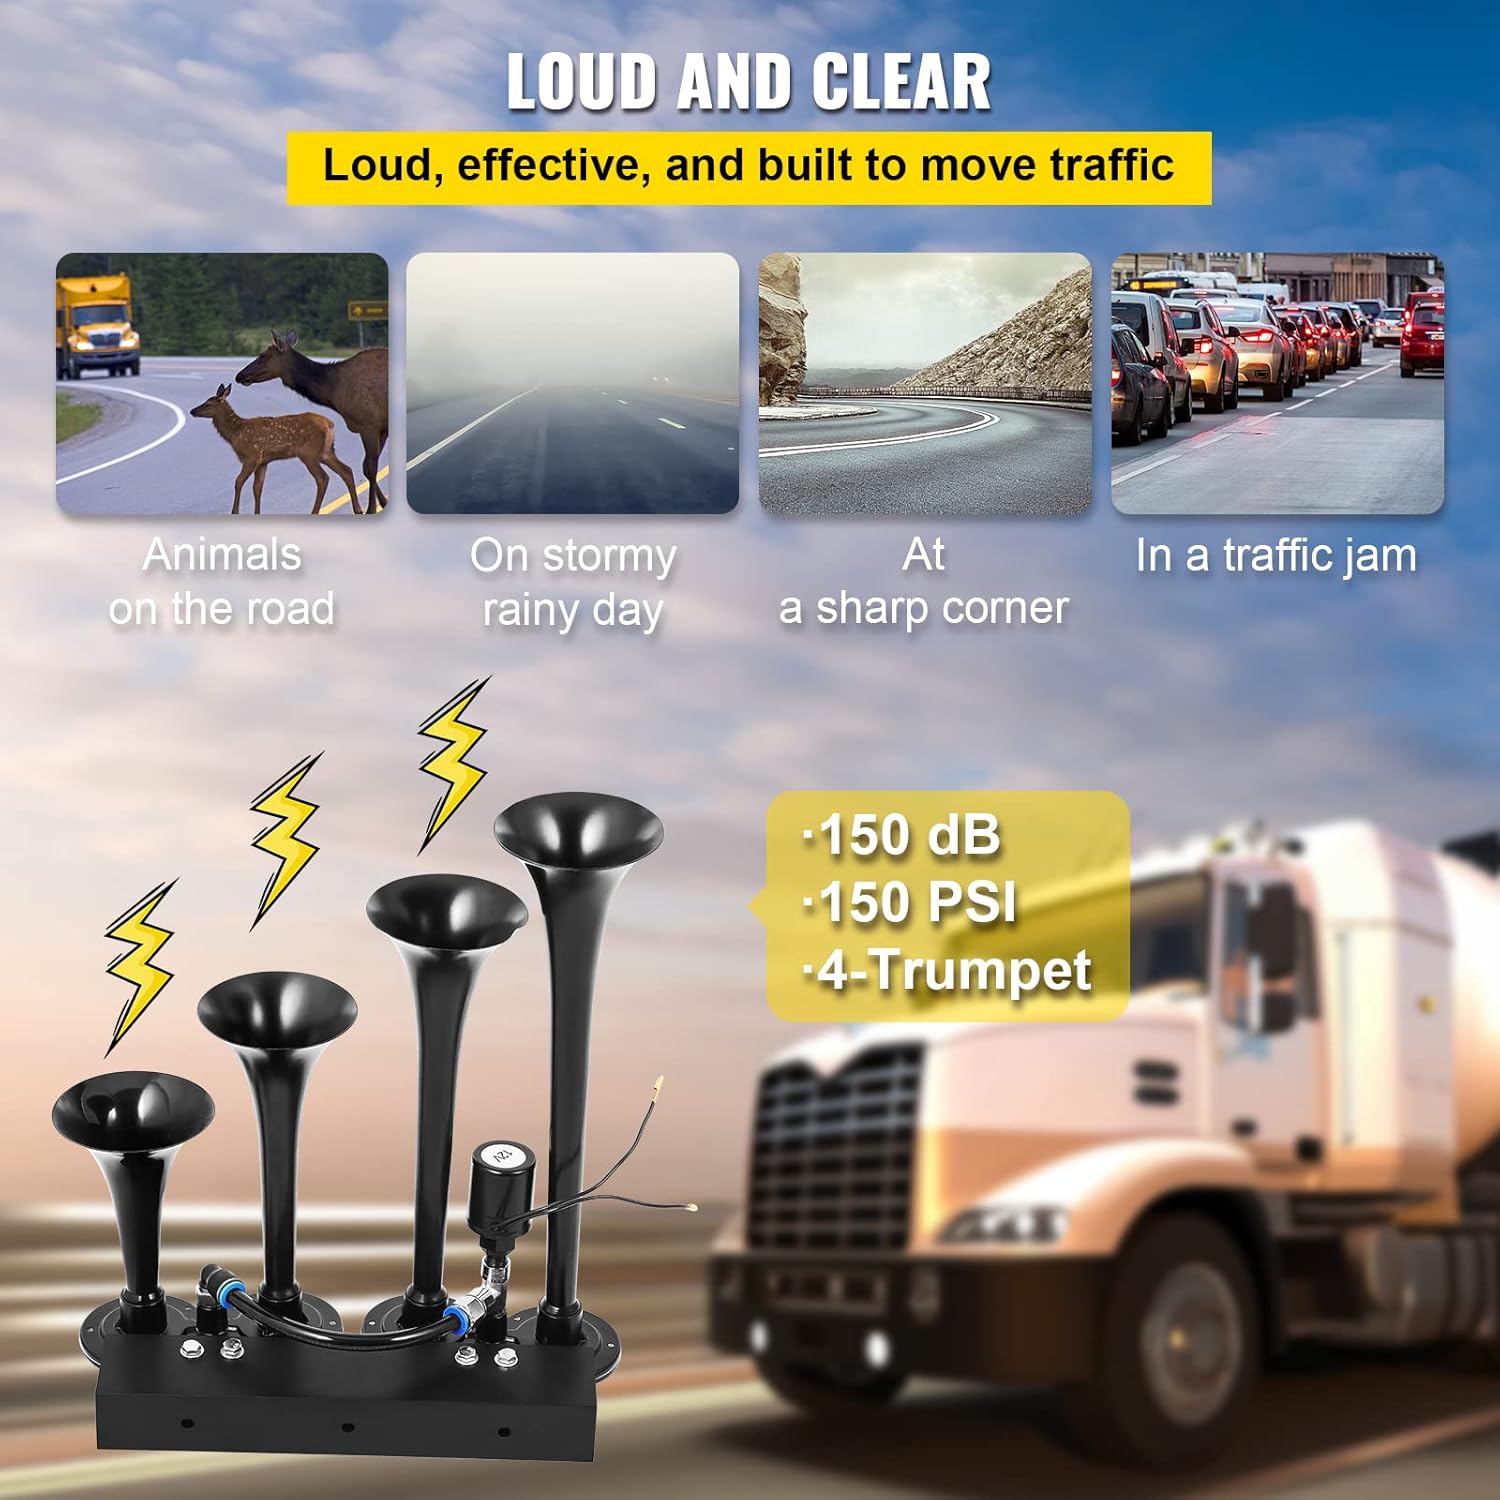
Figure 2.2: The horn's effectiveness in different situations.

Figure 2.3: Detailed view of the 150 PSI compressor.
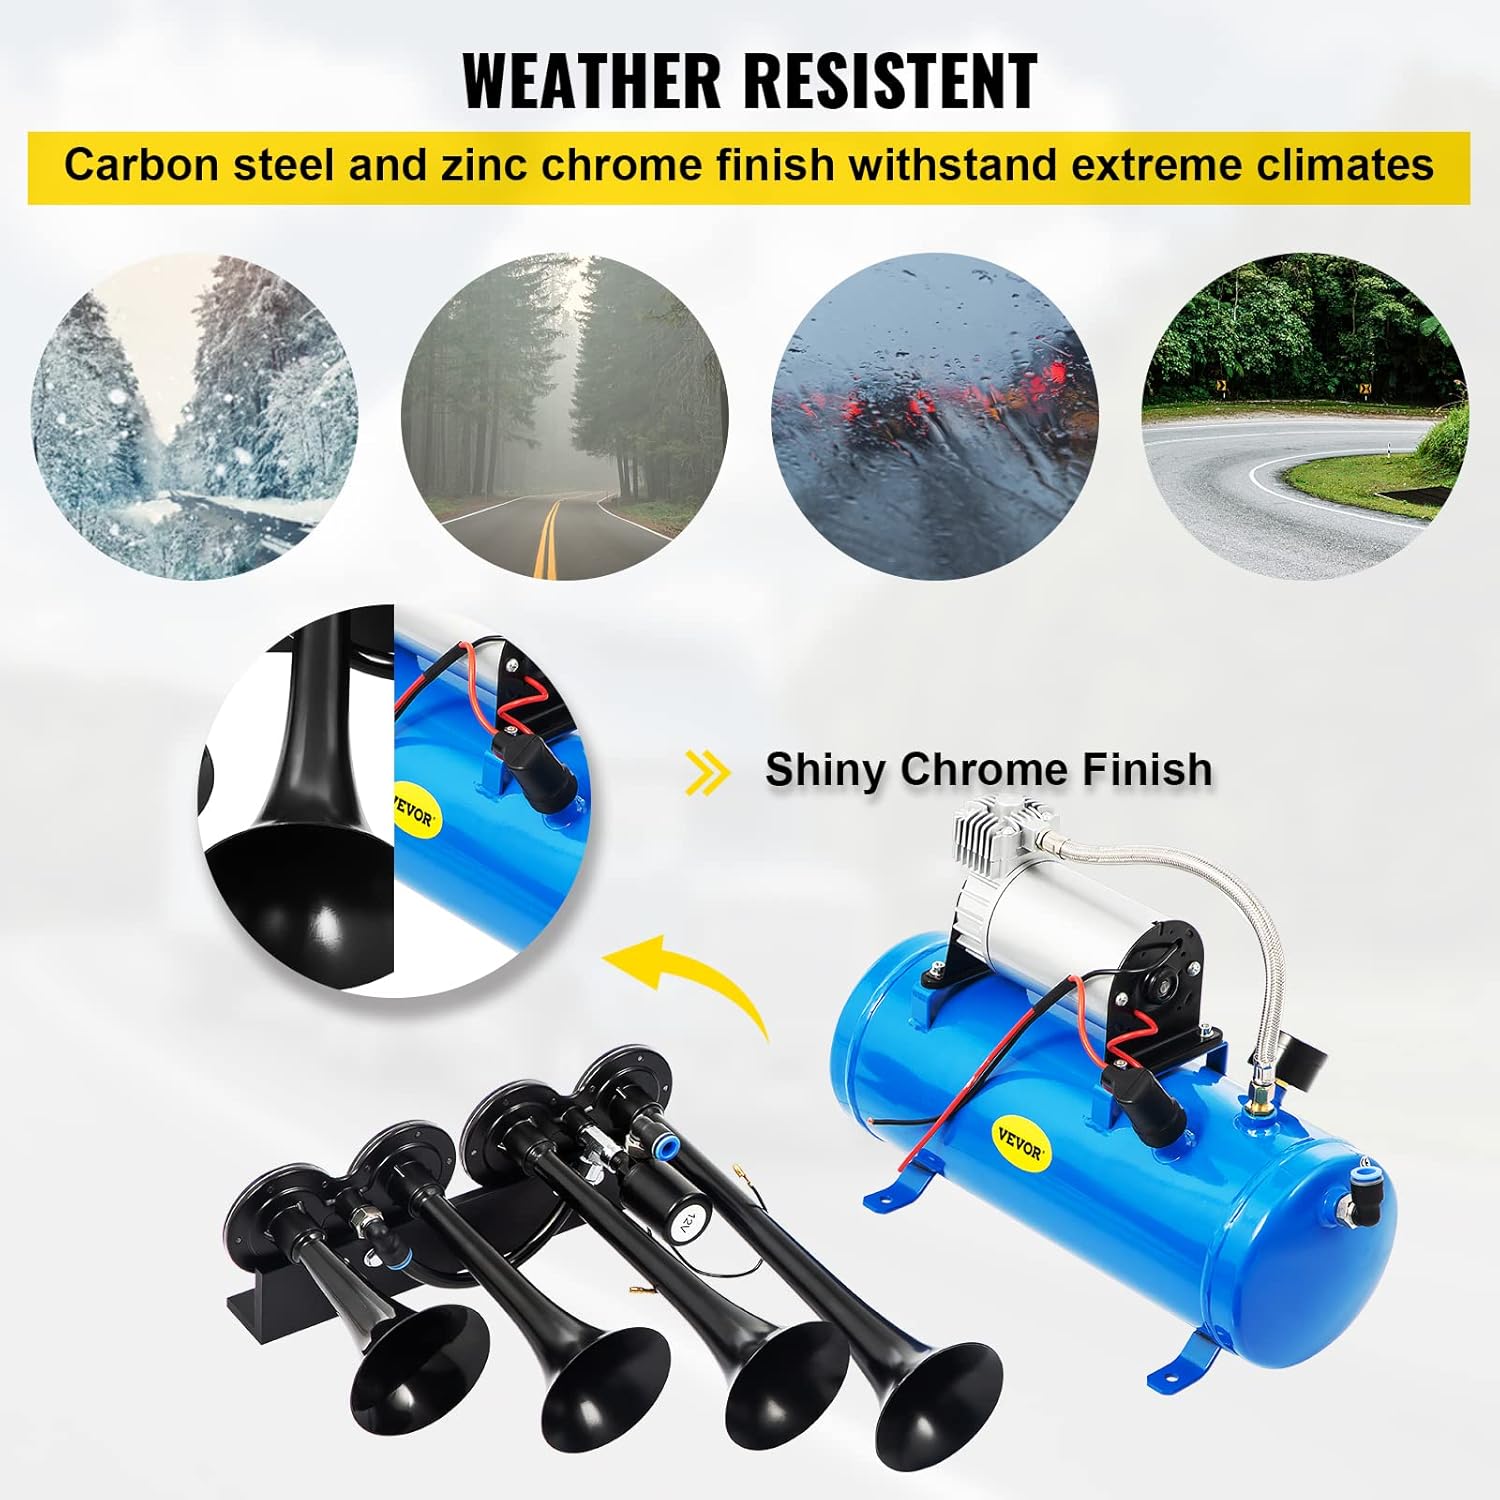
Figure 2.4: Weather resistance of the horn kit components.
3. Specifications
| Attribute | Value |
|---|---|
| Model | TrainHorn150D |
| Material | Stainless Steel & Carbon Steel |
| Number of Trumpets | 4 |
| Gas Tank Capacity | 6 L (1.5 Gallon) |
| Sound Volume | 150 dB |
| Max Air Pressure | 150 PSI |
| Pressure Switch Settings | 95 PSI On, 125 PSI Off |
| Color | Black and Blue |
| Output Voltage | 12 V |
| Air Tank Dimensions (L x W x H) | 41 x 14 x 28 cm (16 x 5.5 x 11 in) |
| Trumpet Dimensions (approx.) | Varying lengths, up to approx. 36 cm (14 in) |
| Package Dimensions (L x W x H) | 48 x 46 x 34 cm (19 x 18.3 x 13.5 in) |
| Weight | 9.32 kg (19.5 lbs) |
| Included Accessories | 1 x Horn Kit, 1 x 6.56 ft (16.7 cm) Air Hose, 1 x Sealing Tape |

Figure 3.1: Product dimensions and typical applications.
4. Setup and Installation
The VEVOR Train Air Horn Kit is designed for straightforward installation. Ensure your vehicle is turned off and the battery is disconnected before beginning.
4.1. Components Check
Before installation, verify that all components listed in the "Specifications" section (Section 3) are present and undamaged.
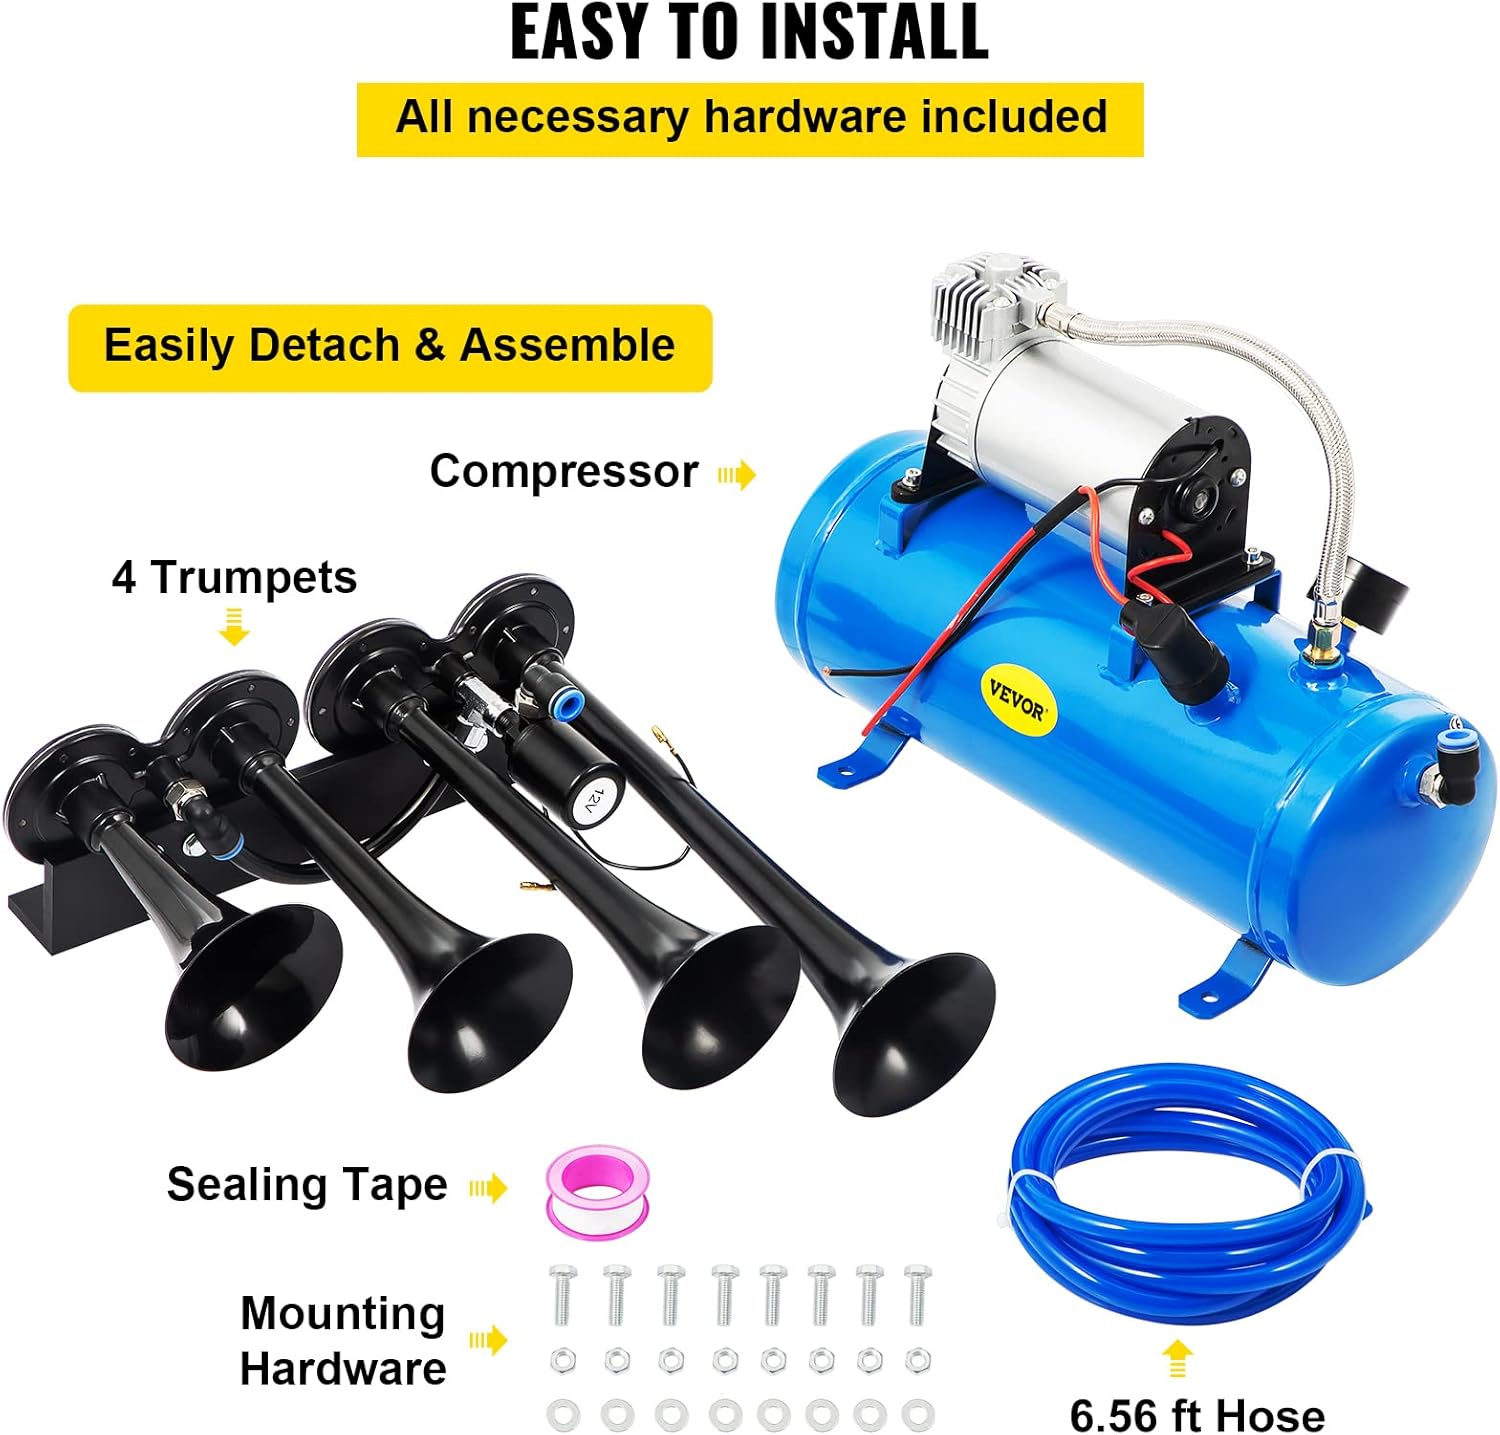
Figure 4.1: All necessary hardware included for installation.
4.2. Mounting the Compressor and Tank
- Choose a secure, dry, and well-ventilated location for the air compressor and tank. Ensure it is away from excessive heat or moving parts.
- Use the provided mounting hardware to firmly attach the compressor and tank to a stable surface. The anti-vibration pads on the compressor should be utilized.
4.3. Mounting the Trumpets
- Select a location for the four trumpets that allows for maximum sound projection and is protected from direct impact or debris.
- Mount the trumpets securely using the provided hardware. Ensure they are oriented to prevent water accumulation.
4.4. Air Line Connection
- Connect the air hose from the compressor's output to the air inlet on the horn assembly.
- Use the provided sealing tape on all threaded connections to ensure an airtight seal and prevent leaks.
- Ensure the hose is routed safely, away from hot engine parts or sharp edges.
4.5. Electrical Wiring
This kit operates on a 12V DC system.
- Connect the positive (+) wire from the compressor to a fused 12V power source (e.g., directly to the battery via a relay, or an existing accessory circuit capable of handling the current draw). The kit includes a 30A fuse for protection.
- Connect the negative (-) wire from the compressor to a good chassis ground point.
- Wire the horn's solenoid valve to a switch (not included) that will activate the horn. This switch should be connected to a 12V power source and the solenoid, with the other solenoid terminal grounded.
- Reconnect the vehicle's battery.
WARNING: Improper wiring can cause damage to the product or vehicle, and may pose a fire hazard. If you are unsure about electrical connections, consult a qualified automotive electrician.
5. Operating Instructions
Once properly installed, operating the VEVOR Train Air Horn Kit is simple.
- Ensure the vehicle's ignition is on (or accessory power is supplied to the compressor).
- The air compressor will automatically turn on when the air tank pressure drops below 95 PSI and will turn off when it reaches 125 PSI. Allow the compressor to build up sufficient pressure before using the horn.
- To activate the horn, press the horn activation switch (connected during installation). The solenoid valve will open, releasing compressed air through the trumpets and producing the loud sound.
- Release the switch to stop the horn sound.
CAUTION: The horn produces an extremely loud sound. Use it responsibly and only when necessary to alert others. Avoid prolonged activation to prevent overheating of the compressor and to conserve air pressure.
6. Maintenance
Regular maintenance will ensure the longevity and optimal performance of your VEVOR Train Air Horn Kit.
- Air Filter: Periodically check and clean the air filter on the compressor. Replace if it appears excessively dirty or damaged. A clogged filter can reduce compressor efficiency.
- Air Lines and Connections: Inspect all air lines and connections regularly for leaks. Use soapy water to detect bubbles at connections. Tighten or re-seal as necessary using sealing tape.
- Electrical Connections: Ensure all electrical connections are clean, tight, and free from corrosion.
- Mounting Hardware: Check that all mounting bolts and screws are secure. Vibrations from vehicle operation can loosen fasteners over time.
- Drain Valve: If your air tank has a drain valve (typically at the bottom), periodically open it to drain any accumulated moisture. This prevents rust and extends tank life.
- General Cleaning: Keep the exterior of the trumpets and compressor clean from dirt and debris.
7. Troubleshooting
If you encounter issues with your VEVOR Train Air Horn Kit, refer to the following common problems and solutions.
| Problem | Possible Cause | Solution |
|---|---|---|
| Horn does not sound or is weak. |
|
|
| Compressor runs continuously or frequently. |
|
|
| Compressor does not turn on. |
|
|
8. Warranty and Support
For warranty information or technical support, please refer to the warranty card included with your product or visit the official VEVOR website.
VEVOR Official Website: www.vevor.com
Ask a question about this manual
Ask about setup, troubleshooting, compatibility, parts, safety, or missing instructions. Manuals+ will review the question and use this page’s manual context to help answer it.