1. Introduction
The SEESII NanoVNA-H4 Vector Network Analyzer is a compact and portable device designed for evaluating antenna resonance and Standing Wave Ratio (SWR). It features a 4.0-inch LCD touchscreen and offers a measurement range from 9KHz to 1.5GHz. This manual provides essential information for setting up, operating, and maintaining your NanoVNA-H4.
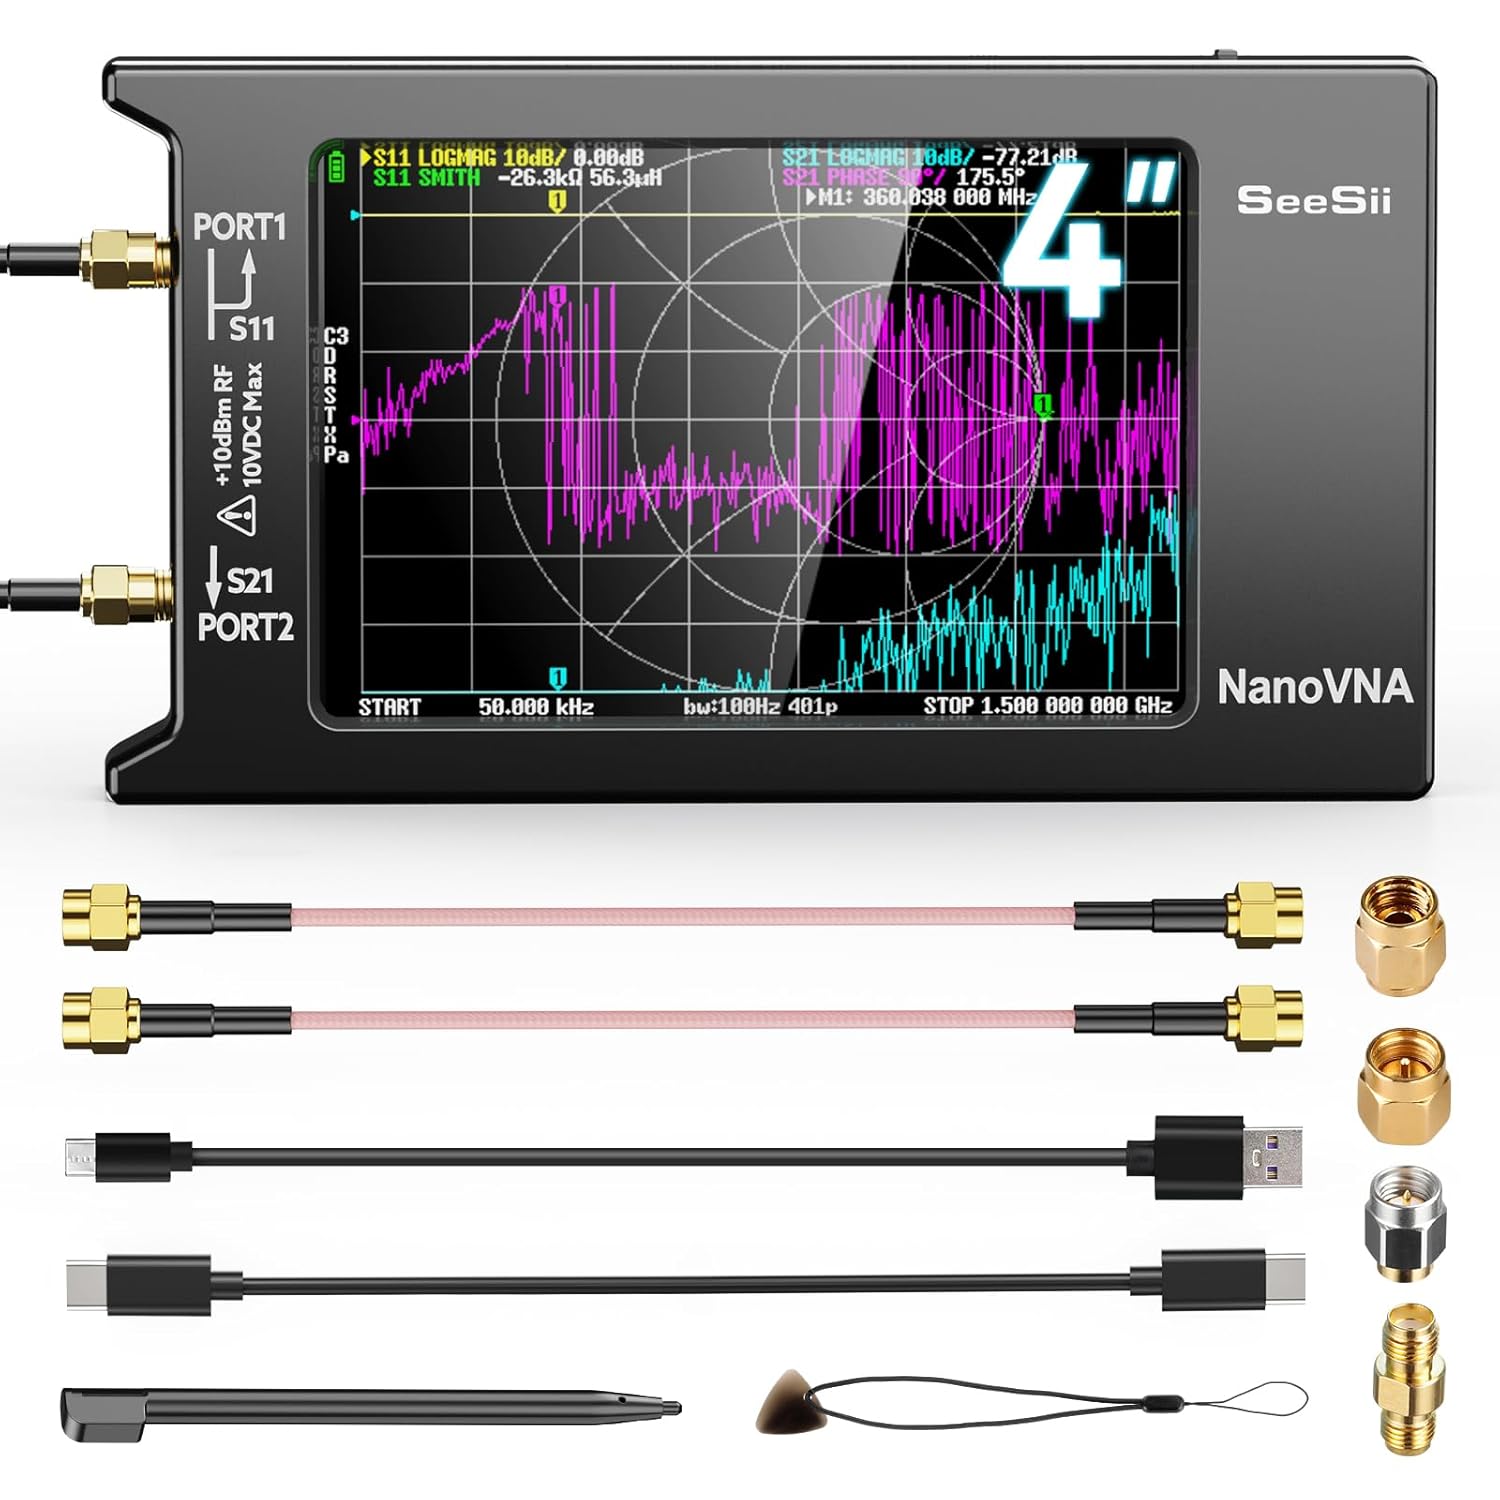
Figure 1: SEESII NanoVNA-H4 with included cables and calibration kit.
2. Package Contents
Verify that all items listed below are included in your package:
- 1x NanoVNA-H4 unit (with 1950mAh battery)
- 1x USB Type-C cable
- 2x 15cm SMA male to male RG316 RF cables
- 1x SMA male calibration kit - OPEN
- 1x SMA male calibration kit - SHORT
- 1x SMA male calibration kit - LOAD
- 1x Touchscreen pen

Figure 2: Complete packing list of the NanoVNA-H4 kit.
3. Setup
Follow these steps to prepare your NanoVNA-H4 for use:
- Unpack the Device: Carefully remove the NanoVNA-H4 and all accessories from its packaging.
- Power On: Locate the power switch on the side of the device and slide it to the 'ON' position. The device will boot up and display the main interface.
- Initial Touchscreen Test: Navigate to the 'CONFIG' menu, then select 'TOUCH TEST' to perform a self-test of the touchscreen functionality. This ensures proper responsiveness.
- Connect Cables: For measurements, connect the appropriate SMA male to male RG316 RF cables to PORT1 and PORT2 as required by your test setup.
Video 1: Basic setup and initial checks of the NanoVNA-H4, including power-on and touchscreen test.
4. Operating Instructions
The NanoVNA-H4 offers various measurement capabilities. Here's a general guide to its operation:
- Accessing Menus: Tap anywhere on the screen to bring up the main menu options (DISPLAY, MARKER, STIMULUS, CAL, RECALL, CONFIG).
- Setting Frequency Range: Select 'STIMULUS' from the menu. You can then set the 'START' and 'STOP' frequencies for your sweep. For example, to measure the 2-meter band, you might set the start frequency to 135 MHz and the stop frequency to 155 MHz.
- Displaying SWR: From the main menu, select 'DISPLAY', then 'TRACE'. Ensure only 'TRACE 0' (SWR) is active. Then go to 'FORMAT' and select 'SWR'. This will show the SWR curve on the screen.
- Using Markers: To pinpoint specific frequencies or SWR values, use the 'MARKER' menu. You can activate multiple markers and search for minimum or maximum values within your sweep range.
Video 2: Detailed tutorial on operating the NanoVNA-H4, including setting frequency sweeps, displaying SWR, and using markers.
5. Calibration
Calibration is crucial for accurate measurements. It should be performed whenever the frequency range to be measured is changed.
- Reset Calibration: From the main menu, select 'CAL', then 'RESET' to clear any previous calibration data.
- Perform OPEN Calibration: Connect the SMA male calibration kit - OPEN to PORT1. Select 'CALIBRATE' then 'OPEN' from the menu.
- Perform SHORT Calibration: Disconnect the OPEN kit and connect the SMA male calibration kit - SHORT to PORT1. Select 'SHORT' from the menu.
- Perform LOAD Calibration: Disconnect the SHORT kit and connect the SMA male calibration kit - LOAD to PORT1. Select 'LOAD' from the menu.
- Complete Calibration: Once all three (OPEN, SHORT, LOAD) calibrations are performed, select 'DONE' and then 'SAVE' to store the calibration data.

Figure 3: The NanoVNA-H4 with calibration standards (OPEN, SHORT, LOAD) for accurate measurements.
6. PC & Android Connectivity
The NanoVNA-H4 supports connection to a PC or Android phone for enhanced control and data analysis.
- PC Connection: Use the provided USB Type-C cable to connect the NanoVNA-H4 to your computer. Utilize PC software like NanoVNASaver to extract data for display, analysis, and saving to Touchstone (.snp) files.
- Android Phone Control: The device can also be controlled via Android applications such as NanoVNA-Web-Client or WebAPP.

Figure 4: NanoVNA-H4 connected to a PC and an Android phone for advanced control and data visualization.
7. Key Features & Specifications
Key Features:
- Upgraded Hardware Version 4.4
- 9KHz-1.5GHz Measurement Range
- 4.0-inch Resistive Touch Screen
- Built-in MicroSD Card Port (supports up to 32GB, card not included)
- Customizable Date and Time Display
- Improved Frequency Algorithm for enhanced dynamic range (70dB for 50K-300MHz, 60dB for 300M-900MHz, 40dB for 900M-1.5GHz)
- PC and Android Phone Control via NanoVNASaver and WebApps
- TX/RX Function for S11/S21 parameter measurement
- Built-in 1950mAh Rechargeable Battery with Type-C charging
Specifications:
- Item Model Number: NanoVNA-H4
- Package Dimensions: 6.73 x 4.8 x 2.09 inches
- Item Weight: 11.99 ounces
- Batteries: 1 Lithium Ion battery required (included)
- Brand: Seesii
- UPC: 889251537400

Figure 5: The NanoVNA-H4 features the latest hardware version 4.4 for enhanced functionality.
8. Troubleshooting
If you encounter issues with your NanoVNA-H4, consider the following:
- Inaccurate Readings: Ensure the device is properly calibrated for the specific frequency range you are measuring. Environmental factors and nearby metallic objects can affect readings.
- Touchscreen Unresponsive: Perform the 'TOUCH TEST' from the 'CONFIG' menu. If issues persist, ensure the screen is clean and free of debris.
- Connectivity Issues: Verify that the USB Type-C cable is securely connected to both the NanoVNA-H4 and the PC/Android device. Ensure the correct software/app is installed and updated.
- Battery Not Charging: Check the USB Type-C cable and power source. The charging indicator LED should illuminate when charging.
9. Maintenance
To ensure the longevity and optimal performance of your NanoVNA-H4, follow these maintenance guidelines:
- Cleaning: Use a soft, dry cloth to clean the device, especially the touchscreen. Avoid abrasive cleaners or solvents.
- Storage: Store the device in a cool, dry place away from direct sunlight and extreme temperatures. Keep it in its original packaging or a protective case when not in use.
- Battery Care: For long-term storage, charge the battery to approximately 50% to prolong its lifespan. Avoid fully discharging the battery for extended periods.
- Connector Protection: Always use the protective caps on the SMA connectors when not in use to prevent dust and damage.
10. Warranty and Support
Seesii provides reliable after-sales service for your NanoVNA-H4.
- Technical Support: For any questions or issues, please contact Seesii customer service.
- Warranty: The product comes with a 36-month warranty.
- Customer Satisfaction: Seesii is committed to 100% customer satisfaction.


