1. Introduction
Thank you for purchasing the Ultralux 6-inch Modern Gimbal LED Retrofit Downlight. This product is designed to provide efficient and adjustable lighting for indoor residential and commercial applications. Its retrofit design allows for easy installation into existing 6-inch recessed housings. Please read this manual thoroughly before installation and operation to ensure proper use and safety.

Image 1.1: Front view of the Ultralux 6-inch Modern Gimbal LED Retrofit Downlight. This image shows the white circular trim and the central light source, which can be angled.
2. Safety Information
WARNING: RISK OF ELECTRIC SHOCK. Disconnect power at the fuse or circuit breaker before installing or servicing.
- Read all instructions before installation.
- This product must be installed in accordance with the applicable installation code by a person familiar with the construction and operation of the product and the hazards involved.
- Ensure the supply voltage is 120V AC, 60Hz. Connecting to an improper voltage may damage the fixture and/or pose a safety risk.
- Do not attempt to alter or modify the fixture.
- Suitable for damp locations. Not suitable for direct exposure to water.
- Minimum 75°C supply conductors.
- Operating temperature should not exceed 40°C.
- Always wear safety glasses and gloves during installation.
3. Package Contents
Verify that all components are present before beginning installation:
- Ultralux 6-inch Modern Gimbal LED Retrofit Downlight
- Mounting Accessories (e.g., torsion springs or friction clips, wiring connector)
- Instruction Manual
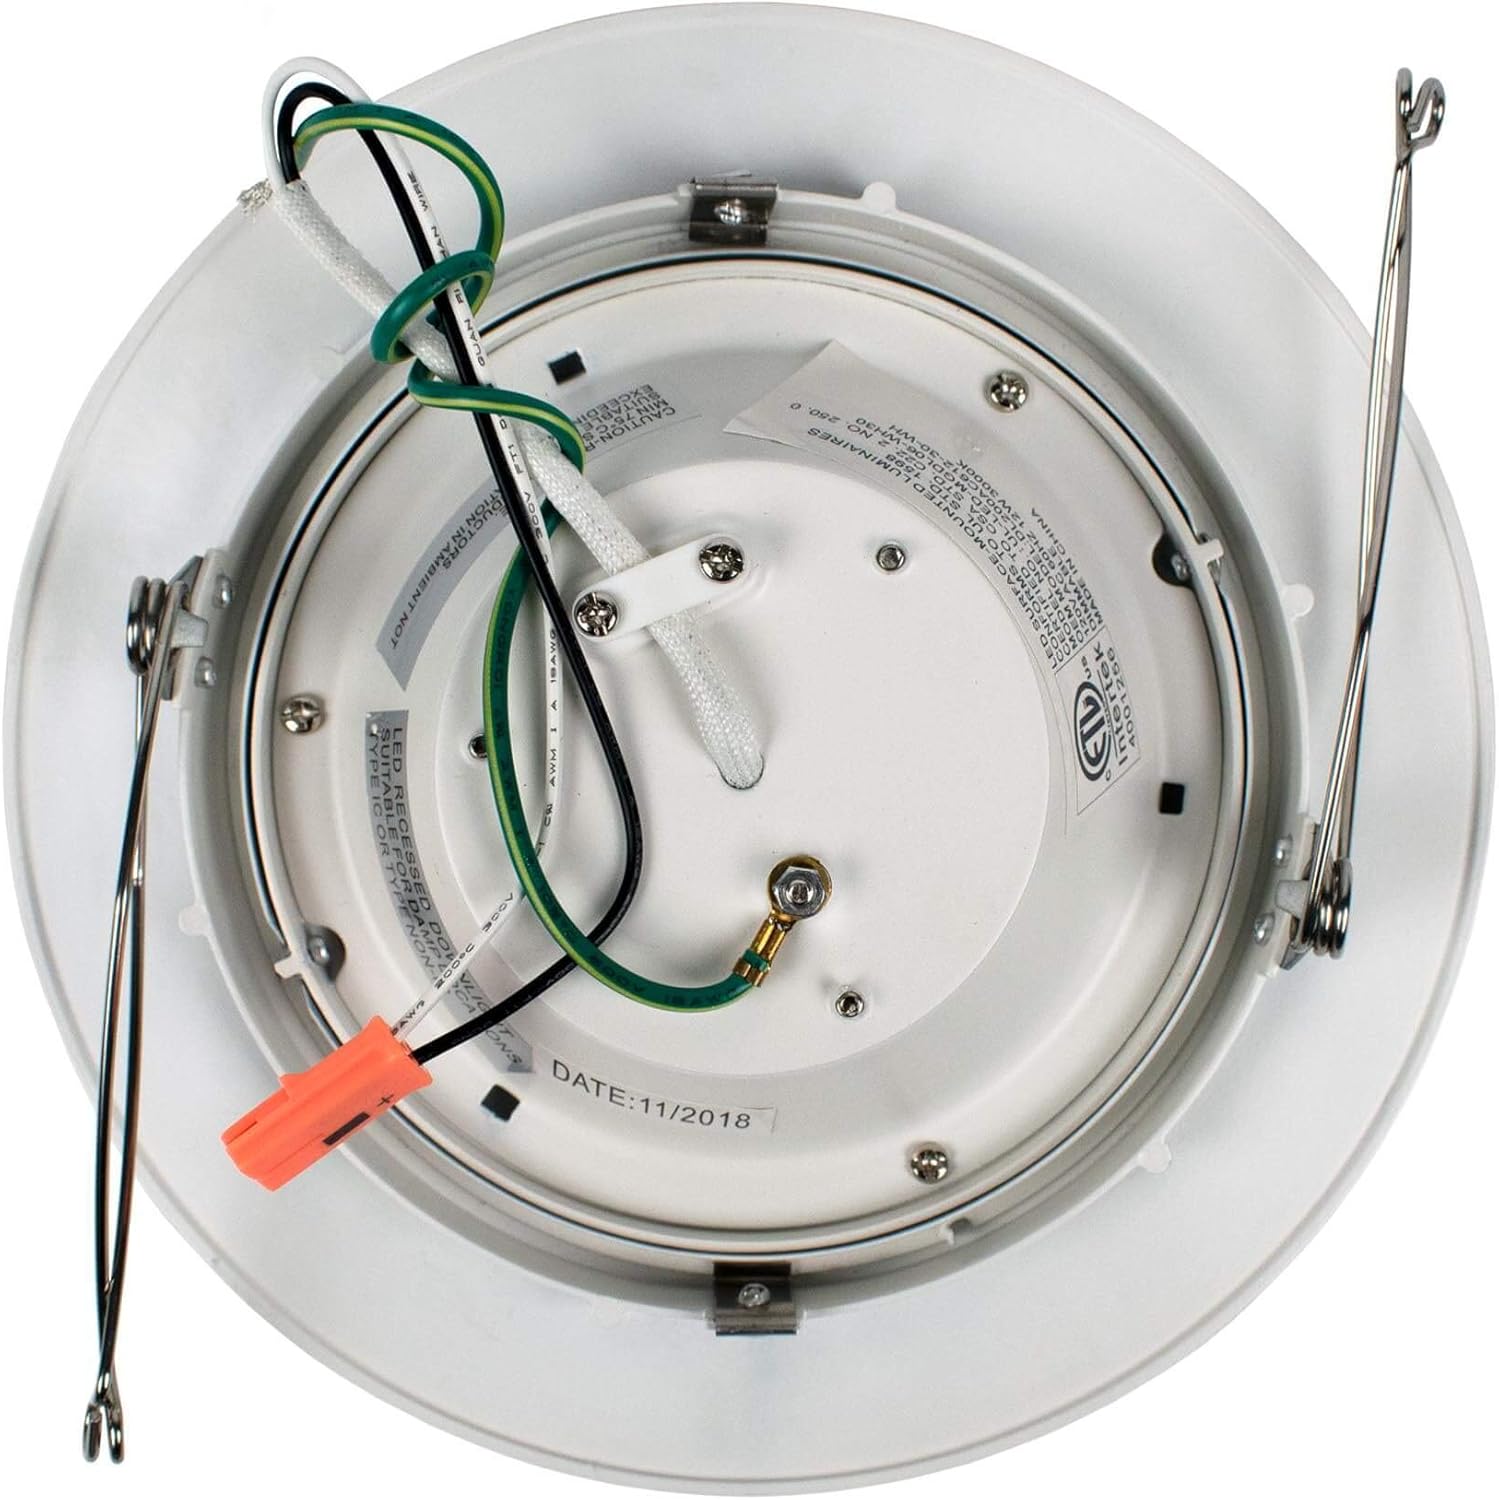
Image 3.1: Back view of the downlight showing the wiring and mounting springs. The orange wire connector is visible, indicating a quick connect system.
4. Setup & Installation
This retrofit downlight is designed for installation into existing 6-inch recessed housings.
4.1 Pre-Installation
- Turn off power: Locate the circuit breaker or fuse box and turn off the power to the light fixture you are replacing.
- Remove existing fixture: Carefully remove the existing bulb and trim from the recessed housing. Disconnect any wiring.
- Inspect housing: Ensure the existing recessed housing is in good condition and compatible with a 6-inch retrofit downlight.
4.2 Wiring Instructions
- Connect the white wire from the downlight to the white (neutral) wire from the junction box using the provided wire connector.
- Connect the black wire from the downlight to the black (hot) wire from the junction box using the provided wire connector.
- Connect the green (ground) wire from the downlight to the bare copper or green ground wire from the junction box.
- Ensure all connections are secure.
4.3 Mounting the Downlight
- Gently push the connected wires into the recessed housing.
- Compress the mounting springs on the sides of the downlight and insert the fixture into the recessed housing.
- Release the springs. The springs will expand and hold the downlight securely in place against the ceiling.
- Adjust the gimbal head to direct the light as desired.

Image 4.1: Example of multiple Ultralux 6-inch Modern Gimbal LED Retrofit Downlights installed in a hallway ceiling, providing directional lighting.
5. Operating Instructions
5.1 Power On/Off
Once installed, restore power at the circuit breaker. The downlight can be turned on and off using a standard wall switch connected to the circuit.
5.2 Dimming Function
This Ultralux LED Retrofit Downlight is TRIAC dimmable. To utilize the dimming feature, ensure you have a compatible TRIAC (forward-phase) dimmer switch installed on the circuit. Follow the dimmer switch manufacturer's instructions for operation. The light output can be adjusted from 100% down to 10% or lower, depending on the dimmer.
5.3 Gimbal Adjustment
The gimbal feature allows you to adjust the direction of the light beam. Gently tilt the central light module within its housing to aim the light where needed.
6. Maintenance
The Ultralux LED Retrofit Downlight requires minimal maintenance.
- Cleaning: Ensure power is off before cleaning. Wipe the fixture with a soft, dry, or slightly damp cloth. Do not use harsh chemicals, abrasive cleaners, or solvents, as these may damage the finish or electrical components.
- LED Longevity: The integrated LED light source is designed for long life (over 50,000 hours) and does not require bulb replacement.
- Inspection: Periodically check the fixture for any signs of damage or loose connections. If any issues are found, disconnect power and consult a qualified electrician.
7. Troubleshooting
If you experience issues with your downlight, refer to the following common problems and solutions:
| Problem | Possible Cause | Solution |
|---|---|---|
| Light does not turn on | No power to the fixture | Check circuit breaker/fuse. Ensure wall switch is ON. |
| Light flickers or dims improperly | Incompatible dimmer switch or loose wiring | Ensure a TRIAC compatible dimmer is used. Check all wire connections. |
| Light is too dim | Dimmer setting is too low | Adjust dimmer to a higher setting. |
| Light makes buzzing noise | Incompatible dimmer or electrical interference | Replace dimmer with a high-quality LED compatible TRIAC dimmer. Consult an electrician if noise persists. |
If these solutions do not resolve the issue, please contact customer support.
8. Specifications
| Feature | Detail |
|---|---|
| Model Number | 689749000016 |
| Brand | Ultralux |
| Input Voltage | 120V |
| Wattage | 12W |
| Lumens | 750 lumens |
| Color Temperature | 3000K |
| CRI | >90 |
| Beam Angle | 120° |
| Dimmable | Yes (TRIAC) |
| L70 Lifetime | >50,000 hrs |
| Dimensions | 7-1/2"D x 3"H (Approximate) |
| Material | Copper |
| Finish Type | White |
| Installation Type | Recessed Mount |
| Indoor/Outdoor Usage | Indoor |
9. Warranty & Support
Ultralux products are manufactured to high-quality standards. For warranty information or technical support, please refer to the documentation included with your purchase or visit the official Ultralux website. Keep your purchase receipt as proof of purchase for any warranty claims.