
1. Introduction
This manual provides essential instructions for the safe and efficient use of your PRIMECOMTECH Portable Electric Vehicle (EV) Charger. This charger is designed for use with electric and plug-in hybrid vehicles equipped with a Type 1 (J1772) connector, and features a European Schuko 10-Amp plug for power input. Please read this manual thoroughly before operating the device and retain it for future reference.

Image 1.1: The PRIMECOMTECH Portable EV Charger, showing the coiled cable, control box, Type 1 (J1772) connector, and European Schuko power plug.
2. Safety Information
Always observe the following safety precautions to prevent injury or damage to the charger or vehicle:
- Do not use the charger if the cable or connector is damaged.
- Ensure the power outlet is properly grounded and rated for 10 Amps at 220 Volts.
- Do not immerse the charger in water or expose it to extreme weather conditions unless specified for outdoor use.
- Keep children and pets away from the charging area.
- Disconnect the charger from the power source before cleaning or maintenance.
- Do not attempt to open or repair the charger yourself. Contact qualified service personnel.
3. Package Contents
Verify that all items are present in the package:
- 1 x PRIMECOMTECH Portable EV Charger (Type 1 J1772 connector, European Schuko 10-Amp plug)
- 1 x Instruction Manual (this document)
4. Setup
The PRIMECOMTECH Portable EV Charger is designed for ease of use and does not require complex installation. It can be plugged directly into an existing 220V, 10-Amp European Schuko outlet. No expensive wiring modifications are typically needed.
- Select a Location: Choose a dry, well-ventilated area near your vehicle's charging port and a suitable 220V European Schuko power outlet. Ensure the cable can reach the vehicle without being stretched or creating a tripping hazard.
- Inspect the Charger: Before each use, visually inspect the charger cable, control box, and connectors for any signs of damage, wear, or foreign objects.
- Connect to Power: Insert the European Schuko plug firmly into a compatible 220V, 10-Amp wall outlet. The charger's control box should illuminate, indicating power is supplied.
- Prepare Vehicle: Ensure your vehicle is turned off and in park. Open the charging port cover on your electric vehicle.

Image 4.1: A close-up view of the Type 1 (J1772) connector, which plugs into the vehicle's charging port.
5. Operating Instructions
Follow these steps to charge your electric vehicle:
- Connect to Vehicle: Take the Type 1 (J1772) connector and firmly insert it into your vehicle's charging port. You should hear a click as it locks into place.
- Initiate Charging: The charger's control box will communicate with the vehicle. The "Charging" indicator light on the control box should illuminate, and your vehicle's dashboard or charging indicator will confirm that charging has begun.
- Monitor Charging: Periodically check the charging status on the control box and your vehicle. The charger operates at Level 2 (220V) and provides 10 Amps of current.
- End Charging: Once your vehicle is fully charged, or you wish to stop charging, first unlock the charging port from your vehicle (if applicable, consult your vehicle's manual). Then, press the release button on the Type 1 (J1772) connector and pull it out of the vehicle's charging port.
- Disconnect from Power: Unplug the European Schuko plug from the wall outlet.
- Store Charger: Coil the cable neatly and store the charger in a dry, safe place, away from direct sunlight and extreme temperatures.
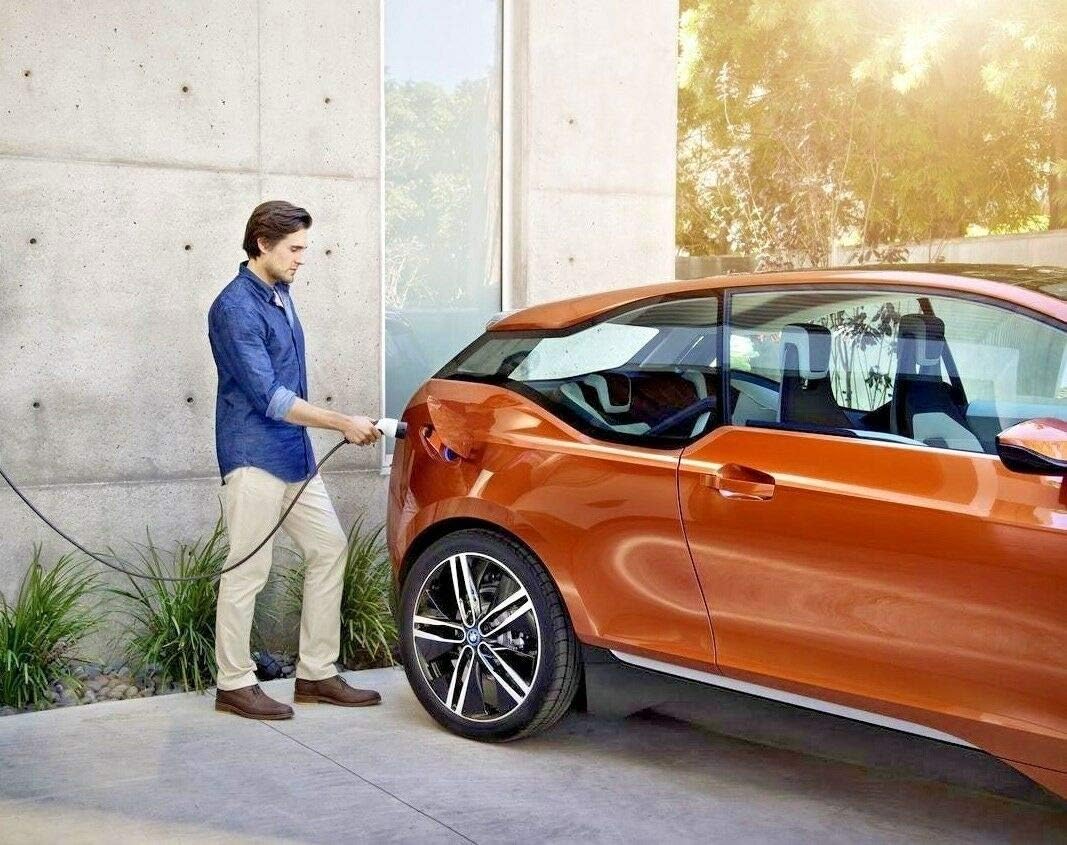
Image 5.1: A user connecting an EV charger to a BMW i3, demonstrating the typical charging process.
5.1 EV Connector Types
This specific model features a Type 1 (J1772) connector for the vehicle side and a European Schuko plug for the power source. It is compatible with many European and Asian electric cars, including models like BMW i3, i5, i8, 330e, 530e, 740e xDrive4, Mercedes B Class ED, or SMART ED plug-in hybrids (PHEV) that utilize the Type 1 standard.

Image 5.2: Visual comparison between a Type 2 Mennekes European EV plug and a Type 1 J1772 USA EV plug. This charger uses the Type 1 J1772 for the vehicle connection.

Image 5.3: A world map illustrating the distribution of different EV charging standards (Type 1, Type 2, CCS Combo 1, CCS Combo 2) across various regions. This charger is designed for regions using Type 1 (J1772) for the vehicle and European Schuko for the wall outlet.
6. Maintenance
Proper maintenance ensures the longevity and safe operation of your charger:
- Cleaning: Wipe the charger's exterior with a soft, dry cloth. Do not use abrasive cleaners, solvents, or immerse any part of the charger in water.
- Cable Care: Avoid kinking, twisting, or driving over the charging cable. Store it neatly coiled when not in use.
- Connector Care: Keep the connectors clean and free of dust, dirt, or moisture. Use a dry cloth to wipe them if necessary.
- Storage: Store the charger in a cool, dry place, protected from direct sunlight and extreme temperatures.
7. Troubleshooting
The charger's control box features indicator lights to help diagnose common issues. Refer to the table below for guidance:

Image 7.1: A detailed table showing the meaning of different LED light combinations (Power, Charging, Ground Present, Charging Fault) on the EV charger's control unit, along with corresponding conditions and troubleshooting steps.
| Power LED | Charging LED | Ground Present LED | Charging Fault LED | Condition / Status | Action / Description |
|---|---|---|---|---|---|
| O | O | O | O | No power from socket | Check power outlet and circuit breaker. |
| ● | O | O | O | No ground connection / Low resistance to ground | Ensure outlet is properly grounded. Consult an electrician if needed. |
| ● | O | ● | O | Power is applied to vehicle / EV not requesting charge | Charger is ready. Ensure vehicle is properly connected and ready to charge. |
| ● | ● | ● | O | Charging active | Normal operation. Vehicle is charging. |
| ● | O | ● | ● | Internal fault / Problem with EV communication | Disconnect and reconnect. If fault persists, contact support. |
| ● | O | O | ● | High resistance to ground / EV ground fault | Check grounding of the outlet. Do not use if ground fault persists. |
| ● | O | ● | Blinking ● | Overcurrent / Over-temperature | Unplug and allow to cool. Check for overloaded circuits. |
Note: "●" indicates LED is ON, "O" indicates LED is OFF. Blinking "●" indicates a flashing LED.
If you encounter a problem not listed here or if troubleshooting steps do not resolve the issue, please contact PRIMECOMTECH customer support.
8. Specifications
| Feature | Detail |
|---|---|
| Brand | PRIMECOMTECH |
| Model Number | Delphi-01 |
| Input Voltage | 220 Volts |
| Output Voltage | 220 Volts |
| Amperage | 10 Amps |
| Wattage | 2.2 kW (2200 Watts) |
| EV Connector Type | Type 1 (J1772) |
| Power Plug Type | European Schuko |
| Special Features | Universal Compatibility (with Type 1 EVs) |
| Item Weight | 14 pounds (approx. 6.35 kg) |
| Product Dimensions | 12 x 12 x 5 inches (approx. 30.5 x 30.5 x 12.7 cm) |
| Manufacturer | BMW-Delphi |
| Specification Met | IEC |
9. Warranty and Support
For warranty information and customer support, please contact PRIMECOMTECH directly. Details regarding specific warranty periods and terms are typically provided at the point of purchase or on the manufacturer's official website. Protection plans may also be available for extended coverage.
For technical assistance or inquiries, please visit the PRIMECOMTECH Store on Amazon or refer to the contact information provided with your purchase.