KODLIX N33 Mini PC
KODLIX N33 Mini PC User Manual
Model: N33 Mini PC
1. Introduction
This manual provides comprehensive instructions for the setup, operation, maintenance, and troubleshooting of your KODLIX N33 Mini PC. Please read this manual carefully before using the device to ensure proper functionality and to maximize your user experience.

Image: KODLIX N33 Mini PC, a compact black desktop computer.
2. Product Overview
2.1 Key Features
- Processor: Intel Celeron N3350 Dual-Core Processor (up to 2.4 GHz)
- Memory: 4GB LPDDR4 RAM
- Storage: 64GB eMMC internal storage
- Graphics: Intel HD Graphics 500, supporting 4K HD video output
- Connectivity: Dual-band Wi-Fi (2.4GHz/5.8GHz), Gigabit Ethernet (1000Mbps LAN), Bluetooth 4.2
- Display Output: HDMI and VGA ports for dual monitor support
- Design: Fanless for silent operation
- Operating System: Pre-installed with Windows 10
2.2 Ports and Connectors
The KODLIX N33 Mini PC features a variety of ports for connecting peripherals and external devices.

Image: Rear ports of the KODLIX N33 Mini PC.
- USB 3.0 Ports: For high-speed data transfer with external drives, keyboards, and mice.
- HDMI Port: Connects to monitors or TVs for digital video and audio output, supporting up to 4K resolution.
- VGA Port: Connects to monitors for analog video output, enabling dual display setups.
- Ethernet Port (RJ45): For wired network connection (1000Mbps LAN).
- Audio Jack: For connecting headphones or external speakers.
- Power Input: For connecting the power adapter.
- SD Card Slot: For storage expansion using a Micro SD card.
3. Setup Guide
3.1 Unboxing and Initial Inspection
Carefully remove all components from the packaging. Ensure the following items are present:
- KODLIX N33 Mini PC
- Power Adapter
- HDMI Cable
- Mounting Bracket (for VESA mounting)
- User Manual
Inspect the Mini PC for any physical damage. If any damage is found, contact customer support immediately.
3.2 Connecting Peripherals
- Connect Display: Connect your monitor or TV to the Mini PC using the HDMI cable. If you are using a VGA monitor, connect it to the VGA port. For dual display, connect both HDMI and VGA.
- Connect Keyboard and Mouse: Plug your USB keyboard and mouse into the available USB ports on the Mini PC. Wireless peripherals can be connected via Bluetooth or a USB dongle.
- Connect Power: Plug the power adapter into the power input port on the Mini PC, then plug the adapter into a power outlet.
- Optional - Network Connection: For a wired internet connection, connect an Ethernet cable from your router to the Ethernet port on the Mini PC.
3.3 Powering On and Initial Setup
- Press the power button on the Mini PC. The power indicator light will illuminate.
- Follow the on-screen instructions to complete the initial Windows 10 setup, including language selection, network configuration, and user account creation.
4. Operating Instructions
4.1 Basic Operation
Once Windows 10 is set up, you can use the Mini PC like any standard desktop computer. Navigate using your connected keyboard and mouse.
4.2 Network and Bluetooth Connectivity
- Wi-Fi: To connect to a wireless network, click the Wi-Fi icon in the system tray, select your desired network, and enter the password. The Mini PC supports both 2.4GHz and 5.8GHz bands.
- Bluetooth: To pair Bluetooth devices (e.g., headphones, speakers, keyboards), go to Windows Settings > Devices > Bluetooth & other devices, and follow the pairing instructions.
4.3 Dual Display Setup
The KODLIX N33 Mini PC supports connecting two displays simultaneously using its HDMI and VGA ports. This can significantly enhance productivity.
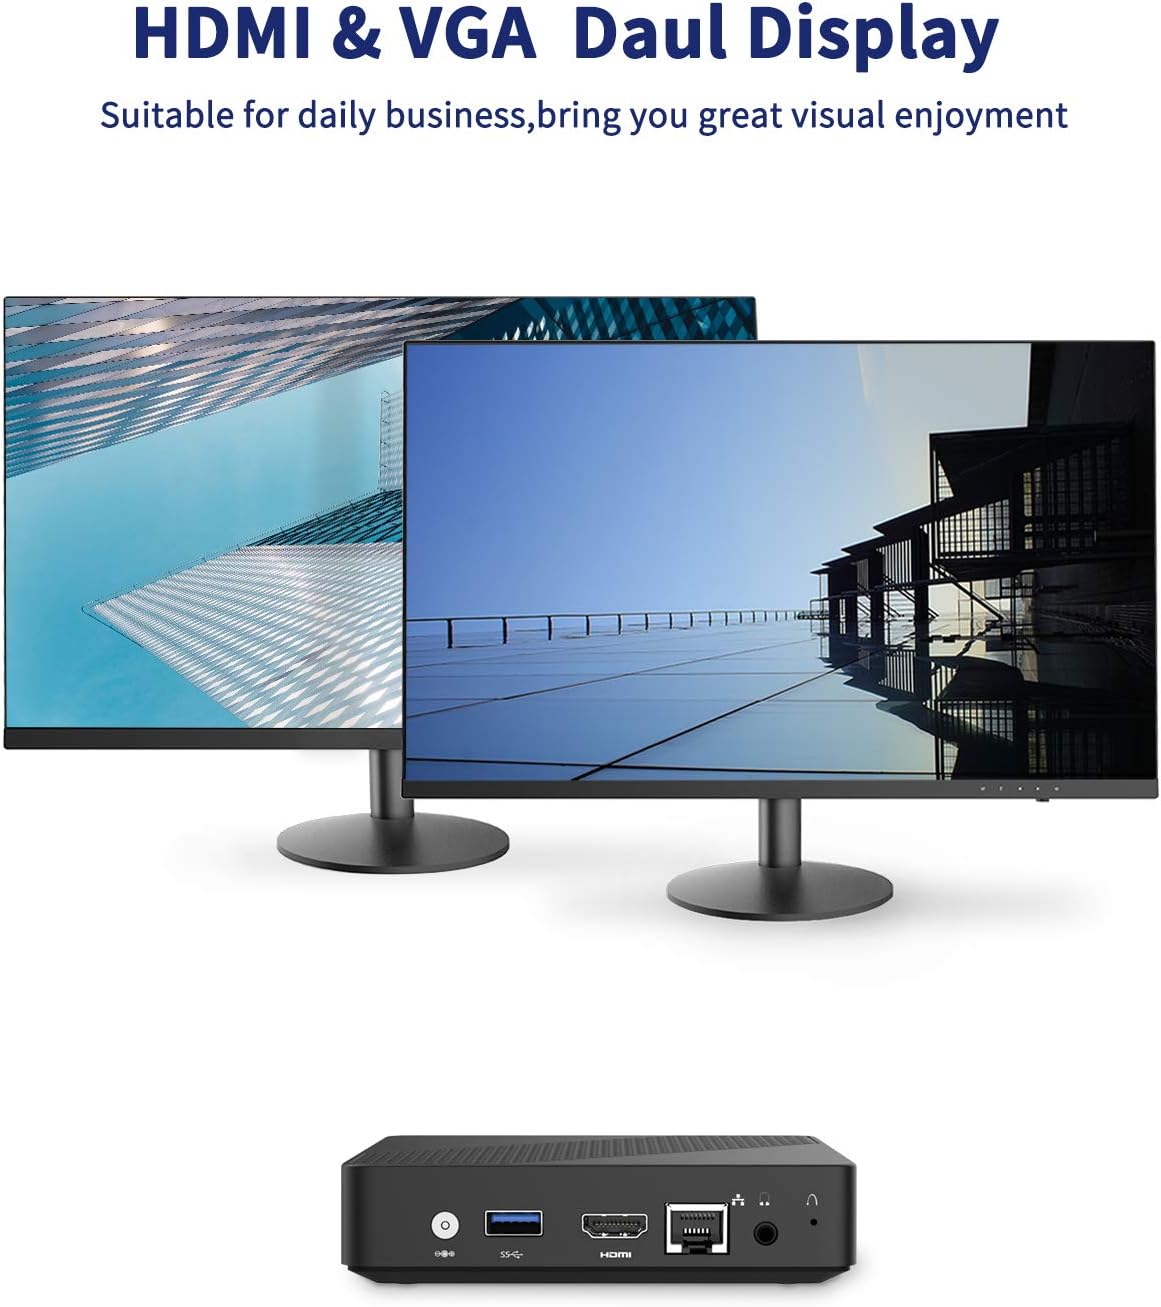
Image: Dual display setup with KODLIX N33 Mini PC.
- Connect the first monitor to the HDMI port.
- Connect the second monitor to the VGA port.
- Once both monitors are connected and powered on, Windows should automatically detect them.
- To configure display settings (e.g., extend, duplicate, resolution), right-click on the desktop, select "Display settings," and adjust as needed.
4.4 4K HD Video Playback
The Mini PC's Intel HD Graphics 500 supports 4K HD video output via the HDMI port. Ensure your display device also supports 4K resolution for optimal viewing.

Image: KODLIX N33 Mini PC supporting 4K HD resolution.
5. Storage Expansion
The KODLIX N33 Mini PC comes with 64GB eMMC storage, which can be expanded using several methods:

Image: Internal and external storage expansion options for the KODLIX N33 Mini PC.
- Micro SD Card: Insert a Micro SD card (up to 128GB, not included) into the dedicated SD card slot for additional storage.
- M.2 2242 SATA SSD: The Mini PC supports an internal M.2 2242 SATA SSD (up to 1TB, not included). This requires opening the device and installing the SSD. Refer to the detailed instructions provided with the SSD or consult a professional if unsure.
- External Hard Drive: Connect a 2.5-inch or 3.5-inch mobile hard disk box via the USB 3.0 interface for up to 2TB of external storage.
6. Specifications
| Feature | Detail |
|---|---|
| Brand | KODLIX |
| Model Name | N33 Mini PC |
| Processor | Intel Celeron N3350 (2.4 GHz) |
| RAM | 4 GB LPDDR4 |
| Internal Storage | 64 GB eMMC |
| Storage Expansion | Micro SD (up to 128GB), M.2 2242 SATA SSD (up to 1TB), USB 3.0 for external drives (up to 2TB) |
| Graphics | Intel HD Graphics 500 |
| Max Screen Resolution | 3840 x 2160 pixels (4K) |
| Wireless Connectivity | 2.4GHz/5.8GHz Dual-Band Wi-Fi |
| Bluetooth | Bluetooth 4.2 |
| Ethernet | 1000Mbps LAN |
| Operating System | Windows 10 |
| Ports | HDMI, VGA, USB 3.0, Audio Jack, SD Card Slot, Ethernet, Power Input |
| Item Weight | 1.46 pounds |
| Package Dimensions | 8.07 x 6.93 x 2.32 inches |
7. Troubleshooting
This section addresses common issues you might encounter with your KODLIX N33 Mini PC.
- No Display:
- Ensure the monitor is powered on and the correct input source is selected.
- Check that the HDMI or VGA cable is securely connected to both the Mini PC and the monitor.
- Try a different cable or monitor to rule out faulty equipment.
- No Power:
- Verify the power adapter is securely connected to the Mini PC and a working power outlet.
- Ensure the power button has been pressed.
- Wi-Fi/Bluetooth Connectivity Issues:
- Check if Wi-Fi/Bluetooth is enabled in Windows settings.
- Restart the Mini PC and your router/Bluetooth device.
- Ensure the Mini PC is within range of the wireless signal.
- Update network adapter drivers if necessary.
- Slow Performance:
- Close unnecessary applications running in the background.
- Ensure Windows is up to date.
- Check for malware or viruses.
- Consider expanding storage with an SSD if the eMMC is nearly full, as this can impact performance.
8. Maintenance
- Cleaning: Use a soft, dry cloth to clean the exterior of the Mini PC. Avoid liquid cleaners. Use compressed air to gently clear dust from vents if necessary.
- Software Updates: Regularly check for and install Windows updates to ensure system stability and security.
- Data Backup: Periodically back up important data to an external drive or cloud storage to prevent data loss.
- Optimal Placement: Place the Mini PC in a well-ventilated area to prevent overheating, despite its fanless design.
9. Warranty and Support
The KODLIX N33 Mini PC comes with a 1-year after-sales service. For technical support, warranty claims, or further assistance, please refer to the contact information provided with your purchase documentation or visit the official KODLIX support website.
Please retain your proof of purchase for warranty purposes.
Ask a question about this manual
Ask about setup, troubleshooting, compatibility, parts, safety, or missing instructions. Manuals+ will review the question and use this page’s manual context to help answer it.