Relaxdays 10029551
Relaxdays Black Hose Cart Instruction Manual
Model: 10029551
Introduction
This manual provides detailed instructions for the assembly, operation, and maintenance of your Relaxdays Black Hose Cart. Please read this manual thoroughly before use to ensure proper function and longevity of the product.

Image: The Relaxdays Black Hose Cart, shown without a hose, highlighting its sturdy metal frame and two large wheels.
Product Features
- Manual Winding: Equipped with a hand crank for easy manual winding of garden hoses up to 80 meters (5/8") or 50 meters (3/4").
- Versatile Connectors: Includes 1/2” and 3/4” adapters for direct connection of hose pipes to water taps.
- Mobile Design: Features two durable plastic wheels with treads for effortless transportation across your garden.
- Hose Protection: Designed to compactly store the hose, preventing kinks and extending its lifespan.
- Durable Construction: Made from robust metal and plastic components, ensuring stability and long-term use.
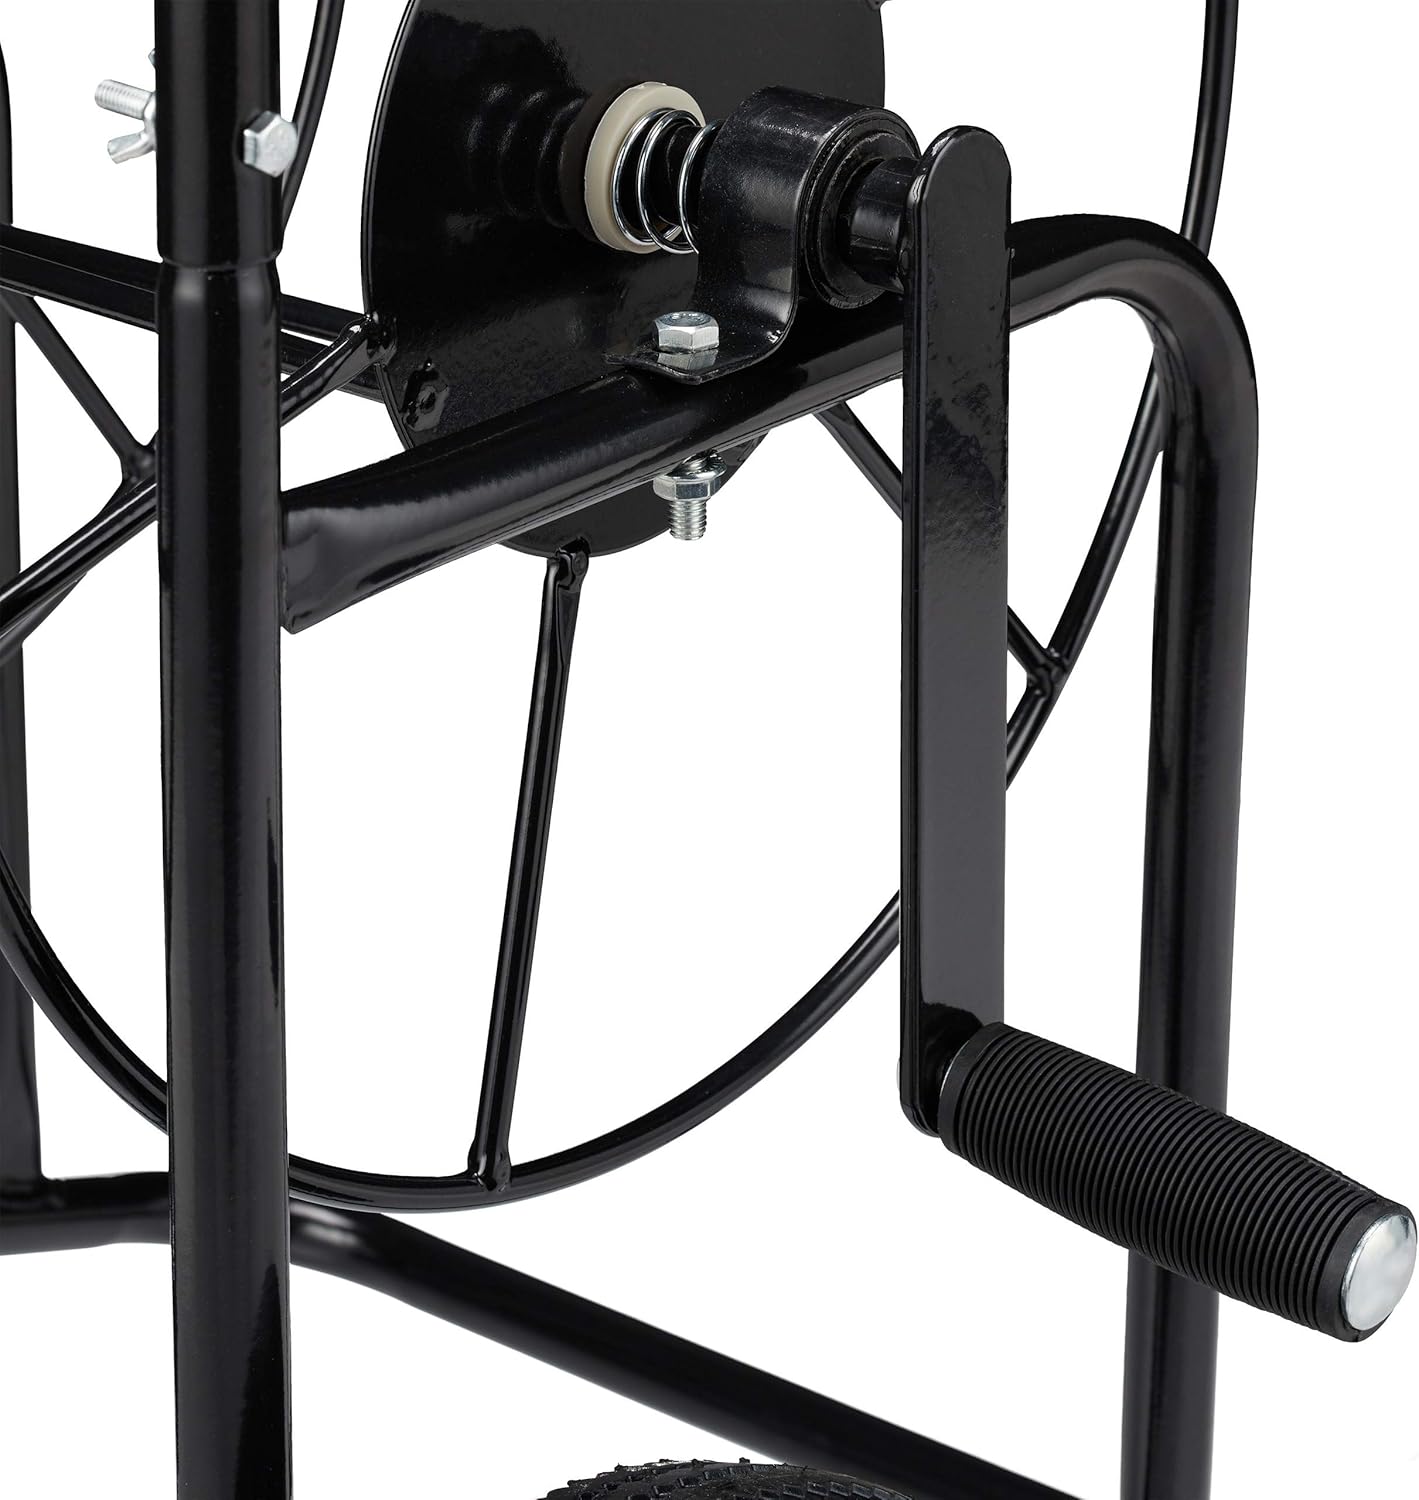
Image: A detailed view of the manual hand crank mechanism, used for winding the hose onto the reel.
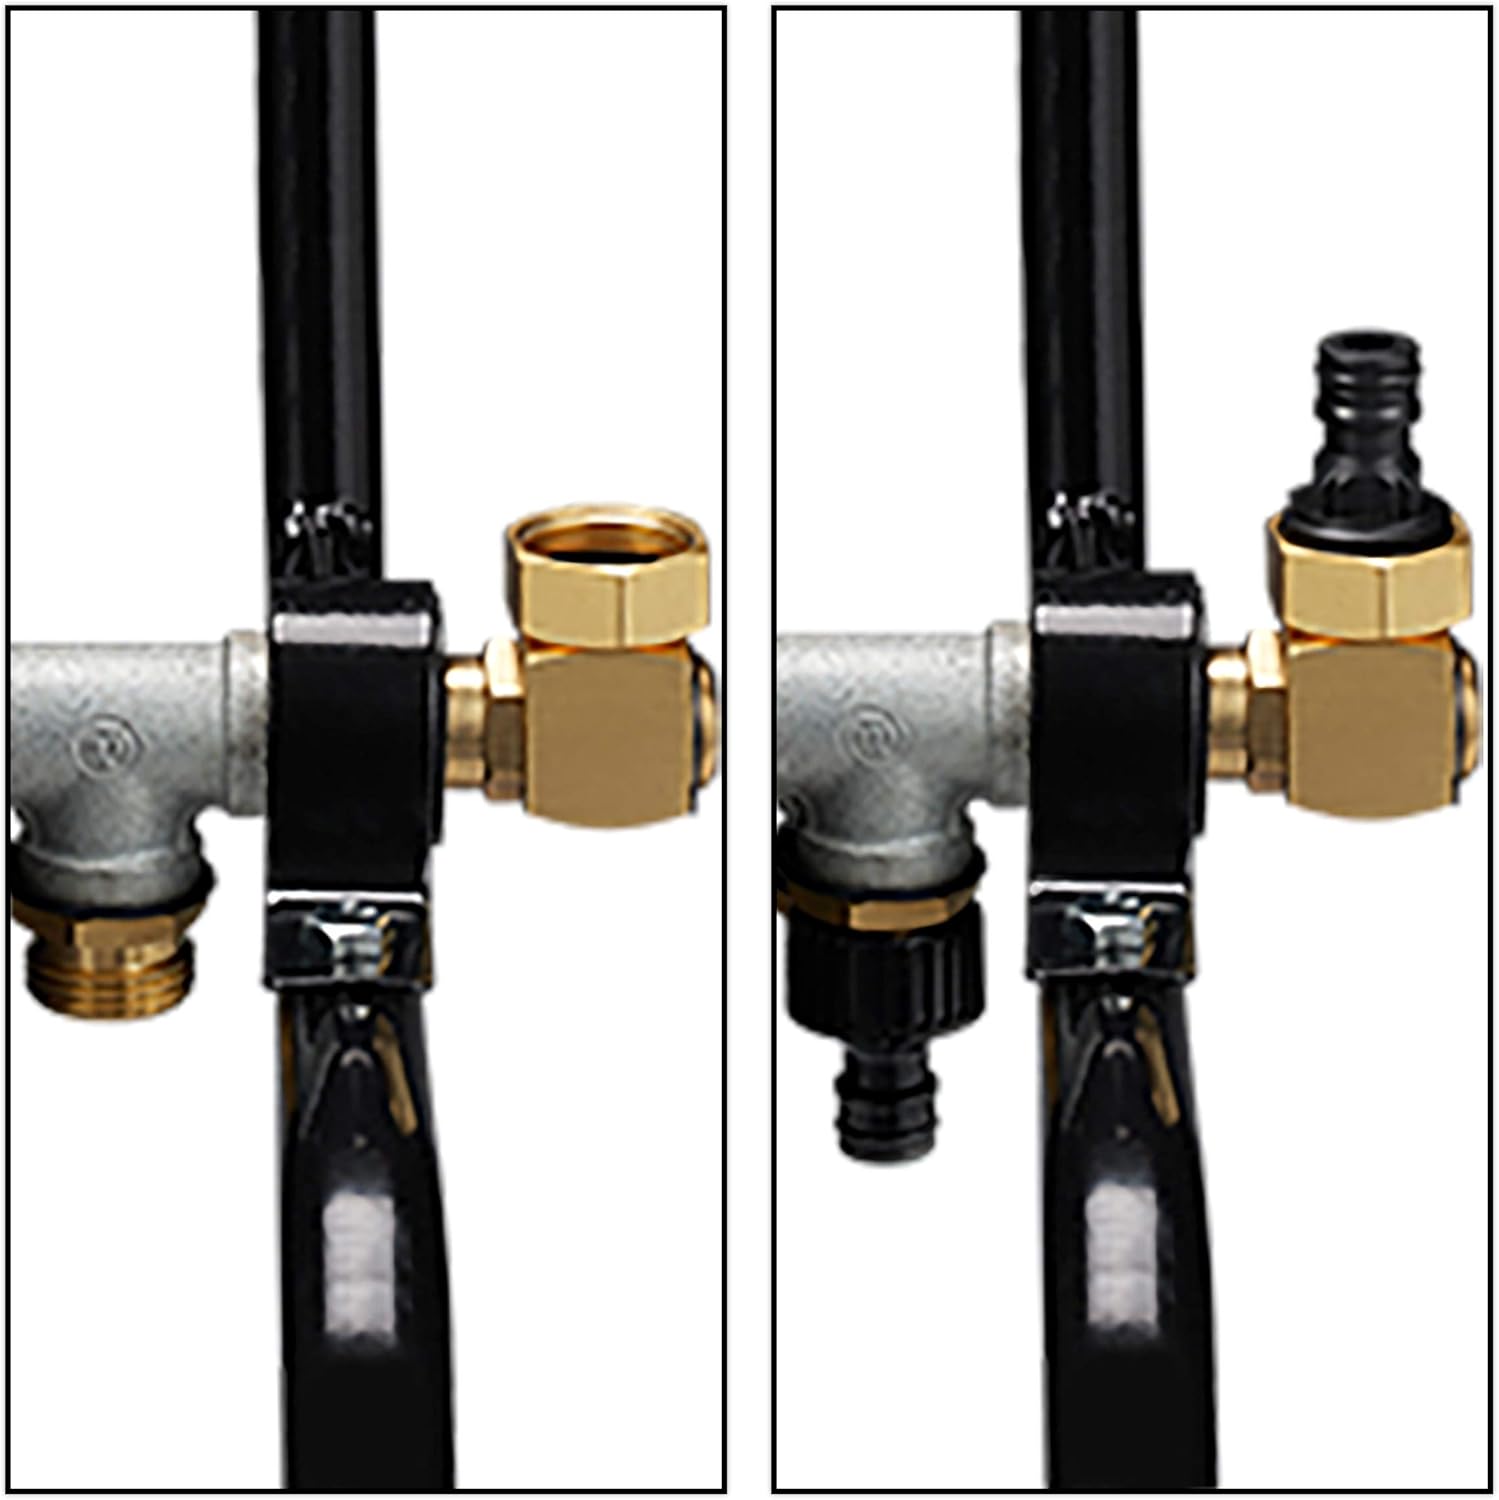
Image: A close-up showing the 1/2 inch and 3/4 inch hose connectors, demonstrating their compatibility with standard garden hoses.
Package Contents
Before beginning assembly, please ensure all parts are present and undamaged. Refer to the image below for typical packaging.
- 1x Hosepipe Cart (in pieces for assembly)
- 2x Adapter (1/2” and 3/4”)
- Assembly Instructions
- Note: Hosepipe is not included.

Image: The product packaging box, indicating the item is shipped in parts for assembly.

Image: A close-up of the product label on the box, showing the Relaxdays brand, model number 10029551, and barcode 4052025295516.
Setup Instructions
Follow these steps to assemble your hose cart. It is recommended to have basic tools available, such as a wrench or pliers, though specific tools may vary based on the included instructions.
- Unpack Components: Carefully remove all parts from the packaging and lay them out on a clean, flat surface.
- Assemble Frame: Connect the main frame components according to the diagrams in the included assembly instructions. Ensure all bolts and screws are securely tightened.
- Attach Wheels: Securely attach the two plastic wheels to the axle of the cart. Verify that the wheels spin freely.
- Install Hose Reel: Mount the hose reel drum onto the frame, ensuring the winding mechanism is correctly aligned and can rotate smoothly.
- Attach Crank Handle: Fasten the hand crank to the winding mechanism.
- Connect Adapters: Attach the appropriate 1/2” or 3/4” adapter to the hose connection point on the reel, depending on your hose size.
- Load Hose (Optional): If you have your hose ready, you can now begin winding it onto the reel.

Image: A close-up view of one of the durable plastic wheels with treads, essential for mobility.
Operating Instructions
Using your Relaxdays Hose Cart is straightforward. Follow these steps for efficient watering and hose storage.
- Connect Hose to Reel: If not already done, connect one end of your garden hose to the internal connector on the hose reel.
- Connect to Water Source: Attach the other end of your garden hose to a water tap using the appropriate adapter (1/2” or 3/4”).
- Unwind Hose: Pull the hose from the reel to the desired watering location. The cart can be easily pushed or pulled thanks to its wheels.
- Watering: Turn on the water supply and use your hose as normal.
- Rewind Hose: After use, turn off the water supply. Begin winding the hose back onto the reel using the hand crank. Ensure the hose layers evenly to prevent tangles and kinks.
- Storage: Once the hose is fully wound, the cart can be stored upright against a wall or in a shed.

Image: The hose cart positioned in a garden while a person waters plants, demonstrating its portability and ease of use.

Image: The hose cart stored vertically against a wooden wall, showcasing its compact storage capability.
Maintenance
- Cleaning: Wipe down the metal and plastic surfaces with a damp cloth periodically to remove dirt and debris. Avoid abrasive cleaners.
- Lubrication: Occasionally apply a small amount of lubricant to the moving parts, such as the axle and crank mechanism, to ensure smooth operation.
- Check Connections: Periodically inspect all hose connections and adapters for leaks or wear. Replace worn parts as necessary.
- Winter Storage: In colder climates, drain all water from the hose and reel before storing the cart indoors during winter months to prevent freezing damage.
- Wheel Inspection: Check the wheels for any damage or excessive wear. Ensure they rotate freely.
Troubleshooting
| Problem | Possible Cause | Solution |
|---|---|---|
| Hose does not wind smoothly. | Hose is tangled or not aligned properly on the reel. Moving parts need lubrication. | Ensure the hose is guided evenly onto the reel. Apply lubricant to the crank mechanism and axle. |
| Water leaks from connections. | Connections are loose or washers are worn. | Tighten all connections. Inspect and replace any worn rubber washers or O-rings. |
| Cart is difficult to move. | Wheels are obstructed or damaged. | Check wheels for debris or damage. Ensure wheels are securely attached and rotate freely. |
Specifications
| Attribute | Detail |
|---|---|
| Brand | Relaxdays |
| Model Number | 10029551 |
| Material | Metal, Plastic |
| Color | Black |
| Dimensions (H x W x D) | Approx. 94 x 66 x 52 cm (37.01 x 25.98 x 20.47 inches) |
| Weight | Approx. 10.1 kg (21.7 pounds) |
| Hose Capacity | Up to 80 meters (5/8" hose) or 50 meters (3/4" hose) |
| Connectors | 1/2” and 3/4” adapters included |
| Operation Mode | Manual |
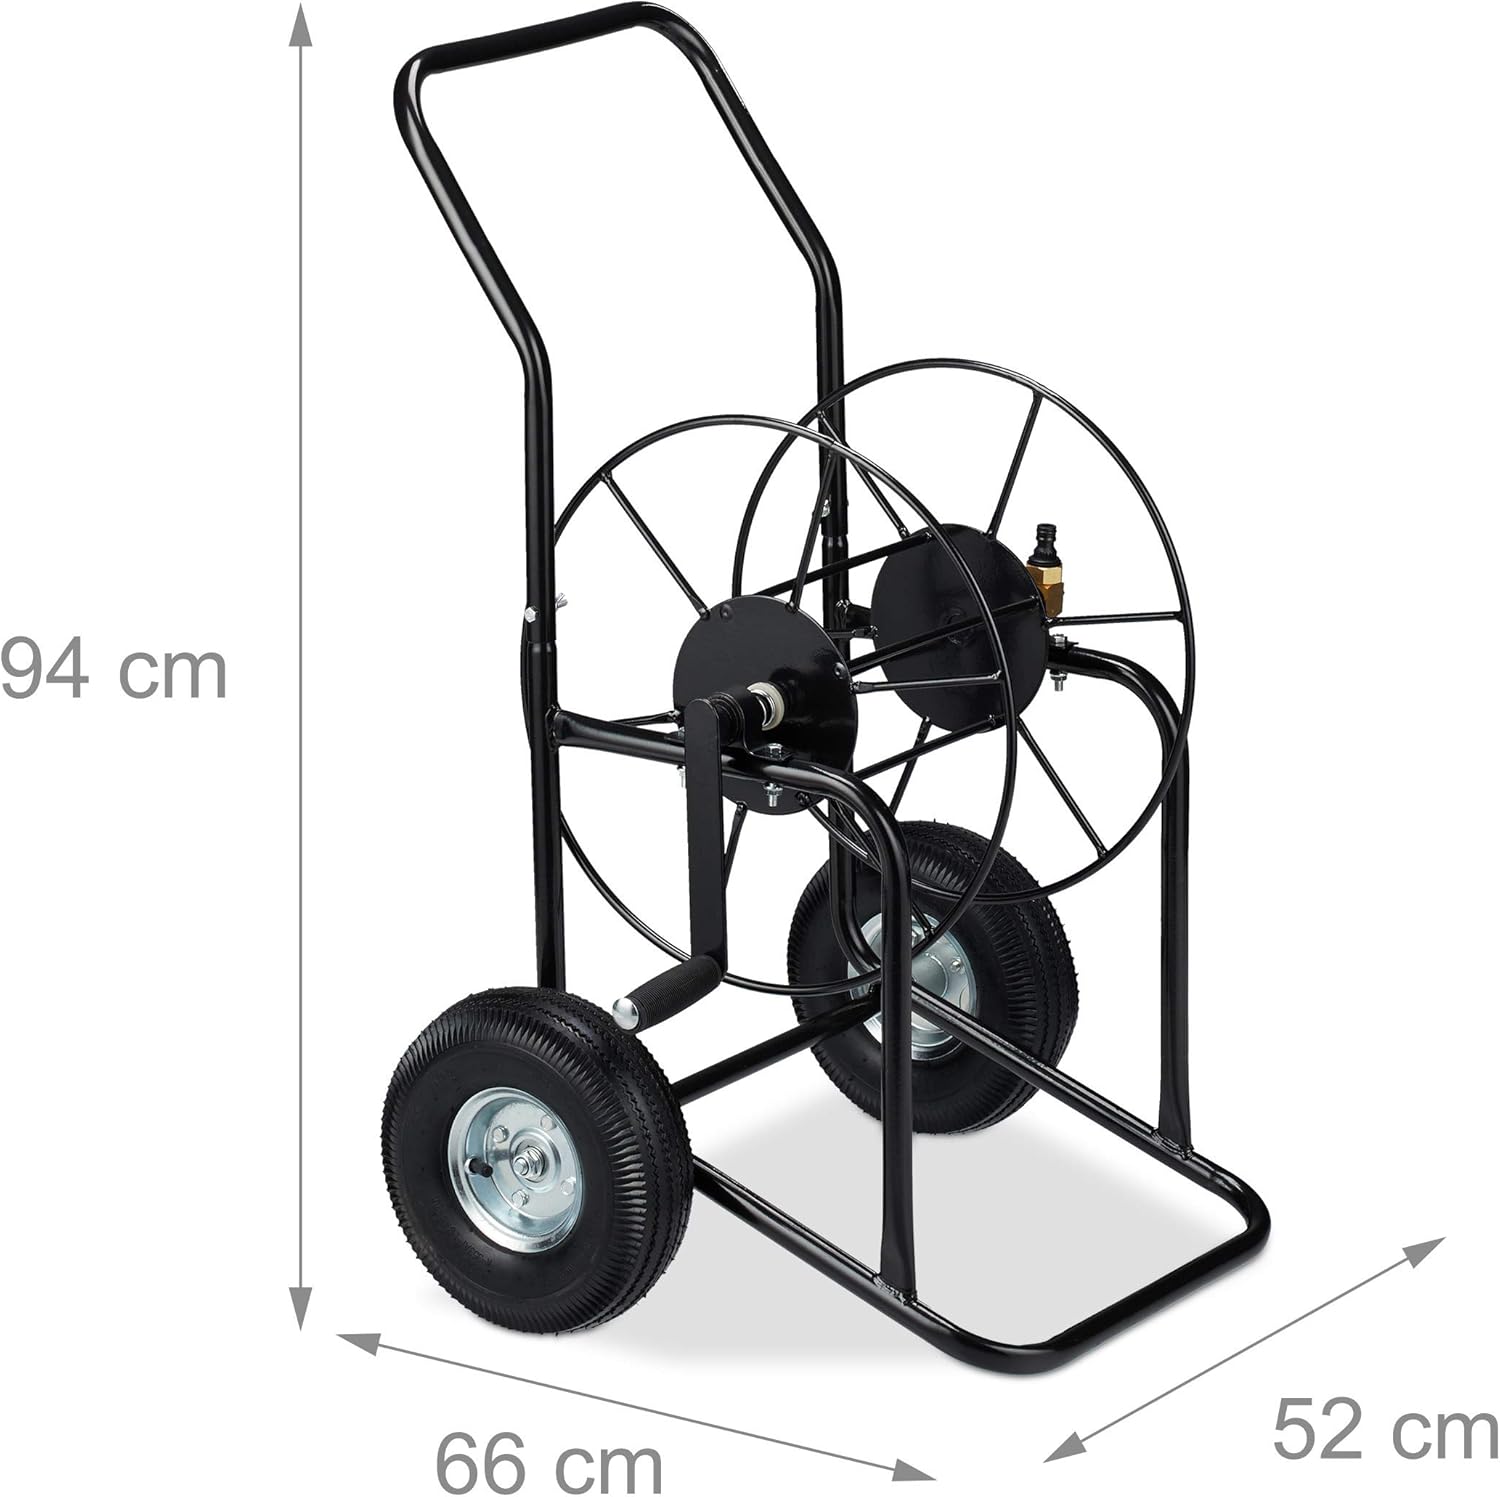
Image: A diagram illustrating the key dimensions of the hose cart: 94 cm height, 66 cm width, and 52 cm depth.
Warranty and Support
For warranty information, technical support, or to inquire about replacement parts, please contact Relaxdays customer service directly. Refer to the contact information provided with your product packaging or visit the official Relaxdays website.
Manufacturer: relaxdays
Website: www.relaxdays.de (Example link, actual link may vary)
Ask a question about this manual
Ask about setup, troubleshooting, compatibility, parts, safety, or missing instructions. Manuals+ will review the question and use this page’s manual context to help answer it.