1. Introduction
Thank you for choosing the Enga 12-Inch Rainfall Shower System with Body Jets and Handheld Spray. This manual provides detailed instructions for the safe installation, operation, and maintenance of your new shower system. Please read this manual thoroughly before installation and keep it for future reference.

Figure 1: Enga 12-Inch Rainfall Shower System (Chrome)
2. Safety Information
Please observe the following safety precautions during installation and use:
- Ensure all water supply lines are turned off before beginning installation.
- Professional installation is recommended for optimal performance and safety.
- Verify that all connections are secure and leak-free before concealing any plumbing.
- The Enga shower faucet sets are cUPC certified to ensure safe water temperature and prevent scalding.
- Do not use abrasive cleaners or harsh chemicals on the chrome finish.
3. Package Contents
Carefully unpack your Enga shower system and ensure all components are present:
- 1 × 12-inch Square Rain Shower Head (304 stainless steel)
- 1 × Handheld Shower Head (Brass)
- 4 × Body Jets (Brass)
- 1 × Pressure Balance Valve (Brass)
- 1 × Shower Arm (Brass)
- 1 × Shower Holder (Brass)
- 1 × 59-inch Shower Hose (304 stainless steel)
- Mounting accessories and user manual

Figure 2: Package Includes (Illustrative)
4. Setup & Installation
Installation of the Enga 12-Inch Rainfall Shower System requires careful attention to plumbing connections. All connections are US standard NPT 1/2".
4.1. Rough-in Valve Installation
The pressure balance valve is the core of your shower system. Ensure it is securely mounted within the wall studs at the correct depth. The valve body is made of solid brass for durability.

Figure 3: Enga Shower Valve Construction
Refer to the detailed installation video for step-by-step guidance on plumbing connections and valve placement:
Video 1: Installation Guide for Enga 12 Inch Rain Shower System. This video demonstrates the complete installation process for the shower system, including rough-in valve placement and pipe connections.
4.2. Shower Head and Arm Installation
Install the shower arm into the wall outlet, ensuring a tight seal with plumber's tape. Attach the 12-inch square rain shower head to the shower arm. The shower head features a 360° ball joint for adjustable angle.
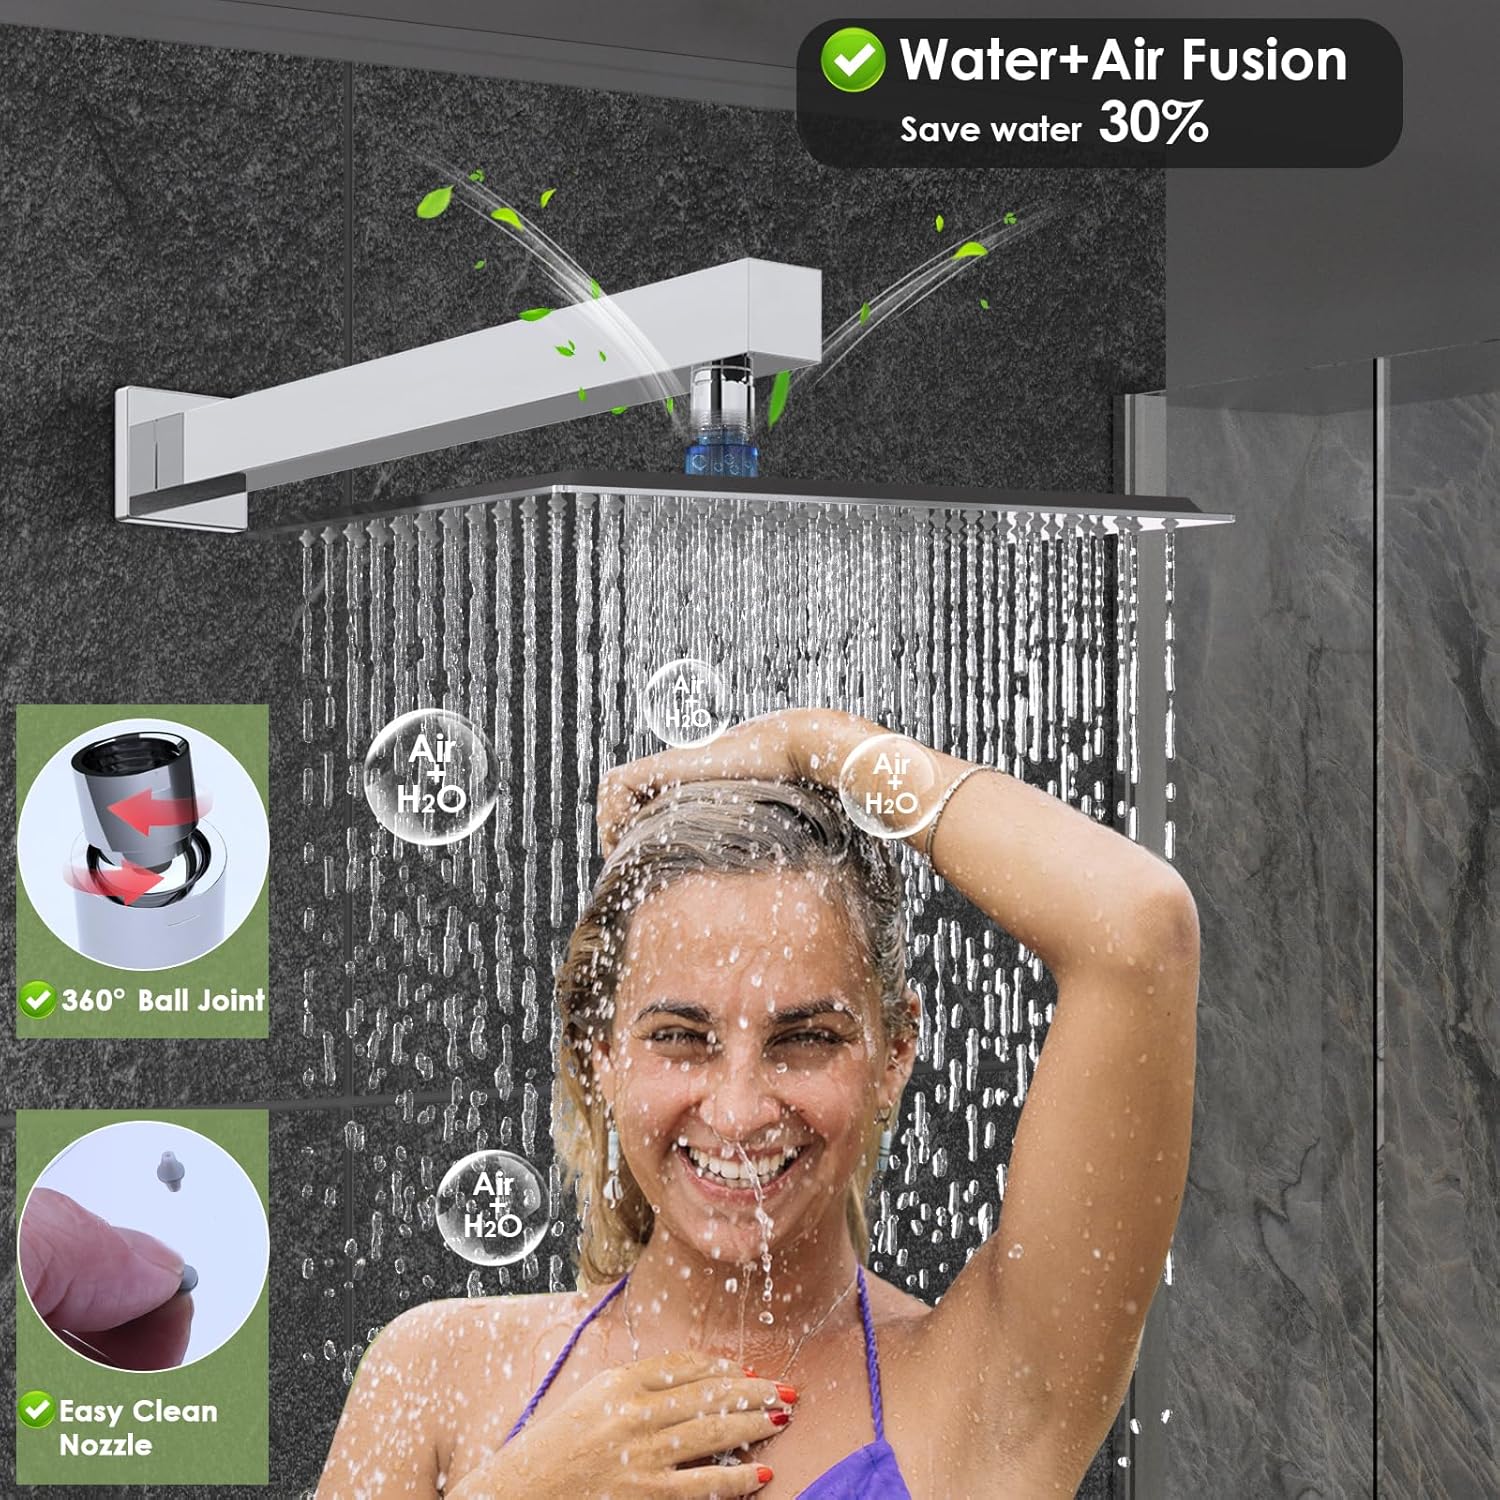
Figure 4: Rain Shower Head with Air Injection Technology and Adjustable Ball Joint
4.3. Handheld Shower and Body Jet Installation
Mount the shower holder and connect the 59-inch shower hose to the handheld shower head. Install the four body jets at desired heights, ensuring they are securely threaded into the NPT 1/2" outlets.

Figure 5: Handheld Shower Head and Hose
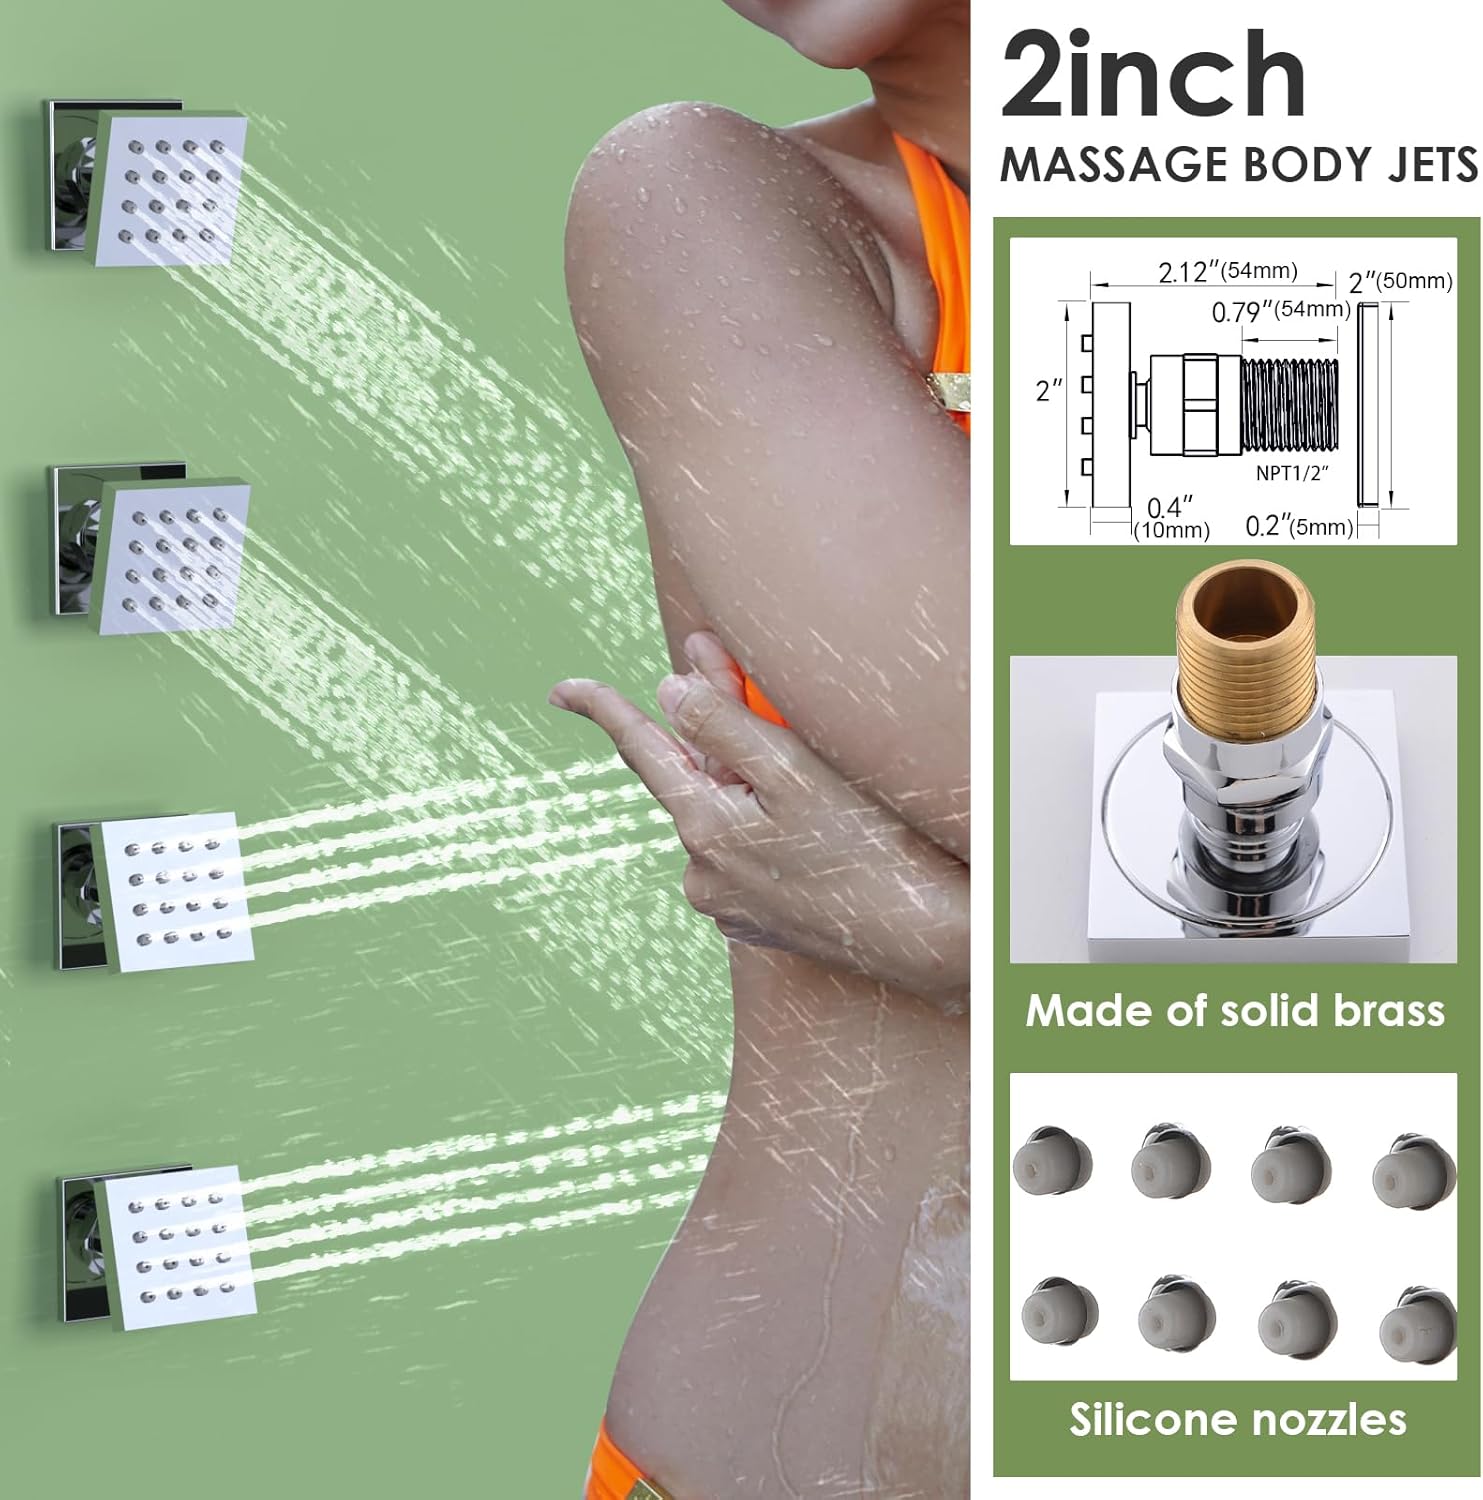
Figure 6: 2-Inch Massage Body Jets
5. Operating Instructions
Your Enga shower system offers a 3-mode shower experience with easy controls:
5.1. Water Flow and Temperature Control
The single lever handle controls both water flow and temperature. Move the lever left for hot water and right for cold water. Adjust up or down for desired flow intensity.
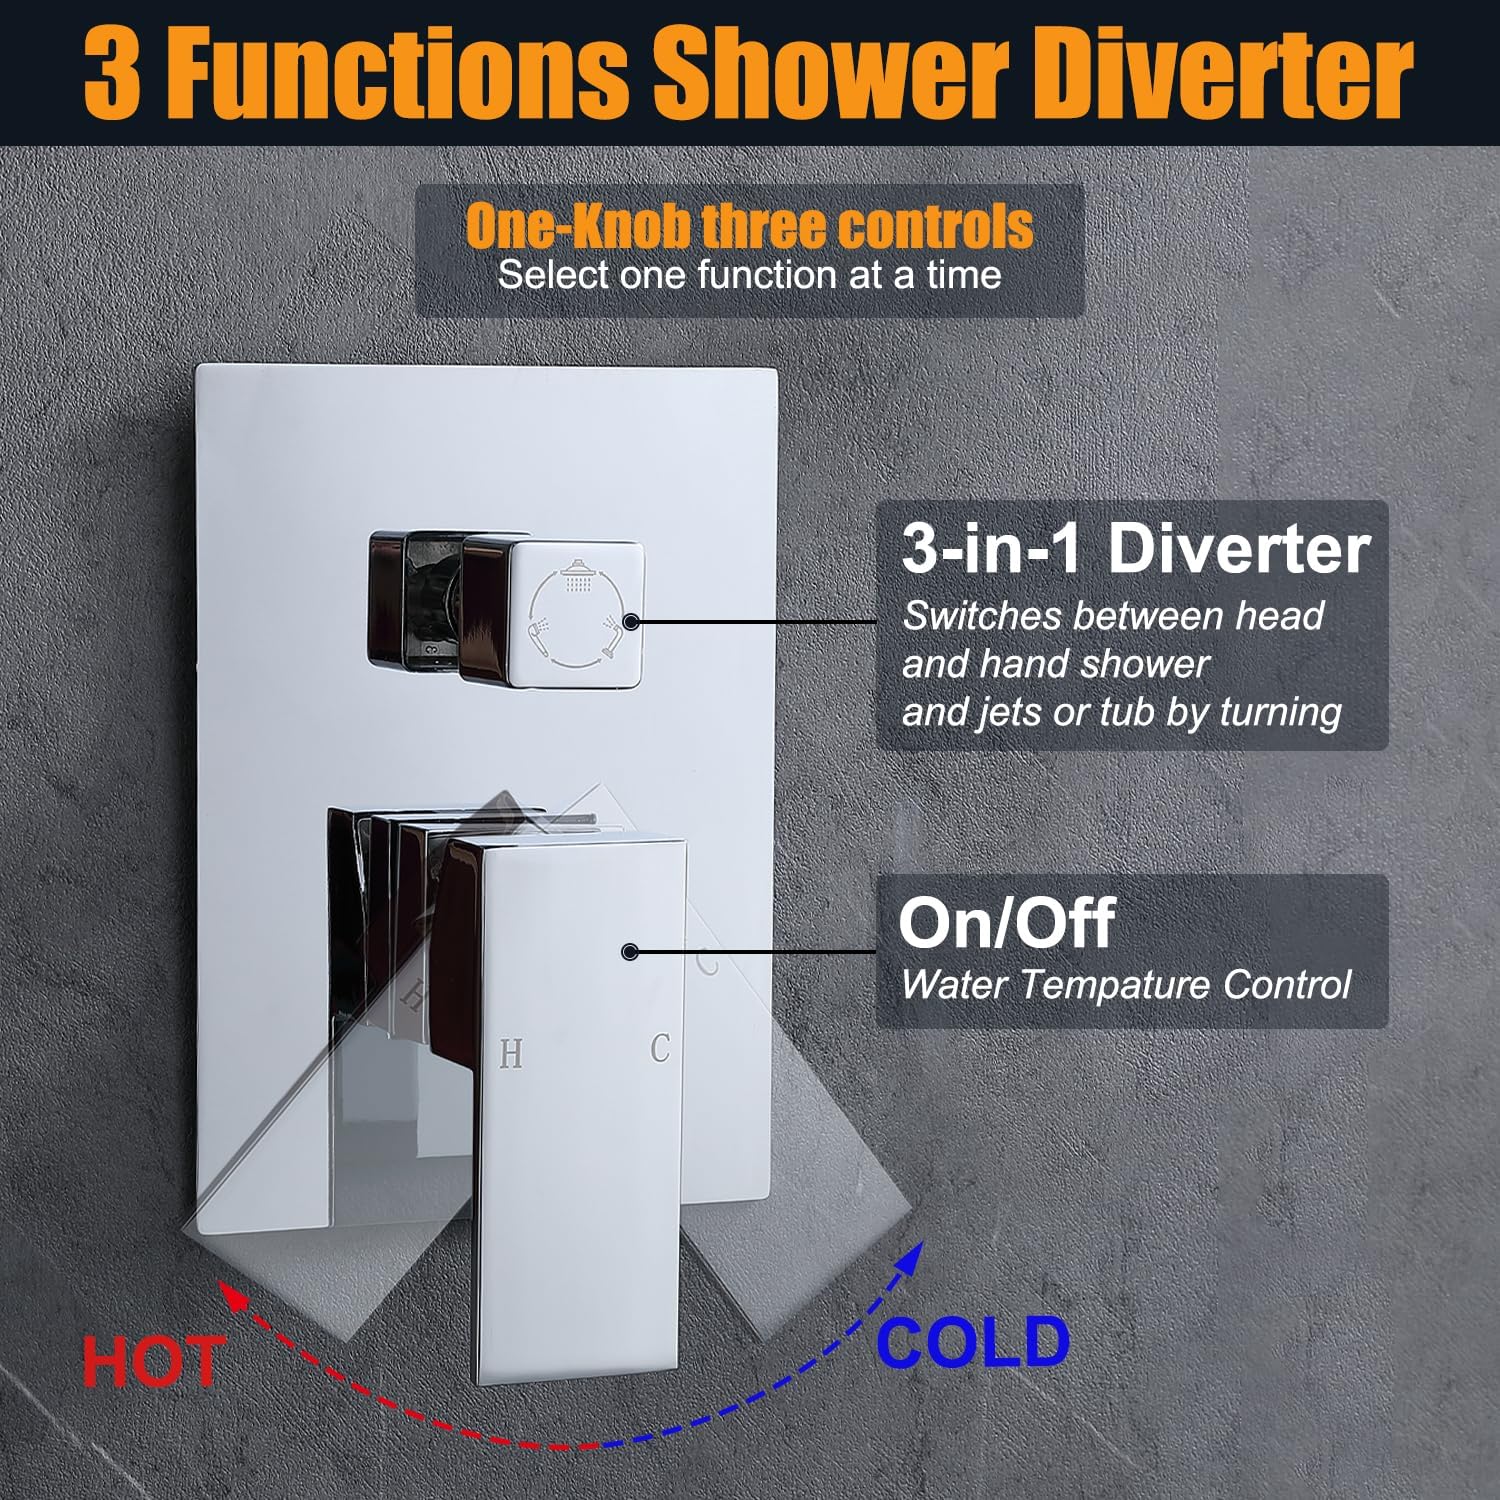
Figure 7: 3-Function Shower Diverter
5.2. Function Selection
Use the upper knob to switch between the three shower functions: rain shower head, body jets, or handheld spray. Select one function at a time for optimal performance.
Video 2: 12-inch Rainfall Shower System Overview. This video demonstrates the different spray modes and functions of the shower system.
Video 3: Enga 2 Handle 12-inch Shower with Body Spray Jets. This video highlights the functionality of the rain shower and body jets.
6. Maintenance
Regular cleaning and maintenance will ensure the longevity and optimal performance of your Enga shower system.
6.1. Cleaning Nozzles
The rain shower head and body jets feature easy-clean silicone nozzles. Simply rub your finger across the nozzles to dislodge any mineral buildup.
Figure 8: Easy Clean Nozzles on Rain Shower Head
6.2. Finish Care
Clean the chrome finish with a soft, damp cloth and mild soap. Avoid abrasive cleaners, steel wool, or harsh chemicals, as these can damage the finish.
7. Troubleshooting
If you encounter any issues with your shower system, refer to the following common solutions:
- Low Water Pressure: Check if the main water supply is fully open. Ensure nozzles are clean and free of mineral buildup.
- Leaking: Verify all connections are tightened correctly. Ensure plumber's tape was used on threaded connections.
- Temperature Fluctuations: The pressure balance valve is designed to prevent sudden temperature changes. If fluctuations occur, consult a professional plumber.
8. Specifications
| Feature | Detail |
|---|---|
| Brand | Enga |
| Model Number | EG-KT-34* |
| Color | Chrome |
| Material | Brass, Stainless Steel |
| Finish Type | Chrome |
| Number of Handles | 2 |
| Mounting Type | Wall Mount |
| Head Size | 12 inches |
| Item Weight | 6.89 Kilograms |
| Certifications | cUPC certified |
9. Warranty Information
Enga provides the following warranty for this product:
- For original consumer purchasers (homeowners): Five (5) years from the date of purchase for as long as the original consumer purchaser owns both the product and the home in which it was originally installed. (LED device warranty period is one year).
- For commercial purchasers: Two (2) years from the date of purchase.
- This warranty covers defects in material and workmanship.
- This warranty is non-transferable and does not cover Enga products purchased from unauthorized sellers.
10. Customer Support
For any questions, concerns, or assistance with installation, please reach out to our responsive and helpful customer service team via Amazon message or email. We also offer remote installation assistance.

Figure 9: Enga Customer Support