1. Introduction
This manual provides essential information and instructions for the proper installation, operation, and maintenance of your Cutex Professional Bobbin Case. This bobbin case is designed as a compatible alternative part for specific Juki industrial walking foot sewing machines. Please read this manual thoroughly before use to ensure optimal performance and longevity of the product.
2. Product Overview
The Cutex Professional Bobbin Case is a precision-engineered component crucial for the lower thread mechanism in industrial sewing machines. It securely holds the bobbin and provides tension to the bobbin thread, ensuring balanced stitch formation. This unit is constructed from durable metal for reliable performance in demanding industrial environments.

Figure 1: Top-down view of the Cutex Professional Bobbin Case, showing its exterior and latch mechanism.
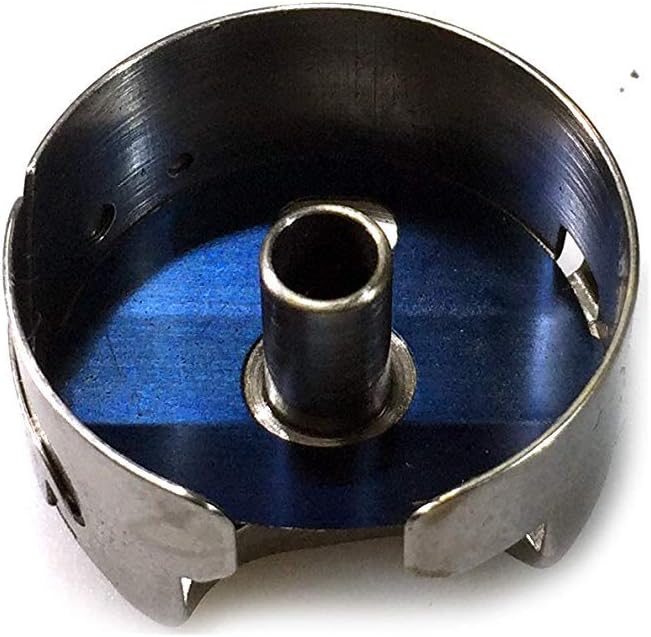
Figure 2: Interior view of the Cutex Professional Bobbin Case, illustrating the central post for bobbin placement and the blue tension spring.
3. Compatibility
This Cutex Professional Bobbin Case is a compatible alternative part for Juki Part Number B1837-241-H00. It is designed for use with the following Juki industrial walking foot sewing machine models:
- Juki DNU-1541
- Juki DNU-1541H
- Juki DNU-1541S
- Juki DNU-241H
- Juki DNU-261H
Ensure your machine model is listed above for proper fit and function.
4. Setup and Installation
Before installing the bobbin case, ensure your sewing machine is turned off and unplugged for safety.
- Prepare the Bobbin: Wind your desired thread onto an empty bobbin according to your sewing machine's instructions. Ensure the bobbin is wound evenly.
- Insert Bobbin into Case: Place the wound bobbin into the Cutex bobbin case. The thread should feed from the bobbin in the direction indicated by the bobbin case design (usually clockwise or counter-clockwise, depending on the machine and bobbin type).
- Thread the Bobbin Case: Guide the bobbin thread through the tension spring slot on the side of the bobbin case. Pull the thread gently to ensure it moves smoothly and has appropriate tension.
- Install Bobbin Case: Open the bobbin compartment of your Juki industrial sewing machine. Carefully insert the bobbin case into its designated position. It should click or lock securely into place. Refer to your specific Juki machine's manual for precise bobbin case insertion instructions.
- Test Thread Tension: After installation, perform a test stitch on scrap fabric to verify proper upper and lower thread tension. Adjust as necessary.
5. Operating Instructions
The primary function of the bobbin case is to hold the bobbin and provide consistent lower thread tension. Proper tension is critical for balanced stitches.
- Tension Adjustment: The bobbin case features a small screw on its side (visible in Figure 2, near the blue tension spring). Turning this screw adjusts the tension on the bobbin thread.
- Turn the screw clockwise to increase tension.
- Turn the screw counter-clockwise to decrease tension.
- Regular Checks: Periodically check the bobbin case for smooth thread feeding and consistent tension, especially when changing thread types or fabric weights.
6. Maintenance
Regular maintenance ensures the longevity and optimal performance of your bobbin case.
- Cleaning: Remove the bobbin case from the machine regularly. Use a small brush or compressed air to remove lint, dust, and thread fragments that can accumulate around the tension spring and inside the case.
- Inspection: Periodically inspect the bobbin case for any signs of wear, damage, or burrs, particularly on the edges where the thread passes. Damaged areas can snag thread and cause breakage.
- Lubrication: The bobbin case itself typically does not require lubrication. Refer to your Juki sewing machine's manual for lubrication points within the bobbin area of the machine.
- Storage: When not in use for extended periods, store the bobbin case in a clean, dry place to prevent dust accumulation.
7. Troubleshooting
If you encounter issues, consider the following common troubleshooting steps related to the bobbin case:
| Problem | Possible Cause | Solution |
|---|---|---|
| Skipped Stitches | Incorrect bobbin tension, improperly inserted bobbin case. | Adjust bobbin tension. Re-insert bobbin case ensuring it is seated correctly. |
| Thread Breakage (Bobbin Thread) | Too much bobbin tension, burrs on bobbin case, poor quality thread, improperly wound bobbin. | Decrease bobbin tension. Inspect bobbin case for damage. Use quality thread. Re-wind bobbin evenly. |
| Loopy Stitches (Bottom Side) | Insufficient bobbin tension. | Increase bobbin tension. |
| Loopy Stitches (Top Side) | Upper thread tension too high, or bobbin tension too low relative to upper tension. | Adjust upper thread tension or increase bobbin tension. |
| Noise from Bobbin Area | Lint accumulation, loose bobbin case. | Clean bobbin case and bobbin area. Ensure bobbin case is securely installed. |
For issues not resolved by these steps, consult your Juki sewing machine's comprehensive manual or contact a qualified sewing machine technician.
8. Specifications
| Feature | Detail |
|---|---|
| Brand | Cutex |
| Model Number | DNU 261 (referring to compatible Juki series) |
| Compatible Juki Part Number | B1837-241-H00 |
| Item Weight | 1.06 ounces |
| Package Dimensions | 5.94 x 2.76 x 1.02 inches |
| UPC | 850010940014 |
9. Warranty and Support Information
Specific warranty terms and conditions for the Cutex Professional Bobbin Case are not provided within this instruction manual. For detailed warranty information, product support, or to inquire about replacement parts, please refer to the official Cutex website or contact your authorized Cutex dealer or the seller from whom the product was purchased.
Manufacturer: Cutex Sewing Supplies