1. Introduction
This manual provides detailed instructions for the assembly, installation, and maintenance of your vidaXL Door Canopy. This canopy is designed to protect entrances or windows from precipitation while allowing light to pass through. Please read all instructions carefully before beginning installation to ensure safe and correct setup.
2. Safety Instructions
- Always wear appropriate safety gear, including gloves and eye protection, during assembly and installation.
- Ensure the mounting surface is structurally sound and capable of supporting the canopy's weight and potential snow/wind loads.
- Do not attempt installation in strong winds or adverse weather conditions.
- Verify that all fasteners are securely tightened after installation. Periodically check for loose connections.
- The canopy cannot withstand heavy snowfall. In areas with heavy snow, it is recommended to clear snow accumulation promptly to prevent damage.
- Keep children and pets away from the installation area.
3. Package Contents
Please verify that all components are present before beginning assembly:
- Polycarbonate Panels (Transparent)
- ABS Brackets (Gray)
- Aluminum Rods
- Mounting Accessories (Screws, Wall Anchors, Washers)

Image 1: Top view of the assembled canopy, illustrating the transparent panels and gray framing.
4. Setup and Installation
Follow these steps for proper installation:
- Prepare the Mounting Surface: Choose a suitable location above your door or window. Ensure the wall material is appropriate for the provided wall anchors.
- Assemble Brackets and Rods: Attach the aluminum rods to the ABS brackets. The polycarbonate panels will slide into grooves within this frame.
- Insert Polycarbonate Panels: Carefully slide the transparent polycarbonate panels into the designated grooves of the assembled bracket and rod structure. Ensure they are fully seated and aligned.
- Mark Drilling Points: Hold the assembled canopy against the wall at the desired installation height. Use a pencil to mark the drilling points through the holes in the ABS brackets. Ensure the canopy is level.
- Drill Holes: Using an appropriate drill bit for your wall type, drill holes at the marked points. The depth and diameter should match the provided wall anchors.
- Insert Wall Anchors: Insert the wall anchors into the drilled holes. Ensure they are flush with the wall surface.
- Mount the Canopy: Align the holes in the ABS brackets with the inserted wall anchors. Secure the canopy to the wall using the provided screws and washers. Tighten all screws firmly but do not overtighten.
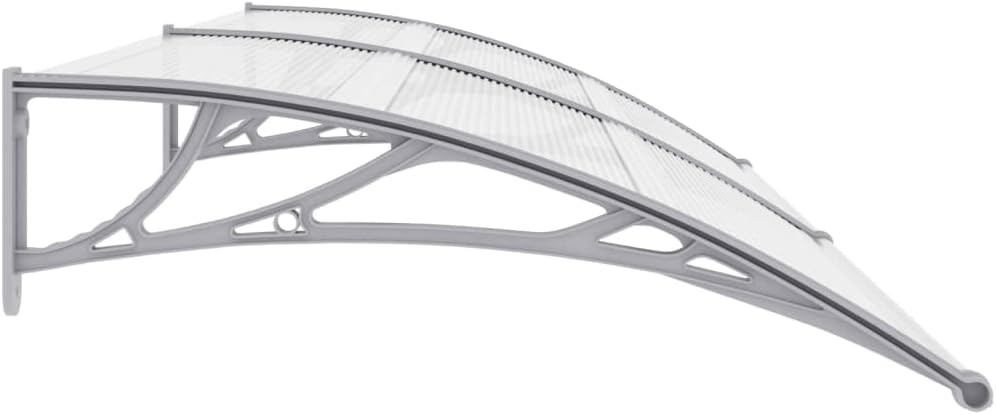
Image 2: Side profile of the canopy, highlighting the curved panels and the structural support of the gray bracket.
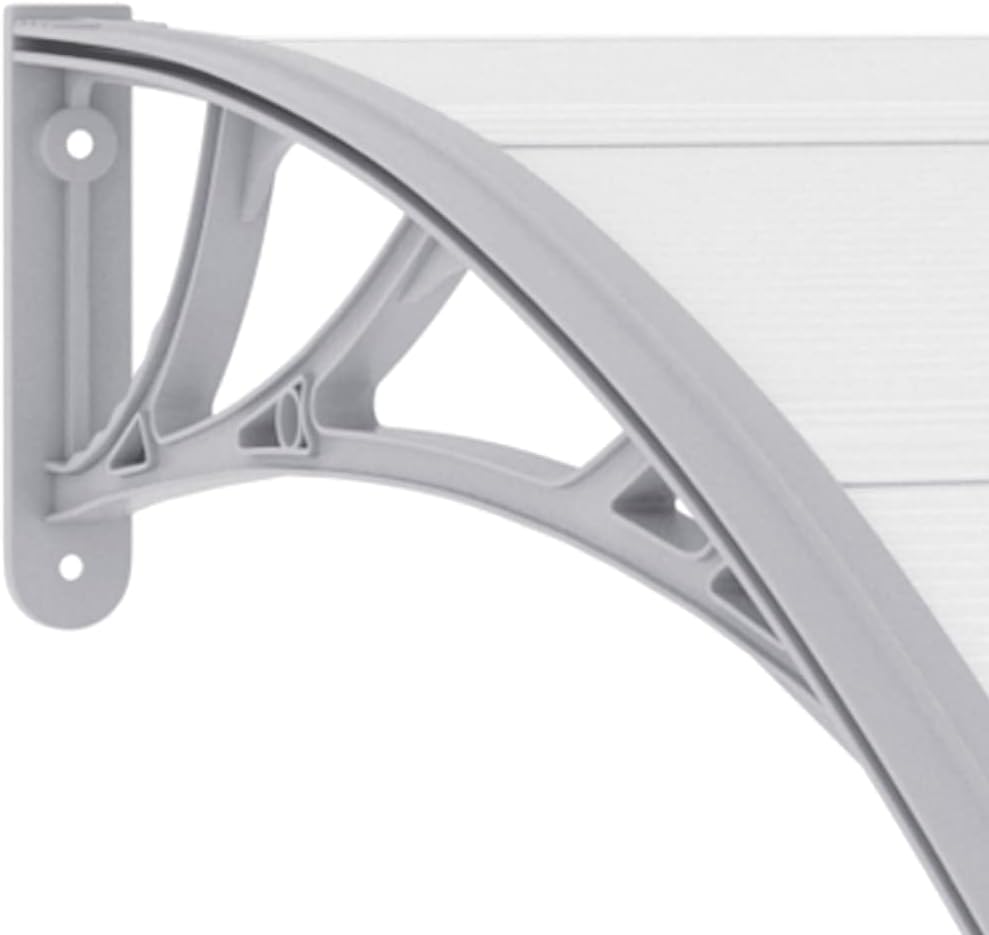
Image 3: Detailed view of an ABS bracket, illustrating its design and mounting points.

Image 4: Example of the wall anchors provided for secure installation.
5. Operating Principles
The vidaXL Door Canopy functions as a protective shield for your entryways or windows. Its transparent polycarbonate panels allow natural light to pass through while offering resistance against rain, light snow, and UV radiation. The robust ABS brackets and aluminum rods provide structural stability, ensuring durability in various weather conditions.
6. Maintenance
- Cleaning: Clean the polycarbonate panels and frame periodically with a soft cloth, mild soap, and water. Avoid abrasive cleaners or harsh chemicals that could damage the material.
- Inspection: Regularly inspect all mounting points and fasteners for tightness. Re-tighten any loose screws to maintain stability.
- Snow Removal: In regions prone to snowfall, promptly remove accumulated snow from the canopy to prevent excessive weight and potential damage.
- Damage Check: Periodically check for any signs of damage to the panels or frame. Address any issues promptly to ensure continued protection.
7. Troubleshooting
- Canopy feels loose: Check all mounting screws and wall anchors. Ensure they are securely fastened to a stable wall surface.
- Water leakage: Verify that the polycarbonate panels are correctly seated in their grooves and that all seals are intact. Ensure proper installation angle for water runoff.
- Panels appear scratched or cloudy: This may be due to improper cleaning. Use only soft cloths and mild, non-abrasive cleaning solutions.
8. Specifications
| Color | Gray bracket and transparent panels |
| Material | Polycarbonate, ABS plastic, Aluminum |
| Overall Dimensions (L x W) | 240 x 80 cm (94.5" x 31.5") |
| Panel Thickness | 5 mm |
| Item Weight | 6 Kilograms |
| Assembly Required | Yes |
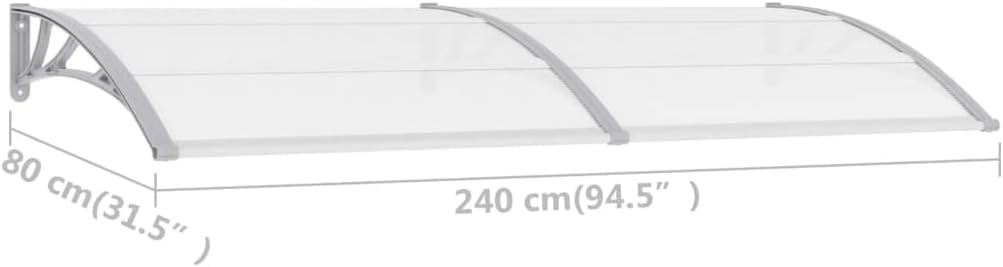
Image 5: Diagram showing the overall dimensions of the canopy.
9. Warranty and Support
For warranty information or technical support, please refer to your purchase documentation or contact the retailer from whom you purchased this product. Ensure you have your product model number and purchase date available when contacting support.


